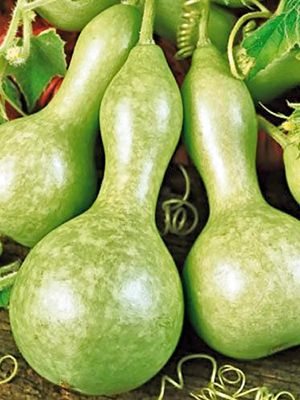
The gourd is a real eye-catcher in the garden because of its special shape. We will show you how to plant and use the bottle gourd.
The calabash belongs to the climbing plants and is also called bottle gourd because of its unusual shape. This shape is mainly created when the pumpkin grows hanging down. The gourd originally came from North and South America. There, the pumpkin species is not only used in various recipes. The dried skin of the gourd is good for making various vessels and even musical instruments.
Planting calabash: this is how you do it right

The bottle gourd thrives primarily in countries with a Mediterranean climate. If you want to plant gourds in your own garden, it is best to prefer seeds to plants indoors. You will find a large selection of organic seeds for the calabash in well-stocked gardening shops.
Preparing calabash from seeds: From April you can germinate bottle gourd seeds in small flower pots with a diameter of about ten centimeters. You should only plant the early seeds in the garden when there is no longer any danger of night frosts, which is usually the case at the beginning of May.
Fill the flower pots with plenty of potting soil. Make sure the soil is peat-free to protect the bogs.
Put one seed in the center of each pot and cover it with a thin layer of soil.
Then place the growing pots in a bright and warm place, for example on the windowsill. Always keep the soil slightly moist for the next few days.
After a week you should be able to see the first cotyledons. Now move the calabash seedlings to a slightly cooler spot where the temperature should be between 16 and 20 degrees Celsius.
Before you plant the little bottle gourds in the garden, you should harden them off a bit. To do this, place the pots outside on warmer days.
Before you plant the calabash in the natural garden or vegetable garden, you should observe the following information:
The right location: A sunny and warm location is a must if you want to successfully establish the bottle gourd in your garden. For example, a garden bed in front of a hedge or a stable fence is best. Especially the latter can be a practical climbing aid for climbing plants.
The right soil: gourds need a lot of nutrients to develop their fruit. You should therefore dig up the soil at the location one to two weeks beforehand and dig up plenty of compost under the soil.
Planting calabash in the garden:
First dig sufficiently large planting holes for the young gourds. Leave at least 40 centimeters between each hole.
Lay a drainage layer of pebbles at the bottom of the holes so that the irrigation water runs off better later.
Now place the pumpkin plants that you have brought forward in the holes and fill everything back up with soil.
Finally, water the gourds with plenty of rainwater.
Proper care for the gourd
The bottle gourd is quite undemanding in its care and therefore also well suited for gardening beginners: inside. So that you can bring in the first successful pumpkin harvest from the end of August, you should consider the following tips:
Watering: Even if the gourd needs a lot of water, you should definitely avoid waterlogging. Especially on hot summer days you have to water the pumpkin plant, preferably in the cooler evening hours. Always aim the water jet directly at the roots, because wet leaves and flowers can quickly become moldy. You can also mulch calabashes from mid to late June so that the soil at the location retains moisture better.
Fertilizer: In order to be able to develop its flowers and fruits properly, the bottle gourd needs many additional nutrients. Therefore, enrich the soil at the site with compost every two weeks if possible. Horn shavings or plant manure are just as suitable as fertilizer.
Climbing aids: Even though gourds are climbing plants, they need some support to climb up. Therefore, put a stable climbing aid in the ground shortly after the harvest, to which you can tie the pumpkin plant.
Be stingy: The fewer flowers there are on your pumpkin plant, the larger the fruits that will later develop from them. So if you want to grow particularly large bottle gourds, you should remove some flowers. Concentrate on the first flowers at the ends of the shoots.
Harvesting: When the annual pumpkin plant slowly begins to wither at the end of August, you can harvest the bottle gourds. If you want to be on the safe side, you can tap the pumpkin’s skin lightly. If the tone sounds dull and hollow, the calabash is ripe. In the last few weeks before harvest, you should protect the pumpkins from the blazing sun with a damp cloth. This will prevent the shell from getting unsightly cracks.
You can use the bottle gourd in so many different ways
In their countries of origin, the calabash has long been used as a container for liquids or even as a musical instrument. If you want to paint and carve the gourds, the first thing to do after harvest is to dry them.
Drying and processing bottle gourd:
Find a warm, dry place for the gourds where they can air dry. Do not use additional heat sources such as fan heaters.
Place pumpkins that will stand on their own on a firm cloth-lined surface.
All other gourds should be hung up by tying some gardening raffia around the neck.
As soon as the seeds rattle loudly when you shake them, the pumpkin is dry.
You can process the dried bottle gourd into various items:
drinking bottles
vases
lamps
Musical instruments for children, for example rattles