Tag

attention

Browsing

How healthy are grapes really? They are a popular snack, especially in the summer heat. We’ll show you what you should know about the fruity vitamin bombs.

They are definitely delicious, but are grapes healthy? The first local grapes are harvested in Germany in late summer. Sweet and juicy, the grapes have many fans, especially in hot temperatures. Nevertheless, the fructose they contain has the bad reputation of being fattening. Let’s see what’s up with this image.

These ingredients make grapes healthy

The main component of grapes is water. That is why they are also an excellent source of water in summer. The fruits also contain a relatively large amount of fructose and fruit acid. Other nutrients included are:
Vitamin B6: Your body needs it to process proteins in the metabolism and for a strong immune system.
Folic acid: It plays an important role in the metabolism of amino acids and also supports the formation of new blood.
Ellagic acid: This vegetable acid is also found in grapes and is said to reduce the growth and formation of fat cells and boost sugar metabolism.
Resveratrol: This substance is found in the skin of the grapes and is said to have an antioxidant effect.
Vitamin C: Vitamin C actively supports the immune system.

Fructose as a fattening agent?

If you like eating grapes, you should be aware that the fructose they contain can have some disadvantages. As a guide: the sweeter a grape tastes, the more fructose it contains. The negative effects of too much fructose are:
an increased feeling of hunger, which encourages you to eat more
causes the blood sugar level to rise
If you have fructose intolerance, it is best to be careful and not eat too much of the grapes, as they contain a lot of fructose. Consumed in moderation, fructose does not pose a major threat to your slim line, as long as you pay attention to a healthy diet overall.

Caloric content of grapes

A serving of grapes (100 grams) has 65 calories. That’s why you can eat a little more of it with a clear conscience. In comparison, 100 grams of chocolate have 550 calories. Grapes are therefore very suitable as a healthy snack in between meals.

You can also use grapes in many different ways. In another article you will find out, for example, how to make your own grape juice. Other delicious ways to process grapes include:

The classic cheese platter with grapes: All you have to do is dice some cheese and arrange it on a plate together with the grapes. The perfect snack is ready!
Fruit salads aren’t the same without grapes. The small green fruits can be combined with all your favorite fruits.

Are grapes also healthy for diabetics?

Even if you have diabetes, you don’t have to give up grapes. In small amounts, your body can still metabolize the fructose it contains on its own. So a handful of grapes won’t directly spike your blood sugar. But you should keep a close eye on him after you’ve eaten grapes.

Freezing leftover squash is quick and easy. Just follow this step-by-step guide. We also reveal what you should consider when freezing pumpkin.

Before freezing: cut the pumpkin into pieces

Before you freeze the squash, you should break it up into small pieces. This way you can defrost it later in portions. All you need is a sharp knife and a cutting board.

To prepare the squash for freezing:
Halve the squash lengthwise.
Use a spoon to scoop out the soft insides and seeds.
Depending on the variety, you may need to remove the skin.
Halve the halves again lengthwise and cut into small pieces.

Freeze the pumpkin so it doesn’t stick together

If you freeze the squash straight away, the pieces may stick together afterwards. You can prevent this with the following trick:
Spread the pumpkin pieces on a baking sheet.
Place the tray in the freezer for a few hours.
You can then transfer the pre-frozen pumpkin pieces into freezer-safe containers.
Put the containers in the freezer.
It’s a good idea not to cook the squash before freezing, otherwise it will become mushy. Alternatively, you can boil the pumpkin, puree it and freeze it in the jar.

Depending on the variety, the pumpkin changes its consistency in the freezer. If you need extra crunchy pumpkin for a recipe, it’s better to use a fresh one. Since pumpkin can be stored well, you can buy it regionally until the end of winter.

Freeze squash as a soup

If you freeze the squash as a soup, the consistency does not change and you have a quick meal for cold winter evenings. It is best not to use any spices – you can add them to the warmed up soup if you like.

Tip: If you freeze the pumpkin soup in portions in glasses, you also have a healthy and quick lunch for work. Just take out the glass the night before and warm it up on your lunch break.

It is best to use up the entire pumpkin

Pumpkin is versatile: You can not only prepare it as a soup, but also as a smoothie, spread or any other pumpkin recipe. You don’t have to throw away the skin – depending on the type of pumpkin, you can eat it too. The cores don’t have to go in the trash either. You can roast the pumpkin seeds – this turns them into a delicious snack.

Comb honey is honey in its most natural form: the beekeeper does not process it after harvesting. Comb honey has a particularly intense taste due to the pollen it contains. When buying, it is worth taking a closer look at the quality.

Comb honey is honey that is harvested, sold and consumed in the comb. The honeycomb is made of wax that bees produce in the hive. They sweat it out of the wax gland in their abdomen and shape it with their mouthparts until the hexagonal combs are formed. The bee colony incubates part of the honeycomb. The other part serves as a honey store: the bees fill it with pollen and nectar. When the honey is ripe, they seal the honeycomb with wax. The honeycomb is then “capped”.

Comb honey: Valuable natural product

Comb honey is a purely natural product. The bees store it as a reserve for the bee colony and only close the honeycomb when the honey is really ripe.

During the harvest, the beekeeper removes the closed combs and honey from the beehive and packs them without opening the combs. All the substances that the bees store in the comb remain in the honeycomb. These substances include:
flower nectar
pollen
honey bread
Together they ensure an extremely fine taste profile and also contain a valuable mixture of nutrients and vitamins. In order to protect their honey supply from pests and diseases, the bees also store propolis in the honeycomb. The natural composition of these substances makes comb honey a high-quality and healthy food.

Comb honey: differences to conventional honey

Beekeepers harvest conventional honey before it is ripe – usually when 30 to 50 percent of the combs are covered. It is then thrown out of the honeycomb, possibly filtered and bottled.

As a result, the finished honey contains fewer nutrients than comb honey. By the time centrifuged honey ends up in the supermarket, it is often mixed with other types of honey or even diluted with sugar syrup.

This cannot happen with comb honey: the comb stays tightly closed until you open it at home. Since the bees sealed it themselves, comb honey is also guaranteed to be ripe.

Comb honey from the beekeeper

Comb honey is easy to harvest: once the comb is closed, the beekeeper takes it out of the hive and packs it. He no longer has to centrifuge or filter the honey afterwards. Although comb honey is easier to harvest, it often yields less for the beekeeper. There are several reasons for this:
The beekeeper waits until the honey is ripe before harvesting. For extracting honey he can already use combs that are only partially covered. So he can harvest more honey more often.
The removed combs are missing in the hive. The bees first have to build new walls before they can produce and store honey again. With conventional honey, the beekeeper usually puts the ejected honeycomb back into the hive. This allows the bees to produce fresh honey directly.
With comb honey, the beekeeper has to wait longer overall before he can harvest. There are also special costs:
Only a few beekeepers let their bees build the hive themselves. A wildly built beehive can become quite confusing. To keep the beehive tidy, the beekeepers build beeswax foundation into the hive. The walls already contain honeycombs in the typical form. The bees can use them directly and fill them with honey. Since the beekeeper has to buy new foundation regularly, additional costs are incurred.
So that the beekeeper can better harvest and pack the comb honey, he often also provides the beehive with special wooden frames. The beekeeper can take the combs out of the frame directly and pack them up for sale. The wooden frames are usually more expensive than a regular honey jar.
For these reasons, comb honey is usually sold at a higher price than conventional centrifugal honey.

Eat and enjoy comb honey

You can eat good quality honeycomb with the honeycomb without hesitation. The stored pollen make it a special taste experience. Like conventional honey, it tastes different depending on the type of honey.

You can enjoy comb honey in several ways:
You can chew the honeycomb so that the taste can fully develop. It’s best to spit them out afterwards. While honeycomb is not harmful to your health, it can cause stomach pain if you eat large amounts of it.
When you chew out the comb, wax can stick to your teeth. To avoid this, you can instead crush the honeycomb on your tongue and suck it like candy.
You can also cut the combs into small pieces and enjoy them with bread or in yoghurt. But be careful: If you put the comb honey in hot food or drinks, the wax will become liquid.
Store your comb honey in a cool, dry place. Like conventional honey, it can then be opened for at least two years.

Growing mushrooms – is that possible? In fact, it is not that difficult to grow your own mushrooms. We will explain to you which varieties and methods are best suited.

Growing mushrooms at home: why it’s a good idea

Mushrooms – which are not plants, by the way – are low in calories, but provide important nutrients. Most mushrooms are a relatively good source of protein and can also contain important ingredients such as the important nerve cell component potassium, B vitamins or iron and phosphorus. Mushrooms, for example, contain 91 percent water, potassium, phosphorus and vitamins B1 and B2.

In contrast to wild-collected mushrooms, you don’t have to worry about the fact that home-grown mushrooms are contaminated with heavy metals or radioactive. If you grow mushrooms yourself, you can harvest all year round.

When it comes to where they grow, mushrooms are undemanding. However, they prefer shady places to sunny ones. Many varieties, such as mushrooms, can even do without light, which is why you can even grow mushrooms in the basement. They don’t like direct sun that much because they dry out too quickly there. Some mushrooms depend on sufficient humidity, more about that in the next sections.

This is what you need to grow mushrooms

You don’t need much to start your mushroom cultivation. Essentially, there are two things: the fungus and a substrate.

You have two options when choosing the mushroom: Either you only buy the mushroom culture, the so-called mushroom mycelium. Or you buy a mushroom culture kit, where everything you need is already prepared. Making a mushroom culture yourself is quite difficult for you as a hobby mushroom grower, so you will probably have to buy it. Ready-made sets also have an advantage: the substrate is usually already penetrated by the fungal tissue, so that the fungus very quickly begins to form its fruiting body, i.e. the part that we eat. That’s why you already have the first harvest successes after three to five weeks.

Choosing the substrate is easier. Ordinary residual products are used here. For example, you can use the following as a substrate for growing mushrooms:
coffee grounds
straw
sawdust
wood (untreated and unvarnished)
tree stumps

Make sure the substrate is as clean as possible. Because mushroom cultivation needs a lot of moisture, which in turn promotes the growth of germs or mold. If in doubt, you can treat your substrate with steam over 60 degrees Celsius. This kills germs and unwanted fungal spores.

You can fill the substrate in a bucket, pot or box, for example. Depending on the location you choose, a mushroom grow bag may also come in handy. It prevents the mushrooms from drying out. Mushroom growing bags are used in particular when your chosen location is very dry. You can buy together with the mushroom cultures.

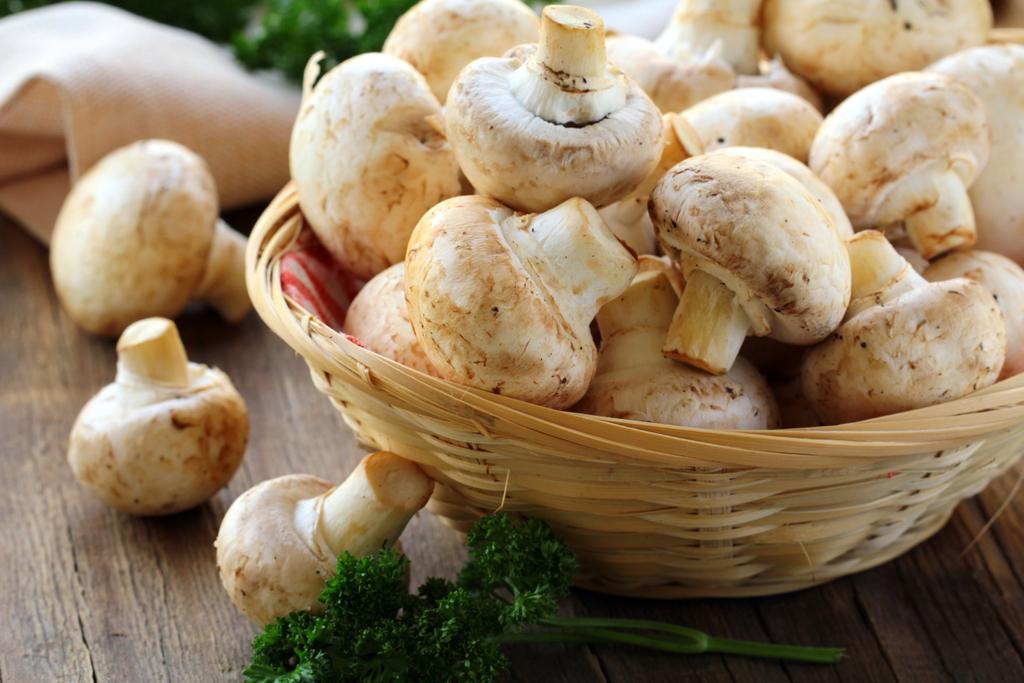
Grow mushrooms yourself: This is how you start your mushroom cultivation

Once you have the mushroom culture and substrate together, you can get started. With these tips you will succeed in growing mushrooms:

Before you put the mushroom culture in the substrate, water the substrate and then let it drain. It should be damp but not soaking wet.
Also make sure that the humidity in the area is high. 80 to 95 percent relative humidity is ideal. The basement, bathroom or kitchen are probably best suited here. If you don’t have a room with high humidity, you can support the growth of your mushrooms with a mushroom grow bag or indoor greenhouse.
Make sure the temperature is right: Mushrooms like a warm, humid climate, so the temperature should be between ten and 25 degrees Celsius. But it is worth taking a look at the packaging of your mushroom culture. This often indicates a temperature window.
Mix the mushroom culture under the substrate and fill it in a bucket or box. The layer should be a few centimeters thick.
Now it’s time to keep wet and wait. Check daily that your substrate is still damp. It is best to moisten it with a spray bottle. Be careful not to let the water stand in it and always use fresh tap water – otherwise mold can form here too.
If you only work with a mushroom culture, it will take a few weeks for the mycelium, i.e. the subterranean networks of your mushroom, to develop. Only then does the fruiting body form.
When the mushrooms are the size you want, you can harvest them. The best way to do this is to cut them off with a clean knife.
As a rule, a mushroom culture will sprout three to four times after you have harvested it. In between, she always needs a few days off.

You don’t always recognize vegan chips at first glance. In addition to potatoes, oil and salt, there are often flavors and additives, which is why not all chips are vegan. We’ll show you what to look out for.

Vegan chips are not a matter of course due to various additives. Animal ingredients are hidden in the salty snacks, especially in the form of flavor enhancers and flavorings.

Therefore, you should always take a look at the list of ingredients when shopping. The following substances are often found in conventional chips:
butterfat
sweet whey powder
milk protein
cream powder
buttermilk powder
cheese powder
animal rennet
shrimp powder
honey
pork powder
animal flavors such as game, poultry or fish

Animal additives are also hidden behind some E numbers, such as in emulsifier E471. The substance is obtained from animal fats.

To fry Pak Choi, you only have to pay attention to a few points. We’ll show you how to prepare the delicious Asian cabbage in a pan or wok.

Pak Choi, or Bok Choy or Pak Choy, is related to Chinese cabbage and is particularly popular in Asian cuisine. The vegetable looks similar to the local chard, but has its own taste with a mustard note. In this article you will find out how to fry pak choi deliciously.

Frying Pak Choi: Preparation

Basically, it is very easy to prepare Pak Choi in a pan or wok. Before you can start roasting, you must first prepare the cabbage:
Cut off the base of the stalk so that the leaves come loose one by one. If necessary, remove wilted leaves.
Wash each leaf thoroughly with water. To dry them off afterwards, you can shake them off or use a salad spinner.
Separate the leaves from the stems by either plucking them off or cutting them off with a knife. Keep the leaves separate from the stems, as you don’t want to add them to the pan at the same time afterwards.
Cut the stems and leaves into bite-sized pieces. Since the thicker stems in particular need a little longer in the pan, you can cut them a little finer.

Frying Pak Choi: This is how it’s done with a pan or wok

After you have washed and cut the pak choi, you can fry the cabbage. In Asian cuisine, the wok is usually used for this. In this you can serve Pak Choi particularly crispy. If you don’t have a wok, you can also fry the cabbage in a normal pan.

In Asian cuisine, pak choi usually goes into the wok with many other ingredients – for example other vegetables and diced tofu. But you can also serve Pak Choi separately with a side dish. The only important thing is to fry the stems first, as they take longer to cook.

How to fry pak choi:
Heat some oil in a pan or wok. In principle, you can use any oil that is suitable for frying. The Pak Choi is particularly tasty with sesame oil.
Then first put the chopped stalks into the pan and fry them for about three minutes.
Then add the leaves and fry them for about one, maximum two minutes.
Take the pan off the stove and season the fried pak choi with salt, pepper and some soy sauce.
Variations: Of course, you can also season Pak Choi creatively. Depending on your taste, some chilli paste, lemon juice, roasted sesame or peanuts are suitable.

If you harvest and dry sage properly, it can be stored for a long time. So you can use it at any time of the year to refine and season dishes. Even harvested and dried sage is also suitable as a tea for a sore throat.

6 tips for the right sage harvest

The real sage is a popular herb for refining dishes. But sage can also provide relief as a variety of home remedies, for example for sore throats or gastrointestinal complaints.

It is important to harvest the sage correctly in order to have sufficient supplies for the cold season, when the sage no longer sprout.

You should pay attention to these tips for a productive harvest:
Harvest time is from May to August. Normally, the sage begins to bloom at the beginning of summer. In its heyday, however, its aroma content is very weak, which would make it uninteresting as a herb.
If you grind consistently and evenly, you’ll reduce woodiness and blooming. The young shoot tips in particular are rich in essential oils and aromatic ingredients.
Never cut into the woody part of the shoots, otherwise the shoot will not sprout again.
Do not wash the harvested sage, just wipe it off to avoid unnecessarily slowing down the drying process and losing valuable ingredients.
To avoid loss of aroma, you should dry or freeze the sage immediately after harvesting.
You should harvest the last time around the end of August so that the shoots can fully mature before the first frost and are therefore protected. To protect the hardy shrub from frost, you can put leaves, fir green or straw around the root area. Attention: Not all sage species are hardy.

drying sage

Dry or Freeze Sage – Which is Better? The answer: both are possible! The essential oils are preserved both dried and frozen.

Sage really dry
In the air:
Dry the sage at 70 to 80 degrees Fahrenheit (21 to 27 degrees Celsius) in a well-ventilated area. That takes about ten days.
You can simply spread individual sheets on newspaper.
If you have harvested stalks, tie them together with string and hang them upside down.
In the oven:
It is also possible to dry the sage in the oven at 40 degrees Celsius within about six hours.
Turn the leaves regularly and leave the oven door ajar (say, with a wooden spoon between them). However, this method is not very energy-efficient and therefore not recommended.

Freeze sage properly

To freeze sage, you can put the sage leaves uncrushed in a screw-top jar or freezer container.

If you store apples correctly, they stay fresh and tasty longer and can even be stored for many months – just like grandma used to do! Utopia tells you what you should consider here.

Why is proper storage of apples important?

The ripening process of an apple continues even after it has been picked and the texture of the harvested fruit changes. If you store apples incorrectly, they can overripe, rot, or dry up.

In order to avoid food waste, save money and simply enjoy the healthy fruit for longer, you should follow a few tips and store apples correctly.

Store apples separately from other fruit

Anyone who has ever put together a decorative fruit basket with apples, bananas, plums or pears knows how quickly the fruit ripens.

Apples give off the plant hormone ethylene, which causes the other fruits to ripen faster or even rot. Potatoes also suffer if they are stored with apples – they become shriveled and old faster. Therefore, you should always store apples separately.
You should also make sure to keep your apples cool and dark, ideally in a closet or basement. The vegetable drawer in the refrigerator is also suitable, but it should not contain any other fruit and vegetables because of the ethylene. The fridge shouldn’t be too cold either, because apples don’t tolerate frost.
If you still have old plastic bags at home, you can also use these for storage: the film retains moisture and the fruit is protected from drying out. But make sure that not too much water accumulates in the bag.

Stock up on apples to keep them fresh through the winter

With a few tricks, you can not only store the apples for a few days or weeks, but make them durable for the whole winter or even until the next harvest in autumn. This is far more ecological than buying imported apples from overseas.

Keep the following points in mind when storing apples:
Find a dark, cool storage place with a constant temperature – preferably between three and four degrees Celsius. For example, a basement compartment, a garage or a shed is suitable. Under certain circumstances, an unheated hallway or a cool pantry may also be suitable.
Make sure there is enough humidity so that the apples don’t dry out and shrivel up. For example, regularly set out bowls of water or loosely cover the apples with a perforated plastic wrap, if you have one. In this way, moisture is retained, but excessive condensation can escape.
At the same time, make sure there is enough air supply so that the apples don’t get moldy. If you’re storing them in wooden crates, only put one layer of apples per crate and make sure the fruit doesn’t touch each other. Boxes with side or bottom slots are particularly suitable.
If you store your apples in a shed in the garden, be sure to protect them from frost and rodents, such as mice!
Before storage: Only choose apples that are in good condition for storage – i.e. only fruit without bruises, signs of eating or rot. It is best to store the apples with the stem.

If you freeze porcini mushrooms, you can make them last much longer. We explain how it works and what you should consider before buying or collecting the mushrooms.

Freezing porcini mushrooms: You should pay attention to this

If you want to freeze porcini mushrooms, they should be fresh. When you buy porcini mushrooms, an organic seal guarantees you organic cultivation that is free of chemical-synthetic pesticides. With your purchase you can also support regional suppliers, such as the farm or organic market in your area.

If you are looking for porcini mushrooms in the forest, you should note that mushroom picking is strictly forbidden in nature reserves. In other forests you are usually allowed to collect for your own use, but find out about it beforehand.

Freezing porcini mushrooms: this is how you do it

If you want to freeze porcini mushrooms, the mushrooms should be in an unprocessed state if possible. This way you can keep them for up to 12 more months by freezing them. We explain in three steps how to freeze raw porcini mushrooms:

Clean mushrooms: First, carefully clean the porcini mushrooms with a cloth or brush. Don’t wash the mushrooms with water at this point, because that way they will go mushy very quickly.
Cut the mushrooms into small pieces: Use a paring knife to remove the stem ends of the porcini mushrooms. Now cut the mushrooms into small pieces. Halve, quarter or slice the mushrooms.
Freezing: Put the porcini mushrooms in an empty screw-top jar and freeze the mushrooms at around minus eighteen degrees.

To use the porcini mushrooms for various mushroom dishes, you can heat the porcini mushrooms while they are frozen. If you let them thaw for a long time, they lose their firm consistency.

Many pumpkin dishes are part of the autumn season. But did you know that you can also eat pumpkin raw?
Pumpkin soup or pumpkin puree are classics, but if you’re looking for more variety, you can also eat pumpkin raw. You can eat many types of pumpkin uncooked without worry, but to be on the safe side, you should still follow a few tips before doing so.

Eating pumpkin raw: when is it safe?

There is a rule of thumb when eating raw pumpkins: edible pumpkins are good raw vegetables, but you should stay away from ornamental pumpkins! Because ornamental gourds contain the bitter substance curcurbitacin, which is toxic even in small amounts and can cause nausea and tachycardia, according to the Federal Center for Nutrition (BZfE). The best way to recognize a decorative pumpkin is that it is much smaller than its grocery store relatives and often a much more striking color and shape. It is also marked as such in the store.

On the other hand, you can eat almost all types of pumpkin available in the supermarket raw without hesitation. According to the BZfE, the toxic curcurbitacin was mostly bred from them by the producers. The following pumpkins taste best in raw recipes:

nutmeg squash
Butternut Squash
Hokkaido pumpkin

Already knew? You can not only eat pumpkin from the shops raw, but sometimes also with the skin! For example, you can save yourself the trouble of peeling the Hokkaido pumpkin before processing it.

Better not to eat pumpkin from the garden raw

While growing your own pumpkins in the garden is a good idea, it’s best not to eat your harvest raw. Because even if you use seeds from which a pumpkin should actually grow, so-called reverse mutations can cause poisonous cucurbitacins to form again in the pumpkin. This crossbreeding is particularly dangerous because you often cannot tell with the naked eye whether the bred pumpkin is poisonous or not.

Incidentally, such a mutation can also occur if you use your own seeds from the previous year. Even with tested organic seeds, there is a risk that your pumpkin will crossbreed with a poisonous ornamental pumpkin that may be growing in your neighbor’s garden. That’s why it’s best to play it safe and only eat pumpkin raw if you bought it from a store.

Eating raw pumpkin: This is how you do the taste test!

A certain residual risk also remains with purchased pumpkins. Before you can safely eat pumpkin raw, you should always do a taste test. In general, only use pumpkins that you bought in a grocery store.

This is how the taste test works with raw pumpkin:

First cut off a small piece of the raw pumpkin. Refrain from seasoning the pumpkin, otherwise you will no longer be able to perceive the pure taste.
Now put the piece of pumpkin in your mouth and see if you notice a bitter taste.
Don’t swallow the gourd, instead spit it out after the test.
If the pumpkin tastes bitter, it may contain harmful bitter substances.
In this case, do not eat the pumpkin raw and do not cook it either! It is better if you dispose of the pumpkin on the compost to be on the safe side.