Tag

attention

Browsing

Freezing pizza dough is useful if you have misjudged the quantity or want to build up a small supply. We’ll explain how to freeze.

Freeze pizza dough in portions

Ideally, you freeze the pizza dough before it has risen – this way the pizza doesn’t get soggy. If you’ve made a lot of pizza dough, you should freeze the dough in the portions you need for one pizza at a time.

When freezing, it is important to pack the dough airtight. This works with cling film or freezer bags, but for the sake of the environment and your health you should avoid plastic. A good plastic-free alternative is a beeswax wrap.

You can freeze pizza dough particularly well in a cake tin: Roll out each portion of dough into a circle and place them in a round cake tin. Always put a layer of baking paper between the flatbreads (you can use the baking paper later).

Then you pack the whole thing airtight, for example in wax paper. The advantage of this method: You can take individual pizza bases straight out of the fridge. They thaw faster thanks to their flat shape and you don’t have to roll them out after freezing.

thawing and shelf life

Well packaged, the pizza dough can be stored in the freezer for up to three months. That’s enough to create a small supply.

You should defrost the dough slowly, ideally over a few hours or overnight in the refrigerator. This allows the pizza dough to rise again. If it has to be quick, you can save yourself the hassle, the pizza will be a bit crispy.

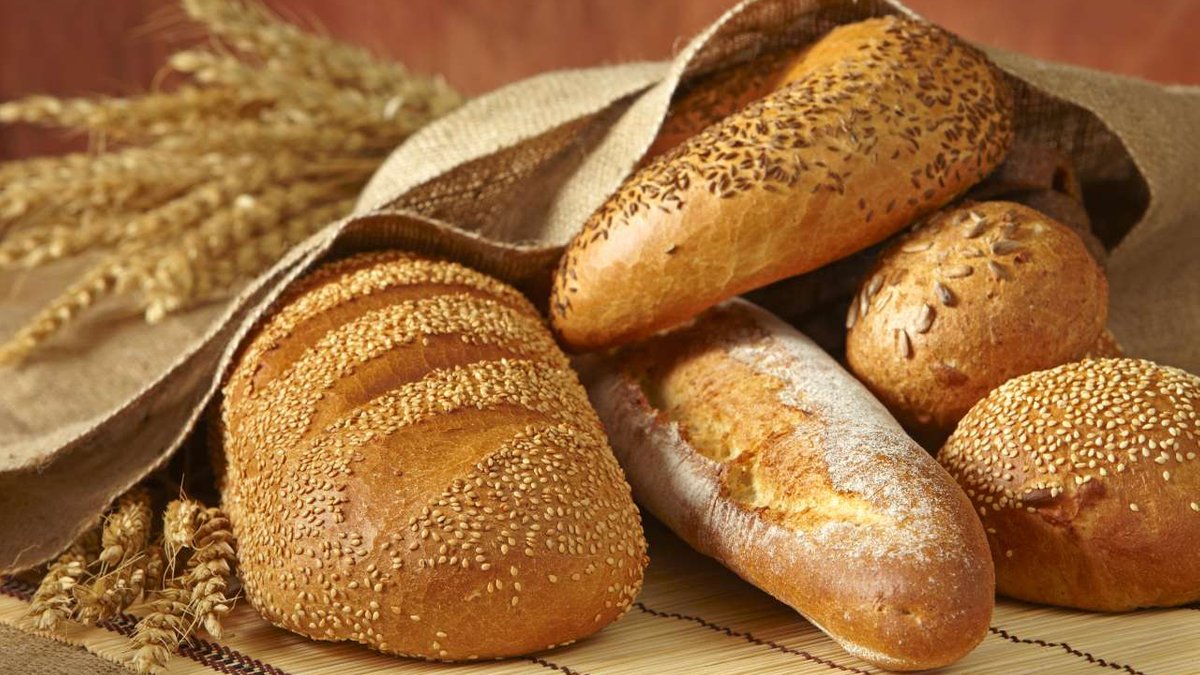
Baking alkaline bread is not difficult and does not take long. We present three recipes with which you can bake the healthy and low-acid bread in your kitchen.

Alkaline bread differs from conventional bread in the way it is made: For alkaline bread, the grain must first begin to germinate before it is crushed. The baking result most closely resembles crispbread. Basic bread is said to prevent an overly acidic diet. However, this has not yet been scientifically proven.

The big advantage is rather that with basic bread you do without unhealthy foods such as white flour or sugar.

Alkaline bread can consist not only of germinated (!) grain, but also of germinated oilseeds such as pumpkin seeds or sesame. In addition to herbs and spices, fruit and vegetables can also be part of alkaline bread. This works for example with bananas, zucchini and celery.

We recommend that you use organic food from regional suppliers for the following recipes. In this way you can support food with a low transport distance and a good carbon footprint.

Bake basic bread: Recipe for buckwheat bread

The first recipe is for a basic bread with grains. You can prepare it with chia seeds or alternatively with sunflower seeds or sesame:

You need these ingredients for a buckwheat bread:

500 grams of buckwheat flour
2 tbsp chia seeds
120 grams of buckwheat
100 g pumpkin seeds
3 tsp honey
450ml + 440ml + 400ml water
50 g amaranth
3 tsp sea salt
some olive oil
You should start preparing your basic buckwheat bread the day before:

Soak the buckwheat and pumpkin seeds in a glass of water in the morning. Use about 440 milliliters, twice as much water as seeds. Then let them dry overnight. The best way to do this is to spread the seeds out on a baking sheet lined with baking paper and place them on the heater.
Soak the chia seeds in a glass filled with water overnight. The chia seeds should be completely covered with water. Use about 400 milliliters of water for this.
Preparation:

Puree the buckwheat grains and pumpkin seeds in a blender and then set them aside for a moment.
Blend the soaked chia seeds and water again in the blender.
Now put the chia seeds, buckwheat, pumpkin seeds, honey, water, sea salt and amaranth in a bowl and stir vigorously with the buckwheat flour.
Spread the batter on a greased baking sheet.
Let the basic bread dry in the oven at around 40 degrees for eight hours.
Turn the bread and let it dry for another eight hours, then it will have the right consistency.
Tip: If you like, you can sprinkle your bread dough with sunflower seeds or sesame seeds before you put it in the oven.

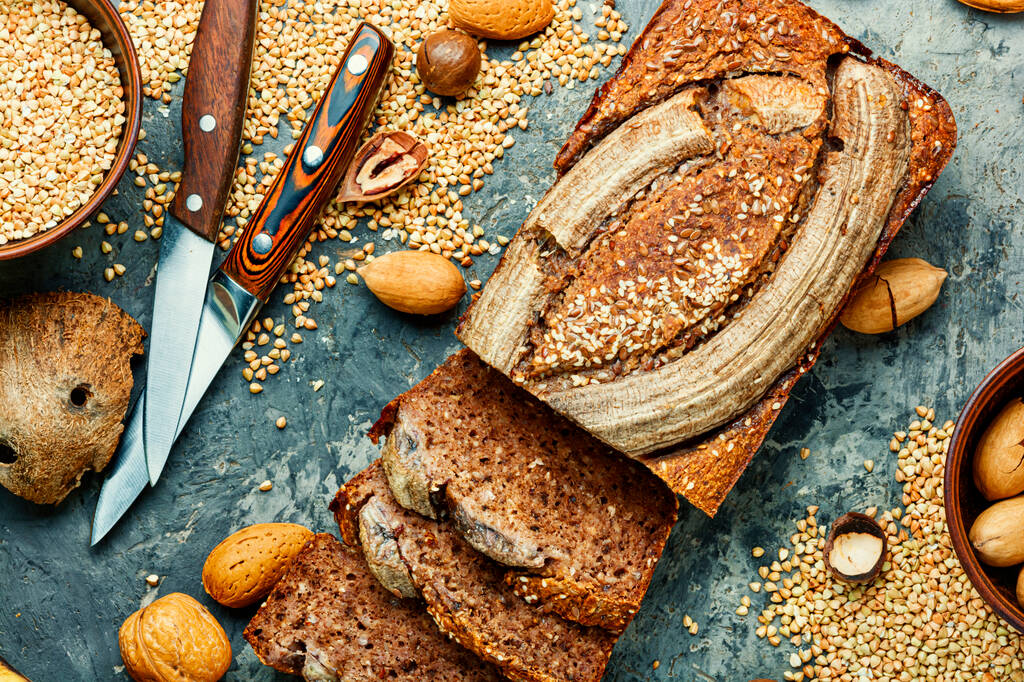
Baking basic bread: A sweet variant

You can bake sweet basic bread with the help of fruit, sweet spices and nuts. How about a sunflower seed bread with banana and cinnamon?

You need these ingredients:

500 g wholemeal flour
100 g sunflower seeds
150 grams of flaxseed
1 liter of water
1 banana
3 tsp honey
3 tsp vanilla
3 tsp cinnamon
some sunflower oil
How to prepare this basic bread:

Fill a jar with 1 liter of water and let the sunflower seeds and flax seeds soak in it overnight.
Then let the seeds dry for a few hours without the water.
Puree the dried sunflower seeds and flaxseeds.
Peel the banana and cut it into small pieces.
Put the banana, honey, vanilla and cinnamon in the blender and blend until smooth.
Mix the seeds, the mixture from the mixer and the whole wheat flour.
Spread the batter on a greased baking sheet.
Let the basic bread dry in the oven at around 40 degrees for eight hours.
Turn the bread and let it dry for another eight hours, then it will have the right consistency.

If you confuse a porcini mushroom with other mushrooms, this is not a problem as there are no poisonous doubles. In this article you will find out which other mushrooms you could confuse the porcini mushroom with.

One of the most popular edible mushrooms is the porcini mushroom, also known as the porcini mushroom. The porcini mushroom belongs to the thick boletus family and lives in root symbiosis with trees. The name spruce boletus, which is common in some places, indicates that the boletus is often found under spruce trees.

There are no poisonous doubles for the porcini mushroom, but it can happen that you confuse it with the common gall boletus and thick-stemmed specimens of the chestnut boletus.

Characteristics of the boletus

The dark brown hat of the porcini can reach a diameter of up to 25 centimeters. The robust, bulbous stem is an average of ten centimeters long and reaches a diameter of two to eight centimeters at the base. In the transition to the cap, the handle is significantly narrower. On the underside of the cap you can see whitish tubes on young porcini mushrooms, which take on a yellow-green color with age.

The porcini has light, firm flesh and tastes pleasantly nutty. Porcini mushrooms do not have a special smell. In older specimens, the pores under the cap are often infested with vermin. Therefore, you should pay attention to this before preparing it in the kitchen and detach the spongy tubes from the cap. The pores hardly change color when pressure is applied.

Boletus mistake: common gall boletus

The common bile boletus belongs to the thick boletus family and is therefore related to the porcini mushroom. Hence the similarities. The common bile boletus is also called bitterling and is not considered an edible mushroom due to its extremely bitter taste. This means that the common bile boletus is not poisonous but inedible.

The most important characteristic, in order not to confuse the common bile boletus with the porcini mushroom, is the color of the pores. The bile boletus has whitish tubes under the brown cap that turn pink with age. The stalk of the bile boletus is slightly darker and veined like a net. The odor of the gallbladder is unpleasant. The flesh has an extremely bitter taste. Therefore, the bile boletus is not popular in the kitchen at all, since a single fungus can spoil the whole dish.

Chestnut boletus vs. porcini

The chestnut boletus also belongs to the thick boletus family and is related to the porcini mushroom. In the vernacular, the chestnut boletus is also called “Marone” because the dark brown hat in the moss looks similar to chestnuts.

The cap of the young chestnut boletus has a hemispherical shape and later becomes irregularly curved. The diameter is up to fifteen centimeters. The whitish tubes, which turn olive yellow when old, are striking and turn blue when pressure is applied. The light flesh also turns blue when you cut the mushroom. This has also earned it the name “blue mushroom”. The stalk, which is shaped like a cylinder, is brownish in color and lighter than the cap and is significantly slimmer than that of the porcini mushroom. The chestnut boletus smells pleasantly slightly sour and is a popular, tasty edible mushroom.

If the pressure point on the tubes and the cutting point on the stem turn blue, it is not a porcini mushroom but a chestnut boletus. You can rule out the additional confusion of the chestnut boletus with the bile boletus by the taste test. Since the chestnut boletus is a tasty edible mushroom, you can harvest it as soon as you have ruled out confusing it with the gall boletus.

Olive oil is a healthy and tasty Mediterranean cooking oil. It just can’t get too hot. Here we tell you what you should pay attention to when heating olive oil.

Heat olive oil: tips for cooking, braising, baking and frying

Whether you want to fry onions until translucent, season a pasta sauce to taste, or brush a pumpkin in the oven with the popular oil in autumn: you can use most olive oils – including good “extra virgin” quality olive oils.

As long as the olive oil is cooking, stewing or baking in the pot with vegetables or other water-containing foods, it hardly gets hotter than 100°C.
You can even fry in olive oil as long as you use a temperature controlled fryer and don’t set it above 180°C.

Be careful when frying: do not let the olive oil get too hot

In fact, there are few situations where olive oil can actually burn and lose both its great taste and health-giving properties. For example, if you want to sear something to create roasted aromas.

The so-called smoke point of olive oil is around 180°C. Beyond this temperature, the oil burns and not only loses its healthy components – dangerous and sometimes carcinogenic by-products such as the toxic acrolein are also produced.

If it must be olive oil, only hot-pressed, refined olive oil would be suitable for searing. This is heat-resistant at temperatures of up to 220°C. During hot pressing, however, a large part of the aroma and the health-promoting properties of the oil are lost.

In summary – what should be considered when heating olive oil?

Here are a few things to keep in mind when heating olive oil:

Combined with vegetables or other water-containing foods, olive oil does not burn.
With a temperature control, you can even use olive oil for frying at a maximum of 180°C.
For temperatures higher than 180°C, you should use hot-pressed olive oil or other cooking oils.
If you want to get the most out of your olive oil, both in terms of taste and health, you can add it at the end of the recipe to refine it. Organically grown olive oils from cooperatives are best for the environment and producers. However, since it is such a coveted raw material, consumers are often misled.

Freeze tofu? That’s fine! This not only keeps it longer, but also makes it particularly crispy or tasty. You can find out what you should consider here.

Freezing tofu has several advantages: Not only can you extend the shelf life, but you can also change the consistency. Tofu can be frozen for up to six months.

When does it make sense to freeze tofu?

Freezing tofu makes sense to prevent food waste – for example in these cases:

You don’t consume your tofu within its shelf life. Note: Most foods are still edible beyond the best-before date without any problems.
You opened the package and you have tofu left over. Tofu usually only lasts a few days in the refrigerator once opened.
Because it contains a lot of water, the tofu changes its consistency when it freezes. You can use this:

The pores get bigger. As a result, thawed tofu can absorb the marinade and spices better and tastes more intense. For particularly flavorful marinated tofu, it makes sense to freeze the tofu beforehand. However, be careful not to over-season – this can easily happen due to the larger pores.
Depending on the type, freezing the tofu makes it either firmer, softer or more crumbly. Natural tofu becomes firmer and easier to express. You can take advantage of this in dishes with crispy tofu, such as breaded tofu sticks. All other types of tofu, such as silken tofu, become softer and more crumbly and are then great for soy Bolognese or desserts such as vegan chocolate mousse or vegan cheesecake.
It is possible that some varieties will turn yellowish when frozen. However, the yellow tinge often disappears again when it is thawed.

Freezing tofu: what do you have to consider?

Pack the tofu airtight, for example in a tightly sealable box. Alternatively, you can leave it in the vacuum pack that you bought the tofu in. This is important to keep the tofu from drying out and freezer burn.
If you like, you can chop or portion the tofu before freezing.
The tofu should be in the freezer compartment or cupboard for at least half a day so that it is properly frozen. Then you can use the changes in consistency (see above).
Don’t marinate and season the tofu until it’s thawed.
The best way to thaw frozen tofu is to place it in the fridge the night before.

Which tofu is recommended

We recommend buying organic tofu. In particular, organic seals such as Bioland, Demeter or Naturland have strict guidelines and ban chemical-synthetic pesticides, among other things. In addition, organic tofu mostly consists of European soy.

Ask your supermarket or health food store about regional products and pay attention to the indications of origin. With shorter transport routes, you can save on CO2 emissions and thus reduce your ecological footprint. Here you can find out more about how you can eat regionally despite a vegan diet: Vegan regional: Soya and seitan are also available from Germany.

Tip: You can also make tofu yourself.

In itself, the preparation of the miracle tuber Jerusalem artichoke is not difficult. However, there are a few things you should keep in mind when peeling and cooking.

Jerusalem Artichoke: Good for digestion and a slim figure

Jerusalem Artichoke is a perennial sunflower with bright yellow flowers. Like the tomato or the potato, the tuber was brought to Europe by French emigrants from North America in the 17th century. Visually, it resembles ginger, but tastes more like parsnip, but with a nuttier taste.

The tuber can be processed in many ways, for example to:

soups
puree
Casserole
potato pancakes
and even raw in a salad.
In addition to its excellent taste, Jerusalem artichoke has other positive properties. The tuber has 30 kilocalories per 100 grams and is high in fiber, which is important for good digestion. This includes, for example, the water-soluble dietary fiber inulin. This makes them particularly interesting for diabetics, as their consumption does not affect the blood sugar level, but has a positive effect on the intestinal flora. It is also rich in potassium and iron.

You have to pay attention to this when cooking and peeling

First, use a good vegetable brush to thoroughly scrub and clean the mostly earthy tubers in cold water.
Remove dark spots with a knife.
You don’t need to peel it as the skin is very thin and can be eaten. If it still bothers you, you can peel Jerusalem artichoke thinly with a paring knife. This is particularly recommended for larger tubers. Alternatively, you can peel the peel after cooking. That’s a little easier.
The Jerusalem artichoke is now ready for further processing: In contrast to potatoes, you can also eat it raw, for example in a salad or on a raw vegetable platter. If you want to prepare the tuber as a Jerusalem artichoke soup, casserole or puree, you should cook it for 15 to 30 minutes.

Undesirable side effects of Jerusalem artichoke

In addition to its many positive properties, Jerusalem artichoke unfortunately also has a few unpleasant side effects. Consuming them can cause severe gas and even diarrhea if you overeat. This is due to the large amount of roughage, which the intestinal flora often has to get used to digesting. It’s best to approach it slowly and start with very small portions. This gives the intestine time to adjust to the new food.

Can ice cream go bad? This question is important both the next time you visit the ice cream parlor and for ice cream in your own freezer. We explain how you can extend the shelf life of ice cream and what you should pay attention to before consuming it.

Whether as a ball of ice cream in a cone, as a bar or on a stick: ice cream is particularly popular in summer. But can ice cream go bad? Here you can find out when you should stop eating the popular candy and what role the cold chain and best-before date play in this.

What role does the cold chain play?

Maybe you know it: You just bought an ice cream in the supermarket and were stopped on the way home. Suddenly you realize you’ve been carrying the fresh ice cream around with you for an hour in the heat. Can ice go bad if the cold chain has been broken for so long?

If you transported the ice in a cooler or in a special cooler bag, you may be lucky. But: Just to be on the safe side, check whether your ice cream is still good. If ice crystals have formed on the surface, this is a clear indication of an interrupted cold chain. In this case, you should not refreeze the ice cream. This is because germs can easily develop that can cause food poisoning.

Even if you have stored the ice cream in the freezer at home, you should still pay attention to the cold chain. It is best to fill smaller portions of ice cream into a bowl instead of leaving the whole pack out for a long time. Make sure to use a clean spoon or ice cream scoop for this.

Can ice go bad in the freezer?

If the cold chain is maintained throughout, you don’t have to worry. In this case, ice will last for many months. Of course, there is also a best-before date for ice cream. But you don’t necessarily have to stick to it. As a rule, you can still eat ice cream after a week has passed.

It’s best to do a little “taste test”: If your ice cream tastes fresh, it’s still edible. On the other hand, if it tastes slightly sour or has a different consistency, you should better dispose of it.

Tips for the ice cream parlor on the shelf life of ice cream

You can also easily recognize good ice cream in the ice cream parlor with a few tips. If you like to get vanilla ice cream at the ice cream parlor around the corner, next time you should take a closer look at the ice cream parlor. Is the water in the scoop clear or stale? Are the ice tubs clean? Does the ice cream itself look smooth and creamy? These indicators already tell you whether the ice cream is good or whether it could be contaminated.

A clear red flag that indicates “bad” ice is a friable surface. Then you can be sure that the ice has definitely been thawed before. The risk is great if you ingest germs and pathogens with the ice cream.

Make ice cream yourself

If you want to be on the safe side, you can of course prepare the frozen candy yourself. Then you can also be sure that there are no additives (such as flavor enhancers or preservatives and colorings) in the ice cream. However, even with the homemade varieties, make sure to use up the dessert quickly after the cold chain has been broken. Put ice cream that you don’t need back in the freezer as quickly as possible and use clean utensils to serve.

Eating Brussels sprouts raw is possible in principle, but can put your digestion to the test. Here you can find out how to prepare the small cabbage florets as easily digestible as raw food.

Brussels sprouts are in season in Germany between September and March. It is therefore a popular ingredient, especially in autumn and winter cuisine. It is usually served boiled, fried or gratinated – for example as a Brussels sprouts casserole, Brussels sprouts in a pan or Brussels sprouts stew. Recipes with uncooked Brussels sprouts are rarer.

In principle, it is possible to eat brussels sprouts raw – the uncooked kale florets are not poisonous or otherwise harmful. However, they can be difficult to digest. You can prevent this by preparing them as gently as possible on the stomach.

Eat brussels sprouts raw – this is the most digestible way

Brussels sprouts have a slight bitter note both cooked and uncooked. For this reason, the prejudice persists that the raw leaves are poisonous. In fact, a bitter taste in some types of vegetables is a warning signal: in zucchini or pumpkins, for example, it can indicate that the toxic substance cucurbitacin has formed. With Brussels sprouts, on the other hand, the slightly bitter aroma is normal and therefore not a cause for concern.

Cooked Brussels sprouts are one of the more digestible types of cabbage. However, it is harder to digest raw and can lead to flatulence and other digestive problems. This is mainly due to its high fiber content. If raw cabbage always causes problems for your stomach, you should also be careful with Brussels sprouts. Then try a smaller amount first to see how your body reacts to the uncooked Brussels sprouts.

Eating Brussels sprouts raw: Preparation and recipe ideas

The florets harvested from November are best suited for recipes with raw Brussels sprouts. They have usually been exposed to freezing temperatures and taste milder and sweeter as a result. When cleaning Brussels sprouts, it is also best to remove the outer, dark green leaves. They are usually dry, fibrous and taste less pleasant than the light green inner leaves, especially when raw.

You can eat Brussels sprouts raw, for example, by preparing them as a salad. Some recipes for Brussels sprouts salad use pre-steamed Brussels sprouts—the florets are usually cut in half. If you use raw Brussels sprouts for salad, you should chop them up as finely as possible. This makes it easier to digest and easier to digest. For example, cut the florets into thin slices, grate them or pluck off the leaves individually.

You can dress the raw Brussels sprouts salad with a classic vinaigrette, a honey-mustard dressing or a lemon dressing, for example. Walnuts are particularly suitable as a topping because they harmonize with the slightly bitter note of the cabbage. You can add other ingredients to taste. A few Brussels sprouts also add an interesting touch to a classic mixed salad.

Tip: It is best to buy your groceries seasonally and regionally and, if possible, pay attention to organic quality. We can recommend the organic seals from Demeter, Bioland and Naturland, as they follow stricter criteria than the EU organic seal. In this way you contribute to biodiversity and soil protection.

If you freeze broccoli, you can still enjoy the summer vegetable in the fall and winter. We’ll show you how it’s done – and tell you the best way to defrost the florets again.

Broccoli is a relative of cauliflower, grown in Europe mainly in Italy. From June to October he is also in season in Germany. The vegetable with the dark green florets is very healthy: broccoli is rich in minerals such as potassium, iron and zinc. It also contains various B vitamins and lots of vitamin C.

Freezing broccoli: How to cook it

It is best to buy the broccoli at the market during the season, where you can get it unpackaged. The florets should look fresh and green and still be connected. Avoid broccoli that is already bruised or discolored.
At home, wash the broccoli thoroughly, removing the leaves and the woody end of the stalk. Cut the florets into 1-1/2 inch pieces and the stem into 1/4 inch slices.
If you like, you can now put the broccoli pieces in a bowl with water and some lemon juice for five minutes. This is how the broccoli keeps its green color.
Tip: If you buy organic broccoli, you avoid chemical-synthetic pesticides.

Also: If you want to eat the broccoli right away, don’t worry about bruises when you go shopping – they are quickly removed and the vegetables taste just as good.

Blanch the broccoli before freezing

Before freezing, you should blanch the broccoli briefly. Otherwise it will get mushy later when defrosting. Boil a few liters of water in a large saucepan. Place the chopped broccoli in the boiling water for about 2 minutes, then scoop out the pieces with a slotted spoon. Now let the broccoli cool in a colander.

How to freeze broccoli

To freeze the broccoli, fill a freezer container, such as a glass one, and place it in the freezer. The broccoli can be kept for up to a year.

If you later want to thaw the broccoli pieces individually, you should prefreeze them before freezing. Place the broccoli florets a little apart on a board or tray and place in the freezer for half an hour. This will prevent the broccoli pieces from sticking together when you freeze them. You can then freeze them as described above.

Thaw frozen broccoli

There are several ways you can defrost the broccoli:

You can thaw the broccoli at room temperature or in the refrigerator. Depending on the ambient temperature, this can take a few hours.
Broccoli can be thawed much faster in a large pot: Bring water to a boil and blanch the frozen broccoli in it for a maximum of 90 seconds. This also keeps the vegetables nice and crunchy. Attention: For this method you need a large pot with a lot of water so that the liquid does not cool down too much due to the cold broccoli. Caution: Consider whether you can still use the broccoli water after cooking. If not, another method might be more water-efficient.
In the oven, you can defrost and roast the broccoli at the same time. To do this, place the broccoli pieces in a mold, drizzle them with a little olive oil and season with salt and pepper. Then place the mold in the 200 degree oven for 15 minutes.

Buying too much bread or you want to stock up? Then you can also freeze the bread. You can find out how this works without plastic in our practical tips.

The right container for freezing

Plastic containers are not recommended for storing bread. In the worst case, plastic cans contain harmful plasticizers and are difficult to dispose of in an environmentally friendly manner. Instead, it’s better if you freeze bread and other foods in glass or stainless steel containers.

You can easily freeze sliced bread in it for a few weeks and then only take out as many slices as you need. The fresher the bread is when frozen, the longer it will keep in the freezer. However, it also loses its freshness and flavor over time, which is why you should generally not freeze baked goods for longer than a month or two.

Freeze bread in a cloth bag

In addition to plastic cans, plastic freezer bags can still be found in many households. You can use them several times, but sooner or later they end up in the trash. A good alternative to this are, for example, simple cloth bags. You can freeze the bread whole loaf or in slices. A cotton bag also works well to absorb excess liquid when you thaw the bread in it.

Tip: If you are only freezing your bread for a few days, for example over the weekend, you can even leave it in the paper bag. Well wrapped, the bread can also be frozen in it without any problems. You should only take it out of the paper bag to thaw it.

After freezing – thaw the bread properly

Give the frozen bread some time to thaw. One to three hours at room temperature is usually sufficient for this.
You can also let your bread thaw overnight, covered in a cotton bag or under a clean cloth.
If you defrost the bread in the oven, you should not heat it up for too long. This can make it hard and dry. However, it is possible to briefly bake the defrosted bread again in the oven. Then it tastes fresh again after the time in the freezer.
If you have frozen your bread in slices, you can also defrost it in the toaster. Simply toast the frozen slice a few seconds longer than fresh bread.