Tag

Cleaning

Browsing

Clean pearl jewelry and care for pearl jewelry with tips. Store with practical tricks and home remedies for pearl jewelry. Pearls are natural products and require proper care. Cleverly store pearl jewelry to preserve the beauty of the pearls. Here are some important pointers. If these tips are followed, you can enjoy pearl jewelry for a long time.

Clean pearl jewelry

  • It is best to wear the pearl jewelry frequently and wipe it off with a soft cloth without additives after each wear.
  • To keep the pearls from losing their shine, they can be carefully rubbed with olive oil once a year.

Care for pearl jewelry

  • Avoid contact with any kind of cosmetics, including hair sprays, perfumes, skin creams, soaps, and detergents.
  • Excessive heat and sunlight can cause pearl jewelry to dry out.
  • Maintaining pearl jewelry by avoiding water. Do not wear while showering or bathing. Also do not wear pearls in swimming pools or even in seawater.

Store pearl jewelry

  • When storing, do not bring it into contact with other pieces of jewelry, otherwise, scratches may occur. It is best to put it in a soft, separate bag or wrap it in a cloth.
  • Depending on how often a pearl necklace is worn, it should be taken to the jeweler every few years to be re-strung.

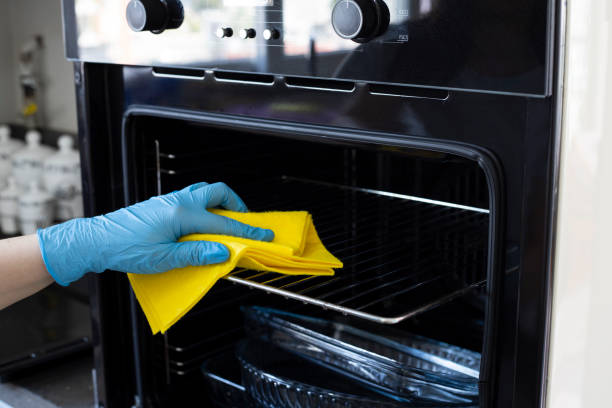
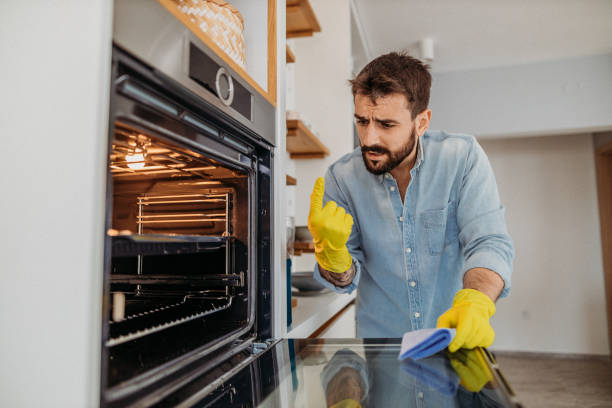
A clean oven not only ensures more hygiene but can also significantly increase performance. A dirty oven is not able to show its full heating capacity. Cleaning the oven is, therefore, a very sensitive matter, which can also save electricity.

Cleaning the oven is not only important for hygiene but can also help to save electricity. For this reason, it makes sense to thoroughly clean the oven once every 2 to 3 months. It’s worth taking a little time to clean the oven, as you can loosen even the most stubborn dirt so that bacteria and germs don’t stand a chance.

You need this to clean the oven

Cleaning the kitchen also includes the proper cleaning of the oven. In order to be able to clean the oven, you can consult a whole handful of tools. The best way to do this is with oven spray. This cleaner has been specially developed to make oven cleaning quick and effective.

The spray can even loosen stubborn dirt and encrustations, which prevents bacteria from accumulating any further. This enables significantly better hygiene. It is advisable to clean the oven regularly. How often you have to clean the oven naturally depends primarily on how it is used. However, it is recommended to clean the oven at least once every 3 months.

1) Clean the preparation in the oven

As everywhere, preparation is half the battle. In order to be able to effectively remove dirt from the oven, you should first remove all the trays. This is the only way you can really reach every part of the oven if you want to clean the oven. It is recommended that you clean the sheets at the same time at this point. In addition, note important criteria for buying an oven, because ovens with a self-cleaning function help you with your work.

2) The application of the oven spray

Before you can use the oven spray, you have to shake it well first. Next, you can easily distribute this to the areas in the oven that need to be cleaned. It is important that you distribute the oven spray evenly. This is the only way it can develop its full power. In the case of heavily soiled ovens, it makes sense to apply the layer a little thicker. Next, let the spray sit for a few minutes.

There are products that only work effectively at a certain temperature. For this reason, it may be necessary to heat the oven to around 50 degrees. However, this depends on the spray used. Therefore, one must study the application instructions carefully before use. Over time, the cleaner should discolor slightly. Here you have to pay attention to a slight brown coloration. If this is the case, you can be sure that the oven cleaner works. In addition, the oven can also be cleaned with household products such as baking powder. Home remedies help to remove bad smells in the oven.

3) Remove Oven Spray

If you have given the oven cleaner enough time to take effect when cleaning the oven, you must free the oven from the foam again. A rag or damp cloth is best for this. It is important that you really remove the foam from all places in the oven, as this should under no circumstances come into contact with food. In addition, unpleasant odors can occur the next time the oven is heated up if all the residue of the oven cleaner has not been removed. It is advisable to rinse the rag several times with water during wiping.

4) The conclusion

Finally, you take another look into the oven to check whether all the dirt has really been removed. If there are still impurities, you can easily repeat the cleaning process several times if you want to effectively clean the oven. If the oven is clean, you can push all the racks and baking trays back in and the oven shines in new splendor.

Important tips for cleaning the oven

  • The exposure time of the oven cleaner must be taken into account. It is therefore advisable to take some time to clean the oven. As a rule, you should plan for about an hour.
  • The more regularly you clean the oven, the less dirt there is. It is therefore advisable to clean the oven once every few months, as this way it keeps the amount of work to a minimum.
  • The oven cleaner can be used not only for the oven itself but also directly for the inserts and trays. It is advisable to clean them at the same time.
  • Thoroughly rinsing the oven after cleaning is important so that the food does not come into contact with the cleaner and unpleasant odors can be prevented.

Finally, clean, well-groomed, and durable shoes can be shined in simple steps explained here with a few Learn guide tips and home remedies.

Clean shoes are part of a well-groomed appearance and make a significant contribution to the first impression, for example at a job interview. Unfortunately, very few people know what to look out for when cleaning and caring for shoes.

Clean shoes properly

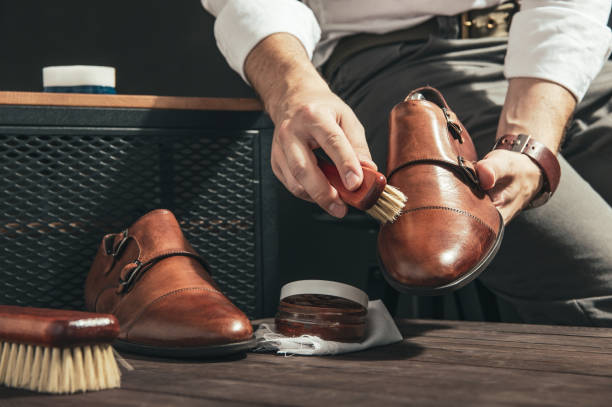
In this article, you will get tips and step-by-step instructions for beautiful shoes. First of all: the right shoe care set In order to properly clean and care for your shoes, you need the right products. Then you can not only clean the shoes but also widen your tight shoes if necessary.

1) Remove coarse dirt with the dirt brush

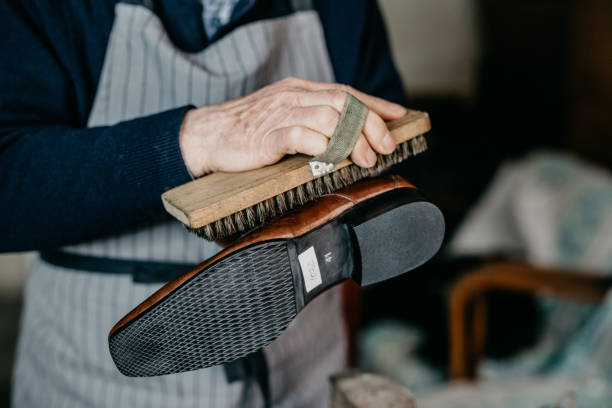
At least one dirt brush should not be missing in any shoe care set. If possible, the bristles should be made of pig bristles or cattle or ponytail hair. Agave fiber brushes are also popular. These are resilient, flexible leaf fibers from an agave species from South America.

2) Shoe polish for shine and care

For long-lasting, well-preserved shoes, the application of shoe polish is essential. Depending on personal preferences, you can use a colorless cream or one that matches the color of your shoe. If you don’t have any shoe polish to hand, baby wipes or greasy creams such as Nivea are just as good.

3) Brushes, sponges, or soft cloths to apply shoe polish

Depending on how many coloring shoes polishes you have, you need a separate application product for each shoe polish. This makes sense so that color irregularities cannot occur.

4) Shine brush or soft cloth to polish

For a nice shine after cleaning, we recommend using a horsehair shine brush for suede leather and a soft cloth for polishing smooth shoes.

Care and cleaning of leather shoes

Good leather shoes are usually not cheap. It is, therefore, all the more important to properly care for and clean them. A detailed YouTube video on this can be found below. In addition, the proper cleaning of patent leather should be observed.

The new trend is called “minimalistic living” and abolishing the consumerism of the people in the country. In all the shops you see far too many things that you then take home and which are actually more of a burden than making you “happy”.

Cleverly creating order in the kitchen

This is how it often looks in the kitchen. You have a juicer that you only use once every light year, you need a food processor, and you have dozens of plates, cups, and dishes because friends come over for dinner once a year. And if you don’t need all of this in everyday life, it still fills up the kitchen. Also, note the valuable home remedies and useful tips for cleaning the kitchen.

1. What do I need every day?

The first thing to be clear about is what you need to eat, drink and cook on a daily basis. Maybe there is some favorite equipment, crockery, or cutlery. Of course, this is at the forefront and is also used regularly. In most cases, it also depends on the space in the kitchen. Many apartments today are very small and the kitchen is connected to the living room. Then you don’t want to have a kitchen full of junk that nobody uses regularly. A good alternative would be the attic or basement, where you store large pans and family dishes.

2. Borrowing things that are rarely needed

Many neighbors may use their juicer regularly, but we only use it every few months. Then why not ring the neighbor’s bell and ask if you can borrow one. It’s always better than having the press in the kitchen for years, buying it, spending money on it, and then not using it. Of course, this also works with other things, such as a food processor or even dishes if several people are invited.

The dishes take up a lot of space in the kitchen and you can’t turn and turn when you want to cook. Often you only need as many plates as there are people in the house, if you have children, sometimes one or two more, but that’s it. The good crockery is often only used very rarely or not at all. That’s why you should also think about whether you should simply throw away old things or take them to the social department store and use the old family crockery every day and enjoy it. That would be the best way to use rare pieces regularly.

3. Clear out cutlery

The drawer is overflowing and you always use the same spoons, forks, and knives. Why? Didn’t grandma give the beautiful cutlery with the flowers on the handle years ago? Where is it? That’s how it is for many. For everyday use, you often only take simple things. But you should not save anything in life, but integrate the beautiful into everyday life. It’s like the closet.

Why are there clothes that can only be worn on Sundays? What is so special on Sunday that there are separate things for it? Nothing at all, it’s a day like any other, so you can also use the “rarities” regularly and simply give away or give away the old pieces. So everyone regularly enjoys spoons, forks, and knives. They don’t break if you use them regularly. It is exactly the same with a service or other items in the kitchen. Just because these are old doesn’t mean you have to save them for special days.

4. Use up food

Food is also an important part of the kitchen and you should always keep an eye on it. Expired food makes you ill, especially when it starts to rot and mold. Then you can no longer use them and the money is spent and gone. Too bad actually. So you should make a shopping list and only buy what will be used up within the shelf-life period. You can regularly clear out the pantry by putting older cans and fruit compotes in front and the newer things in the back.

These then land first on the dining table and are spent. This is also very important in the fridge. Above all, you should regularly check the vegetable compartments, because there one or the other is quickly forgotten. So if you want to have a tidy kitchen, you should not only clear out the utensils but also have a very special plan for how to use the food. This is also a form of decluttering.

Cleaning and polishing silver can be time-consuming and expensive – but it doesn’t have to be! We have ten tips on how to give your silver pieces a new shine quickly and cheaply with home remedies.

Silver and silver cutlery are valuable. Often there is also a reminder attached to the pieces, for example, if you inherited them or saved them for a long time to afford the special piece. It goes without saying that one would like to have something of the pieces for a long time to come. That is why it is important to know how to properly clean and polish silver, silver cutlery, and silver jewelry.

Clean silver with household tips

Silver has a big disadvantage that it can turn black. In the following article, we will explain why this happens. If you want to clean your silver, silver jewelry, and silver dishes, you will also find helpful housewife-style household tips here.

Why Silver Tarnishes

Silver reacts in the air with oxygen and traces of hydrogen sulfide. The dark silver sulfide is formed in the process. This causes the silver to have a gray to the black surface which is unsightly and should be removed by effectively cleaning the silver.

Effective home remedies for cleaning silver

There are many silver cleaners available at drugstores and specialty stores. However, you can save money by using simple household tricks and home remedies. The following applies here: This is a collection of housewife tips, use at your own risk. Also, note our tips on storing and caring for opal jewelry.

1) Clean silver cutlery with aluminum foil

Aluminum foil can be used for more than just wrapping food, it can also help you clean silver. First-line a washing bowl with aluminum foil and fill it with boiling salted water. Then put the tarnished silver in for an hour. Then carefully brush the cutlery individually and polish it with a cloth.

Alternatively, you can simply wrap the silver in aluminum foil. Then place in simmering, lightly salted water for a few minutes. The aluminum foil should not be wrapped too tightly around the silver, the saltwater must come into contact with the silver. Finally, bring it to a boil briefly and remove the silver again and polish it dry.

2) Toothpaste for cleaning

You can not only brush your teeth with toothpaste – cleaning silver with toothpaste is a well-tried tip. Simply put some toothpaste on a toothbrush and use it to clean the silver. After a short exposure time, simply rinse off with water.

3) Shine again with sour milk

You can also use sour milk to clean silver. Simply pour the sour milk over the silver in a bowl. Leave the milk on for several hours, ideally overnight. Thoroughly rinse off with clear water in the morning and the silver shines in new splendor again.

4) Brush raw potato with silver

With a versatile raw potato, you can clean coarser silver jewelry by simply rubbing the silver with a freshly sliced ​​potato. This is suitable, for example, for plates or shelves made of silver. Afterward, it is best to wipe it off directly with a damp cloth so that the starch does not settle on your silver pieces and cover the shine that has just been achieved.

5) Curd soap and ammonia solution for silver jewelry

Silver chains can be cleaned well with a mixture of liquid curd soap and ammonia solution. Put the curd soap in a bowl with some warm water and a small dash of ammonia solution. Then let the silver work for a few minutes and the bracelets and chains will look like new.

6) Baking soda and toothbrush

You can treat the silver with a brushed surface well with baking soda. To do this, put some baking soda on a toothbrush and rub it into the piece of jewelry in circular movements. Again, you should make sure that you use a soft toothbrush.

7) Ash and lemon against tarnished silver

Ash mixed with a little lemon juice is suitable for cleaning silver and silver cutlery. First, apply the mixture to the silver with a household cloth. Then rub off with a soft cloth. Then wash the silver (and your hands) thoroughly with water.

8) With beer against silver sulfide

Another way to clean silver sounds a bit strange at first, but it is effective. You can clean silver with beer! Simply soak the silver in beer overnight. To prevent residue and the smell, rinse it off thoroughly with water the next morning. As with the lemon, the acid in the beer helps get rid of the silver sulfide and thus the unsightly discoloration.

9) Silver Cleaning Baking Soda

The next home remedy for cleaning silver also comes from the kitchen: baking powder. Simply mix a packet of baking soda with a little water, apply the paste to the silver and leave for a few minutes. Then rinse thoroughly.

This method is particularly suitable for silver-plated objects. Due to the fact that it is very gentle, even thinner coatings are not damaged or can be wiped off accidentally.

10) Remove discoloration with Kukident

To clean silver with Kukident, you can dissolve one tablet in a bowl of warm water. Then put the silver jewelry or cutlery in for a few hours. This dissolves the discoloration and the silver regains its beautiful shine.

Would you like to professionally clean heavily soiled porcelain? Here you will find helpful home remedies for cleaning and cleaning porcelain. Beautiful and durable porcelain with the right care.

You won’t only find porcelain as crockery. Works of art sink and bathtubs can also be made of porcelain. Unfortunately, porcelain can become dirty and unsightly over time. In this case, you should think carefully about how to professionally clean simple crockery and expensive porcelain.

Porcelain as an everyday object

The history of porcelain goes back a long way. And meanwhile, porcelain has become an everyday object. As a result, we often do not think long about storage, care, or proper cleaning. When porcelain items break, new ones are bought. But when it comes to valuable objects, we want to preserve them for a long time. But how do I care for ceramics that are often fired or sealed differently?

Proper cleaning of porcelain

Porcelain is not just porcelain. That’s why you should always pay attention to the information provided by the manufacturer when it comes to porcelain. Because there can be differences in care. You should pay attention to the categories “dishwasher safe” and “dishwasher safe” when buying. If the porcelain crockery is marked “Dishwasher safe”, you can put it in the dishwasher. You should make sure there is enough space between the dishes to achieve better water circulation. In contrast, “dishwasher-safe” does not mean that the dishes can be put in the dishwasher regularly. Because there is a risk that it could fade. Also, note our contribution to optimal drying of dishes without water stains.

Home remedies for cleaning porcelain

Particularly sharp and scouring cleaners are not an advantage for porcelain with ornate patterns or gold-rimmed decorations. Although they quickly loosen dirt and clean reliably, they damage the glaze. Thus, the surface and decorations are broken. Consequently, the protection of the porcelain is irreparably damaged. Likewise, it can lose its beautiful shine. Therefore, cleaning with simple home remedies makes more sense. And you can protect decor and shine. Also, note how you can clean narrow bottles and vases.
1) Clean porcelain by hand

Collector cups, valuable vases, or decorative plates are mostly made of high quality. And therefore very sensitive. You should always wash such valuable porcelain crockery carefully by hand. Particularly thin, decorated, and particularly expensive porcelain should be cleaned in water and with a soft cloth. Although porcelain is made of durable, hard material, it can quickly become unsightly if not treated properly. So you shouldn’t scrub hard. And don’t use harsh cleaners either! Also, see our article on cleaning stainless steel and removing stains from stainless steel.

2) Clean porcelain with cork, oil, and salt

If your chinaware doesn’t go in the dishwasher but needs to be cleaned, you can use cork, oil, and salt. In particular, the use of salt in the home and the use of olive oil as a household remedy are well known. But how can you use it to clean your porcelain? Very easily. To do this, take a cork and dip it in some oil. After that, you need to sprinkle it with a little salt. You can then use it to clean the dirty or discolored areas of your porcelain dishes. Move over the affected areas with light circular movements.

3) Cleaning with vinegar

If porcelain items are calcified, you can decalcify them with a mixture of diluted vinegar. Using it with vinegar is quick and easy. To do this, pour the diluted mixture onto a soft cloth. Then wipe the dishes or sink with it. The lime stains should then be removed. But don’t forget to rub the treated items dry. Otherwise, the lime will come back quickly. Lemon juice is just as good for removing limescale stains.

4) Special porcelain cleaner for polishing

There are also special polishes for porcelain in specialist shops. This is carefully applied to the surface and seals it again. Afterward, you can enjoy the beautiful pieces again for a long time.

5) Baking soda to clean the porcelain

If you have a porcelain teapot that cannot be put in the dishwasher, you can remove internal deposits with the effective home remedy baking soda. So fill your teapot with hot water and add half a packet to a whole packet of baking soda. Then leave it on for a few hours. You should then be able to easily wipe away the deposit. You can also use baking soda as a cleaning agent.

6) Clean porcelain with denture cleaner

You can also gently clean your porcelain dishes with denture cleaner. Although not everyone has this in the household, it is worth buying, especially when it comes to valuable porcelain crockery. Because the effect of the denture cleaner is very effective. Consequently, you can put your dishes in the sink, fill them with water and add a denture cleanser tablet or two. And the dishes clean themselves as if by themselves. Then rinse them off with a little water.

7) Heavy-duty detergent to clean porcelain

Likewise, some people swear by cleaning the china with detergent powder. If old deposits or stubborn stains have settled, then you can use the detergent powder. To do this, take the porcelain vessel or the porcelain plate and add the powder. Then add water and let everything soak in. After a few hours, you can rinse the whole thing off with water. This is just one of many household tips. Also note our household tips for single households.

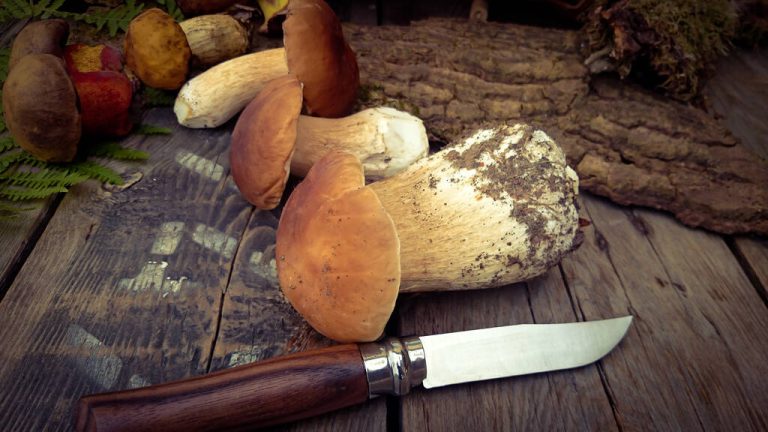
We give you three tips on how to clean fresh porcini mushrooms – and also show you which dishes you can prepare with them.

Porcini mushrooms are among the most popular forest mushrooms. They grow from June to November and are most likely to be found in shady spots under trees such as beech and oak.

Tips for cleaning porcini mushrooms

Porcini mushrooms should be cleaned immediately after collecting or buying them.

Tip 1: Check for vermin when collecting

When collecting the mushrooms, pre-clean them in the forest. That means you should carefully wipe away any dirt with your fingers, cut away broken or pitted areas, and remove bugs. Also check bought mushrooms at home first for damage. Since porcini mushrooms are often attacked by maggots, it is advisable to cut the mushrooms open lengthwise and examine them for such. Maggots mostly eat inside the fungus from bottom to top. Infested areas should be cut away generously, preferably in the forest.

You can continue to work on the mushrooms at home: With very large porcini mushrooms, you should cut away the sponge under the cap, as dirt and insects can hide in it. Even if the sponge is old or a bit muddy, you should remove it. If you pulled the porcini out of the ground with a twisting motion and the lower, earthy end of the mushroom is still there, you should cut that off as well.

Tip 2: Proceed with caution

If you have not already done so, remove the coarse dirt carefully with your fingers. Be careful when doing this, as the surface of mushrooms is very delicate. Helpful utensils for removing dirt are a brush or a small brush. You can use this to carefully clean each individual porcini mushroom. Finally, you can clean the mushrooms with a kitchen towel. Optionally and depending on the degree of soiling, you can (slightly!) moisten it.

Tip 3: Avoid water

Avoid washing the porcini mushrooms with water. They soak up water quickly and lose their flavor. They then release the water when they boil. If specimens are heavily soiled and you cannot get them cleaned with the above steps, you can rinse them in a sieve with cold to lukewarm water. Then pat the mushrooms dry with a cloth.

There are several ways to clean a CD or DVD. Often, however, it is not only about cleaning, but also about removing scratches. You can easily clean scratches or dirt on the top or bottom of the CD or DVD with our household products.

We have put together seven home remedies for you to make CDs with fingerprints or scratches clean and functional again. Toothpaste, washing-up liquid, or compressed air spray are different ways to clean your CD or DVD. So nothing stands in the way of data recovery from CDs and DVDs.

Remove scratches on top

When you talk about cleaning a CD and DVD, it’s often about removing scratches. But grease stains or simply dust can also be a reason for having to clean the CD and DVD. There is a difference if this is supposed to be on the top or the bottom and if there are stains or scratches. If the CD or DVD has scratches, you don’t have to throw the data carrier away right away. You can remove the scratches if you work carefully. If the scratch is not on the underside that is being read but on the upper side with the label, this means that the laser beam is no longer reflected during reading and playback errors occur. You can quickly fix this problem in the following ways:

  1. Edding works best for drawing over scratch. This allows reflection when reading and the CD or DVD can be played without any problems.
  2. CD markers have proven to be very practical for painting over because they are particularly soft and do not contain any solvents. Using another felt-tip pen may cause damage.
  3. Not only CDs and DVDs get scratched, but also smartphones. That’s why we have 7 tips for protecting cell phones and smartphones for you.

Remove scratches on the underside

Depending on the depth and nature of the scratches, problems may arise during playback. The first step is to do the cleaning. This can often solve minor problems. You can also polish out a superficial scratch with a fine-grain polishing compound. There are special polishing pastes for this. But you can also use toothpaste or car polish because you often have these tools to hand. Of course, you have to be very careful when polishing to avoid further scratches. To gently clean your CD or DVD, proceed as follows:

  • A lint-free cloth is best for applying the home remedy of your choice and then polishing from the inside out.
  • Don’t go in circles! Because this can lead to further scratches.
  • Work with little pressure and then remove the polish with cold, clear water.
  • The CD or DVD dries best in the air. This is how you achieve a quick repair of the CD or DVD.

1) Use compressed air spray

A simple way to clean your disk is to blow it clean with compressed air spray. But be careful: Do not tilt the spray sideways to prevent condensation from forming. It is not a good idea to clean the CD or DVD with your breath, because the moisture contained in it would only stick the dust particles together and they would then stick to the CD or DVD even more. So if you have compressed air spray handy, cleaning is easy.

2) With the glasses cleaning cloth

You can use a lint-free lens cleaning cloth or another clean microfiber cloth to clean your CD or DVD if, for example, there are dust particles on the data carrier. You’ll notice that the CD then suddenly jumps to a different point when playing, for example. Never wipe in the reading direction, i.e. in a circle around the ruts. You could damage the rut with it. Always wipe from the inside out! You can wipe both damp and dry. Only use cold or lukewarm water, as hot water can damage your CD.

3) Toothpaste for polishing

You can also remove slight scratches on your data carrier by polishing the CD or DVD with toothpaste. Use normal toothpaste from your bathroom. Gently rub the CD from the inside out with a little toothpaste and a clean, lint-free microfiber cloth. Leave the toothpaste on for 5 minutes. Then carefully remove the toothpaste. But be careful: Again, only wipe from the inside out so as not to damage the CD or DVD.

4) Rubbing alcohol and water

A CD or DVD can be cleaned well with alcohol. However, it is necessary to mix 1 part alcohol with 1 part distilled water to clean your disc, as pure alcohol would be too intense. It is best to use rubbing alcohol for the mixture. You can get it at the pharmacy, for example. With the mixture and a lint-free microfiber cloth, gently clean the data carrier in straight lines from the inside out. Then let the DVD or CD air dry.

5) Spotlessly clean with washing-up liquid

Commercial washing-up liquid is suitable as a home remedy for cleaning a CD or DVD. You can clean your CD or DVD with a dry, lint-free cloth and clear cold water with a little washing-up liquid or with a glass cleaner. Fill a salad bowl with a squirt of dish soap and water. Put your dirty DVD in the bowl. Then rinse the DVD with cold water. Then stand the DVD upside down on the cloth to dry and let it air dry.

6) Glass cleaner for CD and DVD

Instead of regular washing-up liquid, you can also use a squirt of glass cleaner. Prepare a bowl of plain cold water and a squirt of glass cleaner, and clean the CD or DVD with dish soap in the same manner as described in the previous paragraph. Simply dip the CD or DVD into the bowl of water and glass cleaner mixture, then stand upright on a clean cloth to dry.

7) Ultrasonic cleaning device

There are many home remedies for cleaning DVDs and CDs. None is gentler and safer than the one with the ultrasonic cleaning device. If you work a lot with CDs and DVDs or have a large collection, then it is definitely worth buying this device. You can use it not only for CDs and DVDs but also for jewelry or watches, for glasses, and even for dentures.

You don’t like to stay in a dirty and calcified shower cubicle. Therefore, you should clean your shower regularly. And for a radiant and fresh shower, all you need is a little motivation and simple home remedies such as baking soda, citric acid, or acetic acid.

You can use conventional bathroom cleaners to clean your shower cubicle. But you can also remove dirt, limescale, and mold from your shower cubicle with natural household cleaning products. We will show you how to use the home remedies correctly and which tricks will make your work easier.

A nice and clean bathroom

A beautiful bathroom not only includes stylish furnishings and practical bathroom equipment but also cleanliness. Many people find cleaning the bathroom, particularly torture. Because not only the sink and the fittings have to be cleaned. This also includes cleaning the shower cubicle and removing brown limescale from the toilet. Certainly not a pleasant task. But with our cleaning tricks, you can do this quickly and easily. And with natural home remedies:

1) Remove limescale in the shower cubicle with vinegar

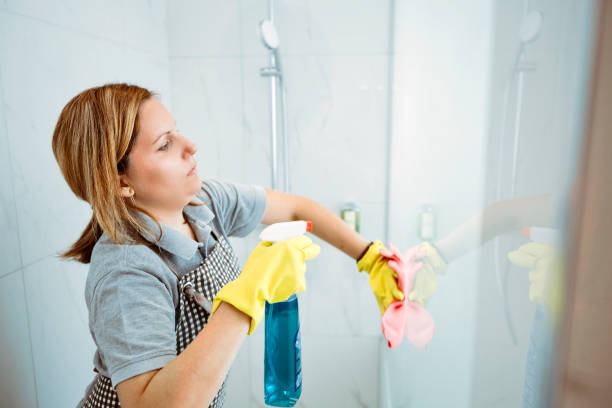
If you want to remove minor limescale stains from a glass shower enclosure, use vinegar as a household remedy. You can also use the acid of lemon. You can also use a rinse aid for the dishwasher (about 10 percent citric acid). Accordingly, give a shot of one of the home remedies on a soft sponge. Then, using circular motions, clean the partition. Then rinse the pane with clear water and pullover with a squeegee. Also, read our helpful tricks for cleaning the bathroom and removing limescale.

2) Clean the showerhead with citric acid and the like

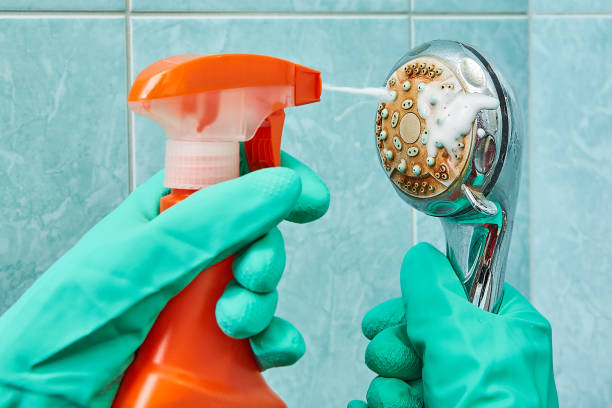
The showerhead also belongs to the shower cubicle. So that the hand and overhead showers shine again, you should put them in a bath with a descaler of your choice. To do this, soak the showerhead in vinegar or the cleansing citric acid for 2 to 3 hours. Then the lime dissolves. With vinegar essence, 1 to 2 hours are sufficient. Observe the progress, you may also be able to leave the shower overnight. Finally, remove limescale deposits easily and quickly with a toothbrush. In addition, note our tips for cleaning chrome parts.

3) Grout cleaning with baking soda and baking soda

Cleaning the shower cubicle also includes effective cleaning of tiles and joints. The use of the home remedy baking powder will help you with this. Sounds strange, but works wonders! The tiles can also be cleaned with baking soda. If mold shows up in the silicone and tile grout, mix up a teaspoon of water with a sachet of baking soda. Then spread the paste over the joint with a disused toothbrush – with a bit of luck, the black specks will no longer be visible. See also our article on removing mold.

4) Rinse the shower cubicle well after use

You should also clean the shower cubicle briefly after each shower. All you have to do is wash out the shower with warm water and dry it off. As a result, you rinse away hair, and shampoo residue and prevent dirt. If that’s not enough, use a mild bathroom cleaner. Spray the cabin with this and wipe with a soft cloth. Is there a dried shampoo stain on the shower tray? Then you can clean your shower cubicle with the help of soapy cleaners, such as washing-up liquid. Also, note our helpful instructions for cleaning the bathroom.

5) Clean the shower with the steam cleaner

You can also remove dirt in the shower with a steam cleaner from time to time. The high temperatures loosen stubborn dirt and eliminate mold – and that in all parts of the shower. Because the good steam gets into all niches and thus thoroughly removes dirt from the shower. Finally, you should dry the shower and it will shine wonderfully clean!

Useful tips for car upholstery care and instructions for cleaning car seats at a glance. Although car cleaning is a common procedure, car upholstery and car seats require a special type of cleaning.

Car seats are among the most used parts in the interior of the car. The dirt can be seen after a while, especially on light-colored seats. With the following tips and tricks, you can effectively clean the upholstery and seats in the car.

Clean car seats and care for car upholstery

The majority of drivers immediately use chemical cleaning agents. However, the use of chemical agents is not absolutely necessary. You can achieve excellent results with just a little soap and water. In particular, gall soap is considered a miracle cure for stain removal. Simply combine normal soapy water with lukewarm water and spread it on the seat. In this case, less is more. Because too much soap and water can soak the seats. And consequently, cause damage to the inner pads. That is why protective covers are highly recommended. Because they can be taken off the seat before every car wash and put in the washing machine. This reduces the washing units on the car seat somewhat.

Clean fabric car seats

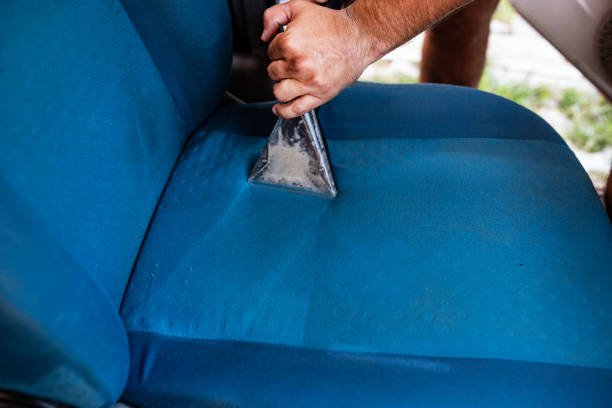
The seat is constantly in use and gets a lot of dirt and stains over time. That’s why you have to take care of your car upholstery regularly. Whether it’s spilled drinks or small stains, everything has to go. But cleaning car upholstery doesn’t always require store-bought products. Because you can clean car upholstery made of fabric with simple household remedies. Also, learn how to make faded plastic in the car look new.

1) Detergent powder to clean car seats

The first step is to use a vacuum cleaner to remove coarse dirt. After vacuuming, wipe with a sponge. First, lukewarm water and normal washing powder are mixed together in a small container. The upholstery is cleaned with the help of a sponge or a brush. By not scrubbing too hard, dark and unsightly stains are a thing of the past. Another plus is that the colors of the upholstery are much brighter than before. However, as with cleaning car seats, the agent should only be used to a limited extent, otherwise, water damage to the filling material can occur.

2) Vinegar to clean car seats

Likewise, using the miracle cure vinegar can help you clean your car seats. Because it can remove stains from your car upholstery. So mix a few tablespoons of vinegar with lukewarm water. Then you can dab the mixture onto the affected areas with a sponge. Then let it soak in for a few minutes. Finally, you need to wipe the car seats with a damp rag. Vinegar can also be used to remove bad smells from car seats. And you can also clean your car windows properly with vinegar water.

3) Cleaning with the steam cleaner

You can clean your car seats particularly gently and without chemical agents with a steam cleaner. To do this, fill the steam cleaner with water, which then heats up. You can now treat your car seats with the resulting water vapor for about 10 minutes. Most of the stains will then be removed and your car seats will be free of dirt. Also, note our tips on removing paint.

4) Shaving cream helps stain car upholstery

In addition to washing powder, shaving foam is also ideal for cleaning car upholstery. To do this, you have to spray the foam onto the affected area and gently rub it in. Then, after a few minutes, wipe the remaining foam into the material. Finally, all you have to do is wipe it clean with the brush. And the result is a spot-free seat. Watch the video below to see how the shaving cream works.

5) Chemical foam cleaners

If you have already tried all home remedies and you still see stains on your car seats, then chemical foam cleaners can help you. Test comparisons 2020 for car upholstery cleaning show that the interior cleaner, as well as the upholstery and Alcantara cleaner from Sonax, are very good. In addition, the universal active foam cleaner from Armor All has proven to be the price-performance winner. Also, note our other tips on useful cleaning equipment for home use.

Clean leather car seats and car upholstery

Leather gives the interior of the car a noble look. It is not for nothing that many people ask about the ideal leather care product. While stains are easier to remove from leather seats, to keep the leather supple, avoid using any type of cleaning product. That’s why we’ll show you how to properly clean and care for leather car seats. Likewise, the less cleaning agent is more.

6) Use leather cleaner

It becomes a bit more difficult when fighting stains on the leather. First, grab a furniture brush, which you should clean with the vacuum cleaner beforehand. So that no small residues from other cleaning work are transferred to the leather. Then you can wipe over it with a damp cloth. Better yet, use a special leather cleaner to clean your car seats. So you can apply it after brushing.