Tag

cooking

Browsing

You can simply cook beetroot – best in summer and autumn from local harvest. Here you can find out how to cook beetroot properly and which dishes you can make from it.

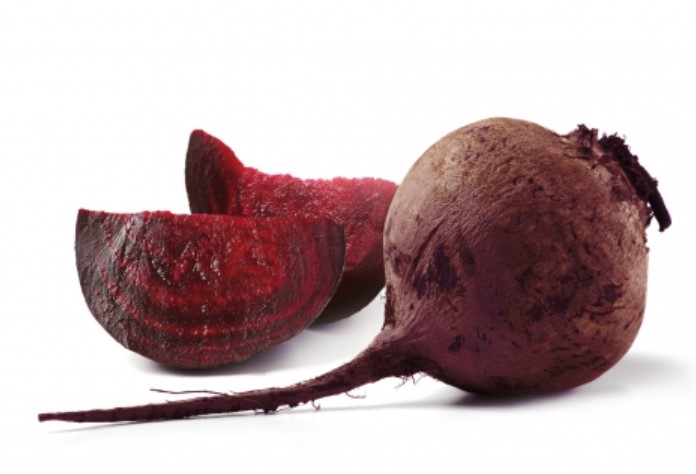
Beetroot is not only beautiful to look at with its dark, strong color, but also very healthy and tasty. Its earthy, sweet taste makes it suitable for both savory and some sweet dishes. Beetroot tastes particularly good when boiled or steamed – it takes a few minutes, but it is very uncomplicated.

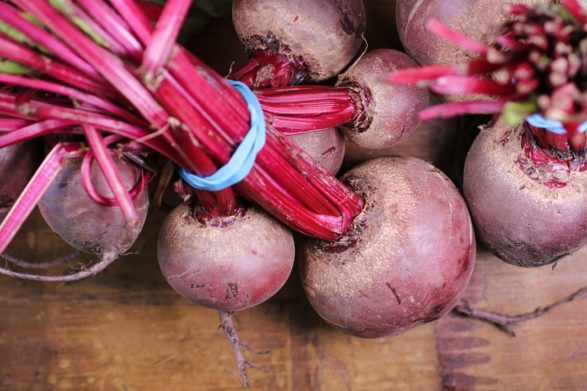
In addition, you can get local beetroot either fresh from the field or from storage almost all year round. It is best to buy them fresh at the market between July and November.

Cooking beetroot: prepare the vegetables

The beautiful color of the beet also has a disadvantage: it leaves stubborn stains. That’s why you should always wear an apron when cooking. If a squirt of beetroot juice gets somewhere, you can remove it with hot water and citric acid. You can also use these home remedies to clean your cutting boards. Otherwise, you can protect the boards from the red dye by placing greaseproof paper underneath.
To ensure that as little of the healthy ingredients as possible are lost during cooking, you should not peel the beetroot before cooking. Instead, wash and brush them gently without damaging the skin. After cooking, you can simply rub off the skin of the beetroot with a knife.

Instructions: Cook beetroot properly

There are many different ways you can cook beets: in a pot, in the oven, in a pan, or in a salt crust. Cooking in a pot is particularly suitable if you want to make a puree or soup from the beetroot.

How to cook beetroot:

Place the unpeeled tubers in a saucepan and cover them completely with water.
Let the water boil with the lid closed.
Then remove the lid and let the beetroot simmer until cooked. Depending on the size of the tubers, this will take 30 to 50 minutes. The beets are done when you can easily pierce them with a knife.
Do not salt the cooking water until just before the end of the cooking process, as the salt draws out the color of the beetroot.

Alternative: Steam the beets with a little water

You can also gently cook beetroot with just a little water.

Then you should cut them into small pieces and cook with the lid closed.
So that you don’t lose all the taste and healthy ingredients in the process, you can save the beetroot cooking water. Cook until it has a creamy consistency.
The resulting dark red cream tastes very intense and sweet. For example, you can add them to a salad dressing or use them to flavor sauces. Combined with raspberry or ginger syrup, the beetroot concentrate is also an exciting ingredient for a dessert or a cocktail.

What to do with the cooked beetroot?

You can use the cooked beetroot in many delicious dishes. Here are some inspirations:

Process them into a soup or puree. You can also add other vegetables like potatoes or carrots. Horseradish or ginger give the vegetables a delicious spiciness. By the way, you can also make delicious vegan spreads from beetroot in pureed form.
Cut the beetroot into thin slices, add some lemon juice and honey and cover a tarte flambée.
Slice the cooked beetroot and sauté them in oil with onions. Deglaze the vegetables with some balsamic vinegar and let them boil down. Season the beets with salt, pepper and rosemary. This goes well with risotto and polenta slices.
Let the beets cool, cut them into thin slices and use them to line plates. Drizzle the slices with a fresh dressing, sprinkle some rocket or lamb’s lettuce and roasted pumpkin seeds / walnuts on top and you have a delicious carpaccio. Organic goat cheese also goes well with this.
By the way: It is also very healthy to eat beetroot raw, for example grated in a salad or as a juice. Only do this occasionally, though, because raw beets are high in oxalic acid. Cooking beets also makes them taste less earthy.

Spinach is a vitamin bomb and a source of protein at the same time. We will show you how to cook spinach properly and what you should pay attention to.

Spinach contains many important vitamins and minerals, including folic acid and vitamin A. You can use it in salads, smoothies or vegetarian dishes, for example. Many use ready-made spinach from the freezer, but you can also easily cook fresh spinach yourself.

The basic rule for fresh spinach is that it should only be stored at room temperature for as short a time as possible. This is because spinach contains nitrate, which turns into nitrite at room temperature – nitrite is toxic in high concentrations. So if you bought spinach, put it in the fridge. You should also keep leftovers in a cool place. Then you can warm up spinach without hesitation.

Blanch, boil or puree spinach

How to cook fresh spinach:

First, you should remove stems that are too large or woody. You can then wash the spinach in a bowl of cold water. You should be thorough here: there is usually a lot of sand from the field in the spinach. Once you have washed the spinach, you can drain it.
Caution: Do not leave the spinach in water for too long when washing, otherwise it will lose too many vitamins.
Then you can briefly boil the spinach in a large pot with salted water. The easiest way is to add the spinach to the pot in batches and cook for a minute at a time.
Keep an eye on the spinach to make sure it doesn’t get too soft. The leaves should still be a little firm to the bite.
To blanch, put the spinach in ice water for a few minutes. This step is optional.
So you can already eat your spinach. You can also add spices like pepper and salt to make it taste better. More about this here: Seasoning spinach: This is how it tastes best.

If you want to puree the spinach, you should let it cook a little longer so that it can be processed more easily. After about five minutes you can shake it off, let it drain and, depending on your taste, refine it with a little (vegetable) cream before crushing it with the hand blender.

Brussels sprouts are a healthy and delicious winter vegetable. We will show you the best way to cook Brussels sprouts and what vitamins they contain.

We recommend that you buy vegetables such as Brussels sprouts that are seasonal and organic.

Before you start cooking Brussels sprouts, you should remove any dirt from them.

Cooking and roasting Brussels sprouts: basic recipe

If you want to cook the Brussels sprouts, put them in a saucepan of boiling salted water. The winter vegetables are cooked quickly and only need about 12 to 16 minutes.
The little florets don’t take long to fry, either. Depending on whether you left it whole, halved, or quartered, it will take 5 to 7 minutes with the lid on to cook.

Store Brussels sprouts properly

Brussels sprouts are a true winter vegetable, ideally harvested after the first frost. It is best to buy it freshly harvested from regional cultivation so that transport and storage times are as short as possible. Brussels sprouts don’t keep for long.

You should also consider this if you want to store purchased Brussels sprouts. It will keep in the fridge for about four days. You shouldn’t keep it next to apples or tomatoes, though. These secrete a substance that accelerates ripening.

That’s why Brussels sprouts are so healthy

Brussels sprouts are healthy because the small winter vegetable is a real vitamin and nutrient bomb:

It is high in fiber and contains more plant-based protein than many other types of cabbage.
Brussels sprouts contain more vitamin C than almost any other vegetable. It offers good protection against flu-like infections in the cold season. However, the vitamin C content is reduced by cooking. Therefore, you should cook it as gently as possible.
There is also a lot of potassium in Brussels sprouts. This can prevent high blood pressure.
It also contains iron.
In addition, regular consumption protects white blood cells from cell damage.
There is sulforaphane in Brussels sprouts. The antioxidant is said to prevent tumors and have an anti-inflammatory effect, for example in arthritis.

Some love it, others can’t stand it. Cooking with garlic adds flavor to your dish. Garlic is also healthy and has a healing effect on the body. Therefore, you should use this tuber more often for cooking.

The garlic bulb

The garlic bulb is grown all over the world and has been used for centuries. Because as early as the Middle Ages, people used it to treat broken bones and freckles. The miracle tuber consists of a main onion and many other small onions, the garlic cloves. These are great for cooking. They are a popular ingredient in Mediterranean dishes.

Cooking with garlic in the kitchen

The tuber comes in a variety of forms for the kitchen. You can use them raw, dried, or powdered. Pickled tubers are also delicious. To cook garlic, use the cloves and chop or crush them and add them to a dish. It goes well with almost any meat, fish, or vegetable dish. You can also round off salads, sauces, or dips with the miracle tuber. Thus, using garlic in cooking is a good home remedy for aging healthily and living longer.

Is Garlic Healthy?

Garlic is an effective remedy for many ailments. Because it has an antibacterial, immune system strengthening, and disinfecting effect. Responsible for this is the highly effective contained allicin, which is produced by pressing the toes. According to this, garlic is healthy and you can use it for various healing purposes. It works against arteriosclerosis, as a home remedy for constipation, a remedy for diarrhea, or gastrointestinal complaints.

Mild or intense taste for cooking garlic?

If you just want to add a light garlic flavor to your dish, add it to the pan or pot at the beginning. If you like a strong garlic flavor, it’s best to add it towards the end of the cooking time. Also, note which home remedies you can use to get rid of the unpleasant smell of garlic.

How to store garlic properly

Storing food properly leads to longer shelf life. Therefore, you should also store garlic properly. Since fresh garlic is still germinable, it is best to store it in a dry, cool, and dark place. With other variants, storage is less of a problem.

There are different types of margarine from full-fat to half-fat margarine. Not all varieties are suitable for cooking or baking. Therefore we have an overview of varieties and uses for you

What types of margarine are there?

Margarine is often used as a good alternative to butter. But margarine is not just margarine, because there are different types. These usually differ in their fat content and the spectrum ranges from full fat – to half-fat margarine and more. Accordingly, different types of margarine are suitable for different purposes.

Use half-fat margarine as spread fat

Half-fat margarine has about half the fat. For this purpose, the margarine is produced chemically modified and water is added for the missing fat. Therefore, low-fat margarine is only suitable as a spread, e.g. for people who want to lose weight in a healthy way, but do not want to do without their beloved butter. However, half-fat margarine is not an alternative to baking or cooking.

Use margarine for cooking and baking

If you want to cook or bake, be sure to use margarine instead of low-fat margarine. Because half-fat margarine does not dissolve like butter when heated, but flakes and separates into its chemical components. In addition, the high water content ensures that it splashes when frying. Consequently, those with half the fat content are completely unsuitable, especially for greasing when baking or as a substitute for butter in the frying pan. Consequently, use butter or full-fat margarine when baking cakes or cookies. The same applies to cooking.

When cooking, it can quickly happen that the water boils over or the food burns. So that this doesn’t happen to you again in the future, we have collected tips on how to prevent overcooking and burning of various foods.

Tips to prevent overcooking and scorching

Multitasking is often required when cooking because many processes run in parallel. It can quickly happen that something boils over or burns. So that this doesn’t happen again in the future, we’ve collected a few tips to prevent overcooking and burning. Consequently, possible burn accidents in the kitchen are also avoided. Even simple tricks help to avoid major mishaps in the kitchen. You should know these tricks, especially when cooking milk, pudding, or rice. But other dishes, such as a delicious bolognese, can burn quickly. The following tips will help against this:

1) Prevent scorching by stirring constantly

The easiest way to prevent burning and overcooking are to stir constantly. This is easy and suitable for almost any dish. Use a standard wooden spoon or a whisk for this. But when preparing rice, you should avoid stirring it.

2) Glass marbles avoid burning food

If you put a commercially available glass marble in the pot while cooking, its rolling motion will prevent the food in the pot from burning. As a result, you can simply cook the marbles and stir them vigorously in the pot. But remember to remove the marble before serving.

3) Prevent rice from burning

As already mentioned, you should avoid stirring when cooking rice. Because that ensures the destruction of the ice cover, which stores the heat. As a result, the rice can burn. So use the swelling method to cook rice. Use 1 part rice and 2 parts water to prepare it. Then let it soak in it for 10 minutes. Then heat it to the highest level until it starts to boil. Then you can turn on the lowest level and let it swell further. But without stirring!

4) Boil milk without burning

Especially when boiling milk, it often boils over or burns. It seems that cooking milk is a big challenge. But you can’t avoid having to heat them up from time to time. Because hot milk with honey is an effective remedy for colds, a recipe for golden milk promotes health, and rice pudding simply tastes delicious. When you boil milk, you should heat the milk slowly. The following tips will also help you cook milk without boiling over and burning:

  • The marble method also works when boiling milk.
  • Using a simmer pot prevents scorching.
  • A wafer-thin layer of water in the pot, then nothing burns.
  • Heating the butter in the pan beforehand also prevents the milk from burning.
  • Place a metal spoon in the pot to dissipate excess heat.
  • A milk guard serves as protection against boiling over.

5) Prevent boilover with ice cubes

If you notice while cooking that the water or milk is about to boil over, you can prevent this by stirring or blowing vigorously. It’s even easier if you throw an ice cube into the water. Then the temperature drops and the water sinks. However, you should note that this method does not last forever. Therefore, turn the temperature down a bit at the same time.

6) Special kitchen helpers to prevent overcooking

There are now some useful kitchen aids on the Internet that prevent overcooking. For example, special and cheaply available lids that fit on different pots. Just put them on the pot while cooking. Due to the shape of these lids, they act as protection against boiling over. After use, you can easily wash them in the dishwasher.

Cauliflower cooking time will vary depending on whether you cook it whole or in parts. In this article you will learn the different cooking times for cauliflower and get tips for the right preparation.

Cauliflower – also known as cauliflower or cauliflower – is a cultivar of vegetable cabbage. This type of cabbage originally comes from Asia, but has been cultivated throughout Europe for many centuries.

Cauliflower cooked in salted water makes a particularly good side dish. Alternatively, you can serve the cooked cauliflower with Hollandaise sauce or béchamel sauce. In Bavaria and Austria, cauliflower with crumbs (“Bröselkarfiol”) is also very well known and widespread.

Buy the right cauliflower

The leaves of fresh cauliflower are juicy green and firm. The individual florets should be an even light color and not black. Black spots could be an unhealthy fungal infection.
Cauliflower is in season in Germany from June to October. During this time you can buy the cabbage regionally.
Use cauliflower with an organic seal: It is free from chemical-synthetic pesticides and comes from sustainable agriculture. You should also use regional products for the ingredients whenever possible. Regionally grown vegetables have shorter transport routes and are therefore better for your carbon footprint.
By the way: Our seasonal calendar will help you shop locally and seasonally all year round.

Cooking times of cauliflower

Cauliflower cooking time depends on whether you want to cook the cauliflower whole or in pieces. Another criterion for cauliflower cooking time is how you plan to use the cooked cauliflower.

If you serve the cauliflower directly as a side dish, you should cook it until al dente to soft, depending on your preference.
If you want to process the cooked cauliflower in the pan, it should still be crisp after cooking so that it doesn’t fall apart when frying.
Tip: Taste a cauliflower floret after a short cooking time to determine whether the consistency is already right.

Cauliflower cooking time

To cook a small cauliflower whole, you need about 15 to 20 minutes of cooking time.
If the cauliflower is medium to large, the cooking time can be up to half an hour.
Cut the cauliflower into large florets and cook for around five to eight minutes. If you want to cook the florets al dente, four to six minutes is enough.
Small florets are cooked after just four minutes. If you want al dente cauliflower florets, three minutes is usually enough.
To blanch cauliflower florets, you need two to three minutes of cooking time, depending on their size.

This is how the cooked cauliflower succeeds

Cook the perfect cauliflower with these tips:

Salt the water as soon as it boils.
Always put the cauliflower florets in boiling water. Measure the cooking time of the cauliflower from the point when the water starts to boil again after adding the florets.
Only let the cooking water boil gently on the lowest temperature setting, as cauliflower breaks down very easily.
Make sure that the cauliflower florets are the same size and therefore have the same cooking time.
Even if you’re cooking cauliflower whole, you should bring the water to a boil first. Then place the cauliflower, florets side down, in the cooking water. Here, too, the time only counts from the moment when the water boils again. Then reduce the temperature and gently simmer the cauliflower in salted water.
Note: Because it cooks quickly, you can’t determine the correct cooking time for cauliflower by steeping it in cold water. Cauliflower florets that cook too long will overcook and taste mushy.

Cooking pasta is made easy with our clever tips for cooking pasta and spaghetti. A guide to cooking pasta and important things to watch out for when cooking pasta.

Noodles can be prepared very quickly and in many different ways for a wide variety of meals. Here we have put together the best tips that will guarantee that the noodles will turn out well. Not too soft and not too hard – they should be al dente!

Cooking pasta made easy – in three steps

With just a few simple steps, you can achieve the result of a perfectly cooked pasta. If you follow these instructions, nothing can go wrong even when preparing pasta for the very first time. The three steps make cooking pasta easy.

Step 1: Water and Salt

When cooking noodles, you should always choose a sufficiently large pot in which 1 liter of water is heated for every 100g of noodles (125-150g of dry noodles correspond to approximately one portion at a meal). As soon as the pasta water is boiling, add a teaspoon of salt per liter of water. After a few seconds, the noodles can be added. Be careful not to burn yourself.

With long noodles, such as spaghetti, it usually takes a moment before they are soft enough to be pushed completely into the water. However, it is not necessary to break through these – on the whole, they are easier to eat.

Step 2: Stir and avoid overcooking

Constant stirring to prevent the pasta from sticking or sticking to the bottom of the pot is very important. No oil needs to be added to the cooking water. The pasta water should be constantly simmering with the heat turned down. To prevent the water and foam from boiling over, you can simply leave a wooden spoon in the saucepan. If the water boils over, add some cold water.

Step 3: Drain at the right moment

With the help of a timer that is set to the specified minimum cooking time (see package), you are guaranteed not to miss the moment when you should try the pasta. Incidentally, homemade noodles take much less time than dried noodles. In this case, it is best to stick to the recipe – often just a few minutes are enough to get the right cooking point.

Whether al dente or soft – this is the moment when you have to decide whether the noodles can be carefully drained in a colander – which is ideally already in the sink. There is no need to quench the noodles, which only makes the noodles cold faster, and it also rinses off the starch in the noodles so that the sauce can no longer stick to them. Oil also prevents the sauce from sticking to the pasta. So it’s most recommended to add the noodles straight to the hot sauce, untreated.

Don’t throw away the pasta water, use it in a variety of ways

Pasta water is a true all-rounder. It’s a shame if the water ends up in the sink after draining the pasta. More than ten kilos of pasta were consumed per capita in Germany in 2020, according to the Statista survey portal. The corona pandemic has accelerated the purchase of goods. And the pasta water used can be reused in many areas because the boiled pasta water contains a lot of starch and minerals.

  • Mixing sauces and pesto becomes creamier with pasta water. Since the pasta releases starch into the water, the liquid is suitable for thickening sauces. As long as the water is still hot, it should be processed further.
  • Adding pasta water to soups and stews. This means that vegetable broth or clear water is often no longer necessary. The starch in the water makes the soup thicker and richer. The water also acts as an aromatic ingredient in other meals.
  • Use for pizza and bread dough. Both doughs need water with salt. This is already contained in the pasta water and gives the pastry a special touch. In addition, note a simple guide to making roux yourself.
  • Use pasta water to soak beans, lentils, and peas. To do this, soak these products overnight. Then the pasta water creates a special taste.
  • Food steaming with the water. So then simply hold the vegetables over the steaming water with a sieve. You can also learn more about healthy steaming of food.
  • Water plants with cold pasta water. If you do not want to use pasta water for further cooking, you should let your plants benefit from it. They are happy about the minerals in the water.

Pasta prepared faster

If you need something quick, you can also use fresh pasta from the refrigerated section. You usually only need a few minutes for such noodles to have them ready to serve. Often even heating in the sauce is sufficient.

Alternatively, very thin spaghetti is recommended, which is also cooked in a very short time. These also have the advantage that – in contrast to fresh pasta – they usually do without eggs. This makes them suitable for both egg allergy sufferers and vegans.

Cook pasta differently

TV chef Stefan Marquard shows on YouTube how pasta can be cooked in a somewhat more unconventional way. He promises: that his method does not require any water to be drained off at the end of the cooking process. So don’t mess up the sieve, don’t scald your fingers on the hot steam… Sounds child’s play, give it a try!

Chinese cabbage can be prepared in many ways – but how? Asian cabbage varieties are popular, but the preparation of Chinese cabbage is unknown to many. A little product information.

Preparing Chinese cabbage is also something for cabbage skeptics

Chinese cabbage is different from its native relatives – it is more subtle and easier to digest. If you are put off by digestive problems, the smell and taste of cabbage from the local varieties, then prepare Chinese cabbage instead.

Because it also has the vital substances typical of cabbage: Above all, it provides a lot of vitamin C, vitamins from the B group, folic acid, mustard oil glycosides and minerals such as potassium and iron. With around twelve calories per 100 grams and a water content of 94 percent, it is the ideal vegetable for losing weight.

Caution: Chinese cabbage has a high nitrate content. Adults can take it without hesitation. Babies and toddlers, on the other hand, should only consume small amounts occasionally – or they should avoid it altogether.

Before preparing: Buy good Chinese cabbage

When shopping, test to see if the cabbage is tightly closed and feels firm. The leaves should be crisp with no dark spots. Chinese cabbage from the supermarket often has small black spots. They are not harmful to health, but occur when storage is too warm. Damage to the outer layer of leaves isn’t a big deal, since you remove this layer anyway when you prepare the Chinese cabbage. The cabbage should not have mushy spots.

Now it’s time to prepare: Cut the Chinese cabbage

In contrast to the local types of headed cabbage, Chinese cabbage does not have a hard stalk and the leaf veins are so tender that you can use them. How to cut Chinese cabbage before cooking:

Remove the outer leaves. Also withered or damaged areas.
Then, at the bottom of the cabbage, cut a slice about an inch thick with a straight cut.
Now the leaves can be easily separated and you can cut them into the desired shape.
Wash the Chinese cabbage pieces in cold salted water.

Cooking Chinese cabbage is quick and easy

If you want to prepare a larger portion of Chinese cabbage, choose a wide pan or pot, because raw Chinese cabbage takes up a lot of space at first. Cooking time depends on how crispy you want it. Basically, the crunchier, the tastier. If you haven’t prepared Chinese cabbage often, try the al dente every now and then. These are the cooking times:

Roast and Cook: Five to seven minutes
Steam and simmer: Five to ten minutes
How to prepare Chinese cabbage:

as a raw food snack or salad
fried in a pan with oil
cooked in salted boiling water
as steamed vegetables in their own juice: first add the thick ribs and later the fine leaves to the pot.
steamed in a saucepan with a steamer insert or a suitable kitchen sieve with the lid closed. The cooking water should not come into contact with the Chinese cabbage.
fermented

Store Chinese cabbage properly

Chinese cabbage is tender, so you should get it as fresh as possible and use it immediately. Stored in the fridge, it keeps its crunchiness for up to four days. If you wrap it, you can still cook Chinese cabbage after a week.

Be sure to wrap the Chinese cabbage loosely, otherwise it will get bruises that can rot. It is better not to use cling film for this: a beeswax cloth is the plastic-free solution. Once added, you can use it over and over again.

The productive head of cabbage can be kept in the freezer for up to four months: Clean the Chinese cabbage, cut into small pieces and blanch briefly in boiling, lightly salted water. The professional would then quench the Chinese cabbage in ice water.

Our tip: If you freeze the Chinese cabbage in portions, it will be easier to prepare the amount intended for your recipe.

Kohlrabi is easy to cook and can be processed into a variety of dishes. It’s cheap, tasty and available regionally. We will show you what you should consider when preparing.

Before you cook kohlrabi, it is important to choose the right tuber: do not reach for the largest specimen, often they have woody parts. You can recognize good kohlrabi by its crack-free skin and fresh, crisp leaves. By the way: You don’t necessarily have to peel young kohlrabi, it’s enough to cut off the base of the leaves and the root.

Less well known than the white-greenish kohlrabi is the bluish-purple kohlrabi, which is rarely found in conventional agriculture. It should be finer and spicier than the white one, but you can cook the purple kohlrabi just like the green one.

Cooking kohlrabi – instructions

With its sweet and nutty taste, kohlrabi offers a great variety in the vegetable kitchen. Cooked kohlrabi is particularly popular as a side dish.

You can cook kohlrabi whole and only then remove the peel if necessary – this way, many of the valuable ingredients such as potassium, selenium and vitamin C are retained.

Cooking kohlrabi whole:

Clean the kohlrabi and remove the roots and leaves.
Bring water to a boil in a saucepan and add some salt.
Put the kohlrabi in the pot and let it cook. The cooking time for a whole tuber is 20 to 30 minutes, depending on its size.
Cooking kohlrabi in pieces:

Remove the roots and leaves of the kohlrabi.
peel him.
Cut the kohlrabi into strips or pieces and remove woody parts.
Boil the kohlrabi in lightly salted water for about 15 minutes.

Practical tips:

Cooked kohlrabi can be seasoned particularly well with parsley or nutmeg and served with a little butter or a light sauce.
If the kohlrabi leaves are fresh and untreated, you can process them like other leafy greens or at least use them as a garnish. The leaves even have about twice as much phosphorus and vitamin C as the kohlrabi bulb.
You can combine kohlrabi particularly well with other vegetables, it goes particularly well with potatoes and carrots.

How else can you prepare kohlrabi?

The kohlrabi has many more uses in the kitchen:

The simplest version: You can cut the kohlrabi into manageable pieces or slices and eat them raw – with a delicious dip, the perfect snack for warm days.
Raw kohlrabi is also easy to grate into a leaf salad.
You can also add kohlrabi and young kohlrabi leaves to your green smoothie.
As a vegetarian alternative to the schnitzel, you can bread the kohlrabi slices after a short cooking time and fry them in a pan. The kohlrabi schnitzel tastes particularly good with a little lemon juice.
Of course you can also prepare kohlrabi in the oven as a casserole – together with other vegetables a good way to use up leftovers.
The stuffed kohlrabi, which you can also gratinate, is particularly sophisticated. Vegetables, bulgur or rice can be used as a filling.
In the cold season you can also use kohlrabi for vegetable soups and stews.
Kohlrabi can be used in many ways and brings variety to every dish. In addition, kohlrabi is healthy and available from May to October from regional cultivation. Pay attention to organic quality, because in this way you support ecological agriculture and avoid chemical-synthetic pesticides in your vegetables.