Tag

Decoration

Browsing

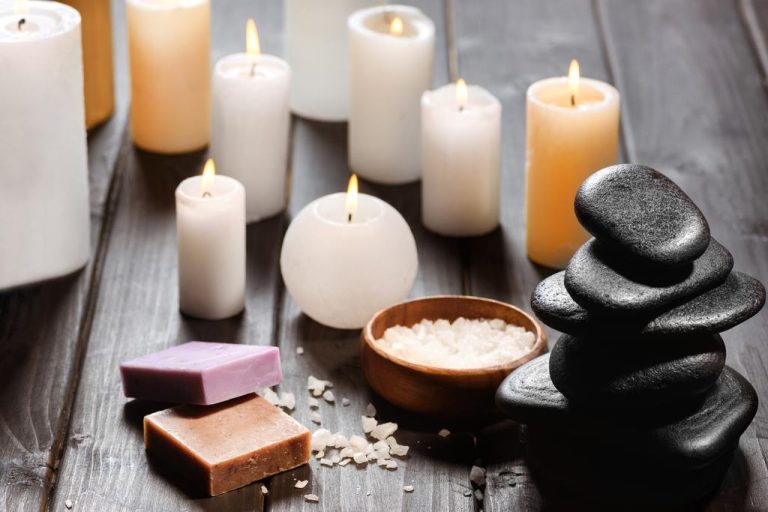
Traditional candles are increasingly taking on new forms: faces, bodies, cubes. But you can also pour the unusual candles yourself. We explain how to do it.

1.1 Material selection: Everything at a glance

When choosing your materials, there are a few things you should keep in mind. For example, when choosing the wax, you can choose between waxes of different origins. That’s what we’re going to talk about in more detail in the next paragraph. In general, to cast wax you need:
for the heat source: a medium saucepan and container or bowl for a double boiler
Bees, paraffin or stearin wax (like pallets?)
or like wax residues from home
as you like: wax color and/or glitter
Perfumes or oils for scented candles
a mold for casting: a jam jar, a toilet paper roll, or a pre-made mold
Wicks and wooden sticks (depending on the mold)
If you have taken care of all this, you will not be missing anything to pour candles. Now we will show you what you should pay attention to when choosing wax and shape.

1.2 Material selection: The right wax

The most popular waxes for pouring candles are paraffin, stearin or beeswax. As a by-product of petroleum, paraffin wax is the most commonly used in Germany. However, paraffin (wax) is often criticized. Not least because of their chemical composition. The EU Chemicals Regulation (also known as the CLP Regulation) is a global system for the classification and labeling of chemicals. She classifies paraffin as harmless to humans, but emphasizes that it also depends on the use and the further composition. However, this does not necessarily mean the paraffin in candles. Because this is also found in cosmetics and medicine, for example. Unfortunately, it is not uncommon for remains of this to end up in nature. Because paraffin is environmentally friendly, petroleum, definitely not.

Stearin wax has a higher melting point than paraffin, so it’s not quite as sensitive to heat and has a longer shelf life. Stearin wax is less polluting, but more expensive. It is obtained from vegetable or animal fats, mostly palm oil or coconut fat. Incidentally, both paraffin and stearin waxes are colorless.

A wax of natural but animal origin is beeswax. Therefore the candles are not vegan. On the other hand, organic beeswax candles are probably the most environmentally friendly alternative. But it is also the most expensive raw material to produce. In addition, beeswax already comes with a golden-yellowish color. As you can see, unfortunately none of the waxes are really sustainable or vegan, which is why you can first look around for wax residues at home. You can use both colored and colorless candle residues. Watering works just as well and you usually already have them at home.

1.3 Material selection: the right shape

Depending on the purpose of the candle, you can use different shapes. You can easily use toilet paper rolls from home to mold your candles and then easily remove them from the roll. Aluminum foil, which you can shape like a bowl, is also suitable for smaller shapes.

If you want to pour scented candles or colorful candles, jam jars are good for this. You can wrap them up with a lid and give them away as gifts. You can also observe the color gradient for candles made of colored wax, and the glass alternative is always sustainable.

If you would like to dare to make large, unusual candles, you can probably still get some shapes online. These range from bodies and faces to a wide variety of shapes. It’s worth browsing. Since the process of making the candles is always the same, you can first try your hand at the toilet roll and then individual shapes.

2.1 Preparation: heat source

There are different ways to heat wax. We will introduce you to the safest and cleanest option. This means that candle casting can also be carried out with small children without any problems, under the supervision of adults.

In order to melt the wax of your candles, you need to set up a water bath. To do this, take a medium-sized saucepan and add a few glasses of water to a heatproof container to melt the wax, or a few more to melt in a bowl. You put your bowl on the pot with water, you put the container in it so that part of it lies or stands in the water.

Once this is done, you can add your wax to the bowl or container and begin melting it. Occasional stirring should be enough to get your wax runny. One benefit of heating your wax in a water bath is that you can easily keep it warm or reheat it.

2.2 Preparation: Prepare the wick

Without a good wick, there is no long-lasting candle. But that is not an obstacle either. We will show you how you can make a wick quickly and easily at home and how to properly prepare this or a store-bought one for watering.

Make a wick yourself: You can easily make a candle wick yourself. For this you need yarn made of pure and thick cotton (this is important!). Once you have chosen your shape, you can first adjust and cut your yarn to length. Then you take your cut yarn and dip it completely into your wax except for a few finger widths (leave the top free) and wait for the first pass until it is well soaked. Then let your wick cool down briefly before repeating the process three to four times. Then let your wick cool down before you use it. Finished!

Prepare a store-bought or homemade wick: You can attach your wicks, whether you have made them yourself or bought them, to one side of the wooden stick and place this over the opening of your mould. This way your wick won’t slip or fall into the wax when pouring and you can easily pour without worrying about your wick slipping.

3.1 Casting: procedure

Now let’s get to the watering! Once the wax has melted, you can color it, add essential oils or glitter. Note that the wax is initially clear and later white. Therefore, you should use moderation with the intensity of your color. You can also place multiple containers in a water bath to pour different color gradients. To do this, you wait after each layer of paint until it cools down. Now it’s about how your candle should ultimately look like.

For smooth candles, the wax should be hot and very runny. This creates a smooth candle shape when pouring, just like you know from the drugstore. To pour matte candles, you should wait a while after heating your wax until it has cooled down a bit, but of course it is still liquid enough. This creates the matte effect of your candle.

Now let’s get to the fun part. You can simply let your poured candles cool down in the molds. Ideally, you’ll give them a day to really solidify.

3.2 Creative casting

We would now like to briefly introduce you to a special way of designing your candle despite its original shape. So you can pour candles with a great optical effect without any effort.

Ideally, use a vessel that has the familiar candle shape. You can also use a toilet paper roll, but you can only see your result afterwards. Therefore, jam jars are ideal for observing the pouring. Then color wax in two containers with at least two colors or leave one colorless or white. Then lay the wick together with the wooden stick over your glass.

Tilt your glass and pour the first layer of paint into the glass. Pour until the wax takes the shape of a pyramid or triangle. Let the layer cool and then take the container of the other color. Now turn your glass in the other direction and pour out the free part. You can repeat this alternately before you recognize the triangle pattern and your glass is filled.

4. Your candle as a decoration or gift

After a few runs, you should be able to make candles fairly easily, which is why you can make candles for yourself as well as for family and friends.

Beautifully cast candles in the form of bodies are increasingly found as decoration in our living rooms. Colorless or single-colored candles are simple and give your living room table style. Colorful candles are perfect as a decoration in the garden for long summer nights. Even poured scented candles give your room a Christmassy scent in winter.

Therefore, you can also give your candles nicely wrapped as homemade gifts. Individually selected shapes can be used for family and friends in advance. This gives your gift a personal touch. As you can see, the production is not too difficult and time-consuming, the result is all the more beautiful. Have fun!

Create great wall decoration ideas and wall decals yourself. So that your home has that certain extra, let your creativity run free. You can be inspired by our clever tips and design murals yourself.

Whether wall decoration made of metal or wood, self-made wall and wallpaper pictures, or creative wall tattoos from the Internet. With simple tricks, you can design your home creatively and bring your own personal flair to your apartment.

Wall design tips for your home

Even small changes in the home can have a big impact. You influence the overall picture of your apartment by painting a new wall color, staging pictures, or decorating bare walls. You can also give the rooms a fantastic atmosphere by choosing your light sources, colors or vases, and associated plants. Since modern wall decoration ideas are diverse, you can let your creativity run free. Also, note great tips for bedroom design and furnishing.

1) Make wall decorations yourself for the living room and bedroom

So that you feel comfortable on your own walls, you can design them according to your own taste and ideas. The focus is usually on the creative furnishing of the living room and bedroom. In addition to beautiful furniture and a tidy overall picture, the wall design plays a major role. As a result, you can make wall decorations yourself and attach picture walls or pinboards, asymmetrically placed picture frames, special lamps, and high-quality shelves and sideboards. You can also hang up vintage world maps, macramés, or posters. They all give such rooms the necessary expressiveness.

2) Design or buy wall decals yourself

Wall decals are stickers or decals used to design walls. Whether motifs, posters, sayings, and quotes, or city pictures, there is a huge selection and there is something for every taste in the personal design of all living spaces at home or at work. You can buy stencils or stickers in specialist shops and on the Internet. It is also possible to create your own creative designs. You can also buy Dc-fix adhesive film and get creative yourself.

Sayings and quotes

If you are a fan of creative sayings or motivational quotes, then a wall decal is just right for you! You can use them in many ways, e.g. as a nice reception in the hallway or as daily motivation in the study. The decisive factor when choosing the sayings is that you like them and that they mean something to you. Consequently, you can use life mottos or special quotes that leave room for interpretation. So how about a motivating saying in the bathroom? Also, read our furnishing tips for the bathroom.

Skylines and world maps

Skylines and world maps are just as popular. Because these remind you of your favorite city, your own home, or your last travel destination. They are available in different shapes and colors so that you can use them according to your own personal taste. You can also design your own personal wall tattoo, e.g. a world map with your life motto. This means that even small rooms can be optimally designed.

3) Wall decor as a wall decal alternative

An alternative to wall tattoos with sayings and quotes is wall decorations – so-called wall decor. So you can make wall decorations yourself, e.g. by attaching picture frames glued to the wall, which are filled with photos of friends and family. Or use stickers with floral patterns to bring a breath of fresh air and a positive attitude to life into your home. Also, note useful tips for setting up with little money.

4) Paint your own wall motifs for the children’s room

Not every decoration or color suits every person and there are reasons for this. A good example of this is the children’s room. Because every child has its own character traits and perceives its surroundings in its own way. With wall paints or decorative elements, in particular, you can quickly and inexpensively set accents without having to remodel the entire room.

Consequently, you can create your own mural. Because great pictures on the wall of the room are easily made by printing any picture on foil, throwing it on the wall with a projector, and coloring it in with colors. This idea is also great for the children’s room. Especially when you are renovating, it is a good idea to make the walls more interesting for your children with beautiful paintings. And it would also be a great activity to do with your child for the weekend.

The right color choice in the children’s room

A restless child, who may also be struggling with concentration problems, is well advised to use calming and warm colors. These include, for example, a harmonious blue or a balanced green. Yellow has the reputation of exuding security and supporting the ability to concentrate. If you now match the furniture and a few accessories to the selected wall color, you can transform the children’s room into a real sanctuary that every child could wish for.

Design great wall decoration ideas and wall decals yourself. So that your home has that certain extra, let your creativity run wild. You can be inspired by our clever tips and design murals yourself.

Whether wall decoration made of metal or wood, self-made wall and wallpaper pictures, or creative wall tattoos from the Internet. With simple tricks, you can design your home creatively and bring your own personal flair to your apartment.

Wall design tips for your home

Even small changes in the home can have a big impact. You influence the overall picture of your apartment by painting a new wall color, staging pictures, or decorating bare walls. You can also give the rooms a fantastic atmosphere by choosing your light sources, colors or vases, and associated plants. Since modern wall decoration ideas are diverse, you can let your creativity run free. Also, note great tips for bedroom design and furnishing.

1) Make wall decorations yourself for the living room and bedroom

So that you feel comfortable on your own walls, you can design them according to your own taste and ideas. The focus is usually on the creative furnishing of the living room and bedroom. In addition to beautiful furniture and a tidy overall picture, the wall design plays a major role. As a result, you can make wall decorations yourself and attach picture walls or pinboards, asymmetrically placed picture frames, special lamps, and high-quality shelves and sideboards. You can also hang up vintage world maps, macramés, or posters. They all give such rooms the necessary expressiveness.

2) Design or buy wall decals yourself

Wall decals are stickers or decals used to design walls. Whether motifs, posters, sayings, and quotes, or city pictures, there is a huge selection and there is something for every taste in the personal design of all living spaces at home or at work. You can buy stencils or stickers in specialist shops and on the Internet. It is also possible to create your own creative designs. You can also buy Dc-fix adhesive film and get creative yourself.

sayings and quotes

If you are a fan of creative sayings or motivational quotes, then a wall decal is just right for you! You can use them in many ways, e.g. as a nice reception in the hallway or as daily motivation in the study. The decisive factor when choosing the sayings is that you like them and that they mean something to you. Consequently, you can use life mottos or special quotes that leave room for interpretation. So how about a motivating saying in the bathroom? Also, read our furnishing tips for the bathroom.

skylines and world maps

Skylines and world maps are just as popular. Because these remind you of your favorite city, your own home, or your last travel destination. They are available in different shapes and colors so that you can use them according to your own personal taste. You can also design your own personal wall tattoo, e.g. a world map with your life motto. This means that even small rooms can be optimally designed.

3) Wall decor as a wall decal alternative

An alternative to wall tattoos with sayings and quotes is wall decorations – so-called wall decor. So you can make wall decorations yourself, e.g. by attaching picture frames glued to the wall, which are filled with photos of friends and family. Or use stickers with floral patterns to bring a breath of fresh air and a positive attitude to life into your home. Also, note useful tips for setting up with little money.

4) Paint your own wall motifs for the children’s room

Not every decoration or color suits every person and there are reasons for this. A good example of this is the children’s room. Because every child has its own character traits and perceives its surroundings in its own way. With wall paints or decorative elements, in particular, you can quickly and inexpensively set accents without having to remodel the entire room.

Consequently, you can create your own mural. Because great pictures on the wall of the room are easily made by printing any picture on foil, throwing it on the wall with a projector, and coloring it in with colors. This idea is also great for the children’s room. Especially when you are renovating, it is a good idea to make the walls more interesting for your children with beautiful paintings. And it would also be a great activity to do with your child for the weekend.

The right color choice in the children’s room

A restless child, who may also be struggling with concentration problems, is well advised to use calming and warm colors. These include, for example, a harmonious blue or a balanced green. Yellow has the reputation of exuding security and supporting the ability to concentrate. If you now match the furniture and a few accessories to the selected wall color, you can transform the children’s room into a real sanctuary that every child could wish for.

This is how you make your own Christmas tree decorations from salt dough. Make simple decorations from salt dough and use them to decorate the tree at Christmas and Advent. How to make salt dough and make great ornaments for Christmas and other salt dough painting and decorating ideas.

The Christmas tree is often the focal point of the Advent season. It shines brightly in all colors and the balls glitter and sparkle everywhere. Unfortunately, most tree decorations are short-lived: something often breaks and you end up with a lot of plastic waste. We spend too much money on colorful Christmas decorations. Isn’t that cheaper and better for the environment? Salt dough is a cheap and easy alternative, and it’s even fun to make tree ornaments. We’ll show you how to easily make your own Christmas tree decorations from salt dough.

Just make salt dough

All you need is flour, water, and salt, i.e. ingredients that are usually in the kitchen cupboards anyway. It is best to use two cups of flour, one cup of water, and one cup of salt so that the ratio is 2-1-1. However, individual changes can be made during the kneading process so that the dough becomes kneadable accordingly. If your dough is too sticky, add some water. If the dough is too dry, add some water. Knead the dough into an even mass and then roll it out on a floured surface. Salt dough is not edible due to the high salt content! Those who prefer to bake something edible with their children are better off baking cookies with children.

Ideas for the salty dough

Substituting cornstarch for the flour will make the dough whiter and softer. If you want colorful dough, you can color it with food coloring. If you add about a tablespoon of oil, the dough will be even smoother and more malleable, so you don’t necessarily need cookie cutters and you can even try to form figures by hand.

On the other hand, if you add a tablespoon of wallpaper paste to your batter before you add water, the dough will become firmer. Consistency and shelf life can also be improved by replacing half the wheat flour with potato flour. You can find out more under Making salt dough yourself.

Make tree ornaments out of salt dough

If you still want to make ornaments for your Christmas tree, you can make them out of the salty dough. Because it’s fun and looks good. In the following video, you can watch instructions on how to make Christmas tree decorations from salt dough.

Make pendants out of the homemade dough

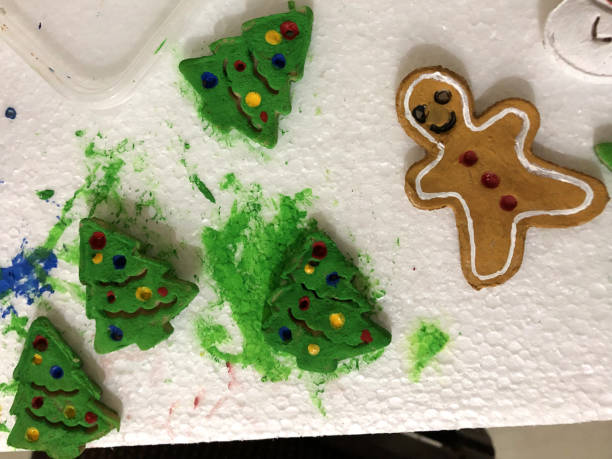
Just like normal cookies, salt dough figures are now created with cookie cutters. For example, stars, fir trees, gift packages, shooting stars, and everything else related to Christmas come into question. Use a straw to poke a hole in your cut-out salt dough cookies so you can hang them up later. After that, the dough has to dry at room temperature. You must not bake it directly, otherwise, it may bubble.

Either you dry your cookies in the air for a day and turn them every now and then, or you dry them in the oven at 50°C with circulating air and the oven door slightly open, which you can also hold open with a wooden spoon inserted between them so that air can escape. Only when your salt dough cookies are dry and light on both sides can you bake them.

Put the cookies in the oven for about 60 minutes at a top and bottom heat of about 130-140 degrees. Depending on how thick your cookies are, the temperature should be adjusted. You can then cool the various shapes and paint them as you wish and tinker with the salt dough. You can also give away the finished pendants. Here are more ideas for homemade Christmas gifts.

Decorate Christmas ornaments from salt dough

You can then cool the various shapes and paint them however you like. But the salty dough is sensitive to water, which is why you should avoid painting with watercolors and use water-free paints. Acrylic and poster paints are well suited, but also finger paints, clear varnish, and even nail varnish with good coverage. Gold and silver stars are particularly pretty and can still be decorated with glitter dust.

So if you don’t want to spend a lot of money on your Christmas tree decorations, but still don’t want to do without great and individual pieces of jewelry, you can make them out of salt dough for Christmas. You can find out more under make beautiful and cheap Christmas decorations yourself.

You can easily make your garden party sustainable with our ideas. We give you tips for the food, the drinks and the decoration.

A successful garden party primarily includes good food and refreshing drinks. You should make sure that you choose seasonal, regional and, if possible, organic quality in order to make your menu sustainable and environmentally friendly.

For your garden party, you can use our seasonal calendar for vegetables and fruit as well as the organic seals from Demeter, Bioland and Naturland, which stand for strict criteria in organic farming and animal welfare.

Garden party: tips for food and drinks

These snacks and drinks are ideal for your garden party:

Food: If you grow your own in your garden, you can use your own fruit and vegetables to make delicious food for your party. Raw vegetables with homemade dips for vegetables, quick salads or finger food are particularly suitable for this (tip: finger food recipes). Make sure to use local foods that are in season at the time of your celebration. If you want to grill, then you will find more tips here: Grilling, but sustainable: 10 tips from charcoal to vegetarian.
Drinks: It is also important for the drinks at your garden party not to forego regionality. Of course, nothing beats domestic tap water, which is the most sustainable drink. For the warm summer months, however, homemade ice tea, various homemade lemonades and other summer drinks are also available.
Little waste: You should produce as little waste as possible during your garden party. You can achieve this by avoiding unnecessary packaging – especially plastic. If you need straws, skewers for finger food or similar, you should use them in a reusable form (glass straws are available at **Avocadostore, for example). Glass bottles are also recommended for drinks, which you can either return as deposit bottles or continue to use yourself after the party.

Sustainable decoration for your garden party

With creative decoration you can give your garden party a unique atmosphere. Your celebration will be particularly sustainable if you recycle or upcycle old and used materials for your decoration. Here are a few ideas:

Flowers as a natural decoration: If you throw a party in your own garden, not so much decoration is necessary. After all, your plants and trees create a unique atmosphere in your garden. If you are still in the process of planting your garden, wildflowers are worthwhile. They not only make your garden shine in bright colors, but you can also use them for a salad.
Sustainable lanterns: When night falls, glowing tea lights bring cosiness to your garden party. You can make these yourself in a sustainable way. For this you can recycle old jam jars as well as cardboard and paper remnants or natural materials such as leaves. With our instructions you will be able to make a lantern. Alternatively, you can also make new candles yourself from old leftovers.
Lanterns as light decorations: Fairy lights and lanterns are as much a part of a garden party as the Christmas tree is at Christmas. You can make your garden particularly beautiful and sustainable with handcrafted lanterns. They are a great way to recycle old packaging or toilet paper rolls.

More ideas for your garden party

These tips can also help you when planning your garden party:

Sustainable children’s corner: If you invite guests with children to your garden party, a sustainable children’s corner makes sense. Depending on the age of the children, this can consist of a sandbox made of wood (tip: build your own sandbox) or a mud kitchen. There is also a whole range of movement games for children that can be fun. A painting corner is also welcome. You can, for example, lay out “scratch paper”, which would have ended up in the waste paper anyway. More useful information: The best colored pencils without poison, paint or solvents.
Make short journeys sustainably: Your celebration will be particularly sustainable if you point out to your guests that they can also reach your garden on foot, by bicycle or by public transport and should avoid using the car if possible. It is best to show directions and the departure times of any nearby trams or buses on your invitation card.

Reusable crockery: If possible, do not use disposable crockery for your garden party. This is often made of plastic and produces an unnecessary amount of waste. Instead, you should use normal crockery and cutlery – and only use more environmentally friendly reusable crockery in an emergency. If you don’t have enough dishes for a larger celebration, you can certainly borrow some from friends or family members. If you want to buy new tableware, it is worth doing without plastic tableware and choosing wooden ones instead.