Tag

how

Browsing

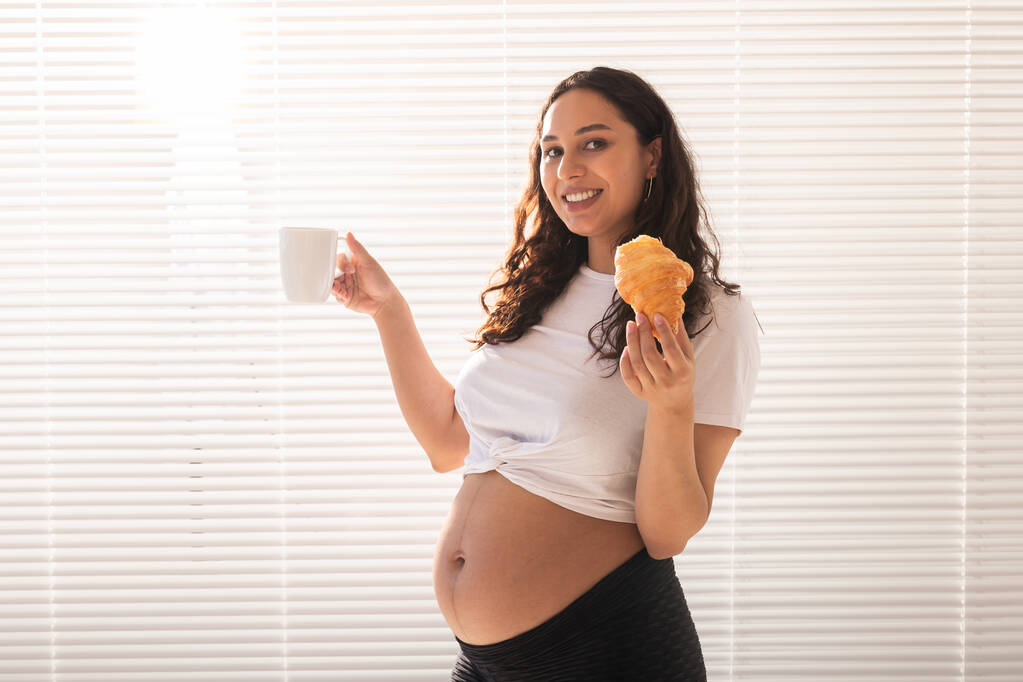
Many coffee lovers don’t want to do without their daily cup of coffee, even during pregnancy. But how much coffee is allowed?

Is Coffee Healthy During Pregnancy?

Women pay particular attention to their diet during pregnancy. After all, the unborn child and the mother should not lack for anything. It is all the more important to know food and its effects. This also applies to coffee and in particular the caffeine contained in coffee. According to studies and experts, the consumption of the drink is not prohibited in principle, but should be restricted. The European Food Supply Authority recommends a maximum of around 200 mg of caffeine per day for pregnant and breastfeeding women, which is equivalent to just over one cup (200 ml) of filter coffee. Typically, up to 400 mg of caffeine per day would be fine for an adult. There are no restrictions such as only drinking coffee up to a certain point in pregnancy or not drinking coffee shortly before the due date.

Lighter birth weight

Coffee is made up of more than 1000 substances, all of which can have different effects on the body. Caffeine has a particularly large impact. Researchers from Norway have found that regular coffee consumption can have an impact on the child’s birth weight. Children born to high-consumer coffee drinkers had a lighter weight at birth than children born to women who abstained from coffee. This is harmless in healthy children. However, if the baby is born prematurely, every gram of birth weight can make a difference.

Restless babies in the womb

Babies are nourished in the womb via the placenta. This also passes caffeine on to the child when the pregnant woman drinks coffee. In general, caffeine has the following effects on the body: Caffeine stimulates the heart rate and metabolism for a short time. Caffeine can have similar effects on the unborn child. This can cause the fetus to become restless in the womb. In addition, regular coffee drinking can lead to the mother producing more urine, sleepless nights and headaches after the caffeine has been filtered out of the system. Because the fetus lacks a liver enzyme, it takes nearly 20 times as long to break down caffeine. In addition, the absorption of iron from food is inhibited.

There is so much caffeine in cappuccino, latte macchiato and co.

Pregnant women should make sure that their total caffeine intake does not exceed 200 milligrams of caffeine. But caffeine cannot only be ingested by consuming black coffee. Caffeine is also found in latte macchiato, cappuccino, tea and cola. To give you an overview, we have put together a list of caffeinated drinks for you:

Filter coffee: Up to 80 mg of caffeine per 100 ml
Espresso: Up to 110 mg of caffeine per 100 ml
Cappuccino: Up to 30 mg of caffeine per 100 ml
Cocoa: Up to 11 mg of caffeine per 100 ml
Black Tea: Up to 50 mg caffeine per 100 ml
Cola/Cola zero: Up to 10 mg caffeine per 100 ml
Cola light: up to 12 mg caffeine per 100 ml
Club-Mate: up to 20 mg caffeine per 100 ml
Energy drink (varies depending on the variety): up to 32 mg caffeine per 100 ml (Red Bull)

What coffee alternatives are there for pregnant women?

To be on the safe side, many pregnant women avoid coffee. For those who find it difficult to wait more than nine months to enjoy it, we have various coffee alternatives:

Decaffeinated coffee: The number 1 alternative is the decaffeinated version of the classic. Our tip: For quality reasons, choose a decaffeinated coffee with an organic seal of approval. However, you should also watch the amount here, as excessive consumption of decaffeinated coffee can lead to stomach upset.

Muckefuck: Another alternative is the so-called Muckefuck. The drink with the unusual name is mostly made from grain and contains no caffeine. It is also referred to as “fake coffee” because although no coffee beans are used, the drink tastes slightly like coffee due to the chicory ingredient. Chicory (or “common chicory”) is a plant that often grows along roadsides.

Fruit and vegetable juices: If you don’t get out of bed well in the morning, you can use a freshly squeezed fruit or vegetable juice. The numerous vitamins are also a good freshness kick.

After childbirth: can breastfeeding women drink coffee?

Women should also limit their coffee consumption while breastfeeding. The infant can continue to absorb caffeine through breast milk. According to the German Society for Nutrition, however, breastfeeding women can safely consume a little more caffeine than pregnant women. The guide value is around 300 mg per day, which corresponds to around two cups (200 ml each) of filter coffee. According to the Professional Association of Pediatricians in Thuringia, there is no precise research into how much coffee is “safe” for breastfeeding mothers and their children. However, we already know that too much coffee can cause sleep disorders in babies. Caffeine can also cause stomach pain and bloating in babies. Breastfeeding women should therefore continue to pay attention to how much caffeine they consume per day.

Something went wrong in the kitchen? Most of the time you can still save your food. We give you tips on typical problems.

You weren’t paying attention for a moment, the salt slipped or the recipe didn’t work. This can happen, but don’t worry: you can usually save your food. Before throwing it away, avoid wasting food and try one of our tips.

Save oversalted food

Almost everyone has probably oversalted a meal at some point. This can often be prevented by adding small amounts of salt step by step and tasting in between. However, this is not easy with some dishes such as casseroles and it can also happen that you add too much salt all at once.

How to save oversalted food:

If you’ve just slipped the salt, you may still be able to skim it off the surface of the food.
Cut a raw potato into large pieces and cook them for a few minutes. It absorbs some of the salt. Then remove them from the pot. The same works with carrots, bread or prunes. Cook the latter for about 15 minutes.
Sweeten your dish slightly, for example with honey or maple syrup. If it tastes too sweet afterwards, you can counteract it with a little acid (e.g. lemon).
Serve unsalted side dishes with the dish, such as lettuce leaves or yogurt.
The following tips also work for foods that are too sweet, spicy or sour:

Mix soup, sauce or your stew with water, wine, milk, cream or a vegan cream or plant-based milk. You can then thicken the liquid – there are tips for this below.
Prepare the dish again unsalted (or without spiciness, sugar or acid, as required) and mix both variants together.

Too spicy food? you can do that

Sharpness is not always easy to dose. Some chili peppers are very hot, others hardly at all. In addition, everyone perceives sharpness differently.

How to save overly spicy food:

Capsaicin, which makes the chili hot, is fat-soluble. You can often save overly spicy food by skimming off the fat on the surface.
Again, add a tablespoon or two of honey or maple syrup to the food. You can then compensate for too much sweetness with acid.
Serve the dish with bread and/or yoghurt or quark or provide milk. These foods help mitigate spiciness.
You can also save food that is too spicy by cooking raw potato pieces in it for a few minutes.

Save too sweet food

Sweetness is also a matter of taste – in both savory and sweet dishes. For both variants, you have different options for saving food that is too sweet:

A pinch of salt can help tone down the sweetness of savory foods.
You can season both savory and sweet foods with acid to balance out the sweetness. Lemon juice or vinegar, for example, help with savory dishes (note: some vinegars contain sugar). You can also round off some sweet dishes with lemon juice. For others, it is a good idea to add sour fruit to compensate – for example a berry sauce or rhubarb compote.
As with other taste flaws, you can sometimes salvage food that’s too sweet by stretching it. This works especially well with rather liquid foods. Stretch them with water or a dry wine, for example, and taste them again.

What to do when your food burns

Charred or burnt food is annoying for two reasons: The black spots don’t taste good and contain harmful substances like acrylamide. So you better always keep an eye on your food. Still, you can salvage burnt or charred food.

If something burns in the pot, you may still be able to salvage your food. Be sure not to stir so the burnt doesn’t mix with the rest. Instead, carefully skim off the unharmed portion of the food and place it in a new pot. You can continue cooking the food in it. It may still taste slightly roasted – either that goes well or you can try to cover the roasted flavor with spices.
A few spots have become too dark when roasting or baking? It is best to cut them off generously. Unfortunately, it doesn’t look so nice, especially with a cake. However, you can cover up the broken spots by covering the cake with icing, vegan frosting or whipped cream, for example.

Save food that is too liquid

Soups and sauces don’t always have the desired consistency – they often just don’t want to be creamy. However, food that is too liquid can be saved easily:

If you still have time, you can let the soup or sauce simmer uncovered. This is useful if you are not that far from the desired result. If so, this method is very time-consuming and energy-consuming.
Mix about a tablespoon of flour or starch with a little water, wine, or milk. Stir the mixture into the food and cook again until thick.
(Vegan) cream or crème fraîche (substitute) can also make dishes that are too liquid creamier.
Grate a raw potato and stir it into the food. Cook them until the shavings dissolve and combine with the rest of the sauce.
Stir cold (vegan) butter into the food in chunks.

Overcooked food? You can save even that

Some people don’t mind if the vegetables are soft and the noodles have a wobbly texture. For others, overcooked food is inedible. Unfortunately, the cooking process cannot be reversed – you can still save the food:

Prevent worse by immediately removing the food from the stove. You can also rinse noodles or vegetables under cold water to interrupt the cooking process.
Garnish the food with a crunchy topping. You have many options for this – for example (roasted) nuts or seeds, homemade croutons or crispy fried tofu.
You can prepare a delicious mash, puree or vegetable soup from overcooked vegetables and potatoes.
Sear overcooked foods or gratinate them in the oven until they get a crispy surface. This works particularly well with starchy foods such as pasta or potatoes.

Cake base is broken

Cakes are often served on festive occasions, which makes it all the more important that they turn out well. A broken cake base is therefore very annoying. It can break for a variety of reasons:

You took the dough out of the mold too soon. It should always cool down first.
The pan wasn’t greased well and the dough stuck in one spot. You can prevent this by very carefully removing the dough from the mold and, if necessary, using a knife or something similar.
You tried to cut through the cake base.
Even if it is broken, you can of course still eat the cake base. How to save him:

The easiest thing to save is a cake with multiple bases, only one of which is broken. Simply use this as a middle or top pie crust by piecing it back together. In the latter case, you can cover the mishap with a layer of whipped cream or fruit, for example.
If you only have the one cake base, you can also puzzle it back together. When cutting, some pieces may be a bit crumbly later. However, a creamy filling or a layer of fruit with icing will hold the cake together.
For example, if the cake base is very crumbled, you can layer the crumbs in muffin cups, alternating with the filling. With some fruit, for example, they become delicious apple muffins. Or you turn the broken cake base into a mole cake.

The coffee bean is the basis of a tasty coffee. Only a high-quality bean guarantees the best coffee enjoyment. But how do you recognize a good coffee bean?

With a high-quality coffee bean for an enjoyable coffee

Unfortunately, bad coffee is still widespread. This is often due to the wrong preparation. However, the decisive factor for the special enjoyment of coffee is the coffee bean. If this is of inferior quality, even a high-quality fully automatic coffee machine from Kaffee Partner is of no use. The coffee tastes bland and the full-bodied aroma just doesn’t come through.

In contrast to many other foods, it is not so easy to distinguish high-quality products from inferior ones when it comes to coffee beans. In the ground state, it is almost impossible to assess the quality. You often have to rely on the information on the packaging, after all it is not a regional product. With our tips and tricks, it will soon be much easier for you to evaluate the quality of the coffee bean and thus create the best conditions for enjoyable moments.

The diverse world of coffee beans

About 40 different coffee beans are grown around the world. However, this variety is not popular in local supermarkets. Instead, two beans dominate the coffee shelf: the Arabica bean and the Robusta. With a market share of 60%, the Arabica bean is the most used coffee bean. It is considered a noble bean because it has a balanced caffeine and acid content. However, this does not mean that all Arabica beans are of high quality – there are differences in quality here too. However, so-called top coffees are almost all made from Arabica beans.
In addition to the type of coffee bean, the growing area also plays an important role. The country in which the coffee is grown is less important here. Instead, the height of the area comes into focus. Coffee made from beans that come from particularly high cultivation areas is referred to as highland coffee. In contrast, the lowland coffee comes from lower areas. The higher the growing area, the slower the bean ripens. This creates particularly fine aromas.

Factors to judge a quality coffee bean

Don’t compromise when buying your coffee beans. Use whole beans and avoid pre-ground coffee. Whole beans can be rated much better and at the same time promise a particularly aromatic coffee. Before preparing your coffee, examine the beans carefully.

Pay attention to the following factors:

pest infestation
fracture
mold growth
roasting
freshness
taste
As a fruit, the coffee bean is susceptible to pest infestation. It is easy to see whether your coffee bean has been attacked by pests during its growth. Small holes on the bean are an indication of pests. If the infestation is limited, this does not have to have a negative effect on the quality. Only when large parts of the harvest are affected is this an indication of incorrect cultivation conditions. Another factor is the breakage rate of the coffee. Of course, every bag of coffee contains a few broken beans. Coffee has traveled a long way, so this is often unavoidable. If more than 5% of the beans are broken, this indicates that the coffee beans were not picked by hand and may therefore be of lower quality.

Another factor that affects the quality of coffee beans is the correct roasting process. Drum roasting is of the highest quality, as particularly few bitter substances are formed here. Finally, freshness and taste also affect the quality of the coffee.

Brazil nuts are considered healthy and are often part of nut mixes such as trail mix. But there is always uncertainty, because Brazil nuts are radioactive.

Ingredients of the Brazil nut: Healthy and radioactive

Brazil nuts have it all: With a fat content of 60 to 70 percent, they are particularly high in calories. However, because these are mainly monounsaturated and polyunsaturated fatty acids, nuts are actually very healthy in moderation. They also contain the minerals calcium, magnesium and phosphorus and thus promote the growth of bones and muscles. The zinc content of the Brazil nut is also not to be scoffed at.

The Brazil nut is particularly valued because of the high amount of selenium: The nut is the largest natural supplier of the trace element and just one nut covers the daily requirement. Selenium helps to strengthen the immune system and detoxifies the body. Selenium is only found in comparable amounts in fish, meat and eggs. In addition, the Brazil nut contains a lot of vegetable protein. It is therefore particularly suitable for a vegetarian and vegan diet.

Brazil nuts are naturally radioactive. Their radium content is 1000 times higher than that of other foods. Nevertheless, it is harmless if you only eat Brazil nuts every now and then.

Brazil nuts: Toxic or not?

Despite its many healthy ingredients, the Brazil nut also has a reputation for being harmful to health. Elevated levels of the mold toxin aflatoxin, which can be carcinogenic even in small amounts, have been found in Brazil nuts from Brazil. As a result, restrictions on the import of Brazil nuts were imposed by the EU. Because many countries of origin cannot meet the high requirements contained therein, the trade in Brazil nuts has declined sharply.

Aflatoxins are found in many dry products, such as grains, legumes, nuts and tea leaves, and can form quickly if stored incorrectly. They are also heat-resistant, so they can withstand cooking and baking processes. It is best to keep peeled Brazil nuts cool and dry and consume them quickly. If they have a musty, rancid taste, stop eating them. You can store unpeeled Brazil nuts for about two to three months.

The Brazil nuts that are available from us in Germany are carefully checked. In a recent report by the Federal Office for Consumer Protection, low aflatoxin levels were found almost exclusively in Brazil nuts – the green light for Brazil nuts.

Brazil nuts: Healthy, but not sustainable

All Brazil nuts available from us are imported from the tropical regions of South America or the Ivory Coast, so they have long transport routes behind them. This is problematic because a lot of environmentally harmful CO2 is emitted with the import.

Brazil nut trees are not cultivated, so the nuts are collected from wild trees. There are no monocultures with the use of pesticides, but collecting the nuts prevents the tree from spreading naturally – and that in the already endangered rainforest. When shopping, you shouldn’t always just grab Brazil nuts, but also try out local nut varieties?

Wild apple is a small tree that attracts attention in summer with its lush flowers and provides you with numerous fruits in autumn. Here you can find out what you should consider when planting, caring for and eating.

The winter apple (also known as the crab apple) is a native plant: it has been cultivated regionally and its fruits eaten for centuries. Today, however, the winter apple is rarely found in Germany. It is also a popular refuge for birds and mammals and an important food source for various insects.

Characteristic is the thin trunk, which only reaches a diameter of two to four centimeters, and the slightly woody consistency. Some branches have thorns. Some varieties also have slightly wrinkled skin. However, this does not affect the health of the tree or the taste of the apples.

The flowering period of the tree extends from April to May and lets it shine in a white to light pink splendour. The apples ripen in early autumn and are yellowish to reddish in color, depending on the variety. Be sure to choose local varieties for planting.

Plant wild apple: The basic conditions

Before you plant wild apples, you should think about the time and place of planting. Please note the following:

Timing: Autumn is the best time to plant. In principle, however, it is possible all year round.
Location: Choose a sunny to partially shaded spot. The tree likes sun and warmth and should not be overshadowed by other plants. Otherwise it is quite robust, so that wind and rain cannot harm it. Note that the apple tree can grow between 3 and 6 meters tall. However, this varies depending on the variety. At the same time, the roots grow quite extensively and close below the surface of the earth. There are also varieties that are suitable for hedge planting.
Soil: Since the wild apple tree is a wild tree, it can get along with almost any soil. He just doesn’t particularly like extremely wet soil like moor. Nevertheless, you can enrich the particularly nutrient-poor soil with nutrients and sand.

This is how you plant the wild apple

Planting a wild apple is not difficult. To do this, follow the steps below:

Place the young tree in a bucket of water so the roots can soak.
Dig a planting hole. This should be at least twice as large as the plant ball of the wild apple tree.
Enrich the soil with some compost or other organic fertilizer.
Place the small tree in the hole and refill the soil. Squeeze them tight.
Water the freshly planted wild apple tree properly.
Depending on the location, it may make sense to initially secure the young tree with a stake.
If you sprinkle bark mulch around the tree, you prevent weeds and at the same time protect the tree from unwanted competing plants.

Caring for a tree: tips and hints

The wild apple tree is robust and quite undemanding. For care, it is sufficient if you observe the following tips:

The most important thing is that you protect the wild apple from drought. Especially when young, you should water the tree regularly during long periods of drought. We recommend collecting rainwater and using it to feed your plants.
If you want to do something good for your wild apple, you can fertilize it in the first half of the year (spring to June), preferably with compost.
Basically, it is not necessary to trim the wild apple tree. However, if it is not developing in the way that is best for your garden and other plants, or if you want to shape it, you should cut it from time to time. You can read here how to best make the cut: Cutting an apple tree: The right tree cut in spring and autumn
Wild apple is hardy. So you don’t have to take any special precautions for the cold season.
If you want to propagate the apple, the best way to do this is by sowing: Scatter the seeds of the fruit in a pot outside in autumn and keep it moist. Cutting a cutting and cultivating it is often not successful.
Diseases and pests do not worry the wild apple tree for the most part. However, typical apple tree diseases such as apple scab or fire blight can sometimes occur.

Here’s how you can use the wild apple

Wild apples are edible. However, young apples of the tree are rather sour and tart because they contain a lot of tannin. You can cook them to tone down the flavor. In addition, the kernels of wild apples, like other apples, contain the substance amygdalin, which is converted to toxic hydrocyanic acid in the body. Even if you bite into the seeds, they are harmless in small amounts.

Wild apples contain a comparatively large amount of pectin. You may know the substance as a vegan gelling agent. They also have a firmer consistency than cultivated apples. You can take advantage of these two properties by using the fruit for homemade applesauce or apple jelly. You can also make tea, juice or syrup from wild apples.

The fruits are also often used as a decorative element in arrangements or wreaths.

Freezing bread dumplings is a great way to avoid food waste or to stock up. In this article we will show you step by step how to freeze bread dumplings and then use them.

Bread dumplings are very easy and uncomplicated to freeze. Not only do you avoid waste if you have cooked too much, you also have a tasty and home-cooked side dish at hand when you need something quick.

Freeze bread dumplings: This is how it works

If you want to freeze bread dumplings, you should cook them first. If you cook the dumplings before freezing them, they will have a nicer shape and be easier to prepare and use.

Proceed as follows so that you can use the bread dumplings individually:

Place the cooked bread dumplings loosely on a tray or in a casserole dish and let them cool completely. Attention: The dumplings must not touch each other, otherwise they will freeze to each other.
Place the tray with the completely cooled bread dumplings in the freezer for at least an hour.
Then, remove the dumplings from the freezer and place them in a reusable glass or plastic freezer container.
Deep-frozen bread dumplings can be kept for up to four months in an airtight deep-freeze container.
Pre-freezing the dumplings on a tray will prevent them from freezing together. This allows you to remove them individually from the freezer and use them.

How to use frozen bread dumplings

You don’t need to thaw frozen bread dumplings before using them. They are therefore an uncomplicated side dish when time is of the essence.

Tip: Freezing bread dumplings is particularly advantageous for single households because you can remove the dumplings individually. In this way you can cook a larger quantity as meal prepping and then have bread dumplings in stock for many weeks.

How to prepare frozen bread dumplings:

Bring a pot of salted water to a boil.
Remove the desired amount of bread dumplings from the freezer.
Add the still frozen dumplings to the boiling water.
Let the bread dumplings simmer in hot water at the lowest temperature for about 20 minutes. Attention: The water should only boil and not boil, otherwise the dumplings will fall apart.
Serve the dumplings as usual.
Alternative preparation options:

Frozen dumplings can also be prepared very well over steam with a sieve insert in the pot or with a steam cooker.

As a pasture for insects, the wild pear is an important food source for bees and the like. The wild form of the pear, which grows in sparse forests, also thrives in domestic gardens. We will show you how to properly plant and care for the rare pear tree.

Plant wild pears in your own garden

The wild pear is the original form of the pear tree and originally grows mainly on the edges of forests and in clearings. Unlike cultivated pears, the wild fruits can only be eaten in processed form, but the gnarled wild pear should not be missing in any natural garden simply because of its ecological benefits. The white umbelliferous flowers provide food for bees and other insects, while the fruits that are stuck are eaten by native birds.

You can buy the wild pear as a young tree in well-stocked garden shops. Before you plant the fruit tree, however, you should pay attention to a few points:

Location: You can plant the wild pear almost anywhere. The only important thing is that it gets a sunny and warm place in your garden. Even on slopes, the wild pear thrives thanks to its deep roots. The blazing sun doesn’t bother her either. On the contrary, in order for the leaves to turn fully colored in autumn, the tree even has to be in full sun.
Soil: Since the wild pear is very adaptable, it grows well on all permeable soils. The only thing you should not plant the tree in is very wet or acidic soil. You can recognize acidic soils, for example, by means of special indicator plants.
When to plant: As with most fruit trees, spring or autumn is the best time to plant the wild pear.
Plant neighbors: In order to reproduce, the wild pear needs nearby pollinators. Apple trees or other types of pears are well suited for this.
Plant wild pear:

First dig a planting hole at the site. Make sure it’s at least twice the size of the wild pear’s root ball.
Slightly loosen the soil at the bottom of the hole and lay a drainage layer of gravel or sand.
Now place the wild pear with the root ball in the hole and fill it up again with the excavation from the plant.
Put a support stick in the ground and tie the young wild pear to it.
Finally, lightly press down the top layer of soil and water the pear tree generously.

The right care for the wild pear

Even if the wild pear is very easy to care for and robust overall, it is worth taking the following care instructions into account:

Watering: The wild pear’s water requirements are usually covered by the occasional rainwater that falls. In particularly long periods of drought, however, you should water them so that the soil does not dry out completely. You should definitely avoid watering too often, as the pear species is very sensitive to waterlogging.
Fertilizer: The frugal wild pear does not depend on additional nutrients.
Pruning: The wild pear is very tolerant of pruning. Once a year, in spring, you can safely remove dead and laterally growing branches. In addition, you should leave the naturally growing fruit tree unpruned.
Harvesting: In autumn, the real wild pear develops round fruits that are about three centimeters in size. At first glance, they don’t look like typical pears at all. The pears only lose their bitter taste when they are overripe or after the first frost. Then you can harvest and process them. The fruits of the Chinese wild pear, on the other hand, are inedible and remain on the branches until they are softened by the frost and serve as food for birds.
Overwintering: In order to protect the wild pear from frost in winter, you should mulch its treetop in autumn with a thick layer of bark mulch or autumn leaves.
Diseases and pests: You no longer need to worry about pests with the robust wild pear. Even the dreaded pear rust rarely occurs with her.

You can use the wild pear in so many different ways

The fruits of the wild pear contain many tannins and fruit acids. In the raw state, they are therefore hardly edible due to the bitter taste. Nevertheless, there are a few ways in which you can still use the wild pear in the kitchen:

Using wild pears in the kitchen: After the first frost, wild pears lose their bitter taste. If you want to speed up this process and process the fruit faster, you can dry and bake the pears. In combination with cultivated pears or apples, you can then process the wild pear into pear syrup or pear puree.
Use wild pear blossoms: Wild pear blossoms can also be useful in the kitchen. As a side dish, the flower buds taste good in a wild herb salad. You can also process the mild-tasting flowers into tea or lemonade. If you sprinkle the buds with sugar water, you can candy them in the oven over low heat and use them to decorate desserts.

Yacon looks inconspicuous, but it is a real super tuber. It is not only versatile in the kitchen, but also a medicinal plant. You can learn more about it here.

What is Yacon?

Yacon originally comes from South America and is still relatively unknown to us. The plant belongs to the daisy family and is a perennial and herbaceous plant. Perennial means that the plant has a lifespan of over a year. A plant is herbaceous if it does not become woody like shrubs or trees. Both also apply to primula or arnica, for example. Yacon is also related to the sweet potato and its orange-yellow flowers resemble those of the sunflower. The leaves of the yacon plant are also striking. They can grow up to 20 centimeters long and 35 centimeters wide.

Yacon is grown primarily for its edible roots. According to a publication by the Federal Center for Nutrition (BZfE), the tubers consist mainly of water and carbohydrates, especially fructans, mono- and disaccharides. The rest are oligofructose and inulin. This is indigestible sugar for humans. However, this is not a bad thing, on the contrary: when you eat yacon, bifidobacteria multiply in the intestine and ensure a good and healthy intestinal environment. For this reason, Yacon is said to help stimulate the metabolism and reduce feelings of hunger. According to the BZfE, calcium and vitamin C are other ingredients of Yacon in addition to sugar. The calorie content is 20 calories per 100 grams.

It is still difficult to buy Yacon from us. It’s easier to grow them yourself. You can buy either rhizomes or young plants from specialized online retailers.

This is how you plant Yacon yourself

Yacon is a rather undemanding plant. However, there are a few tips you can keep in mind when planting them.

When: As soon as it no longer freezes, you can plant Yacon. This is usually the case from mid-May.
Location: A sheltered, sunny spot is best for Yacon, such as on a window sill or in a greenhouse. In addition, there should be enough space, as the plant can grow up to two meters high.
Soil: Sandy and light soils are recommended. It is best to add some compost so that your plant gets enough nutrients. A layer of mulch over the soil is also recommended to protect the yacon from pests or weeds. Also, be sure to buy peat-free soil, as this does not require peatland drainage. You can find out more about this in the following article: Why you should better buy peat-free soil – and where to get it.
Now all you need is a large flower pot and rhizomes. These are Yacon Earth Sprouts. You can buy these online, for example.

If these points are given, you can start planting.

Fill a flowerpot at least 2 feet wide, mixed with potting soil and sand, as the plant grows very large. You should also keep this distance in the bed.
Dig a 1 to 2 inch hole in the soil and place the rhizomes in it.
Carefully cover the shoots with soil and water them.
Yacon grows slowly at the beginning, but you don’t have to worry. This is completely normal. Leaves develop first until the ground is reasonably covered. After two to three months, the plant then grows faster, it can then be up to two meters high.

You should keep this in mind when caring for and harvesting

After planting, Yacon grows almost by itself. However, there are a few things you should pay attention to in order to properly care for your plant.

In the beginning, you should pull weeds regularly. After a while, the conspicuously large leaves will develop and you won’t have to weed as often.
You should water the yacon plant at least once a day. But make sure that there is no waterlogging.
You do not need to fertilize Yacon if you have added compost to the soil or if there is a surface mulch layer. If you still want to help a little, a potassium-rich fertilizer is recommended. Also read: The best organic fertilizer.
If you planted and cared for the plants properly, you can harvest between October and November. Harvest time may vary slightly. However, you can easily tell from the leaves when the time has come.

With the first light frost, the leaves dry up or die. Then it’s time to dig up the tubers. It can sometimes happen that some tubers break off. That’s not a bad thing though, you can still use them later.

After that, you need to separate the tubers and the rhizomes. You can recognize the tubers by the fact that they are larger and thicker and resemble potatoes. The rhizomes, in turn, are roots or shoots.

Only the rhizomes are overwintered, not the whole plant. That means everything above ground has to be disposed of. You can then simply cut off the dead leaves. They go to the compost. Yacon is also very sensitive to frost. Therefore overwinter the rhizomes in a flower pot in a frost-free, not too dry location. Then cover them lightly with soil in the pot.

Now you should wash the tubers and dry them well. The latter is important so that your Yacon bulbs don’t start to get moldy. It is best to store the tubers in a cool and dry place, similar to potatoes. More about this here: Storing potatoes: These 7 tips will keep them fresh for a long time. The longer you store them, the sweeter the yacon tubers will be. They are still maturing.

Here’s how you can use Yacon

Yacon was already known to the Incas as a medicinal and useful plant. Thanks to the inulin it contains, Yacon is said to stimulate the metabolism, improve the intestinal environment and thus help with dieting. It is also believed that Yacon helps against diabetes and depression.

You can also use Yacon in the kitchen. There are various ways to prepare the tuber. For example, you can eat them raw or use them in soups, stews, and stir-fries.

You can also make a syrup from the tuber. This is good for sweetening desserts or drinks.

The stinging nettle is very popular again today because of its healthy nutrients. With these five recipes you can conjure up delicious dishes from the “weed”.

Nettle recipes – you should know that in advance

There are many reasons to cook more recipes with stinging nettles: The garden herb contains an active ingredient that inhibits the growth of bacteria. Stinging nettles also provide a lot of nutrients: In addition to minerals such as iron, magnesium and potassium, they even contain more vitamin C than citrus fruits!

In order to be able to enjoy the stinging nettle in your mouth without irritation, you must first break off the stinging hairs. For that there are different possibilities:

Briefly boil the nettle. This destroys the plant structure so much that the stinging hairs no longer work.
Roll the collected nettle parts with a rolling pin. This is how you break off the stinging hairs.
Puree or mix your nettle harvest: Here, too, the hair is broken off mechanically.
After you have pre-processed your nettle harvest in this way, you can overcook it without hesitation. Try the following recipes:

Recipe: Nettle as a spinach substitute

Cooked nettle leaves are an excellent substitute for spinach and can be used in the same way.

Ingredients for 4 persons:

500g nettle leaves
1 onion
olive oil
Salt pepper
Preparation:

Remove the stalks (with gloves) from the nettle leaves.
In a covered pot, boil the nettle leaves in a little water for about 10 minutes. It is enough if the water fills the pot by about 1 – 2 cm. Any overlying leaves are cooked by the steam.
Drain the cooking water, but don’t throw it away. It is rich in nutrients and can be used in a soup, for example, or drunk as is.
Finely dice the onion and sweat it in a pan with the oil.
Mix nettle, onion and spices and puree everything.
Tip: The cooked nettle leaves also taste good as “spinach” on pizza or with pasta.

Recipe: nettle pesto

Nettle leaves are also ideal for a tasty, healthy pesto. You can use our basic recipe for homemade pesto as a guide, or try the following recipe idea:

Ingredients for a jar of pesto:

100 ml olive oil
approx. a muesli bowl of nettle leaves
1 large clove of garlic
30 grams of walnuts
20 grams of pine or sunflower seeds
1 dash of balsamic vinegar
juice of half a lemon
1 tsp salt
Black pepper to taste
Preparation:

Briefly roast the nuts and seeds in the pan without fat.
Place the nuts and any other ingredients in a suitable container.
Blend everything with a hand blender until you get the consistency of pesto you want. Alternatively, you can use a mortar and pestle to complete this step. However, this is significantly more time-consuming.

Recipe: Refine the salad with stinging nettles

You can also add nettle leaves raw to any salad. Make sure to break off the stinging hairs first, as explained above. If possible, you should only use young plants or the top leaves of older nettles, especially for the salad. These are particularly tasty.

You can add just a few leaves to your salad or use the nettle leaves as the main ingredient. You can’t go wrong with one of our delicious salad dressing ideas.

Recipe: Nettle Soup

Nettle leaves are also a great side dish for soups. There are practically no limits to your creativity: You can, for example, cook one of our vegan soups and simply add one or two handfuls of nettle leaves.

Nettle soup is often prepared with potatoes and carrots. You can orientate yourself on an ordinary potato soup by adding the nettle leaves about ten minutes before the end.

Recipe: Nettle in a smoothie

Smoothies are popular, versatile and can be really healthy with the right ingredients. So it makes sense to also use the healthy nettle leaves for a delicious green smoothie.

For example, you can use our recipes for green smoothies as a guide – or just get creative yourself. Bananas, strawberries or raspberries, for example, go well with nettles, but also other wild herbs such as dandelion. In any case, a handful of nettle leaves will give you a delicious health boost.

Mohnstriezel is a sweet pastry from Silesia. It is traditionally eaten at Christmas or Easter. We show you a delicious recipe with a vegan version.

Originally Mohnstriezel comes from the former Silesia. The area is now mostly in Poland. The Silesian Mohnstriezel are still served in these regions as a traditional pastry at Easter or Christmas. They consist of a sweet yeast dough filled with poppy seeds or almonds. There are also delicious sprinkles and a sweet glaze. You too can make the Silesian Mohnstriezel yourself. We will show you a recipe for the sweet pastry with a vegan version.

Pay attention to the organic quality of the ingredients. In this way you can support species-appropriate animal husbandry and avoid chemical-synthetic pesticides. Above all, we can recommend the organic seals from Demeter, Bioland and Naturland, as they comply with stricter criteria than the EU organic guidelines. Also, make sure to buy eggs without chick shredding.

Buy ingredients that are locally and seasonally sourced. This avoids long transport routes and reduces global CO2 emissions. You can also support local providers in your region.

Mohnstriezel: The recipe

Ingredients:

600 gwheat flour
42 g yeast
630 mlmilk
230 g butter
260 gsugar
1vanilla bean
0.5 untreated lemon
100 g marzipan raw mass
2 tablespoons starch
1 egg
180 g blue poppy seeds
100 gicing sugar

Directions:

Put 500 grams of flour in a large mixing bowl and make a small well in the middle.
Crumble the yeast and pour it into the well.
Heat 130 milliliters of milk until lukewarm. Pour the warm milk over the yeast and let it soak briefly.
Cut 150 grams of butter into flakes and add them to the mixing bowl.
Now add 100 grams of sugar and process the ingredients with the hand mixer to form an even dough. Cover and let the dough rise for about an hour.
In the meantime, you can make the sprinkles. Put the remaining flour and 80 grams of sugar in a bowl.
Halve the vanilla bean and carefully scrape out the pulp with a knife. Put this in the bowl as well.
Wash the lemon thoroughly and grate half of the lemon zest into the bowl.
Now add the remaining butter in flakes and mix the ingredients into a crumbly dough. You can put the finished crumbles in the fridge.
Then it’s time for the filling. To do this, cut the raw marzipan into small pieces. Pour the marzipan into a pot.
Pour half of the remaining milk into a measuring cup. Whisk together the cornstarch or cornstarch substitute and egg until smooth.
Heat the marzipan with the remaining milk and sugar. Stir constantly so it doesn’t burn. Let the ingredients boil up briefly.
Then take the marzipan off the stove and stir in the blue poppy seeds and the milk with starch. Reheat the filling and keep stirring until you get a smooth mass. Then let them cool down.
On a floured work surface, roll out the dough into an oval shape.
Spread the poppy seed filling evenly over the pastry base. Roll up the Striezel from the two longer sides towards the middle.
Place the finished Mohnstriezel on a baking sheet lined with baking paper. Spread the crumbles evenly over the pastry and press lightly.
Bake the Mohnstriezel at 180 degrees top and bottom heat for about 45 to 50 minutes. Then let it cool down completely.
Halve the lemon. Use the half that you already scraped off the skin. Squeeze out the juice from this lemon half and stir in the icing sugar (tip: make your own icing sugar). Brush the cooled Mohnstriezel with the glaze as you like.

Mohnstriezel: Tips for the preparation

The Silesian Mohnstriezel need a certain resting and baking time. However, the effort is worth it for the tasty treat. With a little practice and patience, even baking beginners can prepare the sweet Striezel. The following tips will help you with a sustainable, varied or even vegan preparation:

Blue poppy consists of the seeds of the opium poppy. It contains alkaloids that are used in the production of intoxicants and narcotics. The well-known morphine is also obtained from the opium poppy. The poppy seeds usually do not contain morphine, but they can become contaminated with it during harvest. The Federal Institute for Risk Assessment therefore recommends a maximum intake of 6.3 micrograms of morphine per day and kilogram. This corresponds to around 94.5 grams of poppy seeds per day for a person weighing 60 kilograms.
Vanilla originally comes from Mexico. Madagascar is now the largest cultivation area for vanilla beans. Unfortunately, pods from Germany or Europe are not available. Since the vanilla has to travel long distances, you should use it sparingly. Consume them consciously and preferably buy them with the Fairtrade seal.
You can refine the Mohnstriezel with various ingredients. For example, healthy raisins, almonds or other chopped nuts taste great in the filling. Jam or pieces of apple also give the filling a whole new taste. If you replace the wheat flour with wholemeal spelled flour, your pastries will be more nutritious and rich in fibre. However, the dough may need more liquid.
If you want your Striezel to be less sweet, you can reduce the sugar as you like.
You can also prepare your Mohnstriezel vegan. Replace the milk with plant-based milk and the butter with vegan margarine. You can use an egg substitute instead of eggs.