Tag

how

Browsing

Soak nuts before eating them? We have summarized for you what phytic acid is all about and in which cases soaking can make sense at all.

Soaking nuts before eating is said to increase their nutritional value and make them more digestible. Certain ingredients, including phytic acid, are said to be reduced as a result. Whether this actually makes sense for nuts is a matter of debate.

Soaking nuts: the theory behind it

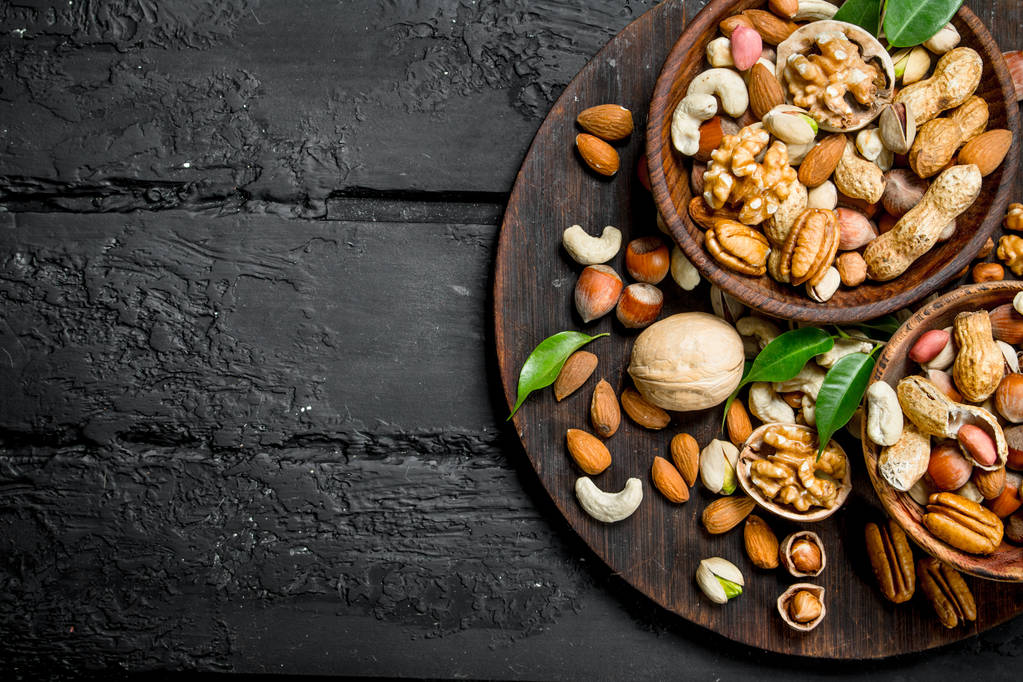
Nuts are healthy – they contain valuable fatty acids, high-quality protein, some B vitamins, vitamin E as well as minerals and trace elements. In addition, they score with secondary plant substances such as phenolic acids or phytosterols, which bring additional health benefits.

But nuts also contain phytic acid. Nuts store phosphate with the help of this self-made substance. However, some judge this storage substance critically, because it binds minerals such as iron, zinc and magnesium. This prevents them from being absorbed into the body. A lot of the nutrients the nut has in its luggage remains unused due to its phytic acid content.

The problem with phytic acid is also known from legumes and whole grains. However, according to the UGB associations for independent health advice, there are solutions to be able to savor their nutrients: Soaking for several hours successfully reduces the phytic acid content in beans, wheat and co. In addition, fermentation processes can minimize the content of phytin. Soaking is also said to help nuts to activate enzymes. However, researchers disagree on whether nuts should be soaked to make them more digestible and to facilitate nutrient absorption.

Nuts are different than grains or legumes

Research from New Zealand has shown that nuts don’t give up their phytin as easily as thought. Only a minimal portion came loose from the test specimens after soaking for several hours. However, the mineral content also decreased at the same time. The conclusion of the investigation: Soaking nuts does not result in any significant advantages in terms of the absorption of minerals and trace elements.

Nuts differ in their composition from legumes and grains. While beans, lentils and the like are packed with a lot of protein, complex carbohydrates come first in cereals. In nuts, on the other hand, the fat content predominates. It is possible that these differences also prevent the release of phytin.

Lower phytic acid in nuts: Here’s how

If you just want to try soaking nuts, you should adapt the soaking time to the nut in question:

8 hours: hazelnuts, peanuts, pecans
6 hours: walnuts, brazil nuts, cashew nuts
4 hours: Macadamia
And this is how it works: Sprinkle about 2 teaspoons of salt over three cups of nuts, pour enough water over them to cover the top nuts by a centimeter and place in a cool place.

After soaking, the water is poured away. You can now use the nuts directly. They are softer than before soaking and also without any bitter note. If you want to store them, they need to be dried so they don’t get moldy. You can do this at low temperatures in the oven (max. 50 degrees Celsius) in a way that protects the nutritional value or in a dehydrator for a few hours from around 30 degrees – the latter solution is also more environmentally friendly.

Lowering phytic acid – useful or not?

While phytic acid and its salts, the phytates, were long decried as mineral robbers, the view has now changed. According to UGB, the phosphorus-rich storage substance is now even attributed positive health properties:

It is now considered certain that phytic acid helps to positively influence blood glucose levels.
At the same time, research is being carried out into whether phytic acid can be used in diabetics to lower cholesterol levels.
There is also evidence that phytic acid has a positive effect on the immune system and could prevent various types of cancer.

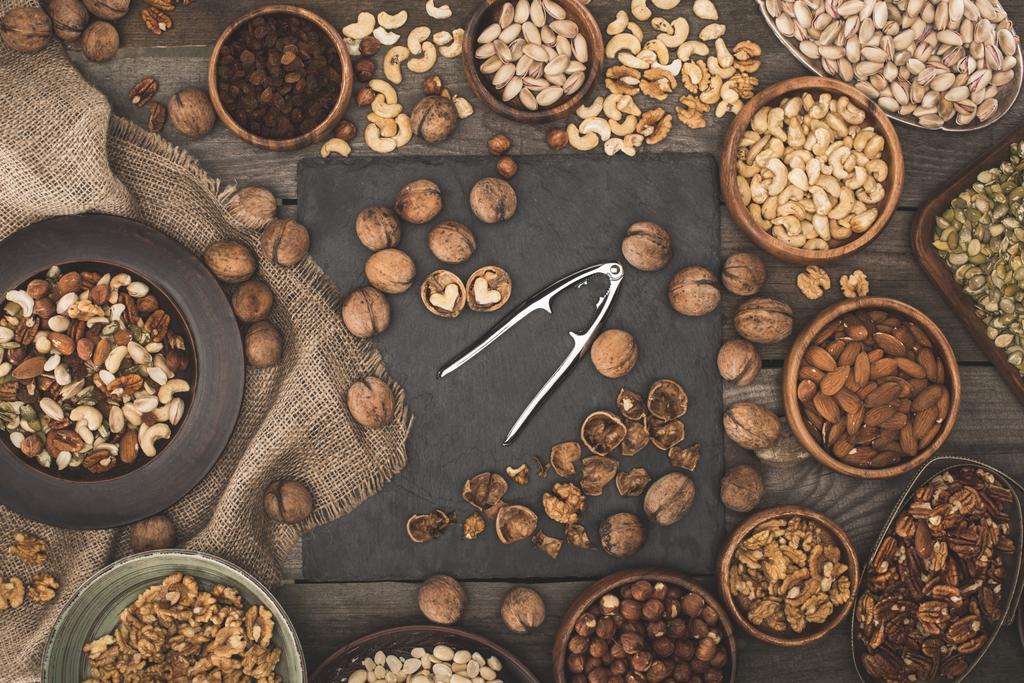
Conclusion: Soaking nuts only brings benefits in a few cases

The scientific evidence on soaking and soaking nuts and reducing phytic acid is sparse. Individual findings speak in favor of this, while others refute the effectiveness of this complex procedure.
Nutritionists see no disadvantage in consuming nuts in moderate amounts (a handful daily) in a mixed, varied diet without an additional soaking procedure – especially since the supply of phytic acid also promises health benefits.
At best, people who eat more foods rich in phytic acid – for example raw foodists or vegans – could benefit from “nut bathing”.

Lupine flour is a gluten- and grain-free type of flour that contains a lot of protein. Here you can find out more about the nutrients and possible uses.

Lupins belong to the legumes. The seeds of the lupine plant have been used as food for several thousand years. In the Mediterranean area, pickled lupine seeds are still a popular snack with beer in restaurants today.

Here, too, lupine is increasingly on the menu: on the one hand, meat substitutes often contain lupine protein isolate. On the other hand, lupine flour is also becoming increasingly popular because it contains a lot of vegetable protein and other healthy nutrients and is easy to use.

Lupine flour: How it is made

Lupine flour is made from lupine seeds. In order to remove the water from them, they are first pressed. The resulting flakes are then soaked in water again. In this way, the protein is released from the fiber structure of the seeds. The protein mass is then heated, causing the water to evaporate. The lupine flour remains.

Lupine flour can only be made from pure cultivated lupine varieties. The seeds of wild lupins and garden lupins contain a toxic type of bitter substances. However, edible lupins are cultivated in such a way that they hardly contain this bitter substance and are suitable for human consumption. In contrast to their wild relatives, these varieties are also called sweet lupins. To produce sweet lupine flour, producers often use the seeds of the white sweet lupine. Sometimes the yellow lupine or the blue sweet lupine are also used.

Lupine flour contains a lot of protein

According to the Association for Independent Health Advice (UGB), lupins contain between 36 and 48 percent protein. This makes them an important source of vegetable protein, especially in vegan diets. Lupine seed protein contains all eight essential amino acids, including lysine. In other plant-based protein sources such as cereals, lysine is rare and found in small amounts.

The UGB also points out that unlike other legumes, lupine seeds provide basic protein that is low in purines. Purines are a natural part of many foods. The body converts them into uric acid. If you have elevated uric acid levels and need to make sure you consume little purine-containing foods, you can eat lupine flour. Elevated uric acid levels occur, for example, in gout.

Nutrient-rich lupins

Lupine flour is also a good source of certain minerals and trace elements. According to the UGB, lupine seeds contain mainly potassium, calcium, magnesium and iron. The flour also contains a lot of fiber and thus fills you up quickly and for a long time.

Lupins contain about four to seven percent fat – less than soybeans. It is mostly present in the form of monounsaturated and polyunsaturated fatty acids. Both types are valuable for the body: the monounsaturated fatty acids help to build up the cell membrane. Polyunsaturated fatty acids (called essential fatty acids) support numerous bodily functions, such as hormone production and blood circulation.

Lupine flour and allergies / intolerances

Lupine flour is one of the types of flour that suit special dietary requirements – for example intolerances. It is starch-free and also contains no gluten. This means that people with gluten intolerance, gluten sensitivity or wheat allergy can also incorporate lupine flour into their diet.

However, lupins can also cause allergic reactions – the Federal Institute for Risk Assessment warns of this. According to the BfR report, cross-allergic reactions can occur, especially in people who already suffer from a peanut allergy. In principle, people who are sensitive to other legumes such as soy (which is the case, for example, with a histamine intolerance) should initially be careful with lupins and test their tolerance with small amounts.

How to use lupine flour

Although lupine flour is made from sweet lupine varieties, the sweet lupine flour does not have a sweet aroma, but has a noticeable taste of its own. It is therefore usually added to food in small quantities and only used proportionately in baked goods. Nevertheless, there are many uses for lupine flour. This includes:

Protein shakes: Because it is high in protein, you can use lupine flour in a high-protein mixed drink. To do this, mix the flour with a liquid (water, milk or plant-based milk substitutes) and fruit or vegetables. Such a protein shake is particularly suitable after exercise. We recommend a portion of 30 grams of lupine flour for about one liter of liquid.
Baked goods: In baked goods, you can replace up to 20 percent of the total amount of flour with lupine flour. More is not recommended, otherwise the taste or consistency may change. For example, combine spelled flour with lupine flour in vegan pancakes or wheat-free bread.
For binding: Instead of starch flour such as potato flour, you can also use lupine flour to thicken soups and sauces.
Egg Substitute: Mix 1 tablespoon of the flour with 12 ounces of water and let it soak to substitute for an egg in recipes.
Instead of soy: You can also use lupine flour to prepare recipes that use soy flour.
Enrichment: You can enrich your porridge with some lupine flour. This makes the porridge creamy and richer in protein.

The pegan diet combines the paleo diet and veganism. We explain to you what constitutes the diet and whether it is healthy.

Veganism and Paleo seem mutually exclusive at first glance:

While you do without all animal products on a vegan diet, meat, fish and eggs play an important role in the Paleo diet.
Whole grains and legumes are important sources of nutrients in a vegan diet. In Paleo, on the other hand, they are taboo.
However, the American doctor Mark Hyman combined the two diets into the pegan diet. This largely corresponds to the Paleo diet, only the proportion of animal products is greatly reduced – fish, meat and eggs are still allowed. The pegan diet is not vegan.

These foods are suitable for a pegan diet:

Fresh vegetables should be the most important part of your meals, combined with plenty of fruit.
Nuts, seeds and avocados as well as olives, olive oil and coconut oil serve as sources of fat.
According to the Paleo philosophy, fish, meat and eggs should come from species-appropriate and natural animal husbandry or wild-caught where possible and play a minor role in your meals.
On the other hand, you should use these foods sparingly in a pegan diet or avoid them altogether:

Grains containing gluten do not belong on your menu. Gluten-free grains and legumes are allowed in small amounts.
You should avoid dairy products and consume them very sparingly.
Refined sugar is taboo. Instead, you can use small amounts of coconut blossom sugar, syrups or concentrated juices to sweeten.
Most oils and fats are considered over-processed and therefore not pegan. Excluded are the fat sources mentioned above.
Processed foods should be avoided as much as possible.
Ultimately, you can decide for yourself how strictly you want to interpret the guidelines. A vegan pegan diet is also possible.

How healthy is the pegan diet?

The pegan diet is very similar to the paleo diet. Experts are discussing how healthy this is.

The DGE gives a positive assessment of the high proportion of vegetables and fruit and the absence of processed products. According to the DGE, studies also show that you can reduce fat mass, improve your insulin metabolism and possibly lower your cholesterol level with a paleo diet.
The DGE is critical of the fact that people who eat paleo eat a lot of animal products. The problem is less with the pegan diet. However, the DGE also criticizes that not eating dairy products, legumes and whole grains can promote nutrient deficiencies – this can also happen with the pegan diet. Finally, the scientific basis of the Paleo diet is also questionable. It is based on the assumption that our bodies are still adapted to the Stone Age diet and cannot handle agricultural products such as milk or grain. However, there is no evidence that our genetic makeup has not changed since the Paleolithic period. In addition, people at that time also had very different diets depending on the region.
If you follow the pegan diet strictly (vegan), you should have your blood values ​​checked regularly to avoid nutrient deficiencies (e.g. certain B vitamins, zinc, iodine, iron or calcium). Get some advice or consult your nutritionist before beginning a strict pegan diet.

Lemons are considered very healthy – not least because they contain a lot of vitamin C. We explain to you what else is in lemons and when they are ripe.

Lemons: The healthy all-rounders

Lemons, which belong to the rue family like grapefruit or orange, are a versatile fruit:
In summer we like to add them to our drinks to give them a fresh, sour taste.
In winter, lemons in the form of a hot lemon are used as a home remedy for colds and to strengthen the immune system.
In the kitchen, you can refine many sweet and savory dishes with lemon juice and zest.
In addition, lemons can neutralize odors in the refrigerator or dissolve limescale as a household remedy.
Tip: Look for an organic seal when buying lemons. This guarantees that the lemons are untreated and that you can use both the zest and the juice.

Are Lemons Healthy? The nutritional values

Lemons have a high water content, which is good for our water balance. The fruits are also low in calories and can therefore help with weight loss. Unlike other types of fruit such as grapes or bananas, they contain little sugar and are therefore healthy.

This is what the specific nutritional values ​​of 100 grams of lemon look like:

29 kilocalories of energy
89 grams of water
0.3 grams of fat
9.3 grams of carbohydrates
2.5 grams of sugar
1.1 grams of protein
2.8 grams of fiber
53 milligrams of vitamin C
26 mg calcium
138 grams of potassium
8 mg magnesium

Lemons: Healthy vitamin C suppliers

The lemon is considered healthy because of its high vitamin C content.
100 grams of lemon contains an average of 50 milligrams of vitamin C and thus covers about half of the daily vitamin C requirement.

A study found that you can prevent kidney stones by drinking lemon water for a long time. Vitamin C helps to stimulate kidney function.

Note: Other foods such as strawberries, blackcurrants, broccoli, Brussels sprouts, kale or cauliflower contain significantly more vitamin C than lemons.

Conclusion: Lemons are considered healthy mainly because of their high vitamin C content. However, there are no precise scientific studies on what effects, for example, an alkaline diet or a lemon juice cure can have on the body. What you should make sure, however, is that you cover your daily vitamin C requirements. Especially in winter or when the immune system is weak, it makes sense to use lemons regularly.

Tomatoes should not be missing in any kitchen, especially in summer. To keep them fresh and tasty for as long as possible, it is important to store tomatoes correctly. We tell you what you should pay attention to.

Tomatoes are sensitive fruits when it comes to storage: they don’t like refrigerators, but they don’t like too much heat either, and they prefer to spend their time away from other fruits and vegetables. Storing tomatoes correctly not only affects their shelf life, but also their taste, because tomatoes that are harvested unripe continue to ripen in storage. Preparation for storage also plays an important role.

Depending on the variety, tomatoes can be kept for up to 14 days under optimal conditions.

How to prepare tomatoes for storage

Even before the actual storage, you can pay attention to certain things that will ensure that your tomatoes stay fresh for a long time.

If you harvest your own tomatoes, you should first harvest them with the stalks and blossom ends and do not remove them even if they have dried up. The green provides the tomatoes with nutrients even after they have been picked.

The following applies to both self-harvested and purchased tomatoes: it is better not to wash them before storing them. When washed tomatoes go into storage, any moisture left behind can quickly lead to mold growth. Overripe tomatoes, on the other hand, burst easily when pressure is applied to them during washing. Therefore: It is better to wash them just before you eat the tomatoes.

Store tomatoes correctly: It depends on the temperature and location

If you want your tomatoes to last as long as possible, the right temperature plays an important role. So the most important thing first: Tomatoes don’t belong in the fridge. This place is the worst imaginable for storing tomatoes. They react sensitively to cold, which means they lose their taste and acquire a floury consistency. In addition, their vitamin content is reduced by the cold temperatures.

But even an environment that is too warm is not good for the harvested tomatoes when they are already ripe. It causes tomatoes to continue to ripen and can therefore rot quickly.

Tomatoes feel best when they

at room temperature
in an airy but dark or shady place
be stored. A simple shelf or the kitchen table is therefore a suitable place to store tomatoes.

Tip for unripe tomatoes: If you want to let unripe tomatoes ripen, you can put them in a slightly warmer place, for example on a sunlit windowsill. Because the higher temperatures accelerate the post-ripening process.

Store tomatoes correctly: Better without neighbors

Another important point is that it is best to store the fruit separately from other fruits and vegetables. Ripe tomatoes emit ethylene, a gaseous plant hormone that stimulates nearby fruit and vegetables to ripen faster—and possibly rot as a result.

Other fruit and vegetables also emit the ripening gas, which means that tomatoes in turn ripen faster – and possibly go bad.

Fruits and vegetables you should keep separate from include tomatoes

Apples, bananas, pears, apricots
Cucumbers, peppers, hot peppers.
Tip for unripe tomatoes: You can of course take advantage of the effects of ethylene if you want to ripen unripe tomatoes faster. Then just store them with these other fruits and vegetables. After a few days, the tomatoes will have ripened and should then be stored separately.

Store tomatoes correctly: the right container

Many tomatoes from the supermarket come sealed in plastic. However, the fruit does not get enough oxygen in it and therefore rots faster. It is therefore better to buy tomatoes without plastic packaging from the start, so you are also doing something good for the environment.

Tomatoes prefer it airy. Therefore, place them in an open container, such as a bowl, basket, storage box without a lid, or on a plate. Baskets work particularly well if they are made of woven straw or metal struts, as this allows for good ventilation.

To prevent the tomatoes from bruising, you can line the container with a clean kitchen towel beforehand.

Everyone loves pasta. But you can do a lot wrong with this supposedly simple dish. We explain what you should pay attention to if you want to indulge in pasta happiness in a sustainable and enjoyable way.

“Making pasta is also cooking!” Anyone who wholeheartedly agrees with this student motto is not alone: ​​pasta is at the top of many people’s list of favorite foods. But from the purchase to the preparation to the use of leftover pasta, you can do a lot wrong.

If you keep a few things in mind, pasta is not only a delicious dish, but also a healthy and sustainable one. You should avoid these common mistakes:

1. Always choose “normal” spaghetti

Durum wheat semolina pasta is delicious, but if you stick to it, you’re missing out.

2. Mismatching sauce and pasta

Not all noodles are the same – and combining them with the right sauce is a chapter in itself. Because only when both are coordinated can the taste really come into its own. As a rule of thumb, long, thin pasta like spaghetti or linguine are perfect for oil-based or creamy sauces.

Thicker or slightly chunky sauces and pesto combine well with short, thick, textured pastas like rigatoni, fusilli, or penne. The sauce sticks to the windings of the noodles, and ingredients such as pieces of vegetables can be mixed in perfectly – while long noodles quickly sink to the bottom of the plate.

3. Cooking pasta wrong

One would think that cooking pasta is not the fine art of gastronomy. Nevertheless, there is a lot to consider, because common mistakes reduce the enjoyment.

Many hobby cooks use a pan that is too small or too shallow, too little water and too little salt. If you add the salt at the beginning, you prevent the noodles from absorbing it optimally – so it’s better to only add salt when the water is boiling. Another mistake: putting oil in the water. Although it ensures that the pasta does not stick together, it also seals the surface of the pasta and the sauce can no longer be properly absorbed.

If you stir too little during cooking, the noodles will stick together – a wooden spoon is good for short varieties, and a fork is recommended for spaghetti & co. You should also be careful not to exceed the correct cooking time, otherwise it means “arrividerci al dente”.

4. Pour away the pasta water

Pasta water is far too valuable to be thrown down the drain – and has the potential to become a liquid all-purpose product for cooking and baking, for your plants and even for your skin and hair.

5. Quench pasta

Once the noodles are in the colander, the sources of error continue: You shouldn’t quench your perfectly cooked, al dente pasta with cold water – this will wash the starch off the surface and the sauce will no longer stick to the noodles as well.

6. Serve pasta wrong

Now it’s a matter of timing: If the sauce isn’t ready yet and the pasta waits too long in the sieve to be used, it will quickly become sticky. When serving, you should not spread the sauce separately on the pasta, but mix both in the pot beforehand – this is how the elements fuse perfectly.

7. Discard leftover pasta

Most hobby cooks portion pasta by eye. And it is not uncommon for the quantities to be misjudged when the stomach is growling. However, if you have leftover pasta after eating, don’t throw it straight into the trash – it’s a waste of food that really isn’t needed.

You can store a small amount in the fridge for a short time and turn it into a new meal with some freshly cooked pasta. You don’t want to eat any more pasta in the next few days? No problem either: you can freeze pasta without any problems.

8. Buy conventional pasta

The basic noodle consists only of durum wheat and water.

9. Buy pasta in plastic packaging

A mistake that most pasta comes with: it is wrapped in plastic. Anyone who buys pasta currently has few alternatives to avoid this plastic waste.

Growing and eating sunflower greens as microgreens? This healthy alternative to enjoying the small seeds of the flower brings you a lot of valuable nutrients and vital substances at any time of the year.

Growing sunflower greens yourself: you need that

You can easily grow fresh sunflower greens yourself. However, you should take a look at them every day and give them a little nurturing. The nice thing is that you can grow the vitamin-rich mini greens in a bright place in your apartment at any time of the year and you don’t need a balcony or garden.

For your sunflower microgreen cultivation you need the following material:

For pre-germination: A germination jar and a dark cloth to cover. Possibly a bowl and colander for rinsing.
For growing: A shallow dish, ideally with drainage holes, and a dense dish or tray to stand on. You can also upcycle used plastic packaging from salads, fruit or vegetables.
The best way to get seed soil is from a garden center. Look for an organic seal and that the soil does not contain peat. As a result, the CO2 balance is better and you protect the moors.
Sunflower seeds: You can use both peeled and unpeeled seeds for sunflower greens. In both cases you should have at least a handful ready and pay attention to organic quality.

Sow and harvest: This is how you get fresh greenery from the windowsill

Whether spring, summer, autumn or winter – you can grow your sunflower greens all year round just like other healthy offspring. For this you do the following:

Soak the sunflower seeds in plenty of water in a saucepan or similar. Cores with shells need about 12 hours, without shells about 6-8 hours soaking time.
After this pre-swelling, which acts like an initial spark for the seeds, you pour off the water and rinse the seeds two or three times with fresh water.
Now fill the seed in your germination jar and let it germinate at room temperature. Because sunflowers germinate in the dark, it is better to protect the seeds from light and cover them with a cloth if necessary. It takes about two to three days for the first sprouts to appear.
Hygiene is important during these first three days: Rinse the germinating seed thoroughly with water every day. At the same time, the kernels receive sufficient moisture for further germination. If you use peeled sunflower seeds, you can now easily detach and skim off the loosening fine seed membrane.
If the white sprouts on the kernels have broken through the shell or are visible on the peeled kernels, you can plant the sprouts to grow. Fill the bowls with about two centimeters of soil and distribute the seed so that there is still some space between the individual plants. Then sprinkle some more soil over it.
Now all you have to do is practice the right feeling for the water supply: Just pour a little at the beginning. There should be no waterlogging, otherwise the seed can become moldy. Always add a little water in the following days.
Place the plant bowls with your “sunflower field” in a room-warm place that offers sufficient sunlight. After about eight to 12 days, the plantlets develop juicy, green cotyledons and begin to develop the next set of leaves.
Now it’s time for the harvest: most of the black shell caps have fallen off. If not, brush them off with your hand. Then cut off the fresh sunflower greens above the ground. You don’t actually have to wash it before you eat it. Unless there is obviously dust or dirt on it.

Germinate sunflower seeds – why?

Sunflower seeds are small packets of fuel. When they germinate, they develop additional qualities. You can harvest the sprouts, which grow into green seedlings, like cress and then process them further.

The tender little plants taste sweet and nutty and are even a little crunchy when they are freshly harvested.
This makes the fresh greens the perfect partner for soups, sandwiches, pan-fried vegetables and anything else that calls for an upbeat topping.
If you want to use a lot of the sunflower bambinis, you can use them to prepare a salad or mix a smoothie. In any case, you should make sure that you eat the sunflower seedlings fresh.
You can process sunflower green better in larger portions than some other microgreens (e.g. from radishes, broccoli, mint), which have a more intense taste and spiciness.
The main advantage: the young plants have a very high nutrient density. In other words, measured in terms of total weight, they contain more vitamins, minerals and trace elements than ordinary vegetables. In addition, there is fresh chlorophyll and antioxidant substances (e.g. flavonoids).

Thickening cherries is worthwhile for refining various desserts. We present three ways to help you thicken without much effort.

Thickening cherries is an easy way to create a delicious topping for desserts and sweets. There are three options: You can thicken cherries with cornstarch (or a cornstarch substitute), vanilla pudding powder and cake glaze. For this you need the following ingredients:

650 g organic cherries
0.5l water
2 tbsp cornstarch/custard powder/cake glaze

It usually takes less than five minutes to thicken the cherries. We explain step by step how to do this:

Place the cherries in a saucepan with the water.
Let the kirsch come to a boil.
Stir in the starch/custard powder or frosting as soon as the mixture boils. Caution: Begin stirring immediately after adding your thickener of choice to the water. That way no lumps form. You should also not add cornstarch directly to the boiling water, but mix it with a little cold water first and then add it. This also prevents lumps from forming.
Important: cherries are in season from June to August. So this is the best time to thicken cherries.

Porcini mushrooms cannot be grown commercially, so they are not available fresh all year round. However, if you dry porcini mushrooms, you can preserve them. We’ll show you how.

Drying porcini mushrooms: the right preparation

Before you dry the porcini mushrooms, you should take the following precautions:

Dry the mushrooms as soon as possible after picking. This is the best way to preserve their aromatic taste.
Wet porcini mushrooms are not suitable for drying, as they easily mold. Therefore, only clean the mushrooms with a slightly damp cloth before drying. You can also scrape off dirt with a sharp knife.
Cut out any eaten spots on the porcini mushrooms. The best way to dry porcini mushrooms is to cut them into slices three to five millimeters thick.
Now you can decide, because there are two ways to dry porcini mushrooms without a professional dehydrator: in the air or in the oven.

Air dry porcini mushrooms

Air-drying porcini mushrooms is the easiest and most environmentally friendly option. However, you need the right weather for it. The air drying process only works when the weather is dry and as hot as possible. How to do it:

Thread the porcini slices on a thin thread or spread them out on a baking sheet. The mushroom pieces should not touch each other.
Dry the porcini either in full sun or in the shade. The former speeds up the drying process, but the latter is gentler and better preserves the aroma of the mushrooms.
If the mushroom slices are on a baking sheet, you should turn them several times a day. If you dry the mushrooms outside, you also have to bring them inside in the evening, otherwise they could absorb moisture from the cool night and morning air.
The duration of the drying process varies depending on the weather. The dried porcini mushrooms are ready as soon as they are dry on the inside but can still be bent. They also rustle like dry leaves.

Drying porcini mushrooms in the oven

Drying in the oven requires more energy. Proceed as follows for the drying process in the oven:

Spread the porcini slices on a baking sheet and place in the oven.
Then let the mushrooms dry at a maximum of 50 degrees and circulating air. Important: Hold the oven door ajar with the handle of a wooden spoon so that the moisture in the mushrooms can escape into the oven.
With this drying variant, too, the duration of the drying process varies depending on the performance of the oven.
Tip: If you have a stove with a stone plate, you can also let the porcini mushrooms dry on this plate while the fire burns in the stove. This way you don’t use any additional energy.

Properly store dried porcini mushrooms

You should store dried porcini mushrooms in airtight jars in a dark, dry place.

Stored in this way, dried porcini mushrooms will keep for several years. If they get a slight gray tinge after a while, this is harmless: they are leaked minerals.

The choice of cat food is huge. But how can you feed your cat well and sustainably? We give you tips on what you should consider.

Feeding the cat: nutritious nutrition for four-legged friends

Cats need a lot of nutrients that they can only get from food. The composition of a balanced cat menu consists of:

high-quality animal proteins,
fats,
phytonutrients,
vitamins,
minerals and
Water.
Carbohydrates are difficult for cats to digest. This is also one of the problems with conventional cat food: grain is often added to it, which can cause problems for cats. Of course, this isn’t the case for all cats, as many cats’ stomachs have become accustomed to even small amounts of grain over time

Ingredients for the cat food: what goes in it?

There are many foods that cats absolutely cannot tolerate: dairy products, onions, garlic, strong spices, grapes, raisins, caffeine, alcohol and chocolate. Under no circumstances should these products end up in the feeding bowl.

The composition of purchased cat food is particularly problematic. In principle, it doesn’t matter to your cat whether it’s “meat waste”, but it depends on the proportions. Too many hooves, claws or feathers can harm your cat just as much as too much grain, fat or meat components. Category 3 animal by-products may be further processed into animal feed, but are not suitable for human consumption. The quality of conventional cat food is therefore often inferior and enriched with additives, sugar and flavor enhancers. The cat can become really dependent on it. For this reason, your cat is better cared for with organic food. Here the quality is assured and the ingredients are sometimes even specified in exact quantities.

In addition to incompatible ingredients, there can also be residues of antibiotics and mercury (especially in fish) in cat food – even more reasons to use organic quality or even to prepare your own cat food.

Avoid cat food waste

If you buy cat food regularly, there is also a lot of packaging waste.

With dry food, you can buy as large a quantity as possible in one sack. If this is too much for your cat alone, you can simply share it with one or another cat owner in your circle of acquaintances.

For large cans of wet food, you can try reusing a matching lid from another product and using it to seal the can when you put it in the fridge. There are also bowls with lids, so that you can divide the large can into them immediately after opening and pre-portion everything.