Tag

instead

Browsing

Quickly post the star menu on the social network, answer an e-mail with important appointments or send a short message to friends: the smartphone is everywhere – even in the restaurant. What is perfectly fine for some is considered impolite by others. There are clear differences of opinion on restaurant behavior and the use of mobile phones in restaurants, especially among women and men.

Mobile phone use in the restaurant

The restaurant behavior of women and men in Germany could not be more different in terms of smartphone use. More than 26 percent of the men surveyed find it very impolite when the mobile phone is used at the table. They even go so far as to say they would be fine with being kicked out of the place. Only 14 percent of women would agree to this drastic approach in return. It is also perfectly acceptable for 18 percent of women to post-dinner dishes on their social networks, according to a recent Groupon survey.

Pasta, sushi, or schnitzel

Despite the discussions about the use of smartphones in restaurants, users are still enjoying themselves. According to the Groupon survey, 36 percent of respondents treat themselves to a restaurant visit several times a month. The Italian is at the top of the list. When it came to the dishes ordered in general, women preferred to order pasta (18 percent) and sushi (14 percent), while male connoisseurs preferred to order fish (15 percent) or schnitzel (11 percent).

Monkey brains, cockroaches, or caterpillars

Both men and women are cautious when ordering exotic dishes such as monkey brains, cockroaches, caterpillars, sheep’s heads, or camel testicles. What is offered as a specialty in other countries is only very hesitantly tried by the guests in this country. For example, 43 percent of respondents opted for a food sample of snails, 24 percent for snake meat, and 17 percent for grasshoppers.

Dining at Groupon

According to the culinary preferences of its customers, Groupon offers delicious and cheap restaurant deals. Here the gourmets among the customers can expect delicious dishes and culinary delights from a wide variety of international cuisines. With or without a cell phone, Italian or Japanese, there is something for everyone here. Only one thing is certain: chicken feet and monkey brains are not on offer.

Especially in summer at a garden party, nobody wants to play the bartender and constantly make supplies for the coveted caipirinha drinks. A good alternative is the Caipirinha bowl, which is best served in a large container (pot, decorative bowl).

Ingredients for approx. 2.5 liter caipirinha bowl

– 10 tablespoons of brown cane sugar
– 5 limes
– 5 shot glasses (2cl) Pitu (white rum)
– 5 shot glasses (2cl) of lime syrup
– 0.7 liters of Sparkling water)
– 0.7 liters lemonade
– 0.7 liters of White wine, sparkling wine, or Prosecco (depending on taste)
– Crash ice or crushed ice cubes

Preparation

Do not wash the limes, just wipe them dry, otherwise, the essential oils in the peel will be diluted. Remove the two ends of the limes and cut them into eighths. Place the eighth piece in the punch bowl and cover with the brown cane sugar. Then use a wooden tamper or pestle to mash the eighths of the lime vigorously, crushing the zest as well. The lime juice combines with the cane sugar and thus develops the typical caipirinha oils. Then mix in the pitu rum and lime syrup.

This mixture can be left in the fridge for a few hours and the rest of the ingredients added just before the guests arrive. But you can also prepare and serve the punch immediately by immediately adding the remaining ingredients. When the wine, sparkling wine or prosecco, and mineral water have been added, fill up the remaining container with crushed ice. A decoration with a few cut lime slices and a few mints leaves on the edge of the container looks pretty. After adding the crushed ice, the punch is immediately cool and ready to serve.

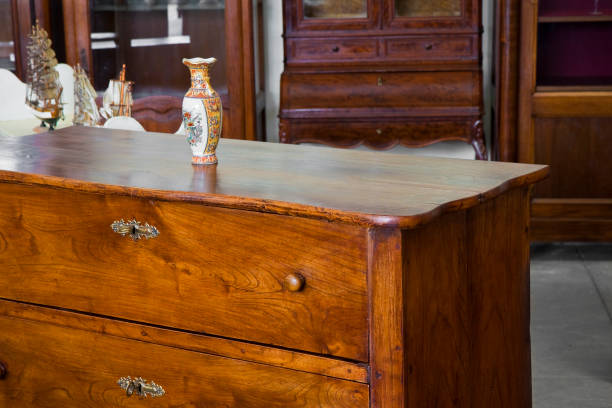
Many will know this wish that it would be time for new furniture again. Finally, the finishes of the furniture may have suffered over time. Or the design is no longer contemporary. But instead of throwing away the old furniture, you can spice up and refurbish the old furniture with simple tricks.

Beautify old furniture with simple tricks

But wooden furniture that is getting on in years is more flexible than you might think. Therefore, a little bit of manual work is often worthwhile to breathe new life into the beloved pieces. Consequently, do not throw away the supposedly old furniture. Instead, you should spice up the old furniture and refresh it with paint. We give you tips on how you can give such furniture a whole new character. This way you can make your household more sustainable and do something good for the environment.

1) Repair damaged and imperfections

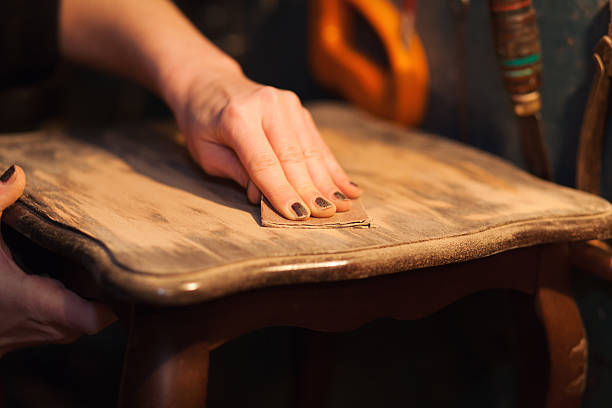
Retouching small dents and scratches in wooden furniture is very easy. But the carpenter does not have to come immediately for larger damages! If a border on the shelf has snapped or the clothes rail has given way under heavy load, get the following furniture refurbishment items to repair: Tools (screwdriver, hammer, chisel, or some sandpaper) and the necessary replacement parts (cut wood, screws, nails, and dowels). Also bring some wood paste from the tube and a spatula, more on that later! Loose connections in aging wooden furniture are also common. Then you should react quickly and either tighten them, create a new hold with a dowel with a thread, or better yet, start a new drill hole. You can also easily fill the old hole with some wood paste.

2) Spice up old furniture with new paint

When everything is secure, you can breathe new life into the piece of furniture with a little paint. Painting it yourself is really not difficult if you do a little preparatory work first. And with paint, you can also touch up and conceal small damage to the paintwork. There is an immense range when it comes to choosing paint. For the sake of simplicity, acrylic paint is recommended because it is water-based and does not have a strong smell.

3) Freshen up furniture with adhesive foil

Unfortunately, the budget sometimes doesn’t even come close to realizing these dreams. The simple way out here is to give the furniture a new look with a self-adhesive adhesive film and thus give the apartment more flair. As a result, we have created a step-by-step guide for you. This guarantees that the old furniture will be refurbished with adhesive film. You can also make great wall tattoos yourself with adhesive foil.

  1. Cutting the foil. To do this, the corresponding furniture, which will usually be cupboards, must be measured. It is advisable to measure the surface first. About five to ten centimeters should be added to this measured area. Then the DC Fix is ​​sufficient to stick it into the cabinet except for a few centimeters.
  2. When sticking the furniture surfaces with adhesive film, you should make sure that you start at the top edge. Then the DC Fix should be slowly applied to the surfaces. Depending on the size of the area, a sponge or the lower part of a broom can be used. In this way, the formation of bubbles can be largely avoided. Protruding surfaces should be carefully smoothed out with a razor blade so that the edges of the cabinets look straight. This results in the cleanest cut surfaces at the edges.
  3. Small bubbles that may have formed during gluing can be removed with a needle. This can be used to pierce the blisters. Then the air is carefully rubbed out and the DC Fix is ​​pressed back onto the furniture. The hole will not be noticed. For somewhat larger areas that may arise, a razor blade should be used if necessary. Also, read useful tips for removing stickers.

Care tips for old furniture

To ensure that your freshly painted piece of furniture retains its like-new character for a long time, you should ensure that it is handled correctly. Guests should always be warned to use coasters for damp or hot vessels, otherwise, the wood will swell and take on unsightly discoloration. You should only clean the varnished wood with a little washing-up liquid or soapy water, never with chemical household cleaners. Because they attack the paint. Then wipe over with a damp cloth and finally dry thoroughly. This is how you easily extend the life of your furniture! Also, read tips on caring for antiques and old furniture and how to reattach a loose doorknob.

Many will know this wish that it would be time for new furniture again. Finally, the finishes of the furniture may have suffered over time. Or the design is no longer contemporary. But instead of throwing away the old furniture, you can spice up and refurbish the old furniture with simple tricks.

Beautify old furniture with simple tricks

But wooden furniture that is getting on in years is more flexible than you might think. Therefore, a little bit of manual work is often worthwhile to breathe new life into the beloved pieces. Consequently, do not throw away the supposedly old furniture. Instead, you should spice up the old furniture and refresh it with paint. We give you tips on how you can give such furniture a whole new character. This way you can make your household more sustainable and do something good for the environment.

1) Repair damaged and imperfections

Retouching small dents and scratches in wooden furniture is very easy. But the carpenter does not have to come immediately for larger damages! If a border on the shelf has snapped or the clothes rail has given way under heavy load, get the following furniture refurbishment items to repair: Tools (screwdriver, hammer, chisel, or some sandpaper) and the necessary replacement parts (cut wood, screws, nails, and dowels).

Also bring some wood paste from the tube and a spatula, more on that later! Loose connections in aging wooden furniture are also common. Then you should react quickly and either tighten them, create a new hold with a dowel with a thread, or better yet, start a new drill hole. You can also easily fill the old hole with some wood paste.

2) Spice up old furniture with new paint

When everything is secure, you can breathe new life into the piece of furniture with a little paint. Painting it yourself is really not difficult if you do a little preparatory work first. And with paint, you can also touch up and conceal small damage to the paintwork. There is an immense range when it comes to choosing paint. For the sake of simplicity, acrylic paint is recommended because it is water-based and does not have a strong smell.

Brief instructions on how to paint old furniture

Acrylic paint can be applied with a brush. Be sure to dab the wood with soapy water beforehand, then wipe it off with clear water. This is how applied paint lasts afterward. Now let it dry completely! Then apply the paint evenly but quickly and let it dry. It may need to be recoated several times to get the texture and color right.

3) Freshen up furniture with adhesive foil

Unfortunately, the budget sometimes doesn’t even come close to realizing these dreams. The simple way out here is to give the furniture a new look with a self-adhesive adhesive film and thus give the apartment more flair. As a result, we have created a step-by-step guide for you. This guarantees that the old furniture will be refurbished with adhesive film. You can also make great wall tattoos yourself with adhesive foil.

  1. Cutting the foil. To do this, the corresponding furniture, which will usually be cupboards, must be measured. It is advisable to measure the surface first. About five to ten centimeters should be added to this measured area. Then the DC Fix is ​​sufficient to stick it into the cabinet except for a few centimeters.
  2. When sticking the furniture surfaces with adhesive film, you should make sure that you start at the top edge. Then the DC Fix should be slowly applied to the surfaces. Depending on the size of the area, a sponge or the lower part of a broom can be used. In this way, the formation of bubbles can be largely avoided. Protruding surfaces should be carefully smoothed out with a razor blade so that the edges of the cabinets look straight. This results in the cleanest cut surfaces at the edges.
  3. Small bubbles that may have formed during gluing can be removed with a needle. This can be used to pierce the blisters. Then the air is carefully rubbed out and the DC Fix is ​​pressed back onto the furniture. The hole will not be noticed. For somewhat larger areas that may arise, a razor blade should be used if necessary. Also, read useful tips for removing stickers.

Buy adhesive films on the Internet

This idea can be applied to really all furniture and rooms. Whether kitchen, bathroom, living room, or any other room, each of these rooms has a different atmosphere. There are no limits to the variety of ideas when redesigning old furniture. In a very simple way, the furniture can be changed in appearance by means of adhesive film. You can beautify your apartment with little money and all rooms regularly get a more modern look despite a tight budget.

Care tips for old furniture

To ensure that your freshly painted piece of furniture retains its like-new character for a long time, you should ensure that it is handled correctly. Guests should always be warned to use coasters for damp or hot vessels, otherwise, the wood will swell and become unsightly discolored. You should only clean the varnished wood with a little washing-up liquid or soapy water, never with chemical household cleaners. Because they attack the paint. Then wipe over with a damp cloth and finally dry thoroughly. This is how you easily extend the life of your furniture! Also, read tips on caring for antiques and old furniture and how to reattach a loose doorknob.

Soy as a food is diverse, and its impact on health is controversial. Cultivating soybeans for feed or fuel is definitely bad.

Soybeans are black-brown to light yellow legumes. As a cultivated plant, the Glycine max bean is derived from a wild form that was probably first cultivated in China. There they have been known for thousands of years as a frugal crop. Soy products have traditionally been widespread in China and Japan for a long time. But they are also becoming increasingly popular with us.

What makes soy and soybeans popular

As a crop, soybeans are particularly interesting because of their high protein content, up to 40 percent depending on the variety! In addition, soy has an oil content that is unusual for beans; depending on the region and climate up to 19 percent.

With over 80 percent unsaturated fatty acids, soybean oil is considered very healthy. In addition, there is a relatively large amount of omega-3 fatty acids, plenty of vitamin E and natural lecithin.

Not only vegetarians and vegans appreciate the wide range of soy food as a vegetable protein source. Soy milk also serves as a substitute for people who cannot tolerate cow’s milk. Soy is often touted as a preventative for allergy sufferers and as an infant formula. Certain secondary plant substances from the soybean, including the phytohormone isoflavone, are even said to have healing effects.

Soy also has a downside

Soy can be a regular part of a healthy diet, as proven not least by the Asian food culture. However, scientists warn against promises of healing in connection with soy. For example, allergies to soy protein are relatively common – although not as common as to cow’s milk protein. So far there is no scientifically reliable evidence for the sometimes claimed effectiveness of soy isoflavones against menopausal symptoms and as protection against cancer.

The Federal Office for Risk Assessment (BfR) advises against using soy as a milk substitute for infants – partly because the hormone-like effect of isoflavones is unclear.

There are different types of margarine from full-fat to half-fat margarine. Not all varieties are suitable for cooking or baking. Therefore we have an overview of varieties and uses for you

What types of margarine are there?

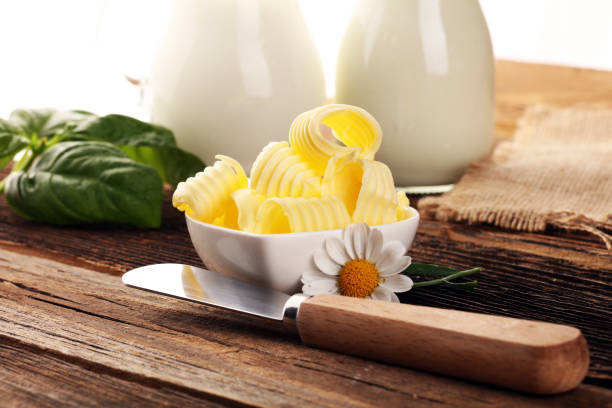
Margarine is often used as a good alternative to butter. But margarine is not just margarine, because there are different types. These usually differ in their fat content and the spectrum ranges from full fat – to half-fat margarine and more. Accordingly, different types of margarine are suitable for different purposes.

Use half-fat margarine as spread fat

Half-fat margarine has about half the fat. For this purpose, the margarine is produced chemically modified and water is added for the missing fat. Therefore, low-fat margarine is only suitable as a spread, e.g. for people who want to lose weight in a healthy way, but do not want to do without their beloved butter. However, half-fat margarine is not an alternative to baking or cooking.

Use margarine for cooking and baking

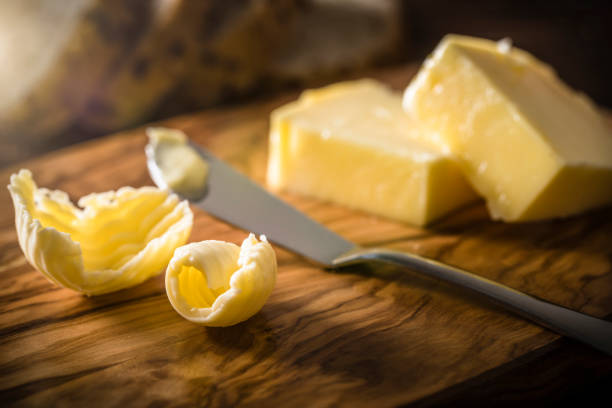
If you want to cook or bake, be sure to use margarine instead of low-fat margarine. Because half-fat margarine does not dissolve like butter when heated, but flakes and separates into its chemical components. In addition, the high water content ensures that it splashes when frying. Consequently, those with half the fat content are completely unsuitable, especially for greasing when baking or as a substitute for butter in the frying pan. Consequently, use butter or full-fat margarine when baking cakes or cookies. The same applies to cooking.

Fennel green is healthy and brings a lot of aroma. Instead of throwing it away, you can use it to flavor many dishes. You can find out how to use it and how to make a delicious fennel green pesto here.

Almost all parts of fennel are edible: apart from the hard stalk, you can use everything it has to offer – even the green fennel. It’s too good to end up in the trash. Because fennel green not only tastes very spicy, but is also healthy.

In Germany, the fennel season runs from June to November. Outside this period, the vegetables come from Mediterranean countries such as Spain and Italy.

Fennel green is so healthy

Fennel is considered an extremely healthy vegetable. It contains many minerals such as calcium, potassium, magnesium and iron, which, among other things, ensure strong nails, healthy hair and strong bones. In addition, it provides vitamins A, C, and B, as well as essential oils.

A study found that there are even more minerals in the green fennel than in the tuber. In addition, fennel green contains omega-3 fatty acids, including α-linolenic acid, which according to the study should have anti-cancer properties.

Various essential oils have also been detected in fennel greens, including anethole, which is considered to be expectorant and slightly antibacterial.

100 grams of fennel green have the following nutritional values:

Energy: 84 kcal
Carbohydrates: 18.44 g
Protein: 1.16g
Fat: 0.6g

Here’s how you can use fennel greens

Especially in summer you can get particularly fresh fennel from the region. Not only the tuber is then suitable for many delicious dishes, you can also process the fennel green. We present you a recipe for fennel green pesto. In addition to the pesto, you can also try the following ideas with fennel greens:

Use it like parsley and season fish and meat dishes with chopped fennel greens. But the spicy aroma also goes well with salads and vegetables such as kohlrabi and cauliflower.
Top various dishes with fennel greens, for example bread topped with cucumber.
Try a classic Italian dish with fennel greens: pasta with fennel.
Tip: Find out the right dosage of fennel herb. The intense taste can quickly ensure that other flavors are masked.

Save the fennel greens

Like any herb, you should also use fennel greens as soon as possible, because it tastes the most intense fresh. If the herb looks limp and wilted, it is no longer fresh. However, if you have more fennel greens than you can use right away, you can store them for a few days. This is the best way to do it:

Pluck the fennel greens from the stalks.
Fill an oblong container with cold water and place the fennel greens in it.
Seal the container and put it in the fridge – but not in the back where it’s coldest. There it can get too cold for the fennel greens.
Alternatively, you can freeze fennel greens:

Pick off the green fennel, chop it finely and fill it into ice cube trays.
Fill them up with oil and freeze them.
You can thaw the ice cubes for salad dressings, for example.

Recipe for fennel green pesto

Ingredients:

150 g green fennel
3 EL pine nuts, toasted
20 g Pecorino (optional yeast flakes as a vegan alternative)
100 mlorganic olive oil
salt to taste

Directions:

Wash the fennel greens and dry them well with a clean kitchen towel. Pick the fennel greens from the stalks and chop them finely.
Finely chop the pine nuts and grate the pecorino cheese. You can also use yeast flakes as a vegan alternative to pecorino.
Mix together the fennel greens, cheese or nutritional yeast, pine nuts, and oil. Season the pesto with salt.
Pour the pesto into a sealable jar and keep it in the fridge. Tip: If the aniseed flavor of the fennel herb in the pesto is too intense for you, you can replace half with parsley or carrot greens.

Candied orange peel is a fruity candy that’s easy to make at home. In this way, the peel of the citrus fruits can still be used in a tasty way instead of ending up in the trash.

Candiing fruit is an easy way to make it last longer. The fruits are cut into cubes or strips and then sugared. Candied ginger, candied apples or candied orange slices are popular sweets.

Instead of using whole orange slices, it is also possible to candy just the peel of the citrus fruit. Candied orange peels have the same fruity taste and at the same time the advantage of reducing unnecessary food waste. This way you can still use the peel of the oranges, which is otherwise considered a waste product.

Important: Be sure to use organic oranges for candied orange peels. They are untreated because organic farming does not use synthetic chemical pesticides. So you can be sure that the orange peel does not contain any unwanted pollutants.

Make candied orange peel yourself: this is how it works

Ingredients:

Peel of 4 organic oranges
400 gsugar
200 g water

Directions:

Thoroughly clean the orange peels. Remove any remaining pulp and use a knife to cut out any damaged areas. Wash the shells under plenty of running water and drain well in a colander.
Cut the orange peel into 5mm wide strips.
Put 200 grams of sugar in a saucepan with the water and bring the mixture to a boil. Let the brew simmer until the sugar has completely dissolved. Reduce the temperature until the water is just slightly simmering.
Add the peel strips to the sugar stock and let them simmer for about ten minutes.
Take the pot off the stove and leave the orange peels in the sugar sauce overnight. Use a small saucepan lid or plate to weigh them down so they are completely covered with the liquid.
The following day, stir another 100 grams of sugar into the brew and let the shells simmer for another ten minutes. After that they have to go overnight again.
On the third day, stir in the last 100 grams of sugar. Let the orange peels simmer in the broth for a third time for ten minutes and then steep overnight.
On the fourth day you can strain the candied orange peel. Use a colander and catch the orange syrup. You can still use it in other ways.
Spread the candied shells out on parchment paper (or a parchment substitute) to dry. Make sure they are spaced enough apart and don’t stick to each other.
The candied orange peels are ready when they are no longer sticky. Until then, they usually have to dry for two to three days. You can then fill them into an airtight screw-top jar for storage.

Candied Orange Peels: Tips and Variations

Stored sealed, the candied orange peels can be kept for several months. You can eat them pure or use them to decorate desserts and drinks, for example.

You can vary the simple basic recipe in different ways:

Instead of orange peel, you can also candy the peel of other citrus fruits and thus save them from the garbage. Try the recipe with grapefruit, lemon or tangerine peels, for example, or mix different varieties.
If necessary, you can replace the sugar in the recipe with a sugar alternative such as birch sugar (xylitol). Then make sure to adjust the amount if necessary. You can exchange xylitol for sugar in a ratio of 1:1 – but this is not the case with all common sugar alternatives.
To refine them, roll the candied orange peels in sugar, for example, while they are still sticky. Or you can cover them with homemade chocolate icing after drying. When buying, look out for Fairtrade chocolate.