Tag

let

Browsing

Simply grow spring onions, garlic, and herbs yourself? What sounds like a beautiful dream can actually be implemented, because some herbs or types of fruit and vegetables can continue to thrive indefinitely – even on your windowsill.

Spring onions, leeks, lemongrass, and fennel (cabbage)

These foods are particularly easy to follow. To do this, place the bottom two to three centimeters of the respective vegetable with the root residue in a glass of water and change it every few days. After about seven days, the green part of the plant grows back at the top, creating a new plant. If you want, you can also plant them in a pot with soil. With fennel, however, only the herb thrives, not the tuber. When buying, you should make sure that onions, leeks, lemongrass, or fennel are fresh.

Garlic

As soon as garlic is left a little longer, small green shoots will sprout from the bulb. If this happens, you can put the toes in a bowl with some water. The shoots, which are very similar to the green of spring onions, thrive quickly. When the shoots are about 10 centimeters long, they can be easily harvested with kitchen scissors.

Alternatively, the clove of garlic can be planted in the ground with the shoot upward. After just a few weeks and regular watering, a new tuber will grow back.

Ginger

Perhaps you have already observed that new shoots grow from ginger bulbs. With a little skill, you can grow a new plant from a piece of ginger that has been expelled.

To do this, fill a pot three-quarters full with soil, place the ginger root on top and cover it loosely with soil. For ginger to thrive, it needs a warm and humid climate. You simply build a small “greenhouse” by covering the pot with foil or a plastic lid. Poke a few holes in the foil to allow air to get in.

After a few weeks, tender shoots break out of the ground. Now you can remove the cover, but watering enough moisture is still important. In a warm and sheltered place, ginger grows into a slender plant with reed-like leaves.

In autumn, when the ginger plant sheds its leaves, it is harvest time: you can simply dig up the ginger tubers that have grown back. The plant thrives ideally if you put the tuber in the ground in spring.

Romaine lettuce, cabbage, and bok choy

An undamaged stalk is enough for romaine lettuce and co. to grow back.

To do this, place the stalk without leaves in a glass of water and place the whole thing in a sunny spot, for example on the windowsill. The water should be changed every few days; In addition, it is advisable to wet the stalk with water from a spray bottle from time to time.
After about two weeks, the first leaves will grow back, and after three to four weeks you will have a complete head of lettuce, cabbage, or pak choi. The latter two can also be planted in the ground and grown there.

Herbs like mint, rosemary, basil, coriander

It is very easy to grow herbs. For this, you need a stalk of the desired herb, which is cut off just below a leaf. To avoid crushing the delicate stalk, use a sharp knife instead of scissors.

Now remove the lower leaves and put the stalk in a glass with water. Here, too, the water should be changed regularly. Roots will form quickly; as soon as these are about five centimeters long, the plantlet can be potted. Plenty of suns and sufficient water accelerate growth. Use stems from good quality plants for your planting experiment, as unfortunately supermarket stock is often grown in such a way that the plant will die when the leaves are removed.

Potatoes

From mid-April, the tuber can be grown wonderfully by burying a potato that has already germinated in a pot or bucket with soil. The shoots must also be completely covered with soil. During the summer, the potato plant blooms very nicely. When the flowering season is over and the potato tops are turning brown, you can dig up your home-grown potatoes.

Tip: If none of your potatoes have germinated yet, you can alternatively quarter them and place them in water for a few days. That’s how they cast out.

Pineapple

You need a little patience when breeding pineapples because the process takes about two years. Be sure to buy a ripe but not overripe fruit that has golden brown skin and unblemished leaves.

Twist off the stalk with the leaves, removing the lower leaves until the stalk is exposed about an inch. Place the stalk in a glass half-filled with water and place it in a warm place.

Once roots have formed, you can pot the seedling. Regular watering is important so that the soil always stays moist. After about two months, a real small pineapple plant has already grown, which you should report after a year. Your patience will be rewarded after about 20 months: the pineapple flowers for the first time! With a bit of luck, you may soon be able to harvest your first pineapple.

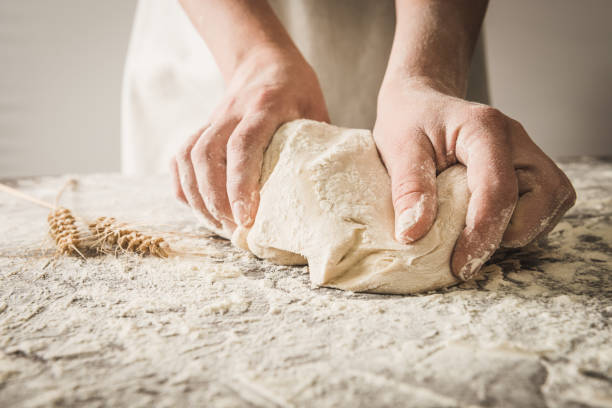
Yeast dough is a classic that many people love. However, you absolutely have to let the yeast dough rise properly! For a fluffy yeast dough, both the pre-dough and the main dough or the topped sheet cake must rise in a warm environment. You can also use your oven for this.

The dough should be nice and fluffy but is often compact and firm. One reason for this is that the yeast dough cannot rest and “grow” long enough. In addition, the wrong temperature is often decisive. We’ll show you the right tips to make your dough rise safely!

Properly “feeding” the yeast for the yeast dough

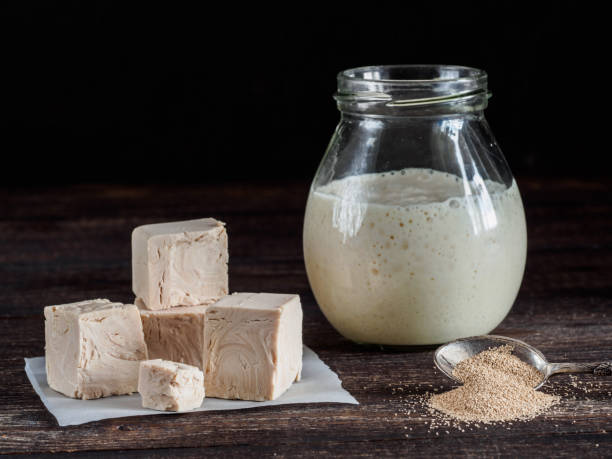
With fresh baking yeast, you must first make a pre-dough. This step is usually omitted with dry yeast. Whether you prefer to use fresh or dry yeast for your dough is up to you. A cube of fresh yeast (42g) corresponds to 2 sachets of dry yeast (each 7g). For the pre-dough, put the amount of flour required according to the recipe in a bowl and make a well in the middle.

In this well, mix the crumbled fresh yeast with a few tablespoons of water or milk and some flour from the edge of the well. The liquid used should always be lukewarm (30-35° Celsius), as the yeast can “work” better that way. Yeast consists of unicellular fungi that feed on sugars. Therefore, “feed” your yeast with a pinch of sugar to make the pre-dough succeed. Salt as an ingredient in a recipe should not be added to the pre-dough as it inhibits the action of the yeast.

The pre-dough forms bubbles in the warm oven

Yeast develops its fermenting effect best at temperatures of 32°C. In summer it is a good idea to leave the pre-dough covered in the sun. In cooler seasons you can simply use the oven as a helper by letting the pre-dough rest in the oven at 32°, covered with a damp cloth. The oven light that is on should produce approximately this temperature.

In addition, you can set this low temperature in a steam oven. Otherwise, any place with a constant temperature of 32°C without drafts would do, such as a sunny window sill or under the covers. If the yeast has bubbled after about 20 minutes and the volume of the pre-dough has increased significantly, you can take the bowl out of the oven again.

Knead the ingredients and let the yeast dough rise

Finally add the remaining ingredients such as fat, eggs, the remaining liquid, and salt to the dough and knead everything for at least 10 minutes. If possible, the ingredients should be taken out of the fridge one hour before baking so that they are hand-warm when preparing the dough and the yeast can do its job better. Now knead the dough well with your hands or the food processor for 10 minutes.

If it’s sticky, add a little more flour and knead again. Depending on the recipe, the yeast dough must now usually be covered for at least one hour in the 32 °C ovens or in another 32 °C warm and draught-free place. When the dough has doubled in volume, you can remove the bowl from the oven. Otherwise, you have to be patient and give the dough enough time.

Let the filled yeast dough rise a third time

After kneading again, shape, braid, and cover the dough until you hold the desired end product in your hands. For a fluffy yeast dough, it is once again important to cover the dough in the finished form with a damp cloth and let it rise with the topping for about 15 minutes, for example on a warm windowsill.

Finally, heat the oven to the desired baking temperature to bake the yeast dough, which will hopefully have risen nicely. Before baking, brush your yeast pastry with egg yolk, but milk is also suitable so that it does not dry out during baking. Finish baking your pastry and enjoy your fluffy yeast cake with a good breakfast or brunch with friends.

You can let the yeast dough rise and store in the fridge overnight. This reduces the effort for fresh rolls or yeast buns in the morning. Here we show you what you should consider.

Many recipes with yeast dough state: the ingredients should not come cold out of the refrigerator, the yeast should be dissolved in lukewarm liquid and the dough must rise in a warm place. These clues are there because yeast is a leavening agent and consists of yeast fungi. These yeasts die off when the yeast is processed too hot and do not become active when it is too cold.

But the last aspect is not entirely correct. Yeast fungi also work in the cold, but much more slowly. Some recipes take advantage of this and let yeast dough rise in the fridge rather than in the heat. This has many advantages that you can take advantage of when baking with yeast.

Leaving yeast dough in the fridge has advantages

If you let the yeast dough rise in the fridge, you benefit from a number of advantages:

You can prepare the yeast dough the night before, let it rise in the fridge overnight and use the risen dough straight away in the morning. So you can look forward to fresh, homemade cinnamon rolls, rolls and more for breakfast. Doing it yourself is particularly worthwhile for pastries, as you can do without many of the additives. You can find out more about this in the article: This is why many people can no longer tolerate bread.
If you have made more yeast dough than you can handle at once, you can store the rest in the fridge for up to a day and don’t have to throw it away. Alternatively, you can also freeze it. It lasts like this for several months.
In addition, you only need half the yeast for refrigerator yeast dough.
The refrigerator dough is prepared with cold liquid. This avoids the risk of your yeast dying from water that is too hot.
Yeast dough from the refrigerator is often looser later. Because he has enough time to rise. Pastries made from frozen and thawed yeast dough are in no way inferior to fresh yeast pastries. The taste does not change when stored in the cold.

Yeast dough in the fridge: you have to pay attention to this

You can let yeast dough rise in the fridge overnight and store it there for up to a day. Pay attention to the following:

Prepare the yeast dough with cold liquid so that it doesn’t puff up too much.
You don’t need a pre-dough and you shouldn’t let the yeast dough rise in a warm place first.
Immediately after kneading, dust the yeast dough all over with flour and put it in a reusable and sealable bag or tin. This should be large enough for the yeast dough to spread out.
Now put the yeast dough in the fridge and let it rise overnight. The ideal duration for this is 12 to 18 hours. You can use the dough first thing in the morning or keep it in the fridge. However, it should not be left in the fridge for more than 24 hours, otherwise it could ferment.

Tips for the yeast dough in the fridge

You can form the yeast dough into balls, snails or braids before you even leave it. If you have formed small balls or pastries, you can store them in a bag that you blow open after filling. This creates more space in it and the yeast pieces do not hit the bag and deform when they rise.
Alternatively, place the yeast pieces on a baking sheet lined with parchment paper or on a floured board. Pay attention to the distance between the individual pieces of dough. You then slide the baking sheet or board into a large bag, which you seal and put in the fridge.
The bag or tin should always be closed tightly so that the dough does not dry out.
After rising: The yeast dough has risen well in the fridge overnight. If you want to bake it now, shape it as you like (if you haven’t already done so) and let the shaped pieces of dough rise again at room temperature for 20 minutes. This makes the pastry particularly fluffy.

Freezing yeast dough: What you have to consider

If you don’t want to use your yeast dough immediately after rising, you can store it longer. To do this, you put it in the freezer. There it stays at minus 18 degrees Celsius for up to six months. You can store yeast dough in the freezer as follows:

Shape the dough into a ball or patty before freezing. Then flour the dough.
Place the dough in freezer bowls or freezer bags and place in the freezer.
If you want to bake the dough later, let it thaw thoroughly beforehand.
After thawing, you can process it like conventional yeast dough. So he has to rise first. Give the yeast dough enough time to do this. Defrosted yeast dough takes about twice as long to rise as fresh dough.
Once the dough has risen, you can process it like conventional dough.

Tomatoes that are still green or unripe can be ripened in various ways. We’ll show you the five best ways to do this.

Tip 1: Let the tomatoes ripen on the plant

In order to preserve as much flavor as possible, it is best to let your tomatoes ripen directly on the plant. As soon as the temperature outside falls below ten degrees Celsius, you simply cut off the entire tomato plant with a sharp knife and remove its leaves. Then hang them upside down in a warm place. The warmer it is, the faster your tomatoes will ripen.

Tip 2: Wrap the tomatoes and let them ripen

If you only have a few green tomatoes left, you can easily wrap them in newspaper or paper bags to ripen. You can also make these paper bags yourself. Simply take the fruit off the plant with a piece of the stalk and wrap it in the paper. You then store the tomatoes in a warm, slightly damp place for a few days. The fruits do not need light with this method.

Attention: You often read that the printer’s ink on the newspaper is poisonous. Carcinogenic substances are severely restricted and partially banned by the European chemicals regulation REACH. The members of the Association of the German Paint and Printing Ink Industry also voluntarily undertake to comply with stricter guidelines. If you still want to avoid any printing inks, you can use unprinted paper bags.

Tip 3: Post-ripening in the container

If you have too many tomatoes to wrap individually, but you can’t let them ripen on the plant, you can use a variety of containers.

1) Let the tomatoes ripen in the box

Remove the tomatoes from the mother plant with a piece of the stalk and place them in a box or basket lined with newspaper. Make sure the fruits don’t bump into each other to avoid bruising. The tomatoes will now ripen in a few days in a dark, cool place.

2) Post-ripening in a mason jar

Place your tomatoes in clean, dry mason jars and seal tightly. Depending on the size of the jar, you should only add 2-3 tomatoes so they don’t crush each other. You then place the jars in a warm, dark room and let the fruit ripen there for about two weeks.

3) Leave to mature in the clay pot

Clean your chosen clay pot well and then place it in water for a few hours so that it absorbs moisture. Put your tomatoes in and cover the jar. You now fill the lid and the saucer with water so that the humidity remains constantly high due to evaporation. The tomatoes will now ripen within a few days in a warm place. You may need to top up the water from time to time.

Tip 4: Post-ripening in the greenhouse

Another good option is post-ripening in the greenhouse. With a minimum temperature of 16 and a maximum of 25 degrees Celsius and high humidity, the fruit here only need a few days to ripen.

Tip 5: Add apples

During the ripening process, fruit releases the gas ethylene, which is released into the environment. As a result, fruits influence each other during ripening and can speed up the process. Apples emit a particularly large amount of ripening gas, which is why fruits around them ripen faster. So you can simply add two to three apples to your green tomatoes and you will have beautiful red tomatoes in a few days.