Tag

long

Browsing

In order for green and yellow beans to be compatible, you have to cook them beforehand. Read here how much time you need to have the fresh kidney beans on your plate.

Green and Yellow Beans: What’s the Difference?

Yellow beans, also known as wax beans, are just another variant of green beans. Basically, you can use the green and yellow beans at the same time. You can buy the legumes fresh from the region in summer. Harvest time for beans is from June to around October.

Fresh beans should not have brown spots when you buy them. If you break through the bean and the inside is nice and juicy, that’s also a sign of freshness.

Cooking time and preparation of the beans

Beans contain the hard-to-digest and toxic protein phasin. According to the Bavarian consumer advice center, bush beans should be cooked, blanched or boiled for at least ten minutes so that the protein compound is rendered harmless. Unfortunately, even the bean water is toxic and you should stop using it.

The preparation of the beans is very simple:
Wash the beans and trim the ends of the beanstalk.
Cut them into small pieces depending on their future use.
Cook the beans in boiling salted water for about 10 to 15 minutes.
If you can bite through the beans without squeaking, they are done.
Tip: In addition to proteins and many other good nutrients, beans also contain some fiber, which can sometimes lead to flatulence. To prevent this, you can incorporate caraway or fennel (seeds) into your dish or chew a few grains of them after the meal. Fennel, caraway and anise also have a stomach-soothing effect as a tea.

Tomatoes should not be missing in any kitchen, especially in summer. To keep them fresh and tasty for as long as possible, it is important to store tomatoes correctly. We tell you what you should pay attention to.

Tomatoes are sensitive fruits when it comes to storage: they don’t like refrigerators, but they don’t like too much heat either, and they prefer to spend their time away from other fruits and vegetables. Storing tomatoes correctly not only affects their shelf life, but also their taste, because tomatoes that are harvested unripe continue to ripen in storage. Preparation for storage also plays an important role.

Depending on the variety, tomatoes can be kept for up to 14 days under optimal conditions.

How to prepare tomatoes for storage

Even before the actual storage, you can pay attention to certain things that will ensure that your tomatoes stay fresh for a long time.

If you harvest your own tomatoes, you should first harvest them with the stalks and blossom ends and do not remove them even if they have dried up. The green provides the tomatoes with nutrients even after they have been picked.

The following applies to both self-harvested and purchased tomatoes: it is better not to wash them before storing them. When washed tomatoes go into storage, any moisture left behind can quickly lead to mold growth. Overripe tomatoes, on the other hand, burst easily when pressure is applied to them during washing. Therefore: It is better to wash them just before you eat the tomatoes.

Store tomatoes correctly: It depends on the temperature and location

If you want your tomatoes to last as long as possible, the right temperature plays an important role. So the most important thing first: Tomatoes don’t belong in the fridge. This place is the worst imaginable for storing tomatoes. They react sensitively to cold, which means they lose their taste and acquire a floury consistency. In addition, their vitamin content is reduced by the cold temperatures.

But even an environment that is too warm is not good for the harvested tomatoes when they are already ripe. It causes tomatoes to continue to ripen and can therefore rot quickly.

Tomatoes feel best when they

at room temperature
in an airy but dark or shady place
be stored. A simple shelf or the kitchen table is therefore a suitable place to store tomatoes.

Tip for unripe tomatoes: If you want to let unripe tomatoes ripen, you can put them in a slightly warmer place, for example on a sunlit windowsill. Because the higher temperatures accelerate the post-ripening process.

Store tomatoes correctly: Better without neighbors

Another important point is that it is best to store the fruit separately from other fruits and vegetables. Ripe tomatoes emit ethylene, a gaseous plant hormone that stimulates nearby fruit and vegetables to ripen faster—and possibly rot as a result.

Other fruit and vegetables also emit the ripening gas, which means that tomatoes in turn ripen faster – and possibly go bad.

Fruits and vegetables you should keep separate from include tomatoes

Apples, bananas, pears, apricots
Cucumbers, peppers, hot peppers.
Tip for unripe tomatoes: You can of course take advantage of the effects of ethylene if you want to ripen unripe tomatoes faster. Then just store them with these other fruits and vegetables. After a few days, the tomatoes will have ripened and should then be stored separately.

Store tomatoes correctly: the right container

Many tomatoes from the supermarket come sealed in plastic. However, the fruit does not get enough oxygen in it and therefore rots faster. It is therefore better to buy tomatoes without plastic packaging from the start, so you are also doing something good for the environment.

Tomatoes prefer it airy. Therefore, place them in an open container, such as a bowl, basket, storage box without a lid, or on a plate. Baskets work particularly well if they are made of woven straw or metal struts, as this allows for good ventilation.

To prevent the tomatoes from bruising, you can line the container with a clean kitchen towel beforehand.

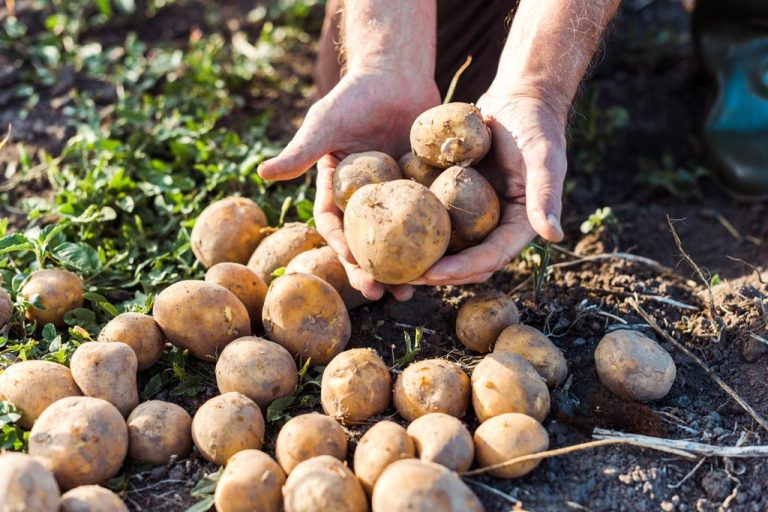
Storing potatoes properly is not difficult at all. The most important thing is that you protect them from light. Otherwise they will quickly start to germinate or turn green. Here you can find out what else you should pay attention to.

Store potatoes correctly: protect from heat and light

Potatoes begin to germinate quickly in warmth and light. The toxic germs cannot be eaten and they deprive the potato of important nutrients. As a result, it shrinks and loses flavor and firmness. Sprouted potatoes can have high concentrations of toxic glycoalkaloids. This substance is also contained in green potatoes and makes them intolerable. You can prevent or at least delay the potatoes from germinating and turning green by storing them correctly.

In addition, potatoes can easily go moldy – even one affected tuber can spread the rot to many other potatoes and possibly make the entire harvest unusable.

With a little experience, you can even store potatoes for many months until the next season. This is practical because you can buy local potatoes in advance without long transport routes. The late potatoes are ripe in September and October, the early potatoes as early as June.

7 tips for storing potatoes properly

Choose a dark place for storage: for example your pantry, the basement or a shed in the garden. If you don’t have all of this available, you can also store the potatoes in a linen bag in the kitchen to protect them from light.
Pay attention to low temperatures, because the potatoes start to sprout from around 10°C. At the same time, it must not get colder than 4° C, otherwise the starch in the tubers will turn into sugar, which will affect the taste. Ideal for storing potatoes is 4°C to 8°C.
Protect the potatoes from frost (e.g. when storing them in the garden or in cold cellars) and never put them in the freezer.
Store them in a dry and airy place so the potatoes don’t get moldy or rot. A linen sack or a wooden box in which the potatoes are loosely stacked is suitable for storage. Plastic bags are unsuitable for storing potatoes. If you have enough space in the garden, you can also build a potato tower.
Check your potatoes from time to time: If small sprouts have formed, the affected tubers must be eaten as soon as possible. Rotten potatoes must be removed immediately and disposed of with organic waste. Regular rearranging also ensures adequate ventilation.
Store potatoes separately from fruit, especially apples. The ripening gas ethylene that many fruits give off will otherwise quickly spoil the potatoes.
Only undamaged potatoes with an intact skin and without bruises or sprouting are suitable for long-term storage over several months. Slightly damaged potatoes should be eaten quickly. If the potatoes are stored well distributed on slatted frames, they will keep for months.

Long hairs are difficult to remove from the carpet with a vacuum cleaner because they stubbornly become lodged in the carpet fibers. But with the following tips, you will be able to completely remove long hair from the carpet.

If you have long hair yourself or own a pet with long hair, then you know the problems. You can find hair everywhere in the apartment and on the carpet and it is difficult to get rid of it. But you can easily get rid of them with adhesive tape and the like.

1) Get rid of long hairs from the carpet with a tape

One of the best tips for removing long hair from the carpet is to use masking tape. To do this, wrap your hand in the tape so that the sticky side is facing out. Then you can use it to remove the long hairs from the carpet. This is because they stick to the adhesive tape. Also, note tips for removing animal hair.

2) Carpet cleaning with a damp sponge

You can also use a damp sponge to clean the carpet and get rid of long hair. Therefore, first, clean the carpet with a vacuum cleaner. Then remove the long hair with a damp cloth or sponge. To do this, simply rub the cloth or sponge over the carpet and you will see that the hair gets caught on it.

3) Use of lint rollers

You can also use a lint roller or brush to remove the hair. Many pet owners use these to remove pet hair. But long hair should also be caught with it. You can find good and cheap alternatives on the internet. In addition, note other tips for cleaning and tidying up and tidying up carpet fringes.

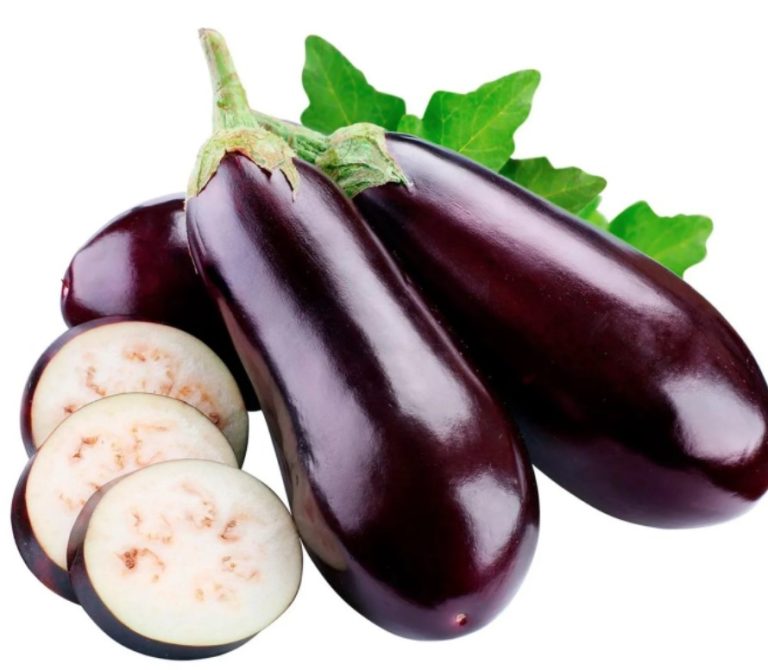
If you want to store eggplants, you should consider a few things. In this article you will find out how to recognize fresh aubergines and at what temperature you should store them.

Although aubergines are warm-loving vegetables, they can only be stored for a limited time at room temperature. We explain how to store aubergines correctly and what you should pay attention to.

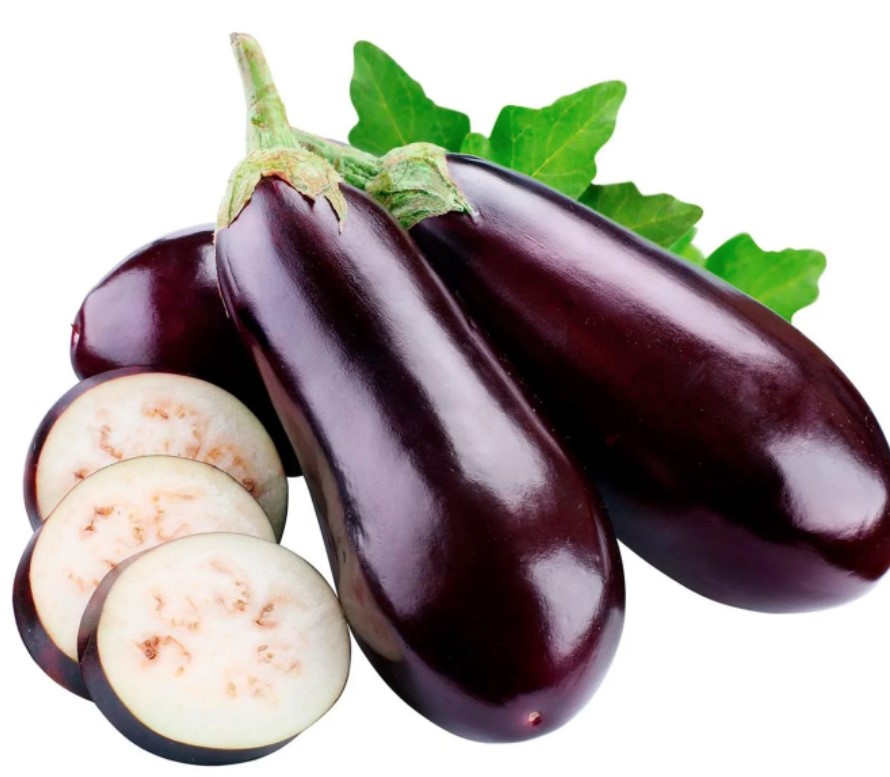
Aubergines belong to the nightshade family and originally come from India. Also known as eggplant, this vegetable is very common in Mediterranean cuisine. Aubergines come in many different colors and shapes, with the dark purple version being the most well-known in this country.

If possible, use organic aubergines for cooking: They are free of chemical-synthetic pesticides and come from more sustainable agriculture. If you get the aubergines from regional cultivation, you also avoid long, energy-intensive transport routes.

Aubergines are in season in Germany between August and October. You can get unpackaged organic aubergines at farmers’ markets, directly from farmers or in organic boxes.

Storing aubergines: You should pay attention to this

When you buy eggplants, you should pay attention to the quality and degree of ripeness. A ripe eggplant has a shiny skin and is firm. If you press gently, it gives slightly. If the aubergine doesn’t yield to pressure, it’s unripe and tasteless. On the other hand, if it is too soft, it will soon spoil. Aubergines taste best when you prepare them fresh. However, you should not eat eggplants raw.

How to store aubergines correctly:

Store eggplants in a dark, cool place in the pantry or basement. Temperatures between ten and 13 degrees Celsius are well suited. Properly stored aubergines stay fresh for around three to four days.
The fridge is actually too cold for aubergines. If you don’t have a pantry or basement, you can still store the eggplants in the crisper of the refrigerator, which is better than storing them at room temperature. It is best to wrap the eggplants in paper to absorb excess moisture. Alternatively, you can place them loosely in the crisper in your fridge. Aubergines stored in the refrigerator quickly become stained and soft. You should process them within a day or two.
Eggplants stored at room temperature are best prepared on the same day or the next day at the latest.
Don’t store eggplants near apples or tomatoes. The escaping ethylene allows the aubergines to ripen more quickly.

Store sliced aubergines

You can store cut aubergines in the fridge until the next day before they spoil.

Place the sliced eggplant in a sealable container.
Keep the container in the fridge and use the leftover eggplant quickly.
Then remove the dried part of the eggplant and wash the fruit thoroughly again.
Aubergine slices turn brown in the air within a short time. It is therefore better to overcook them immediately and not to keep them raw. You can store cooked aubergine dishes in the refrigerator for two to three days.

Store eggplants in the freezer

To store eggplants for a particularly long time, you should freeze them. Eggplants can be frozen for up to nine months.

Wash the eggplants thoroughly.
Cut the vegetables into cubes.
Blanch the eggplant pieces for three minutes.
Immediately cool the vegetables in ice water.
Drain the aubergine pieces well in a hair strainer. Alternatively, you can pat them dry with a tea towel.
Place the blanched cubes in a freezer container. You can also freeze aubergines in jars.
Label the freezer container so you can remember what’s inside later.
Also write the date. This will help you keep track of your freezer.
Frozen aubergines are particularly good for soups, sauces and spreads.

If you want to store cucumbers, you should consider a few things. In this article you will learn what you need to know to keep cucumbers fresh for a long time.

Cucumbers consist of 97 percent water and are therefore relatively sensitive. If you store them incorrectly, they are prone to staining and mildew. In this article you will get many tips on how to store cucumbers properly.

Since the micronutrients are concentrated in and under the skin, you should eat cucumbers unpeeled. Therefore, use cucumbers of organic quality: they are free of chemical-synthetic pesticides.

In Germany, cucumbers are in season between June and September. During this time they are available from regional cultivation. Regional products have shorter transport routes and therefore have a smaller CO2 footprint. You can get unpackaged organic cucumbers at farmer’s markets, from direct sellers in your area or in organic boxes. You can find more information about the season of different vegetables in the Utopia Seasonal Calendar.

Storing cucumbers: You should pay attention to this

It is best to buy cucumbers unpackaged. The plastic wrap is meant to protect the cucumber. However, sometimes the cucumber starts to mold faster due to the condensation under the foil because it is packed airtight. However, opinions differ on this. You can also read online that cucumbers wrapped in plastic wrap last longer. From the point of view of environmental protection, however, unpackaged cucumbers are preferable to those sealed in plastic. More about this here: What is more sustainable: organic or unpackaged?

How to store cucumbers correctly:

Store the cucumber in a dark and cool place in the pantry or basement. Cucumbers do well at temperatures between ten and 13 degrees Celsius. Properly stored cucumbers can be kept for up to three weeks.
If you don’t have a pantry or basement, store the cucumber in the crisper of your refrigerator. This is better than storing the cucumber at room temperature. Cucumbers only last four to five days in the fridge.
Stored at room temperature, you should use cucumbers within a day or two.
Avoid storing cucumbers near apples or tomatoes. The cucumbers ripen faster due to the escaping ethylene.
Because of the high water content, you should not freeze cucumbers. The cold destroys the cell structure and the cucumber becomes mushy.

Storing Cucumbers: Store chopped cucumbers

Once you cut the cucumber, you should use it as soon as possible.

Place the sliced cucumber in a sealable container. You can also store small leftover cucumbers in a jar.
Store the container in the refrigerator and use the cucumber within a day or two.
Before the next meal, remove the dried part of the cucumber and wash it thoroughly again.

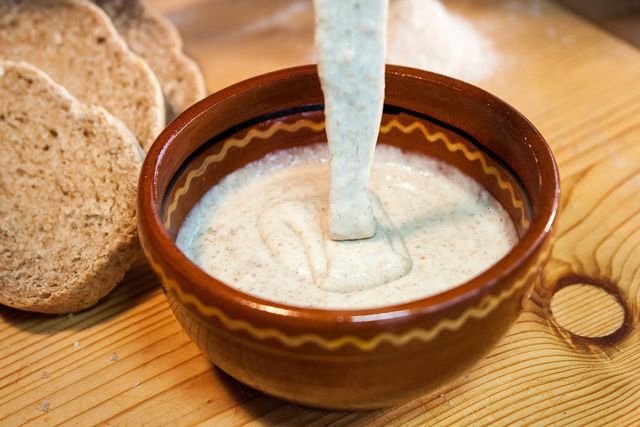
You can simply dry sourdough and store it for a long time. We will introduce you to three methods of preserving sourdough: by crumbling, drying and freezing.

You only have to prepare sourdough once and can then “feed” it again and again with flour and water and thus multiply it. This makes it last forever. The sourdough contains microorganisms (such as lactic acid bacteria and yeast) that form during the fermentation process and make the dough slightly acidic. However, if you don’t bake regularly or want to send the sourdough to friends or relatives, you can preserve the sourdough by drying it. The shelf life of the sourdough varies depending on the method, ranging from three months to several years.

For each of the three methods, you must first prepare a sourdough. You can find instructions here: Prepare the sourdough. We strongly recommend that you buy the ingredients in organic quality. Among other things, you avoid residues of chemical-synthetic pesticides and support ecological agriculture.

Method: Crumble sourdough

The first method is the “crumbling” and subsequent drying of leaven:

Pour your prepared sourdough into a bowl.
Gradually add the flour and mix everything together with a wooden spoon. Use enough flour so that the dough is only slightly moist and crumbs can form.
Gradually rub the dough between your palms. This creates crumbs. Do the same with the entire dough.
It is best to spread the crumbs on a baking sheet and let them dry for several hours. This way you prevent mold.
Fill the so-called Krümelsauer into a lockable screw-top jar. You should only close the jar loosely or drill a hole in it if the dough continues to ferment a little. Alternatively, use a cloth bag. The dried sourdough can be stored in the refrigerator for about three months.

To use the dough again, add enough water to the crumbs until it becomes a paste. Store the dough at room temperature for about 2 to 8 hours. It is then activated again and can be processed further.

Method: Dry sourdough as flakes or powder

The second method involves making flakes or powder from the sourdough:

Spread the sourdough thinly on half of a sheet of baking paper and fold it over. If you have more dough, use a second sheet of baking paper.
Allow the sourdough to dry at room temperature. This takes about a day or two. The dough needs to be really dry, otherwise mold can form.
Dried, sourdough is lighter in color, cracks, and breaks easily when touched.
Note: You can usually reuse the parchment paper. To do this, carefully peel off the dry sourdough so that the baking paper does not tear. Or you can use a sustainable baking paper alternative.

Break off small pieces of the dried sourdough. Now you have two options:

For tiles: Place the small pieces in a sealable container, cloth bag, or paper bag.
For powder: grind the small dividers into powder with a mortar or grinder.
Dried sourdough lasts for several years. You can store it in the fridge or at room temperature in a dark place (for example, in the pantry).

To reactivate the leaven, you need to add water and flour. First add the same amount of water to the dried dough (ratio 1:1). If he starts blistering at room temperature, you can “feed” him with more water and flour. This can take several hours.

Note: Since most microorganisms die off during drying, the sourdough may not always start to ferment. This is always the case when there are no or no longer sufficient microorganisms in the dough.

Method: Sourdough Freezing

Pour your sourdough into a sealable container that is freezer-safe. Alternatively, you can fill the batter into an ice cube tray. Place the dough in your freezer or freezer compartment.

Freezing disrupts the fermenting properties of sourdough, as some of the microorganisms die off. So give the dough 1-3 days after defrosting to recover slowly. You can add some flour and water and activate it at room temperature. You can then feed him more flour and water.

Unopened, tofu has a fairly long shelf life. However, once the package is opened, it is often difficult to judge whether it is still edible. We tell you how long tofu can be kept.

Tofu is a protein-rich food made from soy that is particularly popular with vegans and vegetarians. You can use tofu in a variety of dishes and add flavor to your taste with marinades and spices.

A typical criticism of soy products like tofu is that the soybeans come from rainforest regions. However, organic tofu in particular mostly consists of European, sometimes even German, soybeans. Read more about how to eat vegan regionally at Utopia. Due to the shorter transport distances, you can save CO2 emissions and thus reduce your ecological footprint. Tip: You can also make tofu yourself.

We recommend that you buy organic tofu for other reasons as well. Organic seals such as Bioland, Demeter or Naturland stand for certain standards in cultivation and production, for example they do not allow chemical-synthetic pesticides.

The most important numbers on the shelf life of tofu

Tofu is mostly vacuum packed. This makes it particularly durable. The best before date (MHD) tells you how long the tofu will last. However, if stored properly, tofu can be kept for a long time. A long-term test by the environmental protection organization Greenpeace showed that tofu can still be eaten up to six months after the best-before date.

Once opened, tofu can be kept in the refrigerator for two to three days. You can extend the shelf life of tofu by storing it properly:

Always keep unopened tofu refrigerated. An exception are varieties that were freeze-dried during production and can therefore also be stored at room temperature. As a guide, if the tofu was already refrigerated when you bought it, you should keep it in the fridge as well.
Place opened tofu in an airtight container (such as a box or jar) and place in the refrigerator. It is best if you add some water. The tofu should be at least half covered.
If you freeze tofu, you can extend its shelf life by up to six months – regardless of whether it is still unopened or opened.

Shelf life of tofu: how do you know that tofu is still good?

A first indication of the shelf life of tofu is the best before date. However, as mentioned, unopened tofu lasts far beyond that.

Are you unsure whether your tofu is still edible? If these factors apply, you shouldn’t eat the tofu anymore:

Appearance: greasy, eventually mold
Odor and taste: sour or bitter
In particular, the smell of spoiled tofu can become very strong.

If the pack is still closed, the following also indicates that tofu is no longer edible:

Pack is bloated
The brine that tofu is in is creamy or crumbly

Traditionally, we only drink eggnog every holy time, namely at Christmas and Easter. The question is: if you don’t drink the whole bottle in one go, how long can you drink the rest?

The facts

Eggnog usually consists of three ingredients: egg yolk, sugar, and alcohol. The alcohol content is usually around 20% alcohol by volume. Its roots can be found in the New World: In the 17th century, European seafarers tasted a drink made from avocados for the first time, which was offered to them by the South American natives. In Europe, the discoverers no longer wanted to do without the delicious, creamy drink, but avocados were not available. So they simply replaced the exotic fruit with eggs – and the eggnog was born. Related to the classic eggnog are English Eggnog or Mexican Rompompe.

Eggnog likes it cool and dark

If the bottle is originally sealed and stored in a cool and dark place (preferably standing up in the fridge), eggnog lasts for over a year, and the traditional manufacturer Verpoorten even speaks of two years. Incidentally, since eggnog is counted among the spirits, it does not have to have a best-before date. Once opened, eggnog should be drunk within half a year – which is about the ideal time between Easter and Christmas ;-).

Homemade tastes best

When we make eggnog ourselves, we have the advantage that we know for sure what’s inside. Not sure how long it will last.

As a guide, you can stick to store-bought eggnog. The most important thing when it comes to the shelf life of eggnog is hygiene, both during preparation and storage. If you make eggnog yourself, it is better to use several smaller bottles (these should of course be sterile) than one large one, so smaller amounts of the liqueur can be used up faster and leftovers don’t stand around for too long. If there are leftovers from the homemade eggnog: drink it up within six months!

Shaken, not stirred

Regardless of whether you bought it or made it yourself, it’s worth shaking the eggnog bottle well before opening it. The fat in the yolk combines with the other liquid ingredients to form an emulsion. It may be that solid components settle a little at the bottom of the bottle, but this says nothing about the freshness of the eggnog! If in doubt, a “sensory check” can help: look closely, smell, and taste – rely on your 5 senses to assess whether the liqueur is still edible (you can find out more about the shelf life of food here). By the way: According to a study, salmonella doesn’t stand a chance in eggnog if it contains at least 14% alcohol by volume. Even if you have a “no risk – no fun” attitude in real life, you should be careful with eggnog. If you don’t want to finish the bottle, we recommend our best eggnog recipes, because eggnog leftovers can also be wonderfully packed in cakes or creams – and eggnog cream always goes well with it anyway!

Boiled corn on the cob is the perfect summer vegetable. They are quick to prepare, light and can be deliciously seasoned. We’ll show you how to do it and what to look out for.

Cooking corn on the cob: you should pay attention to this

There are different varieties of corn, but not all are suitable for consumption. However, corn on the cob that you can buy at the market or supermarket is edible. You should make sure that the leaves on the cob have not dried out. If they’re dried out, so is the corn and you can’t eat it anymore.

Corn on the cob with plump, yellow kernels is particularly suitable. Between July and October you can buy fresh corn regionally and seasonally.

For the perfect corn on the cob, it is best to add a little sugar to the water, which intensifies the aroma.

Cook corn on the cob: this is how it works

Cooking corn on the cob is not difficult. Depending on whether you buy a pre-cooked or raw cob, the cooking times will vary. You usually only have to simmer a pre-cooked corn on the cob for a few minutes; it takes longer with raw corn.

How to cook fresh corn:

If your corn still has leaves, you will need to remove them and possibly also cut off the stalk of the corn.
Now put the corn on the cob in enough hot water and bring it to a boil in a covered saucepan with a teaspoon of sugar.
Now cook the corn on a medium-high for about 15 minutes. Depending on the size and number of corn cobs, this may take longer.
To tell if your corn is done, poke the kernels with a toothpick. When your corn is cooked, you should feel a little resistance – the toothpick should still slide in smoothly.
Now let the finished corn drain a bit and meanwhile sprinkle it with herbs and salt and brush it with butter or oil.