Tag

make

Browsing

Make matcha tea perfectly is considered a high art in Asia. Because green tea is very healthy and is becoming more and more popular with us. Here’s how to brew it properly.

Making matcha tea: This is how the powdered tea succeeds

Brewing Matcha tea is a little more complex than with conventional teas. In order for the tea to be nice and creamy, there are a few things to consider. Because to be able to prepare it, you need a bamboo spatula, a bamboo whisk and a matcha bowl (a set is available from **Amazon, for example).

For the matcha tea you also need:

two to four bamboo spatulas or one to two heaped teaspoons of matcha tea powder
75 ml hot water (about 80 degrees Celsius)
1. Soak bamboo whisk

The bamboo broom, called “chasen” by professionals, should be placed in warm water for a few minutes. This makes it smoother and the tea can be whipped better.

2. Matcha powder sift

Matcha tea is only available as a powder. So that no annoying lumps form during the preparation, you should first pass the powder through a fine sieve. This way you can be sure that the tea will have a nice consistency and an even taste.

3. Mix the paste

Now put the powder in the bowl. The more tea you use, the thicker and creamier the matcha tea will be in the end. Pour in some of the hot water. With the Chasen you start beating the tea into a paste.

4. Brew tea

You don’t stir the matcha tea, but open it in a W-shape. To do this, draw a W in the matcha bowl in short, quick movements. Keep your wrist as loose as possible. Gradually add the rest of the water.

5. Enjoy

The matcha tea is ready when the consistency is even and the surface is creamy. Finally, carefully guide the chasen along the inside of the bowl. Now you can enjoy the tea.

That’s why matcha tea is so healthy

Unlike classic green tea, matcha tea uses the entire leaf. During production, the tea leaf is ground and pulverized. In this way, important nutrients are retained that are lost in conventional tea during production.

Matcha tea is particularly rich in antioxidants that protect cells from free radicals. It also contains a variety of vitamins. These include vitamin B1, B2 and B3, but also vitamin C, E and K. Nutrients such as calcium, potassium and beta-carotene also make it so healthy.

Matcha tea has a distinctive green color that can vary somewhat depending on the variety. You can recognize high-quality tea by the fact that it does not taste bitter, but rather has a slight sweetness.

After removing the cork stopper from the bottle, it is difficult to close the bottle again with exactly this. But with the following tricks, you can make the cork fit.

Open the wine, enjoy it and close it again. Sometimes not so easy. After removing the cork, it simply no longer fits into the bottleneck because it is too big.

The practical material cork

Cork is a very practical natural material made from the bark of the cork oak. It was used by humans centuries ago, e.g. as a closure for vessels or as a shoe sole. Nowadays we find it as a wine bottle stopper, a bulletin board, or even a bag. Because the material is poorly combustible, elastic, and resistant to mold growth.

Close the bottle again with the cork

In order to be able to close your bottle with the cork lid again, you have to make it fit. This is relatively easy and quick, with the following tricks. In addition, note the instructions for making wine yourself.

1) Adjust the cork with hot water

If you can’t get the cork back in the neck of the bottle after removing it, that’s perfectly normal. Because the material stretches a little. But if you want to close the half-full bottle with the cork again, put it in boiling water for about 60 seconds. The cork can then be easily shaped and you can use it to professionally seal the bottle. In addition, read useful tips on how to make food last longer.

2) Cut the end of the cork

You can also use a knife to make the cork fit. To do this, you can cut one end of the cork closure so that it tapers to a point. Then it should fit more easily into the neck of the bottle. And your wine stays fresh and enjoyable. Also, read how to clean narrow bottles and narrow vases.

3) Use alternative bottle caps from the Internet

If both of the tricks seem too complicated for you, you can also conveniently buy alternative bottle caps on the Internet and use them to close them. There is a wide variety of shapes and colors. So there is something for every taste. And you can make other great things with the old corks. Then you can optimally store wine and sparkling wine in the future.

Hardly any calories, low in fat and rich in vitamins when made correctly – homemade apple chips are a delicious snack for in between. We’ll tell you how you can make chips from apples yourself.

If you want to make apple chips yourself, you can use old apples, even if they have become a bit soft and shriveled. In addition, homemade apple chips are guaranteed free of sulfur dioxide or other preservatives compared to the supermarket version. In principle, you can use any variety, but Elstar and Boskop taste best (make sure they are organic!).

Air dry homemade apple chips

Ingredients:

apples of your choice

Directions:

Wash the apples, core them (an apple corer is helpful) and cut or slice them into slices about 2 to 3 millimeters thick.
Spread the apple rings individually on a baking sheet or rack. Alternatively, you can also hang up the apple rings with string to dry.
Set them outside in the warm sun to dry. But you can also let the apple rings dry in warm, dry places such as the attic or by the fireplace. With this method you do not need any additional energy.
Cover everything with fly screens, thin curtains or similar to protect the apple chip ships from flies and wasps.
After about two to three weeks, your apples will be dry.
The apple chips can be kept dry for several weeks in a well-closable container. Storage boxes made of glass or stainless steel are best.

Make apple chips in the oven

Ingredients:

apples of your choice

Directions:

Wash the apples, core them (an apple corer is helpful) and cut or slice them into slices about 2 to 3 millimeters thick.
Arrange the apple rings on baking sheets or racks. It makes sense if you borrow several baking trays or racks in order to use the energy of the oven optimally.
Put the apples in the oven at around 70 degrees for three to four hours to dry. Leave the oven door ajar with a wooden spoon. This allows the moisture to escape. It is best if you can use some of the residual heat from other dishes or cakes. This is how you save energy. Because this form of drying is very energy-intensive.
The homemade apple chips will keep for several weeks in an airtight container.

Dry apple chips in the dehydrator

If you make apple chips more often or also dry other fruit, it could be worth buying a dehydrator. The method is more effective than drying in the oven and more reliable than drying the apple chips in the air.

To make marzipan yourself, you only need two ingredients: almonds and sugar. With this recipe you can easily make your own marzipan.

What is marzipan made of?

Traditionally, marzipan consists of ground almonds, sugar and rose water. The proportions of the ingredients are decisive for the quality. According to the legal requirements, a maximum of 17% liquid, 35% sugar and 48% almonds may be used for the marzipan paste. However, manufacturers usually add more sugar for commercial marzipan. Only with very high-quality products, such as certain fine marzipan brands, is no additional sugar mixed in.

Make marzipan yourself: The basic recipe

For the homemade marzipan you need these ingredients:

200 g almond kernels with skin (alternatively walnuts)
150g powdered sugar
1 to 2 tablespoons of liquid (classic here is homemade rose water or from the pharmacy or health food store)
Preparation:

Boil the almonds in about a liter of water for a minute or two.
Pour the almonds into a colander.
Let them cool down a bit.
Peel them by squeezing them out of the skin with your fingers.
Crush the almonds in a good blender. Depending on the moisture content of the almonds, you will get a mealy to mushy mass.
Place the ground almonds in a bowl.
Sift in the powdered sugar.
Add a tablespoon of rose water.
Now knead all the ingredients by hand into a smooth dough. You may need to add some more liquid. (This also depends on whether you dried your almonds after cooking).
When the marzipan is ready, store it airtight in the fridge – e.g. in a screw-top jar.
Then the homemade marzipan is ready for further processing!

Depending on your taste, you can use other liquids instead of rose water. Orange liqueur or amaretto, for example, are suitable, but also a few drops of bitter almond oil. This makes the mass a bit bitter and more intense in taste.

Which almonds are best for marzipan?

Almonds belong to the rose family and probably originally come from Southeast Asia. Today the kernels are also cultivated in Pakistan, Iran or in the Mediterranean region. However, more than 80 percent of the almonds grown worldwide come from the USA, more precisely from California.

However, there has been a drought for several years. Almond cultivation plays its part: to harvest one kilo of almonds in California, about 10,000 liters of water are used. The high water requirements of the almond orchards are also critical in European growing areas.

So when you buy almonds, make sure they’re not from California. The long transport route halfway around the world also worsens the ecological balance. At best, buy almonds from Europe and from controlled organic cultivation.

Instead of almonds, you can also use regionally grown, organic walnuts for the marzipan. The process is the same and the taste is very similar to almond marzipan.

Vegans don’t always have it easy when it comes to baked goods. Because even if some bakeries now offer vegan alternatives, many cakes, biscuits and even breads still contain animal products such as butter and eggs. So how about just baking it yourself? This article will show you exactly how vegan baking works and what to look out for.

Why bake vegan at all? Being vegan means consistently avoiding products of animal origin. According to statista.de, more than 1.13 million people in Germany now live vegan – and the trend is still rising.

While a large number of meat substitutes and milk substitutes have long since found their way onto supermarket shelves, vegan baked goods are still the exception rather than the rule. Vegan baking is actually quite easy, is neither more complicated nor more expensive than traditional baking and the results are just as delicious. So why not just do it yourself?

Baking Vegan: Tips & Tricks

It doesn’t matter whether you’ve been vegan for a long time, want to please vegans in your circle of acquaintances or simply want to try out vegan baking recipes – with our tips you can make your favorite baked goods without animal products.

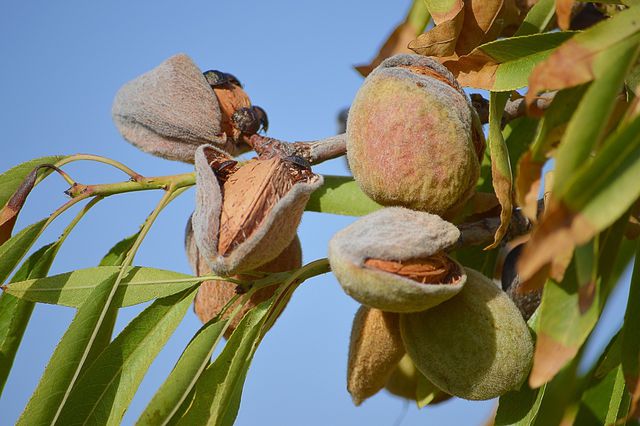
Rely on vegetable fats: Butter is a dairy product – and therefore taboo in vegan baking. Instead, use purely vegetable, preferably palm oil-free (organic) margarine. Of course you can also use oils. The following applies: 100 grams of margarine are replaced with 75 to 80 milliliters of oil (e.g. rapeseed or sunflower oil). Nut butter, such as almond butter, is also an interesting alternative to conventional butter – make sure you use organic and fair trade quality. If you want to improve your ecological balance and save calories at the same time, simply replace 100 grams of butter with a mixture of 120 grams of oat yoghurt and a tablespoon of semolina. Another option is to make your own vegan butter.

Egg substitute instead of eggs: In traditional baked goods, eggs are used to bind the dough better. As you will quickly find out when baking vegan, this is often not absolutely necessary. If you still want to use an egg substitute, you can buy one in most organic stores and some supermarkets – or you can simply make your own egg substitute using simple ingredients that you probably have at home anyway: banana , applesauce or flaxseed can effectively replace eggs in baking. Read more: Make your own egg substitute: 6 ideas for vegan eggs
Plant-based drinks instead of cow’s milk: plant-based milk alternatives have long been found in every supermarket and most drugstores, often even in organic quality. Depending on what you’re baking, cow’s milk can usually be easily substituted one-to-one with milk alternatives such as oat milk, soy milk, or almond milk.
Plant-based cream: Plant-based cream substitutes can also be found in most supermarkets, for example based on oats, soy or rice. Alternatively, you can easily make vegan cream yourself. More on this: Vegan Cream: Recommended Alternatives
Aquafaba instead of egg whites: There are some baking recipes that use egg whites. This is the case, for example, with biscuit doughs. But there is also a vegan variant here: aquafaba. Aquafaba is the soaking liquid from chickpeas and beans. Aquafaba is whipped into the perfect vegan egg whites and is even suitable for mousse au chocolat.

Baking with vegan chocolate: What would chocolate chip cookies be without delicious pieces of chocolate in the batter? In general, many dark chocolates are vegan by nature, although you should pay close attention to the list of ingredients. Those who value sustainability and fair production conditions should choose organic and fair trade chocolate. In the (organic) supermarket you will also find vegan white chocolate and purely plant-based “milk” chocolate with different cocoa contents.
Agar-agar instead of gelatine: Anyone who bakes fruit cakes sometimes seals the fruit layer with a gelatine-based icing. However, since gelatine consists of animal bone and cartilage residues, among other things, this is not an option for vegan baking. Instead, you simply replace the gelatine with agar-agar, a purely vegetable powder made from red and blue-green algae. Here too, pay attention to organic quality in order to get a residue-free product. More on this: Gelatin substitute: vegan plant-based alternatives

What else should you keep in mind when baking vegan?

To ensure that the cruelty-free baked goods are 100 percent successful, you should not overdo it when mixing the ingredients, otherwise a vegan dough can quickly lose consistency and become tough. So sometimes it can be worth using the whisk, spatula or fork instead of the food processor to mix the ingredients.

Depending on the type of oven, your vegan pastries may also cook faster than traditional recipes state. It is best to set the timer 15 minutes before the regular end of the baking time to make sure that cakes, biscuits, rolls and the like do not become too crispy.

Incidentally, when baking bread and rolls, most recipes are already vegan – or can be veganized quickly. Instead of the honey used in some bread recipes, you can use some organic sugar beet syrup, for example, and replace the quark in quark rolls with vegan organic soy quark. Buttermilk is easily replaced with a plant-based milk alternative with a dash of vinegar.

Is Vegan Baking Healthier?

You can decide for yourself how healthy your vegan baked goods will be. For example, if you use whole grain instead of white flour and at least partially replace the sugar content in sweets with low-calorie sugar alternatives such as organic erythritol, you can definitely produce healthier baked goods.

In general, the major health benefit of vegan baking is that purely plant-based ingredients are virtually cholesterol-free, while animal products such as eggs, milk and butter contain a lot of saturated fatty acids and trans fats. With high and regular consumption, these can promote heart and vascular diseases.

Vegan is not always sustainable

While vegan ingredients are always free of animal components, they are not always sustainable, since some of the products have extremely long transport routes to the local shops (e.g. coconut oil, cocoa, chia seeds, Agr-agar) or come from conventional cultivation and are therefore are not free from environmentally harmful pesticides.

If you also want to implement the topic of sustainability in baking, you should therefore rely on fairly traded organic products and prefer regional and seasonal ingredients.

Veganized Recipes vs. Vegan Recipes

Veganized recipes are conventional recipes that are made with purely plant-based ingredients instead of the traditional ingredients. This is particularly recommended for vegan baking beginners and for everyone who would like to recreate the taste of baked goods they love. For example, have you ever baked vegan cheesecake, apple pie, vegan biscuits or purely plant-based stollen yourself? It’s easier than you might think – and the taste is in no way inferior to the original recipes.

Of course, vegan baking is also possible with a variety of more experimental, vegan recipes in which sugar is replaced with dates, for example, and unusual types of flour such as lupine, almond or coconut flour are used. These recipes are not replicas of well-known originals, but developed vegan from the outset and represent their own category. They therefore offer a less comparable, but precisely because of this, interesting taste experience. They are often all about “Clean Baking”. Due to the often exotic ingredients, you should pay close attention to the origin and, if possible, prefer regional products.

Conventional textile fresheners are usually expensive and often smell unpleasant. That’s why we’ve collected tips on how to make your own textile fresheners. This way you can quickly and easily get rid of bad smells from your textiles.

Since you can successfully counteract odors in textiles, curtains, curtains, or sofa covers with a homemade and inexpensive one, you don’t need expensive refreshers from the drugstore.

Fresh fragrance for your textiles

After a while, textiles such as curtains, curtains, or sofa covers can start to smell bad. You can then wash them or spray them with a fabric freshener. The second variant is quick and easy. This saves you a lot of time and ensures a pleasant smell. But purchased textile fresheners and fragrance sprays are usually expensive and you don’t always like the smell. That’s why we have tips on how to make your own textile freshener. As a result, you can easily neutralize odors in the home.

1) Make your own textile freshener with fabric softener

You can create your own fragrance mixture for textiles yourself quickly and inexpensively. All you need is a small old spray bottle and fabric softener. Then fill the spray bottle with 1-2 caps of fabric softener. Then add water and mix well. And your own fragrance spray is ready. Consequently, you can spray your couch, curtains, carpets, or other textiles with it and make them smell good. No residues have formed after prolonged testing. So it is a very easy way to make the textile freshener yourself. Also, note tips on making your own room fragrance and instructions on how to make your own fabric softener.

2) Homemade baking soda scent freshener

Dirt and bacteria often cause bad smells from the sofa or curtains. Then usually only one thing helps: wash hot. But not all textiles can be put in the washing machine. Therefore, a homemade fragrance freshener will help you to remove bad smells. Accordingly, you need 350 ml of boiled, lukewarm water, 1 tablespoon of the household remedy baking soda, and 40 ml of alcohol. In addition, essential oils can refine your textile freshener.

For some people, making coffee is on their daily to-do list. Not every company can afford the “luxury” of excellent freshly ground whole bean coffee that can be easily prepared at the touch of a button.

Is making coffee an intern’s job?

Especially for meetings, a sufficient amount of coffee should ensure a high level of productivity and concentration for all participants. Yes, and very important – it must also be tasty. So where does coffee come from in many German companies and who has a license to produce coffee?

If you still remember the time of the intern, then this was clearly part of the daily tasks. The first coffee pot had to be ready at a quarter to eight (or whenever the boss came to work). A fresh carton of milk should have already been opened on the top shelf of the refrigerator, and the sugar bowl, sweetener dispenser and honey should have been filled accordingly. Of course, it has always been important to ensure that there are enough clean cups, saucers and teaspoons available. If you have a particularly important customer visit, you should take a French press and a milk frother and brew a creation that is special in terms of look and taste. Of course, with a thin layer of milk foam. That’s how it is when you’re an intern, sometimes you have to do things that aren’t part of the standard job description. Then fill everything with water. Satisfying different preferences and tastes was like a knowledge test that was given every morning.

However, in many cases there are no interns, so their place is too often taken by interns. After all, the years of apprenticeship are not the years of men. And it’s not too bad to sweeten your co-workers’ stressful day-to-day work by simply making delicious coffee drinks. However, often administrators, secretaries, or personal assistants must ensure that sufficient coffee is available. In some cases, it is not even regulated who is responsible for the supply of coffee.

Before preparing it, you should wash and soak rice. We explain why and what you should pay attention to.

At first glance, it is actually quite easy to cook rice. If we take a closer look at the topic, it becomes apparent that there are quite a few things to consider when preparing rice. It’s not just about the consistency and taste of the cooked rice, but also about the health aspects. Find out here why you should definitely wash and soak rice.

Washing and soaking rice: That’s why it’s so important

Some people cook rice directly without washing it first. Others swear by washing the grains thoroughly beforehand. Very few, however, remember to soak the rice beforehand. These are important steps, because with the right preparation you can reduce the arsenic contained in rice.

Background: In recent years, various studies and investigations have repeatedly found arsenic residues in rice. Arsenic is a semi-metal that occurs naturally. This element is classified as “carcinogenic to humans” according to the International Agency for Research on Cancer (IARC). This is why there have been maximum levels for arsenic residues in rice and rice products in the EU since 2016.
Arsenic can also be found in other foods such as bread or cow’s milk, but rice is particularly contaminated. This is because the rice fields are flooded during cultivation and the arsenic is released from the soil. Arsenic was found in all six products examined in a WDR random sample study. More information on this topic: Arsenic in food.
Due to the arsenic residues found, the Federal Office for Risk Assessment (BfR) advises against consuming rice too frequently and in too large quantities. Instead, you should replace rice and rice products with other grains and foods – especially for babies and children. Incidentally, brown rice and parboiled rice are particularly affected, since the arsenic is mainly deposited in the outer layers of the grain. However, these types of rice also contain more valuable nutrients than white, polished rice.
But you don’t have to do without rice completely, because the method of preparation plays a major role and can significantly reduce the arsenic content in rice. It is important to wash the rice before preparation – and preferably even soak it.

Soaking, washing and cooking rice: arsenic content

There are two popular methods of cooking rice: the swelling method and the water method. (More info on the two methods: Cook rice)

Culinary connoisseurs argue about which method gives the rice the best consistency and tastes best. Scientists, on the other hand, want to find the preparation method that can remove the most arsenic from the rice.

A study from 2015 took on this task and tested various methods. The results for this:

Thorough washing can leach some arsenic from the rice.
The arsenic contained can be reduced even more by soaking the rice for several hours beforehand.
The rice-water ratio when cooking is also crucial. With the swelling method (water 2:1 rice) almost all of the arsenic remains. For the test, the researchers cooked the rice in the ratios 3:1, 6:1 and 12:1. The more water you use, the more arsenic you can end up rinsing out with the cooking water.
The researchers achieved the best result by soaking the rice overnight, then washing it and then boiling it in water at a ratio of 12:1. With this method, over 80 percent of the arsenic could be reduced.
These findings apply to all rice varieties examined. The exact percentage of arsenic content varies depending on the type of rice. You can find this in the linked study.

Step-by-step instructions: wash and prepare rice

According to research, you should soak and wash rice beforehand. Also, a relatively high water to rice ratio is important for cooking. However, so that you don’t have to use too much energy to heat the water, we do not recommend the 12:1 ratio, but a ratio of 5:1. This represents a good compromise and is also recommended by the BBC, based on the findings of Prof Meharg, one of the authors of the study mentioned above.

Prepare rice correctly – instructions:

Soak the rice in enough water overnight. To do this, cover the rice with water by about an inch.
Drain the water the next day.
Then wash the rice with water until the waste water is clear and no longer cloudy. This not only flushes out arsenic, but also excess starch and any impurities.
Place the rice in a saucepan with water in a 1:5 ratio.
Once the water is boiling, turn the heat down to low. Then let the rice simmer for about 15 to 20 minutes. The exact cooking time varies depending on the type of rice.
Drain the cooking water and drain the rice in a colander.

In order to reduce the burden on the environment, not only do large companies and governments have to adapt their behavior, but private individuals should also start making their contributions. This starts very practically in the household. Read here about how you can make your household more sustainable and environmentally friendly.

Cleaning products

Many cleaning products are made with strong chemicals. By using these in the home, chemicals enter our water system and where possible even our groundwater. There they then poison the soil and the plants and trees growing in it. Often such strong cleaning agents are not necessary. Especially when the dirt is still fresh, natural cleaning agents can be used for cleaning. In some moments, of course, the use of cleaning products cannot be avoided. Then you should try to use the product sparingly. This not only protects the environment but is also easier on your wallet. As a result, the next time you buy cleaning agents, use citric acid-based agents. So keep the remedy as natural as possible.

Electrical appliances

In order to be more environmentally friendly when using your electrical appliances, you can, for example, do without preheating the oven. Most dishes also turn out wonderfully delicious even though the oven has not been preheated. You also do without a wash cycle with a half-loaded washing machine. To be honest, you have enough clothes in your closet to go for at least a week without washing. Before you start your next laundry, you should have enough laundry to fill the washing machine completely. So you wash your clothes less. As a result, it breaks less quickly. Then buy new clothes less often. And that also helps the environment. Please also note clever tips for saving electricity.

Qualitative products

We all know from childhood that quality lasts longer. Of course, quality often means more money. Therefore, many people mostly choose to save money and buy fewer quality products. What is often forgotten is that these products also break down more quickly and that a replacement product has to be bought sooner.

Which in the long run means that the lower quality product costs more money. The purchase of high-quality products is particularly worthwhile in the kitchen, as these are often exposed to high temperatures and are used every day. Cast iron saucepans, such as a Le Creuset roaster, are usually easier to clean and can withstand high temperatures. Cast iron products can therefore be used for a long time, which means that you have to throw away less and then buy again. Such a Le Creuset roaster can also be used for several different purposes, which is why you then generally have to buy fewer pans and pots.

Of course, a household is a big and complex thing in which we make use of many things over which we have no control. Nevertheless, you can start making your household a little more sustainable step by step and thus protect the environment in the household. Don’t take on too much at once. It is enough if you start slowly. All that matters is that you start.

You can simply dry sourdough and store it for a long time. We will introduce you to three methods of preserving sourdough: by crumbling, drying and freezing.

You only have to prepare sourdough once and can then “feed” it again and again with flour and water and thus multiply it. This makes it last forever. The sourdough contains microorganisms (such as lactic acid bacteria and yeast) that form during the fermentation process and make the dough slightly acidic. However, if you don’t bake regularly or want to send the sourdough to friends or relatives, you can preserve the sourdough by drying it. The shelf life of the sourdough varies depending on the method, ranging from three months to several years.

For each of the three methods, you must first prepare a sourdough. You can find instructions here: Prepare the sourdough. We strongly recommend that you buy the ingredients in organic quality. Among other things, you avoid residues of chemical-synthetic pesticides and support ecological agriculture.

Method: Crumble sourdough

The first method is the “crumbling” and subsequent drying of leaven:

Pour your prepared sourdough into a bowl.
Gradually add the flour and mix everything together with a wooden spoon. Use enough flour so that the dough is only slightly moist and crumbs can form.
Gradually rub the dough between your palms. This creates crumbs. Do the same with the entire dough.
It is best to spread the crumbs on a baking sheet and let them dry for several hours. This way you prevent mold.
Fill the so-called Krümelsauer into a lockable screw-top jar. You should only close the jar loosely or drill a hole in it if the dough continues to ferment a little. Alternatively, use a cloth bag. The dried sourdough can be stored in the refrigerator for about three months.

To use the dough again, add enough water to the crumbs until it becomes a paste. Store the dough at room temperature for about 2 to 8 hours. It is then activated again and can be processed further.

Method: Dry sourdough as flakes or powder

The second method involves making flakes or powder from the sourdough:

Spread the sourdough thinly on half of a sheet of baking paper and fold it over. If you have more dough, use a second sheet of baking paper.
Allow the sourdough to dry at room temperature. This takes about a day or two. The dough needs to be really dry, otherwise mold can form.
Dried, sourdough is lighter in color, cracks, and breaks easily when touched.
Note: You can usually reuse the parchment paper. To do this, carefully peel off the dry sourdough so that the baking paper does not tear. Or you can use a sustainable baking paper alternative.

Break off small pieces of the dried sourdough. Now you have two options:

For tiles: Place the small pieces in a sealable container, cloth bag, or paper bag.
For powder: grind the small dividers into powder with a mortar or grinder.
Dried sourdough lasts for several years. You can store it in the fridge or at room temperature in a dark place (for example, in the pantry).

To reactivate the leaven, you need to add water and flour. First add the same amount of water to the dried dough (ratio 1:1). If he starts blistering at room temperature, you can “feed” him with more water and flour. This can take several hours.

Note: Since most microorganisms die off during drying, the sourdough may not always start to ferment. This is always the case when there are no or no longer sufficient microorganisms in the dough.

Method: Sourdough Freezing

Pour your sourdough into a sealable container that is freezer-safe. Alternatively, you can fill the batter into an ice cube tray. Place the dough in your freezer or freezer compartment.

Freezing disrupts the fermenting properties of sourdough, as some of the microorganisms die off. So give the dough 1-3 days after defrosting to recover slowly. You can add some flour and water and activate it at room temperature. You can then feed him more flour and water.