Tag

making

Browsing

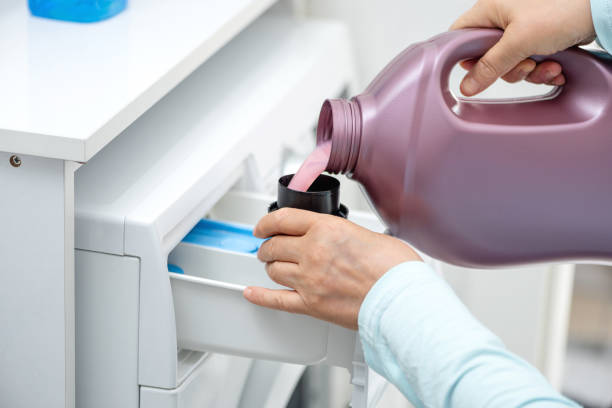
We show how easy it is to make your own fabric softener. Let yourself be inspired by the easy production.

It’s not only interesting to make your own fabric softener, but it’s also often healthier. There are no hidden ingredients, the content is always known. We want to show you how you can make your own fabric softener.

The best for the senses

Homemade fabric softener is the best thing you can do for your senses. The laundry smells good, invigorates the senses, and also feels good. You do without harmful chemicals and can be even happier about your own fabric softener.

But it’s also good that you don’t just get the best out of your own senses in terms of feeling, smelling, and seeing. No, you also think about the environment. Because the chemical detergent pollutes the wastewater and thus also the environment. Allergic reactions can also be avoided, in adults and children. Not to forget that the homemade fabric softener is also much cheaper.

Make your own fabric softener

There are many home remedies that are not only inexpensive but also suitable for fabric softeners. Very simple and without having to do anything, the home remedy would be vinegar. Please no vinegar essence, this smells too strong and will not be easily removed from the laundry.

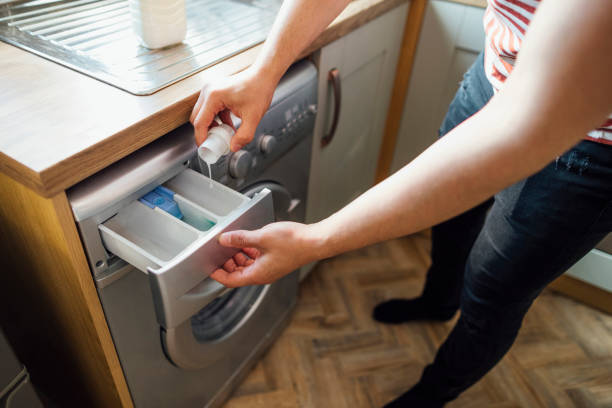
You simply use 30 ml of vinegar with a full washing machine. Put this in the fabric softener compartment and you will be amazed at how soft the laundry becomes. At the same time, you have found a good descaler for the washing machine. The laundry shines like never before, there is no longer a veil to be seen. The small amount of vinegar evaporates when drying, so this special fabric softener cannot be smelled.

Another fabric softener could be lemon. Lemon is especially good for light-colored laundry that you want to keep its color. Just squeeze a lemon and put 1-2 teaspoons in the fabric softener compartment. The bleaching effect is good for turning yellowed laundry white again and the laundry always smells nice like summer.

Another interesting fabric softener would be orange and lemon peels in a cloth sack. This is added to the laundry and simply washed with it. This softens the water, which is a good way to prevent limescale in the washing machine. The laundry smells very fresh and is much softer.

Essential oils as fabric softeners

So far it has been seen that a natural rinse can be used quickly, even if it’s domestic. It was also cheap. If you want to know another trick, you should know that essential oils are perfect as fabric softeners with a great scent. But be careful, if you have an allergic reaction, you should better avoid these oils. It is important that the essential oils are natural. They are simply added drop by drop to the washing powder. Homemade detergent alternatives can also be used.

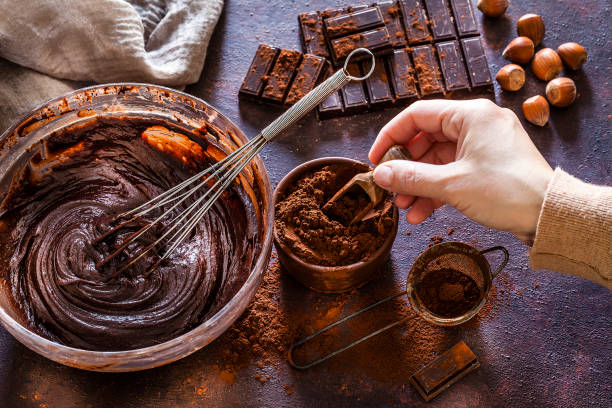
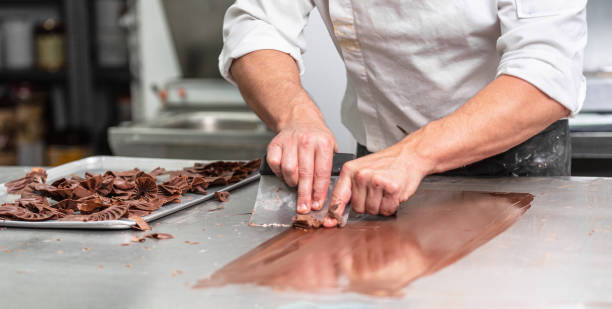
Make chocolates yourself? Simple, tasty, with heart and soul. That’s how you spoil your loved ones. That’s how you spoil yourself. Clever chocolate recipes to imitate and try out.

In the following, you will learn everything that is important and useful for making chocolates. Why do they taste so good? How to make them yourself easily and simply. Which tips and tricks make the result even more satisfying and numerous tasty praline recipes.

Chocolates to indulge in

Making chocolates is already one of the supreme disciplines of hobby bakers and kitchen heroes. But it is also your pleasure. But it is not that difficult to want to make chocolates yourself. The nice thing about it is that pralines, in contrast to cookies, biscuits, cakes, and tarts, have a much longer shelf life and are edible. So you can let off steam in the kitchen for a whole weekend and always have small and romantic gifts for your loved ones and friends for the next few weeks. Have the courage to try. The tasty, delicious results come all by themselves. It is also a great idea for homemade gifts for Christmas.

Tools, materials, and basic equipment

If you want to make your pralines clean and tidy, you can’t avoid a praline grid and a praline fork. For the first attempts, a wire rack and fork will certainly suffice… but honestly? They are just stopgap measures that unnecessarily complicate work and make it less clean. With a praline fork and praline lattice, on the other hand, you can easily “ignite” any homemade praline. A pot for heating the couverture is also essential.

What’s inside?

If you talk about wanting to produce pralines, you are primarily talking about different fillings that are filled into hollow praline balls. At least these are the classic chocolates. This filling is called can ache and usually consists of lots of cream and couverture as the basic ingredients.

Then it depends on the respective taste. Because the ganache can be upgraded with any alcohol such as rum, whiskey, or Marc de Champagne, refined with special flavors such as pistachios, coconut flakes, coffee, chili, vanilla, or spiced up with fruit components made from raspberries or apricots. Depending on the flavor additive, the required amount of butter also varies. Because this determines the respective fat content of the praline.

Making chocolates – the mass makes the difference

In order for the praline production to be successful, you need a good base: the can ache. To ensure that this is correct, we have put together some important tips and tricks.

  • The mass hardens very quickly. We, therefore, recommend using an electric mixer to mix the individual ingredients. If you want to try it analogously with your own physical strength, you will quickly reach your limits. In addition, the result is not as creamy and smooth.
  • The color of the chocolate mass determines the intensity of the taste. The best indication of this is the dried chocolate on the edge. If it is very dark, the cocoa content is very high. The lighter the chocolate, the higher the milk content.
  • Sometimes the mass just doesn’t have the desired consistency. If you want to let your praline mass harden a bit, you can put the mass in the fridge. We recommend a minimum of 3 hours, but you can also stay overnight. Then whip the mass up again. This provides additional suppleness.

Shelf life of homemade chocolates

We often ask ourselves how long a praline can keep for so long. You can’t really say that with any certainty. First and foremost, the respective ingredients decide how long the praline can be enjoyed.

Keep in mind that most ganache contains cream. This limits the shelf life of the praline to a good two weeks. In order to guarantee this period, however, the praline must be stored at 15 to 18 degrees … preferably in the dark. In terms of taste, a reduction in the aromas can definitely be determined after two weeks.

Of course, it is also crucial that flawless ingredients are used and that work is carried out as hygienically as possible. The shelf life can also be extended in this way. Sterilization of the ingredients also increases shelf life. It is advisable to heat the cream just before its boiling point, instead of just heating it to 70°C, as many praline recipes recommend. But be careful: If you heat your cream to over 70°C, you lose taste … at least the flavor is changed. In return, you have less to worry about mold growth.

The alcohol content also determines the shelf life. The more alcohol the chocolates contain, the longer they will keep. Classic liqueur pralines can have a shelf life of up to 6 weeks. But here again: the taste diminishes over time. The best thing to do is to produce less and always ensure fresh supplies, then you don’t have to worry about shelf life … and you can try out many more new praline recipes.

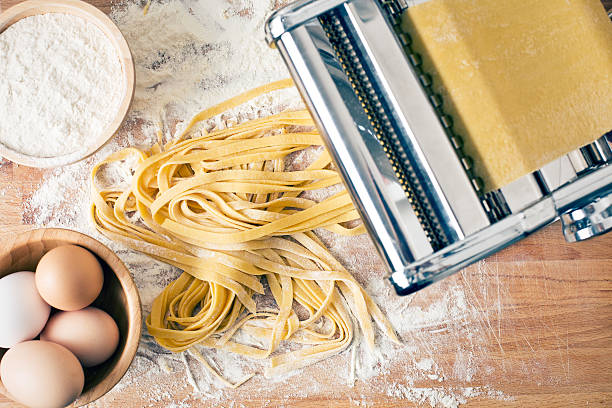
Lots of useful tips for making pasta dough and making pasta yourself. With instructions on how to make your own pasta. Now conjure up your own pasta with your own homemade pasta dough.

Just make your own noodles

They are on everyone’s lips and almost everyone knows them: pasta. They are among the most popular side dishes and simply make connoisseurs happy. Noodles can be prepared quickly and are a taste experience in salty and sweet forms. We usually enjoy industrially produced pasta. Fresh pasta that tastes like it was made by mom or grandma is rare. Freshly made noodles are sold commercially as a delicacy. The price is correspondingly high. But making pasta yourself is not rocket science. With a little patience and practice, anyone can make their own delicious pasta dough.

The ingredients for the pasta dough

For a good pasta dough weighing approx. 550 g, the following ingredients should be ready.

  • 300gr wheat flour type 405
  • 200gr durum wheat semolina
  • 6 egg yolks
  • 1 egg
  • 2 teaspoons oil
  • 3 tablespoons of water
  • and a pinch of salt

This amount makes about four servings when cooked.

The tool for making pasta yourself:

For kitchen tools we need:

  • a cooking spoon
  • a large mixing bowl
  • a teaspoon
  • and a tablespoon

The steps of the DIY pasta

Place the flour and semolina in a mixing bowl. Make a small well in the middle of the mixture with your hands and pour in the yolks and the whole egg.

Now add the oil and salt. If you are not afraid of raw eggs in the dough and thus of salmonella poisoning, you can try the raw dough and possibly spice it up a little to taste. Since the noodles will later be cooked in saltwater, the seasoning should not be overdone. Finally, add the water to the dough. Muscle strength is required now. The dough must be kneaded for at least a quarter of an hour. The dough is good when it rolls smoothly into a ball and doesn’t crumble.

If despite all caution, it crumbles, a tablespoon of water and a few drops of cooking oil can quickly restore the elasticity of the dough.

When the dough is well wrapped in cling film and has been flattened with muscle power, it can be placed in the fridge and left to rest for about half an hour. The break should really be observed. If the dough is not really cool, it can become sticky and processing with a great result is not possible.

The processing of the pasta dough

After the dough has rested in the refrigerator and is now back on the work surface, further processing depends on which pasta is to be made.

Cannelloni: For cannelloni, the dough must be rolled out extremely thinly on a floured work surface. If you want to save flour, you can try rolling it out on baking paper or a silicone mat. Then cut the thin dough into squares and shape it into small rolls. There are various ideas for tasty fillings on the Internet.
Ribbon noodles: For ribbon noodles, roll out the dough wafer-thin and then cut into thin strips with a sharp knife. It is important: Dust the dough well with flour and not place the cut noodles on top of each other.
The dough should be wafer-thin because the eggs it contains give the dough a powerful lift. Even if the batter is so thin that we can almost see through it, it can still be too thick for certain pasta dishes.

No matter which pasta dish you choose, the basic pasta dough mentioned above is suitable for all pasta shapes.

The preparation of the noodles

Last but not least, tips for cooking pasta should be observed. So let the noodles cook in a pot of boiling water for about three to four minutes. Add a teaspoon of salt to the cooking water. Please no oil in the water. The oil in the cooking water closes the pores of the pasta. You can therefore no longer absorb sauces on the plate.

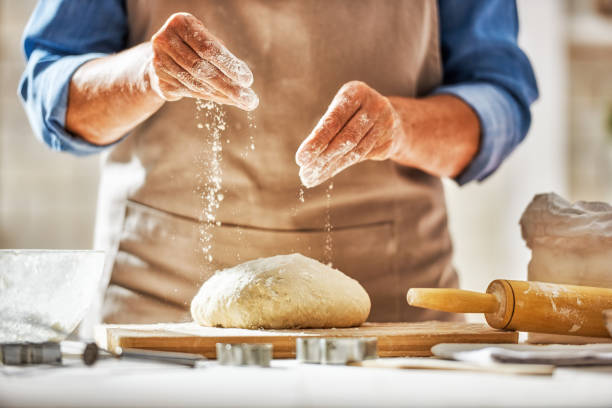
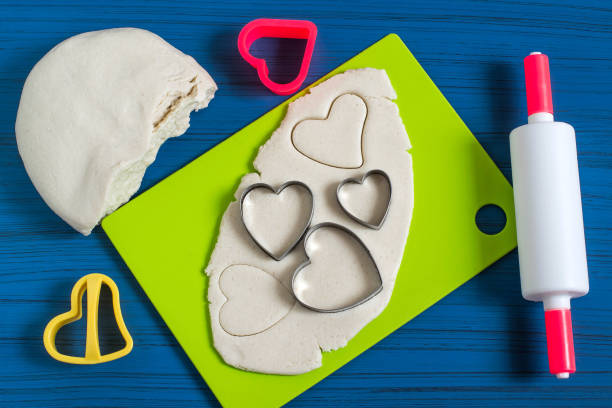
Working with salt dough is a lot of fun. Great decoration can be created at cheap prices. The salty dough has to be really easy to work with. We show how easy it is.

Children love the salt dough to play with and paint, as do many adults. It is important that this is produced in a healthy way and we would like to show you how this can be done.

The salt dough only needs four ingredients

You only need four ingredients to make the salt dough yourself. Children love this salty dough because they can finally muddle and do handicrafts. Wonderful works can be created with salt dough. Toys can be made, pendants, decorations, and even ashtrays if you have a little patience. Salt dough definitely encourages children’s spirit of discovery.

Basically, everyone has already tinkered with the dough, you just have to make sure that you make good salt dough. For the perfect salt dough, you only need 2 cups of wheat flour, preferably type 405, plus 1 cup of salt, 1 teaspoon of vegetable oil, and then another cup of water. Everything has to be mixed well and you can knead the dough perfectly and use it for yourself. Children also have a lot of fun here, many a child loves to knead the dough until it is perfectly smooth. If the dough is still a little sticky, add a little more flour.

Another salt dough recipe

Yet another recipe for making salt dough would be 1 cup flour type 405, 1 cup potato starch, 1 cup salt, 1 cup water, and 1 teaspoon vegetable oil. The whole thing is kneaded well and can be used immediately. You could also just use potato starch if you want the items to last a long time.

Important for the salt dough

Salt dough is best stored in airtight containers. You can always take out as much dough as you need. The dough can be kept fresh in the refrigerator for up to several weeks without drying out. So children could do a little tinkering every day. By the way, the salt dough doesn’t always have to go in the oven. It can also be air-dried. But this can take several days.

The oven is a bit faster there. But here, too, one should proceed with caution. It is best to set the oven to 50 degrees and let the finished works of art bake for an hour. The work then has to cool down and harden. Some people also set the oven to 120 degrees, but then the salt dough becomes darker, but also harder. Cracks can also be avoided in this way, which are annoying if you set the oven too hot.

Paint or pre-dye salt dough

If you want to let off steam creatively with the salty part, you can color the dough in advance or paint the finished works later. Children usually enjoy it more if they are allowed to paint the works of art later. If you want to color the dough, it is best to use food coloring or Easter egg coloring. Even cocoa can be used or beetroot. Curry and other spices also add color to the salt dough. After baking and cooling, the salt dough can be painted with watercolor, poster paint, or even acrylic paint.

Yogurt is delicious and healthy. There is a huge selection on the supermarket shelves. But making yogurt yourself is also very easy.

Just make your own yogurt

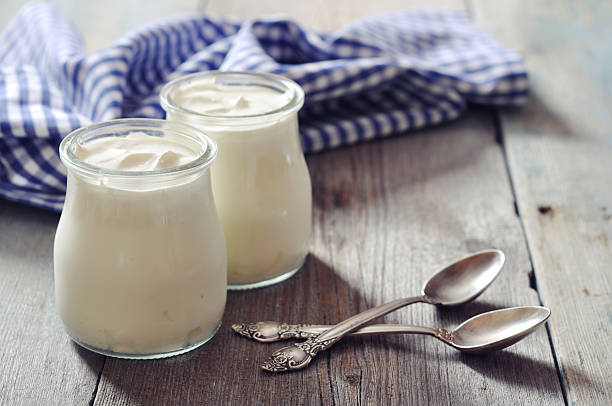
The advantage: the yogurt ingredients are free of artificial flavors and preservatives. But you can refine your homemade milk product with a wide variety of ingredients such as almonds, honey, or fruit according to your personal preferences. But there are many more yogurt recipes. We will tell you how the in-house yogurt production works. You will be amazed at how easy it is to prepare.

There are several ways to be able to make yogurt. For newbies, it’s probably easiest to use a store-bought probiotic dairy product to start with. Once complete, simply save some of the product to grow your own yogurt cultures in the future. But you can also use store-bought cultures. You can then make your own tzatziki with dehydrated yogurt.

Yogurt cultures

The following cultures are particularly suitable for yogurt production and can ensure a healthy intestinal flora:

  • Lactobacillus acidophilus
  • Bifidobacterium lactis
  • Streptococcus thermophilus

You also need milk, milk powder, and optionally inulin, which provides more creaminess. You don’t necessarily need a yogurt maker, which is often mentioned in recipes, to be able to make your own yogurt.

Yogurt production without a preparer

Ingredients:

  • 1 liter of milk
  • 150g natural yogurt or optionally a pinch of yogurt cultures
  • milk powder
  • optionally a pinch of inulin

Step 1:

The milk must first be boiled to kill germs. Then let the milk cool down to around 50 degrees.

Step 2:

Now you can stir the natural yogurt or the cultures into the milk. If you want to make a firm yogurt, use about four tablespoons of powdered milk. And to increase the creaminess, you can use prebiotic fiber inulin. Inulin is also a useful source of food for the good intestinal bacteria and this, in turn, leads to a healthy intestinal flora.

Step 3:

The finished milk product can now be filled into jars and then placed in the middle rack of the oven at 50 degrees for 30 minutes. It is important that you no longer move the glasses.

Step 4:

After 30 minutes you can switch off the oven. But the glasses are left in the oven overnight. The next day the jars are closed and can be put in the fridge. You should have used up the yogurt within 3 to 4 days.

Make lactose-free yogurt

To produce lactose-free yogurt, the yogurt ingredients hardly change. Simply use goat’s milk or soy milk instead of cow’s milk.

Yogurt smoothie recipe with raspberries

Ingredients:

  • 250 grams of raspberries
  • 300 grams of homemade yogurt
  • 1 packet of vanilla sugar
  • 40 grams of sugar

Step 1:

You can use either fresh or frozen raspberries. Fresh fruits should be washed first. If you are using frozen raspberries, allow the fruit to defrost a little.

Step 2:

Now puree the raspberries and then strain to get rid of the pits.
Half of the mark can now be filled into glasses.

Step 3:

The other half is stirred together with yogurt and sugar and then poured onto the raspberry pulp in the glass. You should make sure that both components do not mix with each other in order to maintain the two-color effect.

Yogurt Ginger Dressing

Ingredients:

  • 20 grams of ginger
  • 150 grams of yogurt
  • 2 tbsp lime juice
  • 1 tablespoon apricot spread
  • 1 pinch of salt
  • chili
  • cane sugar

Preparation

  1. Peel ginger and cut it into small cubes
  2. Mix all the ingredients well and you’re done.
  3. The dressing is wonderfully refreshing and goes well with leaf salads and raw vegetables.

Making wine yourself is the dream of many wine lovers. We give you an overview of the basic principles, the accessories and the fermentation methods to make wine yourself.

You can make your own wine from many different fruits. We are particularly familiar with wine made from grapes – in other regions and countries, on the other hand, wine made from apples, berries, cherries or even bananas. However, the basic principle of fermentation is the same: yeasts convert the sugar from the fruit into alcohol.

Make your own wine: mash fermentation or juice fermentation?

Basically, you can distinguish between two methods to make wine yourself: mash fermentation and juice fermentation.

During mash fermentation, you mash or puree the fruit and ferment it whole. Since the color of red grapes is mainly contained in the skin, you get red wine in this way (this does not apply to white grapes, of course). The mash fermentation is considered to be a little easier, and more aromas develop.
For juice fermentation, you squeeze the fruit and only ferment the juice. This is how bright and clear wines are created.
You can also first puree or mash the fruit into the fermentation balloon, squeeze out the juice after a few hours and ferment it. Then you get a rosé.

Make sweet or dry wine yourself

Whether a wine is sweet, semi-dry or dry depends on its sugar content. Since this decreases in the course of fermentation, a sweet wine is less fermented than a dry wine. Accordingly, you can make a sweet wine yourself by interrupting the fermentation process prematurely.

Making wine yourself: important accessories

Without the right accessories, it is relatively difficult to make wine yourself. If you have a few tools, it’s not that complicated.

These are the most important tools for winemaking:
Perhaps the most important tool for fermenting wine is a fermentation balloon, preferably made of glass. The jar should have a matching lid and fermentation attachment. The latter ensures that no air gets inside. To do this, the fermentation attachment allows CO2 to escape, which forms during alcoholic fermentation.
a suction hose or similar to be able to fill the wine out of the fermentation balloon
a scale that is as accurate as possible
a vinometer to measure the alcohol content of the wine (you often get it with the fermentation balloon)
a clean cloth for filtering
large bowls to prepare the fruit or decant the wine. Make sure that these are not made of metal so as not to affect the taste of the wine.
Tip: If you want to make wine yourself, you will not only find fermentation balloons on the Internet, but also complete starter kits.

Making wine yourself: The difficult selection of ingredients

The most important ingredient in wine is the fruit. No matter which fruit you use – they should be fresh, fully ripe and unsprayed. Consequently, freshly harvested organic fruits from the region are ideal for your wine. If you have the right conditions, you can also plant your own grapes.

If you are very puristic, the fruits are almost enough. All you have to do is add a bit of natural yeast and you’re ready to make natural wine yourself. However, even experienced winemakers find this difficult because fermentation with natural yeast is difficult to control. In addition, natural wine has a different taste than conventional wine.

Making wine yourself: these are the steps

Here you will find an initial overview of the stages that await you if you want to make wine yourself. If you actually plan to make wine, you can take a class or use detailed instructions from the internet or books. For the sake of simplicity, these instructions refer to grapes.

Sort the grapes and clean them, washing is not absolutely necessary. Do this very carefully so that no bad grapes spoil the wine afterwards. Important: If possible, do not let the grapes come into contact with metal, as this can change the taste.
Must fermentation or juice fermentation? For a mash fermentation you mash or puree the fruit, for a juice fermentation you squeeze them.
Depending on the recipe, add sugar, yeast and, if necessary, acid or lime to the mash or juice. Note: You can also add the sugar gradually, then there will be a little more alcohol at the end because the yeast can work more efficiently. However, it is easier to add all the sugar at once.
Fill the fermentation balloon with mash or juice, but no more than halfway! As soon as fermentation begins, CO2 is produced. The liquid will begin to bubble and sometimes overflow.
Place the fermentation balloon in a quiet place that has a temperature between 18 and 20 degrees Celsius all the time. After a few days, fermentation begins – the mixture bubbles.
If the fermentation is in full swing, you can also put the fermentation balloon in a cooler place. This slows down the fermentation.
After two to four weeks, there are hardly any bubbles left – the wine is ready. Now all you have to do is filter and bottle the wine. Note: If you have started mash fermentation, you can press out the juice after a few days and continue fermenting it. The longer the juice is in contact with the skin of the grapes, the darker the wine will be.

Important note on making wine yourself

Finally, the most important things to keep in mind when making wine:
Keep all your utensils very clean. This is how you prevent unwanted substances from getting into the wine.
Do not use metal accessories.
Follow the quantities exactly.
The first home-made wine may still taste a bit unusual. However, if you keep trying and adjusting your recipe, you’ll soon get satisfying results. It is best to start with a smaller amount of fruit.

This is how you make mayonnaise yourself quickly and easily. Homemade is the healthiest and definitely tastes the best. With instructions for preparing mayonnaise as well as recipes and tips for shelf life and storage.

It goes well with fries, on sandwiches and also in potato salad. They are available in simple, delicacy, and salad versions. We’re talking about mayonnaise. However, making it is not that easy. So that it still succeeds flawlessly, here are five tips on the basic ingredients and preparation, as well as great recipes.

The Origin of Mayonnaise

Mayonnaise is a must in German and international households. There are various theories as to where mayonnaise comes from. There is a widespread belief that the thick, creamy mass comes from the Balearic Islands and derives from the word Mahón, a port city. There it is said to have been created to celebrate the French victory. The resulting word was ‘Mayonnaise’. However, the French origin of ‘mailler’, which means ‘to hit’ in German, is more likely. Another origin says that mayonnaise descended from the Catalan aioli, which is prepared in a similar way. Aioli is mentioned in writing as early as 1024.

Natural ingredients are important
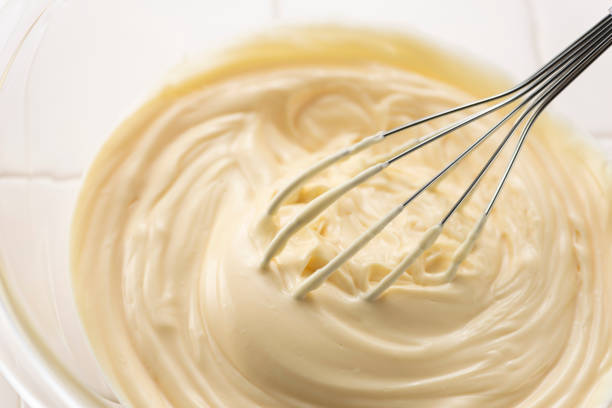
Actually, mayonnaise consists only of egg, oil, lemon juice, mustard, and spices. Fresh eggs are very important in homemade mayonnaise. Usually, only the yolk is used, but whole eggs can be used for your own production – if possible in organic quality and free-range. Mild and neutral vegetable oil such as rapeseed or sunflower oil can be used for the oil. If you want to intensify the taste, nut or olive oil is suitable. Good quality is also required here: It is better to buy the oil in glass bottles and with a low degree of acidity, which is usually shown as a number on the bottles. Here you will find olive oil tips for use as a home remedy.

Lemon juice is responsible for acidity. You can also get good lemon juice from a glass bottle or from real lemons, of course. For a homemade portion of mayonnaise, you need a fresh egg yolk or a whole egg, 200ml oil, ½ squeezed lemon, a teaspoon of Dijon mustard, and, if necessary, salt and pepper for seasoning. The ingredients should all be at about the same temperature. Here you will find instructions on how to make your own mustard.

The ideal preparation of mayo

To make mayonnaise yourself, first put the egg yolk and mustard in a tall container. The oil must be added very slowly during preparation and preferably drop by drop. Actually, oil and water do not bind, but the lecithin in the yolk serves as an emulsifier. This allows the mass to be bound by vigorous stirring. Either the whisk by hand is suitable for mixing, whereby the muscles are properly trained, the stand mixer or food processor (food processor) or the hand blender.

When preparing with a whisk, the ingredients must be whipped very quickly until the mayonnaise succeeds. Typical mistakes made when preparing mayonnaise are stirring too slowly, adding the oil too much or too quickly, or ingredients at different temperatures. Incidentally, the egg yolk and mustard often turn authentic mayonnaise yellow. So you’re not doing anything wrong if you end up with yellow mayonnaise. After all, your mayo is homemade and not an industrial product. The industry tends to use more water and less egg, and whole eggs rather than separate yolks, which results in the white color. Mayo is delicious in any color. Our recipe idea: potato and tomato salad with cheese.

Manual work or rather devices?

If you decide to use the whisk and good old-fashioned handwork, you’ll need to add the oil slowly, pouring it constantly. Best in droplets. The mass is then vigorously beaten with a whisk in a mixing bowl until it is firm and creamy. It is important that you are very quick and do not take a break. This is in the arms! Trained cooks can conjure up the result in about three minutes, but untrained cooks can take much longer, depending on their arm strength. However, apart from a mixing bowl and whisk, no additional equipment is required for this.

It’s much easier in a blender: Put all the ingredients except for the oil in the blender and switch it on. Gradually add oil. Some have a food processor at home because it is also suitable for many other things such as kneading dough, chopping nuts, making pesto, grating cheese, and much more. The easiest way to make mayonnaise yourself is to use a hand blender. It is not expensive, handy and fast. Just as with the previous descriptions, the oil is added here gradually. Here you will find 12 clever kitchen helpers and gadgets for cooking.

Tasty ideas and mayo variants

There are many ideas for refining the mayonnaise. You can’t taste a pinch of sugar or half a teaspoon of honey, but they intensify the other flavors. With garlic, you conjure up a garlic mayo, while with chili you can create a chili mayo. Have you ever heard of wasabi mayo? You can do this by mixing in wasabi powder. With some yogurt in the mayonnaise, you add some freshness and lightness. Ideal for the summer or for nice salads on the grill. You can also experiment with different spices: either the Mediterranean with herbs or curry mayo. Mix salt, water, lime juice, Dijon mustard, cumin, and curry powder. Gradually add the oil. If you like, you can add some cayenne pepper or chili.

Curry mayo tastes a little spicy and deliciously exotic with crispy chicken and sweet potato fries. If you add some Dijon mustard and sambal oelek to the basic ingredients of water, salt, lemon juice, and canola oil, you get a great spiciness. This mayo tastes perfect with Asian dishes and also gives the tofu a special touch. You can also throw other ingredients into the blender during preparation or puree them with the hand blender. Soaked nuts, fresh or dried tomatoes, tofu, or even mango and apple to mackerel go well with this. Try tuna dip for parties and snacks.

Vegan variants without egg

The vegan version uses mayonnaise without eggs. This variant is therefore also good for everyone who has to watch their cholesterol and for people who do not tolerate or do not like eggs. Here you will find more foods and recipes as egg substitutes. The classic is vegan mayo with soy milk: Simply mix 130ml soy milk and 1-2 teaspoons table or apple cider vinegar with lemon juice and 200g vegetable oil with a hand blender until the mixture becomes thick and firm. Season to taste with mustard, salt, and pepper. Another variant is vegan mayo made from chickpea water, the so-called aquafaba. Simply buy a can of chickpeas and pour the water through a sieve into a bowl. Set the chickpeas aside for later dishes. Briefly heat the chickpea water on the stove for five minutes and allow it to cool thoroughly.

Then add lemon juice and a tablespoon of chickpeas. Add the mixture to the blender along with the Dijon mustard and blend well on high. Add the oil very slowly. Season with salt and pepper – done. Many vegans use untreated cashew nuts for their mayo because of the healthy, plant-based fat content. You should soak them in water for two hours, then drain the water and then put the soaked cashews in the blender. Then add white wine vinegar, mustard, oil, water, and lemon juice. You can also omit the oil, as cashews are already very greasy. You can season the whole thing with salt, pepper, and optionally turmeric.

Durability and storage

When warm or hot, mayonnaise is very short-lived due to the egg. It’s best not to eat them after they’ve been warm for a few hours. Homemade mayonnaise should also only be consumed in a cool place for up to three days. Finished mayonnaise in jars or tubes can be kept refrigerated for up to nine months. You can tell that mayonnaise is spoiled by its appearance and smell: rancid smell and very sour taste as well as slight lumps are signs of mayonnaise that is no longer edible. Here are tips for storing and preserving eggs.
The perfect coffee should not fail simply because the right accessories are missing. Here is a small selection for making the perfect coffee.

Good coffee can be very simple. We will show you which equipment should not be missing.

Very early on, with the discovery of the coffee beverage, a real coffee culture centered around the coffee bean emerged. The first coffee house in Europe was built in 1554 in Constantinople, now Istanbul. Since then, many other coffee houses have opened – not only in Europe. With its creation, the focus was not only on the coffee drink itself. Rather, everything around it had to be right. It is not for nothing that coffee is the second most important commodity in the world, and is only trumped by trade in petroleum products.

So what does the coffee do credit to, if not the right coffee accessories that intensify the taste and enjoyment even more? With the right accessories, attempts are made to get the best out of the coffee bean – both in terms of taste and appearance. As is well known, the eye eats and drinks with you. As a result, there is now also a wide variety of coffee accessories for everything to do with coffee: it ranges from the coffee grinder for grinding coffee beans and espresso makers to the right container for every coffee beverage. Of course, the crema from the milk frother and the matching milk jug should not be missing for a grand finale. Here is a small list of relevant accessories so that you don’t miss anything when enjoying the perfect coffee. This must not be missing if you want to make the perfect coffee.

The right coffee accessories for the perfect coffee

Coffee pots, coffee filters, coffee machines, coffee grinders, milk frothers, espresso makers – the list of coffee accessories seems to go on and on. Nowadays there are a lot of coffee accessories that serve as tools to prepare a delicious cup of coffee. This accessory has been specially manufactured for the hot drink, so that coffee lovers can fully enjoy the particularly aromatic taste without much effort.

A common coffee accessory is the coffee grinder, for example. With the coffee grinder, the coffee lover is no longer tied to pre-made coffee powder. He can prepare the coffee beans himself at any time. In contrast to ready-made coffee powder, this has the great advantage that the bean still contains many aromatic substances. These disappear quickly if the grinding is too far away from the coffee preparation. Coffee grinders are available with different grinding systems, which are used in different areas depending on the purpose. Such a coffee grinder is ideal for using an espresso maker. The espresso maker is ideal for conjuring up the perfect espresso in just a few simple steps – according to your own preferences. Those who have decided to prepare their coffee with an espresso maker and not with a fully automatic machine experience the true spirit of traditional coffee enjoyment.

According to a study, 85.4% of the coffee drinkers surveyed in Germany between the ages of 18 and 64 drink their coffee with milk, cream or milk foam. So if you don’t want to be without a frothy topping on your delicious coffee drink, you definitely need a milk frother. Hardly any practice is needed to correctly froth milk, as you quickly get the hang of it and conjure up delicious milk froth in no time at all and enjoy your coffee to the fullest. Any type of milk can be used for frothing, but the easiest way is to use high-fat whole milk. Milk fans with a portafilter can fall back on the well-established milk jug, which also looks good in any room.

If you are expecting visitors or customers – or want to let your employees enjoy it right away, you can use a beautiful serving jug. It also offers space for several cups of coffee, so that new coffee does not have to be prepared as often. Stelton, Bialetti and KitchenAid, for example, are well-known brands that have proven themselves time and again in the field of coffee accessories. One last interesting coffee accessory is the portafilter tamper. With this, the ground coffee in the brewing sieve is regularly pressed so that the water flowing through can extract the ground evenly when the coffee is drawn off.

The secret of almost every grandmother or housewife is that special something in their sauces. A roux is usually the basis of the sauce. Therefore, we have a guide to making a roux.

So that you can conjure up a sauce for your dish or you want to refine your sauce, you can make a roux. Because this is quick and easy without many ingredients.

Preparation of the roux

The preparation is simple and easy to remember. Because all you need is fat, such as butter, margarine, or oil. Butter tastes best in the roux. You will also need flour and some broth. You can use vegetable or beef broth, depending on your preference. Then you proceed as follows. Also, note the delicious recipe for homemade Bolognese sauce.

Make roux as a base for any sauce

After making the roux you have a harmonious basis for your sauce. You can then use it in its pure form as a sauce. Because this already tastes very delicious thanks to the butter and broth. In addition, you can refine them. To do this, stir your normal sauce into the roux and then refine it with spices and herbs as usual. Also, note useful tips for drying herbs.

Make different variations yourself

The usual roux is rather light. However, you can also make a dark version of the roux. You just have to let the sweat toast a little longer. Because the longer you heat it, the darker it gets. And the lighter you want them, the sooner you have to add the liquid. It’s a bit difficult to make the dark sauce at first, as it can easily burn.

A hot and soothing coffee – that’s what hardly any of us can do without. No other drink can match the popularity of the pick-me-up.

Classic coffee machine with filter

Filter coffee is one of the most popular ways to brew coffee. According to the 2016 Coffee Report, about 71.8% of all coffee drinkers own a filter coffee machine. Thus, it takes first place by a wide margin and leaves all competitors far behind. By the way, filter coffee plays a pioneering role in the automation of coffee preparation. Until the 1950s, coffee had to be brewed by hand in the traditional way. With the invention of the filter coffee machine and vacuum-packed ground coffee, all households have been able to brew coffee quickly and easily. Thus, all modern coffee machines and fully automatic coffee machines represent a further development of filter coffee machines.

pressure brewing systems

The so-called pressure brewing system is an offshoot of the filter coffee machine. An attempt was made to prepare espresso as filter coffee. The result is rather unusual: strong, strong coffee is produced. It can best be compared to mocha coffee.

Stamping pot: pure flavor

Making coffee doesn’t always have to be boring. The stamping pot, also known as the cafetere, was invented in France in the mid-19th century. It offers its users a fragrant and full-bodied taste. Anyone who loves strong coffee has come to the right place. The working principle of stamping pot mainly combines aroma extraction and brewing.

Cona Pot: chemical coffee

The Cona pot looks like a chemistry experiment and apparently has little to do with making coffee. The unusual brewing method came from Germany and was widely used, especially in the old days. Nowadays, the equipment is often used for decorative purposes, but, of course, it can also be used for making coffee. In a broad sense, this is the so-called glass piston coffee maker. It owes its name Cona-Kanne to its manufacturer.

Unforgettable Karlsbader Canne

Karlsbader Kanne has been celebrating its market success for over 100 years. Even today, the production of classics does not stop. The secret to their success story lies simply in their simplicity. The pitcher filter is made of porcelain and does not affect the taste in any way. The best filtered coffee with pure aroma is prepared in a short time.

The Karlsbader Kanne is made up of four different parts. It consists of a coffee pot, a lid, a two-piece coarse-mesh porcelain filter, and a brewing attachment.

Coffee maker without espresso?

Contrary to what the name suggests, espresso is not actually made in an espresso pot. The so-called “percolator” uses only the principle of steam, which is also used to make espresso. However, this does not create the necessary pressure to really make a strong espresso. So “only” normal strong coffee is brewed.