As a pasture for insects, the wild pear is an important food source for bees and the like. The wild form of the pear, which grows in sparse forests, also thrives in domestic gardens. We will show you how to properly plant and care for the rare pear tree.
Plant wild pears in your own garden
The wild pear is the original form of the pear tree and originally grows mainly on the edges of forests and in clearings. Unlike cultivated pears, the wild fruits can only be eaten in processed form, but the gnarled wild pear should not be missing in any natural garden simply because of its ecological benefits. The white umbelliferous flowers provide food for bees and other insects, while the fruits that are stuck are eaten by native birds.
You can buy the wild pear as a young tree in well-stocked garden shops. Before you plant the fruit tree, however, you should pay attention to a few points:
Location: You can plant the wild pear almost anywhere. The only important thing is that it gets a sunny and warm place in your garden. Even on slopes, the wild pear thrives thanks to its deep roots. The blazing sun doesn’t bother her either. On the contrary, in order for the leaves to turn fully colored in autumn, the tree even has to be in full sun.
Soil: Since the wild pear is very adaptable, it grows well on all permeable soils. The only thing you should not plant the tree in is very wet or acidic soil. You can recognize acidic soils, for example, by means of special indicator plants.
When to plant: As with most fruit trees, spring or autumn is the best time to plant the wild pear.
Plant neighbors: In order to reproduce, the wild pear needs nearby pollinators. Apple trees or other types of pears are well suited for this.
Plant wild pear:
First dig a planting hole at the site. Make sure it’s at least twice the size of the wild pear’s root ball.
Slightly loosen the soil at the bottom of the hole and lay a drainage layer of gravel or sand.
Now place the wild pear with the root ball in the hole and fill it up again with the excavation from the plant.
Put a support stick in the ground and tie the young wild pear to it.
Finally, lightly press down the top layer of soil and water the pear tree generously.
The right care for the wild pear
Even if the wild pear is very easy to care for and robust overall, it is worth taking the following care instructions into account:
Watering: The wild pear’s water requirements are usually covered by the occasional rainwater that falls. In particularly long periods of drought, however, you should water them so that the soil does not dry out completely. You should definitely avoid watering too often, as the pear species is very sensitive to waterlogging.
Fertilizer: The frugal wild pear does not depend on additional nutrients.
Pruning: The wild pear is very tolerant of pruning. Once a year, in spring, you can safely remove dead and laterally growing branches. In addition, you should leave the naturally growing fruit tree unpruned.
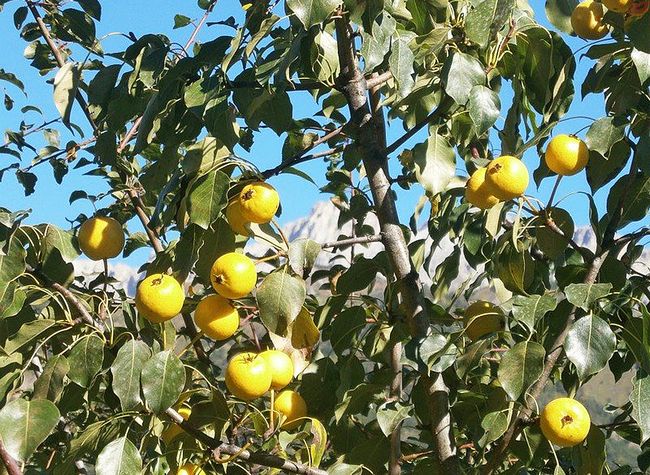
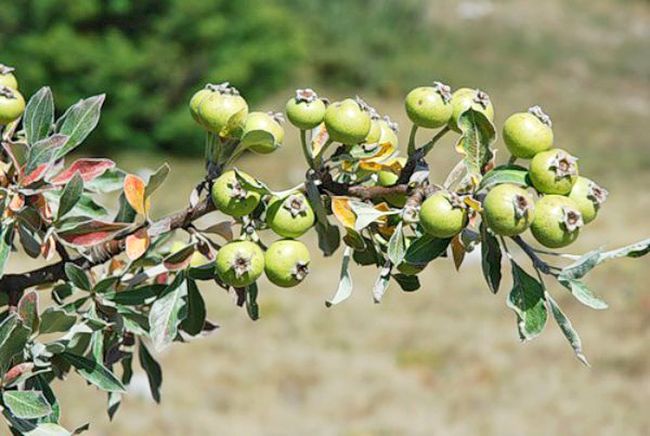
Harvesting: In autumn, the real wild pear develops round fruits that are about three centimeters in size. At first glance, they don’t look like typical pears at all. The pears only lose their bitter taste when they are overripe or after the first frost. Then you can harvest and process them. The fruits of the Chinese wild pear, on the other hand, are inedible and remain on the branches until they are softened by the frost and serve as food for birds.
Overwintering: In order to protect the wild pear from frost in winter, you should mulch its treetop in autumn with a thick layer of bark mulch or autumn leaves.
Diseases and pests: You no longer need to worry about pests with the robust wild pear. Even the dreaded pear rust rarely occurs with her.
You can use the wild pear in so many different ways
The fruits of the wild pear contain many tannins and fruit acids. In the raw state, they are therefore hardly edible due to the bitter taste. Nevertheless, there are a few ways in which you can still use the wild pear in the kitchen:
Using wild pears in the kitchen: After the first frost, wild pears lose their bitter taste. If you want to speed up this process and process the fruit faster, you can dry and bake the pears. In combination with cultivated pears or apples, you can then process the wild pear into pear syrup or pear puree.
Use wild pear blossoms: Wild pear blossoms can also be useful in the kitchen. As a side dish, the flower buds taste good in a wild herb salad. You can also process the mild-tasting flowers into tea or lemonade. If you sprinkle the buds with sugar water, you can candy them in the oven over low heat and use them to decorate desserts.