Tag

preserve

Browsing

Simply store eggs and preserve eggs. Tips and tricks for eggs and information on how long eggs can be kept. This is how you store eggs properly so that they can be kept for a long time.

Many people like to eat eggs. Be it on bread or in a salad or just in between. But mostly eggs are left over and you don’t want them to spoil. After all, spoiled eggs can cause unsightly diseases. In order to enjoy fresh and tasty eggs, one must store the eggs properly and preserve the eggs.

Things to know about eggs

The color of the eggs has nothing to do with the color of the feathers, as is often assumed. However, there is another feature on the hen’s head that can be used to determine what color the eggs will be. On the hen’s head, a flap of skin sticks out between the eye and the beak, which is either brown or light-colored. The egg you laid will be the same color.

Shelf life of eggs

You should never wash raw eggs because it destroys the protective layer of the egg and the eggs don’t last as long. In addition, without a protective layer, salmonella can spread on the egg. Eggs have to mature to really taste good. The egg tastes best from the fourth day after laying. Very young eggs are called “greasy”. Nevertheless, you should note the best-before date. The best before date (BBD) of eggs is stated on the label of the packaging. Here are 5 tips to keep food fresher for longer.

If the eggs are still good shortly after the expiry date, you can still eat them when they are heated to at least 70 degrees. Eggs cannot be sold after 21 days, but they can be kept for about 28 days after laying. If you plan on storing boiled eggs, don’t put them off. Although quenching with cold water stops the cooking process, the eggshell becomes porous and germs can penetrate more easily. Therefore, you should not put off eggs that you want to store longer. Doesn’t it always have to be eggs? There are also foods and recipes as egg substitutes.

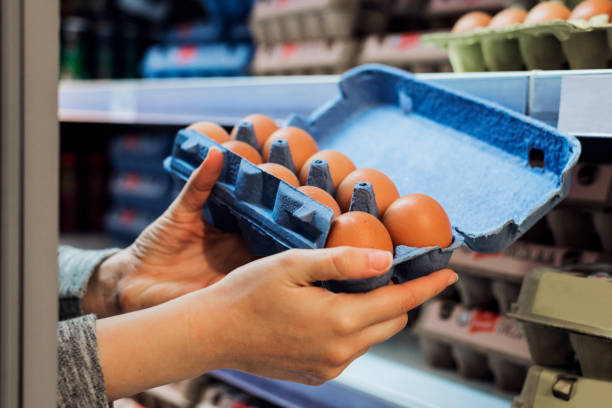
Preserve eggs in the fridge

Eggs are protected by a yolk membrane that prevents germs from entering. The protection of the membrane depends on the temperature. The fewest germs develop at a temperature of 4-6 degrees, which is why storing eggs at 4-6 degrees is recommended. From 20 degrees, the membrane lets bacteria through, which means that eggs definitely need to be refrigerated if they have been exposed to such temperatures. They should be cooled to a maximum of 7 degrees. They can then be stored in the refrigerator for four weeks. Eggs don’t belong in the fridge near smelly foods like cheese. Here’s how to get rid of musty odors in the smelly fridge.

In the refrigerator, they do not belong in the refrigerator door. With eggs, it is very important that the temperature remains consistently cool and that the cold chain is not broken. The constant opening and closing of the refrigerator door damage the eggs as it causes temperature fluctuations. Eggs are best stored in their carton inside the refrigerator. Take a look at our instructions for defrosting and cleaning the refrigerator.

Egg dishes and their shelf life

Extreme temperature fluctuations impair the self-protection of the egg. This reduces the quality and the egg ages faster. You should eat egg dishes such as mayonnaise, pudding, or sauces on the same day or store them tightly closed in the refrigerator at a maximum of 7 degrees for a maximum of one day. If the best-before date has passed, then you should no longer eat the eggs raw. You should heat them to at least 70 degrees and then only use them for baking and cooking. Also, note our tips and instructions on how to cook eggs properly.

There are dishes in which raw eggs must be used. For this, you should only use very fresh eggs and consume these dishes on the same day. You may no longer consume egg dishes once the cold chain has been broken. You should also be careful when blowing out Easter eggs. Sensitive people whose immune system is not very good, such as the elderly and small children, should only eat well-cooked eggs and egg dishes. Here you will find tips for blowing out eggs and dyeing Easter eggs.

Vacuuming food is made easy with lots of household tips. Food such as meat, fish, and vegetables can be sealed airtight in a bag using a vacuum sealer and thus be preserved for a long time. So use our clever step-by-step instructions for vacuuming.

What is a vacuum good for?

Especially if you want to go on vacation for a longer period of time and still have some fresh groceries in the fridge, it makes sense to vacuum them. This allows you to make food last longer and you don’t have to throw it away after your vacation. You can also save money by buying fresh fruit, vegetables, or meat on sale and then storing it longer. All you need for vacuuming food is a plastic bag and a sealing device with a vacuum function, which extracts the air from the bag contents and thus preserves the contents.

The pros and cons of vacuuming food

In addition to preserving food, another advantage of vacuum sealing is that you can store food in your fridge or freezer to save space. Accordingly, simply stack the individual bags on top of each other. There is no longer a need for bulky packaging material that takes up half your fridge. Read useful tips on how to store and preserve food properly. In addition, you can cook vacuum-packed meat with pinpoint accuracy and the food retains its shape, color, and taste. A disadvantage of vacuuming remains a large amount of plastic used, so this does not contribute much to environmental protection in the household. The time-consuming preparation of the food can also be annoying for some.

Tips on how to properly vacuum seal food

If you have decided on a vacuum sealer because you would like to stock up and want to make your food last longer, then you should heed the important tips below. Then you can use this type of food preparation sensibly:

1) Make fresh food last longer

In addition to freezing food, vacuum sealing is a good alternative to preserve as many nutrients as possible. The fresher the food you want to vacuum pack, the longer you can store it in the fridge or freezer. Therefore, first, remove the areas that no longer look so fresh. This means that the brown spots on the apple cannot spread any further.

2) Vacuum seal meat and fish

You can vacuum pack meat or fish with or without a marinade. You can then cook it in a water bath at the time of your choosing. In a sous-vide cooker, in particular, you can cook your vacuumed food with pinpoint accuracy. The advantage of low-temperature cooking in such an appliance is that the food, sealed in an airtight manner, retains its original shape and color. The aroma of the food is not lost during sous vide cooking either. Also, note tips for preserving fish and our instructions for freezing meat.

3) Vacuum soups and stews properly

If you want to preserve soups or stews, we recommend that you freeze the food in the freezer a few days before vacuum sealing. Then you can easily seal them airtight as a block of ice in the bag. If they are then used, you should plan time to defrost the food.

4) Vacuuming bread

Even bread can be preserved with a vacuum sealer. For this, cut it into slices or leave it whole. Then you can put the vacuumed bread in the freezer. Then, when you take it out to eat, you should let it thaw slowly. As soon as it is thawed you can bake it in the oven until crispy. In addition, read tips on baking bread and how to freeze fresh bread.

Buy a vacuum sealer online

If you are looking for a high-quality vacuum sealer at a fair price, then the Clamp Classic Pro 80 vacuum sealer is the right choice. In the comparison test this year, he is the winner. It convinces with its variety of functions and easy handling. It has a pressure regulation for sensitive food and has an LED progress indicator.

Now store food properly and make it durable. Keep edible food fresh for longer with simple storage tips. Storing food is a small art in itself, especially in the summertime.

Good fruit, fresh asparagus, or herbs spoil quickly. Dairy products, sausage, and meat can also pose health risks if stored and consumed incorrectly. Because heat and other factors quickly turn fresh food into spoiled goods.

Proper food storage

We like to enjoy food fresh. But who goes shopping every day? If you make a bulk purchase, you should store the groceries properly afterward so that the groceries stay fresher for longer. Because if stored incorrectly, food can quickly go bad. You also want to avoid throwing away food. Incorrect storage can also attract small intruders. So we have tips on how to store your groceries. Also, note tips for fighting food moths.

1) Preserve meat and sausages

Perishable goods should be stored particularly well and safely. The best way to do this is to pack it with a vacuum sealer and then store it in the freezer. For this, also read our instructions and tips for freezing meat. This will prevent frost burn caused by improper storage. And the inclusion of bacteria in the freezer bags is also avoided. Ultimately, even the so-called zip bags do not protect against the inclusion of too much oxygen and bacteria. It is best to store meat in the refrigerator at 0 – 4 degrees above the vegetable compartment this way you can preserve the food.

2) Fish is best fresh

When it comes to fish, it has to be said very clearly: it should ideally be eaten on the day of purchase. Storing fish is also possible, but should be considered. If you buy fresh plaice, trout, and the like, you can put them straight into the freezer. It is best to vacuum pack and place it in the freezer separately from the meat. This process should be as quick as possible from purchase to freezing. If a certain amount of care is not taken with the fish, there is a risk of pathogens such as salmonella or food poisoning. Also, note our article on recognizing fresh fish and preserving it.

3) Herbs belong in a glass or flower pot

Keeping herbs as food fresh longer is not that easy. This works best if you dry the herbs. Again, you need to store these foods properly. If you grow herbs such as sage, rosemary, oregano, basil, chervil, chives, and wild garlic yourself, you should place them well. Cut herbs should stand in a glass with fresh water. However, the glass must be able to stand in daylight. If not, the water threatens to tip quickly and the herbs are gone. Herbs can also be frozen. You can also wrap cut herbs in aluminum foil and put them in the fridge. As a result, you can effectively preserve these foods.

4) Fruit stays fresh for so long

Unfortunately, there is no uniform regulation for the correct storage of fruit. But many types of fruit should be stored in a cool place to stay fresh for longer. This is especially true on warm days. And storing different types of fruit together can also ensure that they ripen faster. Therefore, we give you an overview of the correct storage of the most popular types of fruit. In addition, you will find out in another article how you can drive away fruit flies. These foods are also suitable for drying.

5) Vegetables are usually stored in cool

Most vegetables should be stored in a cool or dark place. This allows you to keep these foods fresh for longer. But not all tolerate long storage in the refrigerator well, as they are sensitive to cold. Likewise, some types of vegetables can be deprived of their aroma by severe cold. If you want to be on the safe side, you can also store your vegetables in the cellar or on the balcony, provided of course that you always keep an eye on the temperature. Thus, these foods can be preserved well. Find out how you can get the vitamins when preparing vegetables. The preparation with the steam cooker often helps.

6) Cleverly store cookies

Cookies can also dry out quickly. To keep your cookies fresh longer, store them in a tin or plastic container. These should be lockable and airtight. Depending on the type, you can store and enjoy your biscuits at room temperature for two to four weeks.

7) Properly store bread in clay

Bread and rolls from the bakery can be stored very well in a clay or earthenware container. Room temperature is also advisable for proper storage. A bread container made of earthenware can effectively transport moisture to the outside. As a result, the bread does not mold as quickly and retains its fresh taste. For more tips, read our post on storing bread properly.

How many types of tomatoes are there in your supermarket? And how many purple carrots? The variety of our vegetables had to give way to industrialized agriculture a long time ago. Only what yields as much yield as possible is bred. Old vegetable varieties, on the other hand, are being forgotten. Or do you know Bamberger Hörnchen, Mairübe or Purple Dragon?

With the original diversity of fruit and vegetable varieties, varieties that are particularly well adapted to certain locations, that are pest-resistant, robust and of course particularly tasty are simply lost – irretrievably. At least if no one “saves” the seeds of the old vegetable varieties.

The yellow beets

Beetroot has made a successful comeback in recent years – and is even revered as a superfood. But who knows their relative, the yellow beet? As the name suggests, the bulbs are bright yellow, have a pleasantly fruity flavor and are slightly milder and sweeter than most beets. By the way, there are also white and white-beetroot. The colorful tubers are prepared just like the well-known beetroot, all of which are available regionally from September to April. Recommendation: prepare yellow and beetroot separately, otherwise the red color of the yellow root will steal the show…

Old potato variety: the Bamberger Hörnchen

It is quite possible that you have previously known exactly two types of potatoes: firm and mealy. There are a multitude of different varieties – from thick to thin, small to large, round to curved, in yellow, red, black and blue, with such beautiful names as Ackersegen, Rosa Tannenspitzen or Black Ungarin.

The Bamberger Hörnchen (also Bamberger Hörnle, Barmberger Hörnla) is an almost forgotten local variety and as such a “passenger” in the Ark of Taste. The tubers are thin, about a finger long and slightly curved. They have light yellow flesh, a firm consistency and a fine, slightly nutty taste. Because cultivation under conventional conditions is uneconomical, the “Bamberger Hörnchen” is only occasionally cultivated – but the tubers can be found at some weekly markets. If you discover them, you should definitely taste them and thus contribute to their preservation

Old vegetable variety: the May turnip

May turnips (also: navette) are – the name gives it away – mainly available in May and well into June. But: You can also buy the white turnips in autumn. For a long time, turnips were supplanted by potatoes, and it’s only been a few years since they’ve been found more frequently at weekly markets and in greengrocers’ shops. The taste of the beets is reminiscent of radishes or radishes, but they are milder. You can eat everything from the leaves to the tuber – for example raw in a salad, boiled in salt water until soft or fried and glazed.

The purple carrot: Purple Dragon

Surprise: Not all carrots are just orange. There are several old and rare varieties in white, yellow and purple – such as this one with the beautiful name Purple Dragon: purple on the outside, bright orange on the inside. “It has a fine, sweet-aromatic taste and is fast-growing, so very late sowings are still possible,” writes the Arche Noah association. You can find the purple carrots at weekly markets or at greengrocers.

Also an old vegetable: the parsnip

Although the parsnip has recently resurfaced from near oblivion, it is still a long way from being represented in all supermarkets. Parsnips were an important food for a long time – only with the discovery of potatoes did they go out of fashion. However, the root vegetables can be found at many weekly markets and in organic shops. The root is a typical winter vegetable and is available regionally from October to March. It tastes a bit like carrot, but milder, sweeter, and a little bit nutty. Parsnips can be prepared like carrots and potatoes: boiled, baked in a casserole or as “fries” in the oven (very tasty!), fried, made into a puree or soup.

Rare tomato varieties: Black Cherry, Goldita and Little Red Riding Hood

It is estimated that there are several thousand different tomato varieties. Not all of them are red and round: Tomatoes range from small as berries to as big as grapefruit – in red, yellow, orange, green, purple, black, patterned and striped, round, oval, smooth and ribbed… At weekly markets , in vegetable and organic shops you can increasingly find different tomato varieties, including old ones.

Rare Vegetable: Wild Rocket

… doesn’t sound quite as elegant as arugula, but it’s basically the same thing. The only difference is that wild rocket has a much more intense taste and is a little tart than salad rocket (that’s what we usually buy as rocket). Wild rocket tastes delicious in a salad, but also in mixed vegetables, with pasta or on pizza. You can easily grow wild rocket yourself – even in the window box. It is perennial and with a bit of luck you can even harvest twice a season.

Here you will find instructions for freezing and preserving wild garlic. Wild garlic can be used in a variety of ways in the kitchen to prepare tasty dishes. But you have to preserve the delicious wild vegetables because they are not available all year round.

Cool wild garlic and preserve it

Wild garlic stays fresh in the fridge for about 2 days, after which it begins to lose its aromatic freshness. By the way, did you know that you can easily freeze wild garlic? So you can extend its availability to the whole year.

Ferment wild garlic

Fermentation is a typical way of storing food in Japan and Korea. In order to preserve wild garlic, it is fermented. The taste then changes to something sour, as the lactic acid bacteria decompose the wild garlic and convert it into acid. Vegetables preserved by fermentation are a tasty change of taste and have a very health-promoting effect on your body. Be sure to use gloves for the preparation if you don’t like green hands. You will need salt, empty screw-top jars, labels to write on, and a tray or plate. Fermenting only works in a dark place at 18-20 °Celsius.

  • First, clean the wild garlic by carefully shaking out the leaves.
  • Add 0.5 to 1 g salt per 100 g and put the wild garlic in a bowl.
  • Knead everything well with your hands for a while.
  • Fill the softly kneaded wild garlic into a clean glass.
  • Leave 2 cm under the lid after you push it in.
  • Seal the jar and label it with self-written labels.
  • For two weeks you put it on a plate in a dark place at 18-20 degrees.
  • Now the wild garlic is ready to eat. It has a shelf life of one year in a cool, dark place.
  • Wild garlic deep-frozen

You can buy frozen wild garlic from many companies. But to go collect it yourself or to harvest it in your own garden is an experience. Hopefully, you have found a suitable method for preserving wild garlic in our compilation and can now season many delicious dishes with your own wild garlic. By the way: Even the flowers are edible and have a very aromatic taste!

Freezing wild garlic

Another way to preserve wild garlic is to freeze it. You need fresh wild garlic, water, broth, or olive oil. When it comes to wild garlic, you should note that it has not yet bloomed. This method works best if you’d like to take small portions for daily meals. By the way, did you know that wild garlic doesn’t smell as strong as garlic? You can grab it and still not smell like garlic from your mouth.

  • Then pluck off the leaves first.
  • Next, the wild garlic must be carefully washed.
  • Then you should finely chop the leaves.
  • Fill them in airtight plastic containers or in portions in ice cube trays.
  • You can fill the small compartments of the ice cube tray with water, broth, or olive oil.

Freeze wild garlic differently

There are several ways to freeze wild garlic. They differ with regard to the type of use when later cooking with wild garlic. For example, you can freeze the wild garlic ready-made as pesto, herb butter, or spice stock cubes. You need clean containers with lids. Depending on the type of preparation, you also need butter, oil, or broth. We have put together preparation for pesto, a preparation for herb butter, and a preparation of the spice stock cubes for you.

  • For the preparation with butter: Simply stir the chopped wild garlic into the butter with a spoon, using plenty of wild garlic. Then pour the mixture into the prepared glasses. You can even freeze the glasses.
  • However, it is best to only fill the jars three-quarters full, as the liquid inside expands below 4 °C. If there is still enough space in the glass, it will not burst in the refrigerator compartment. Wild garlic butter tastes particularly good with freshly grilled meat, fish, or vegetables.
  • For the preparation with oil: Puree the wild garlic with a little olive oil. Then simply pour it into a glass as usual. This way of preparing wild garlic is particularly suitable for preparing spaghetti with pesto. Pesto with wild garlic is a tasty change from tomato pesto or basil pesto.
  • For the preparation with broth: With this preparation, you should puree the wild garlic with as little liquid as possible. Then freeze the wild garlic. This way of preparing wild garlic is particularly suitable for seasoning soups or sauces. You can use them like bouillon cubes. To freeze a cube shape, use an ice cube tray to freeze.

If you dry rose hips, you can also enjoy the delicious vitamin bombs out of season. We will show you some methods and also tell you what is important when collecting rose hips.

Collecting rosehips: That’s what matters

Before you can dry rosehips, you must first collect them; The fresh fruit is usually not available for purchase. You can harvest rose hips from October. At this point, the small fruits are ripe enough and you can dry them easily. They will not lose quality in the coming weeks either. However, from December they can begin to ferment.

You can collect rose hips either in your garden or in nature. To be on the safe side, you should wear gloves when harvesting. You may remember school pranks and the itch a crushed rosehip leaves on your skin. With gloves you are on the safe side. Also, to avoid stains, don’t wear your best clothes.

Depending on where you collect the rose hips, you can also make sure to pick closer to the top of the bush. The lower berries are significantly more dirt and exposed to the odd dog. Never pick all the rosehips from a bush, as they are an important food source for birds in winter.

You should wash the collected rose hips thoroughly. If you like, you can cut the berries lengthways and scrape out the seeds. But that is not absolutely necessary: ​​rosehip seeds also provide many vitamins as well as valuable omega-3 and omega-6 fatty acids.

Drying rose hips: In the oven or in the dehydrator

You can dry rose hips either in the oven or in the dehydrator. This is the best way to go about it:

Place the washed rose hips on a baking sheet lined with parchment paper or on a rack in the dehydrator. Make sure that the berries are not too close together: otherwise they will only give off the moisture to each other and it cannot escape properly. If you plan to dry a large batch of rose hips, it’s better to use multiple trays.
Set the oven or dehydrator to 40 degrees Celsius. If you’re drying the rose hips in the oven, you should also place a wooden spoon between the oven door and the oven. This will remove the moisture from the oven.
Once in the oven or dehydrator, the rose hips take about eight to twelve hours to dry, depending on their size. This time is reduced if you have already air-dried them a little beforehand.
The following applies to this method: the hotter, the faster. However, if you set the devices to more than 40 degrees Celsius, the rose hips lose valuable vitamins during drying.

Unfortunately, the energy consumption is very high due to the long time in the oven or in the vending machine. It is more sustainable to dry the fruit in the sun or on a heater. So you don’t use any additional electricity when drying. This method is also gentler on the rose hips, which means you retain more vitamins.

Drying rose hips: In the sun or on a heater

If you dry rosehips in the sun, you should choose a sheltered place – otherwise birds may snatch the fruit. You can place a fine sieve or discarded curtain over the hips to protect them, or place a fruit bonnet over them.

If you store rose hips on the heater, you have a lot less to worry about. During the autumn rosehip season, your heating is probably on anyway – and birds won’t get in your way in the apartment either. If you have pets, you should still be careful and maybe choose a high-level heater for drying. While rose hips are not harmful to dogs and cats, you want some of the fruit yourself. A nice side effect of this method is the fruity scent that develops when the rose hips dry.

Rose hips dry without an oven: Further information

If you want to air dry rose hips, it is best to place them on some newspaper or a kitchen towel on an oven rack. In this way, warm air also reaches the berries from below. With the heating method, it is sufficient if you dry the rose hips on newspaper or a cloth. The same applies here: it is better to leave a little more space between the fruits so that the moisture can really escape. Also, if the fruit touches, mold can form in those places.

The rose hips need several days to dry both on the heater and in the sun. You should turn them regularly so that they dry evenly on all sides. If in doubt, it is better to dry the rose hips a little longer. This reduces the risk of them still being damp on the inside and mold forming later.

After drying, it is best to store the rose hips in an airtight container. Store the jar in a cool, dark place, for example in a storage room or in the basement. The dried rose hips will keep for several months.

Use of dried rose hips

You can enjoy dried rose hips, for example, as a tea, as a topping for muesli or as a small snack in between. You can also make rosehip powder yourself from the dried fruit. In addition, dried rose hips are suitable as a special ingredient for smoothies or sauces. They add a great fruity component to savory dishes in particular.

In small amounts, dried rose hips are also suitable as an addition to dog food and provide your four-legged friend with important vitamins. And of course you can also simply use dried rose hips to decorate autumn or winter arrangements, Advent wreaths and the like.

You can prepare horseradish in the form of dips, sauces and soups, for example. If you bought too much or had a particularly rich harvest, horseradish can also be easily preserved.

Horseradish is a particularly hot type of radish that is in season in Germany between October and January. The horseradish root is considered healthy because it is rich in vitamin C and is said to have an antibacterial effect due to its mustard oils. At the same time, the mustard oils ensure the characteristic spiciness of horseradish, which gives various dishes their special flavor.

In this article, we will show you how you can prepare horseradish and how best to store it.

Cook horseradish: This is how you use the root

Due to its sharpness, horseradish is hardly edible on its own. In the kitchen, it is therefore used in small amounts to flavor sauces and similar dishes – often in combination with cream or other ingredients that reduce the heat somewhat.

The classic horseradish sauce is traditionally often served with meat or fish, but it also goes well with potatoes, dumplings, vegetables or vegetarian patties. You can also prepare salad dressings, dips or soups with horseradish.

If you are particularly fond of horseradish, you can plant it in your own garden and harvest the roots yourself. You can find detailed instructions on how to do this in our guides on harvesting and planting horseradish. If you buy the horseradish at the weekly market or in the shop, you should do so in season if possible and pay attention to organic quality. In this way you avoid unnecessarily long transport routes and residues of harmful pesticides.

When cooking, you often only need small amounts of horseradish root. Because of this, it’s easy to end up buying or harvesting more horseradish than you can cook. So that you don’t have to throw away the excess horseradish, you can make it last longer. We’ll show you a simple method to do this.

Preserve horseradish: Simple method with salt and vinegar

Ingredients:

200 g fresh horseradish
1 tsp salt
1 squirt vinegar (plus more for topping if needed)

Directions:

Wash the horseradish, peel it and grate it finely.
Mix the grated horseradish with a teaspoon of salt and a dash of vinegar. Important: Make sure that the vinegar is evenly distributed so that the entire horseradish mixture can be preserved. Otherwise it will quickly turn gray later.
Pour the mixture into a sterilized jar, covering the surface with a little extra vinegar if necessary. Then close the jar tightly.
It is best to keep the pickled horseradish in the fridge. Unopened, it will keep for at least four weeks. Just like with fresh horseradish, you can use it to prepare various horseradish dishes. Once opened, you should use the jar within a few days if possible.

By the way: As an alternative to this method, you can also preserve horseradish by freezing it. This is possible with both the unpeeled whole root and with grated horseradish, which you should mix with a little vinegar or lemon juice before freezing. The horseradish will keep in the freezer for about half a year. However, it may lose some of its flavor when frozen.

If you freeze fresh chanterelles, you can keep them for a few months. In this article you will learn how this works.

Chanterelles are in season from the end of June to September: If you know what you’re doing, you can pick lots of delicious mushrooms on a walk in the forest. You’ll often find more than you can eat in one meal. You can freeze the chanterelles to keep them from going bad. With just a few moves, the mushrooms stay fresh and you can extend the chanterelle season.

Tip: Often chanterelles from the region are offered at the weekly market. Worth buying here and freezing them for fall and winter.

Freezing chanterelles: How to prepare the mushrooms

To prepare the chanterelles for freezing:

Thoroughly brush the chanterelles with a small brush.
Wash them off very gently.
Cut out bad spots with a small knife.
Blanch the chanterelles in salted water for a few minutes. This way they don’t taste bitter after defrosting.
Scoop the mushrooms out of the water with a spoon and gently dry them with a towel.
Let them dry a bit before you freeze them.

How to freeze chanterelles

You can easily freeze chanterelles in just a few steps:

Arrange the mushrooms on a board or tray.
Then place this in the freezer.
Take the board out again after about half an hour. Now the chanterelles are “pre-frozen” – so they won’t stick together when you freeze them afterwards.
Now fill the mushrooms in a freezer container and store them in the freezer.
Tip: Don’t use plastic bags to freeze the chanterelles. Instead, you can use, for example, freezer-proof glasses, cans or cotton bags.

Mushrooms that you collect yourself can stay in the freezer for up to ten months and still taste good. Mushrooms from the supermarket, on the other hand, lose their taste more quickly.

You can freeze basil well and make it last longer, for example if you have harvested too much of it. Find out here what you should consider.

Basil is used both in the kitchen and as a medicinal herb. The nutrient-rich and aromatic leaves give numerous dishes a typical aroma. To have basil on hand all year round, you can freeze it. We’ll tell you how this works best.

Freezing fresh basil: This is how it works

If you want to freeze the basil leaves in their actual form, you should blanch them. That way they won’t be mushy after defrosting. For this you need:

ice cubes
a bowl
a cooking pot
water
a clean kitchen towel
a plate
a container for freezing
In order for the basil to retain its aroma when you freeze it, you must first blanch it. Proceed as follows:

Cut the leaves off the plant. Preferably directly above the leaf node, where more leaves grow, because this allows new ones to grow back.
wash the leaves
Place the ice cubes in the bowl.
Boil water in a saucepan. Make sure the pot is big enough for all the basil leaves.
Blanch the basil leaves in hot water for about 5 to 10 seconds. This means: Dip the leaves in the boiling water for five to ten seconds at a time, preferably with a slotted spoon.
Then, as quickly as possible, dip each leaf into the ice water.
Then place the basil leaves individually on a clean kitchen towel and let them dry for about ten minutes.
Place the individual basil leaves on a plate. Make sure the leaves are really individual on the plate so they don’t stick together when frozen.
Place the plate in the freezer until the leaves are completely frozen.
Now you can put them together in a sealable container, such as a lunch box or an empty screw-top jar.
Put these in the freezer.

How to freeze pureed basil

You can also freeze basil pureed and use it later for cooking. How it works:

Remove the stems from the basil leaves.
Rinse the leaves under cold water.
Drain the basil well and then gently pat dry.
Once the leaves have dried, place them in a food processor or blender.
Chop the basil depending on how coarse you want the leaves to be.
Add some olive oil as you go.
Once the basil leaves have reached the desired consistency, place them in a sealable container.
Basil can be stored in the freezer for several months.

The wild garlic season is short and wants to be savored all the more intensively. If you want to enjoy wild garlic the rest of the year, you can preserve the wild vegetables. We present different methods.

In spring, the leaves of the aromatic wild garlic only sprout from the ground for a few weeks. The wild garlic season usually runs from mid-March to early May. Then the wild garlic begins to bloom. Contrary to widespread belief, the weed is not poisonous, but the leaves become fibrous and lose their taste.

In order to be able to enjoy wild garlic all year round, you can preserve it. This is also recommended if you have harvested too much wild garlic and cannot use it while it is still fresh. There are several methods you can use to preserve wild garlic: you can process it into a more durable food like wild garlic oil, freeze it, or dry it.

Preserve wild garlic: these recipes make it possible

Wild garlic not only tastes fresh as an ingredient in a wild herb salad or wild garlic butter. There are a number of recipes with which you can preserve wild garlic and use it for a longer time.

Wild garlic oil: By soaking wild garlic in oil, you can preserve it for up to a year. You can use the aromatic oil to refine salads or pasta far beyond the wild garlic season.
Wild garlic salt: With this recipe, you can keep wild garlic for at least a year. You can sprinkle the wild garlic salt over a sandwich or give a garlic-like aroma to a vegetable pan.
Wild garlic pesto: With this classic, you can preserve wild garlic for several months. Wild garlic pesto tastes great with pasta, risotto or as a basis for a salad dressing.
Pickled wild garlic buds: Wild garlic buds are also edible. The plants form them shortly before flowering, i.e. from around mid-April. From this you can then produce the so-called wild garlic capers – a regional alternative to the caper plants native to the Mediterranean region. The wild garlic buds will keep in the fridge for up to four weeks.

Preserve wild garlic by drying

You can use dried wild garlic in a variety of ways even after the wild garlic season is over. For example, it adds a slightly spicy flavor to home-made herb salad mixes.

Note that dried wild garlic is significantly less flavorful than fresh wild garlic. Still, drying is a better alternative than possibly throwing away parts of an oversized crop. This allows you to preserve the leftover wild garlic if you can no longer eat it before it wilts.

Preserve wild garlic: This is how you freeze wild garlic

Fresh wild garlic tastes best. But after just two days in the fridge, it wilts. If you freeze wild garlic, you can keep it for about six months longer.

You can freeze wild garlic either in a glass or in practical ice cube molds. You can find the corresponding instructions here: Freezing wild garlic and preserving it: Here’s how!

Tip: You can also make dishes prepared with wild garlic last longer by freezing them. Wild garlic soup, for example, is suitable for freezing in jars. A wild garlic quiche can also be frozen easily.