Tag

recipes

Browsing

If you want to make your own cough syrup, you should read our tips. In this way, a very good and helpful juice can be made. We have collected 4 ways to make your own cough syrup.

Cough syrup from the pharmacy usually also has some side effects. Therefore, more and more home remedies are in demand. You can make a good cough syrup yourself with our tips and know exactly what it contains.

Cough syrup is sometimes a must

Cough syrup is sometimes just necessary. Because often a persistent cough torments. The mucus doesn’t want to come off and you can’t relax. Of course, you could also simply get a cough syrup from the pharmacy, but this is usually associated with side effects. This is not the case with natural remedies and home remedies unless you are allergic to a substance. Even our grandmothers made their own cough syrup so that the problem quickly resolved itself.

For a time conventional medicine was heavily relied upon, but now we are in a state of transition. People understand more and more that you can try home remedies first or that normal medicine must be taken in any case for certain diseases. But if you have a cough, you can first try to fight it with homemade cough syrup. If the homemade juice doesn’t help, you can always go to the doctor and rely on conventional medicine. Especially with a cough that is just beginning, homemade cough syrup is often a great help.

1) Make your own cough syrup with onion juice

A good home remedy for dry cough is onion juice. Onion juice is very popular, even with children. With this, you cut onions into pieces or slices and put them in a container that can be closed. A good portion of sugar is added to this and the whole thing is stirred again and again. As soon as a liquid settles on the floor, take a teaspoon of it every half hour. The cough syrup should be closed so that the refrigerator does not start to take on the smell. Onions are anti-inflammatory, loosen mucus quite well and calm the urge to cough. Anyone who tries it will quickly be amazed.

2) Thyme, Peppermint, and Sage

A lot can also be achieved with thyme, peppermint, and sage. This is boiled with a liter of water, a handful of the herbs at a time, then the tea is strained and the brew is additionally sweetened with honey. Honey has a calming effect on the cough. You drink the tea over the tea with small sips and you will see that the special cough syrup works very well.

3) Own cough syrup with anise

If you like anise, you have another option for a good cough syrup. The anise is crushed and three teaspoons of it are mixed with 2-3 teaspoons of thyme. Half a liter of water is poured over the whole thing. After 5 minutes of steeping time, lemon and honey are added to the brew. Take this now and then throughout the day, preferably a teaspoon every hour, and the cough should stop.

4) Homemade cough syrup with black radish

Black radish can also be used for homemade cough syrup. This is halved and hollowed out. Then the two hollowed-out parts are filled with honey. This must now steep for 12 hours, ideally in the refrigerator in summer. After the 12 hours, you then take a tablespoon of the cough syrup daily. This is stored in the refrigerator and should bring an improvement after 2 days. Few people take this cough syrup due to the fact that it has to stand for so long before it can be used. But it is an effective home remedy for coughs.

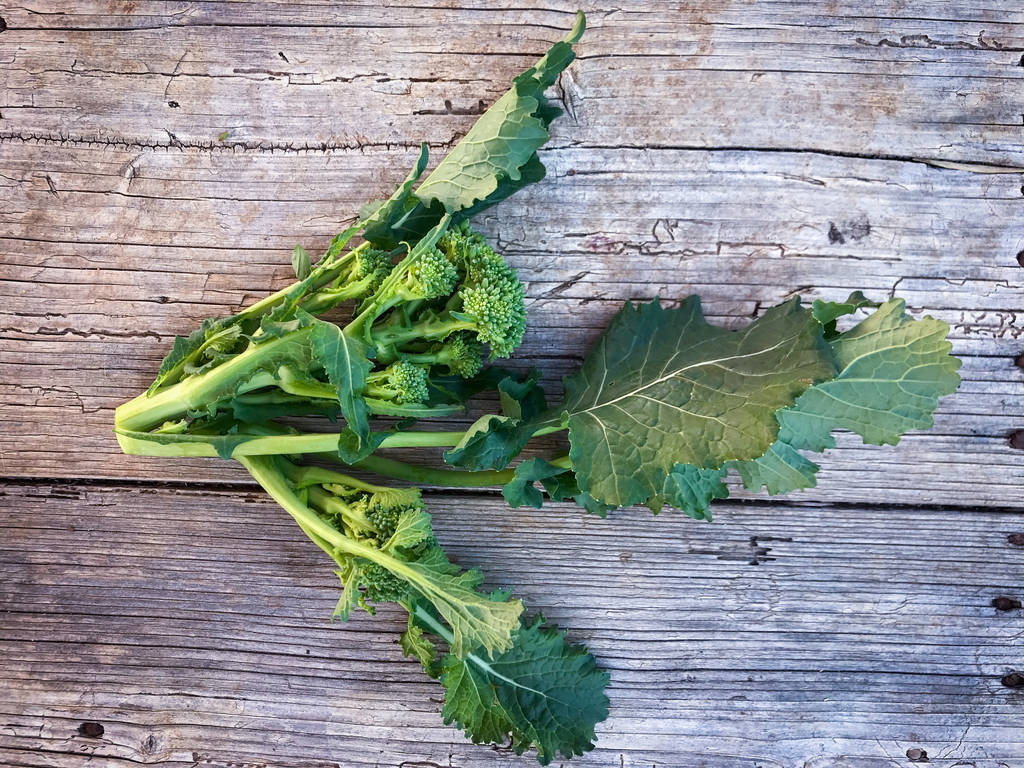
Turnip sticks or turnip greens are vegetables that very few people know. Here you can find out all about its distribution, nutrients and which recipes it goes with.

Stick Mushrooms: Vegetables with a long tradition

Turmeric has been cultivated for many centuries, especially in the Rhineland and North Rhine-Westphalia. Since the vegetable grows in many areas of Germany, it does not have to be transported far to be sold. This makes turnips particularly sustainable.

Rübstalk is a type of turnip. In the past, these were planted so close together that the beet fruit could no longer develop. The leaves grew bigger and bigger. Today, turnips can grow up to 25 centimeters in size – the beets remain very small and tender.

Buy seasonally: Season has turnips from spring, around mid-April, through summer, late May to early June. There is a second harvest in October. The best place to buy turnips is at weekly markets or from well-stocked greengrocers.

Grow turnips yourself: If you have a garden or a balcony, you can simply grow turnips yourself. The best way to get organic seed is from an organic farmer near you.

It is best to sow the vegetables in early March or early September. Since turnip butter is very frugal, it grows in practically any location in any soil. You should only water it regularly – then you can harvest the healthy vegetables after about five to seven weeks.

These nutrients make turnips so healthy

Turnip sticks are a real nutrient bomb. It can be integrated particularly well into a conscious diet. Per 100 grams turnip greens contain:
30 calories
0.2 grams of fat
3 grams of protein
3 grams of carbohydrates
2.3 grams of dietary fiber
In addition, turnip butter is rich in vitamin C and beta-carotene (a precursor of vitamin A). According to the BzfE (Federal Center for Nutrition), it also contains significant amounts of folic acid, calcium, iron and the secondary plant active ingredient mustard oil glycoside.

Health-promoting properties are ascribed to all ingredients: Due to the high vitamin C content, turnip butter is said to promote the immune system and the beta-carotene protects the body’s cells by binding free radicals. Calcium strengthens and builds bones and teeth and mustard oil glycoside even has a slight antibacterial effect.

Preparation and recipes for turnip greens

You can prepare turnips raw, boiled or cooked. In principle, you process it just like Swiss chard. Raw turnip butter goes particularly well with salads. To do this, wash the turnip leaves and cut them into bite-sized pieces. Then serve them with onions and tomatoes, for example.

You can also use turnips as a side dish with fish and poultry and as a soup vegetable.

Tip: If possible, do not use meat from factory farming, but use organic quality products. The DGE recommends consuming a maximum of 300 to 600 grams of meat per week – this also protects the climate. In Greenpeace’s fish guide, you can find out which types of fish are still ecologically justifiable to buy and which ones you should better keep your hands off.

When you cook turnip greens, you should separate the leaves and stalks first, then wash them well. Put the stalks in boiling water first. They take a little longer to finish cooking. If you want to use the leaves as well, just add them 3-4 minutes before the end of the cooking time, depending on the recipe.

Always use fresh turnips. You shouldn’t keep it in the fridge for more than a day or two. Wrapping the veggies in a damp kitchen towel will keep them fresh a little longer.

Beets are healthy and delicious! You can also prepare the red tuber in many different ways. Here you will find information about the ingredients and delicious recipes for beetroot. You will also learn how to preserve and store beetroot.

Are Beets Healthy?

Beets are also known as red beets. And these are true nutritional miracles. Because they contain valuable nutrients that are good for your body and strengthen its health. In order for the beetroot to be able to develop its effect, you should regularly include it in your menu. You can add variety by serving them both cooked and raw. The valuable ingredients support your organism in many ways. For example, betaine is said to reduce the risk of heart disease, while anthocyanins are considered to prevent cancer.

How to cook the beetroot?

You can boil the beetroot very well. The valuable ingredients are preserved if you proceed gently. Either you boil the red tubers in water, as shown in the video below for how to preserve beetroot. Or you pack the tubers in aluminum foil and let them cook in the oven at 160 degrees for 30 minutes. Then rinse them with cold water and remove the shell.

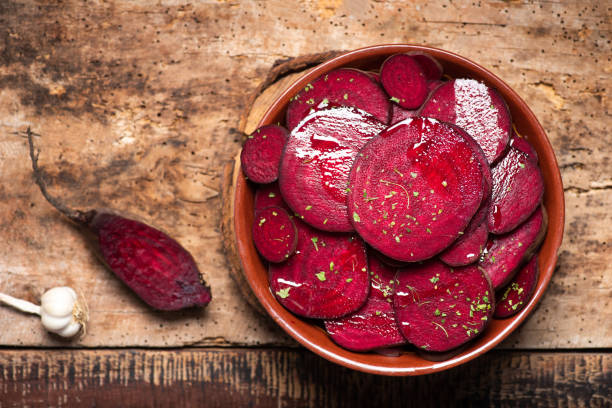
Then cut the vegetables into the desired shape (cubes or slices) and start pickling. To do this, make a brew of high-quality vinegar and water in a ratio of 1 to 1. Then add sugar, salt, and some spices and let the brew boil up briefly. Put the spices (e.g. chili, cloves, peppercorns) in a teabag. Because if you put the cut tubers in a sterile container and pour the broth over them, the spices should be removed. Finally, close the jar tightly.

Store beetroot properly

After you have finished cooking the beetroot, you should store them in a dark and cool place. They can be kept in a sterile glass for up to six months. If you want to eat them earlier, you should let them rest for at least two weeks. If you don’t boil the beets but want to store them untreated, you should store them at around 4 degrees in the basement or storage room. High humidity is also beneficial here. Additionally, you can store the beets in a box with damp sand or sawdust. So they keep for about half a year. Also, note other tips for storing food and preserving it.

Beetroot as a home remedy

Beetroot is healthy and has beneficial effects on the body. Therefore, they serve as a good home remedy that can prevent health problems. Consequently, you can eat the beet regularly and achieve the following effects:

1) Miracle tuber strengthens the body’s defenses

The tuber’s red color is due to the secondary plant substance betanin. This acts as an antioxidant and scavenges free radicals in the body. Consequently, this can strengthen the immune system. The valuable vitamin C is also found in the beet and has an antioxidant effect. Thus, with regular consumption, you protect your body from damage.

2) Is good for liver and bile

The betadine it contains also stimulates the liver cells. It also strengthens your gallbladder. Consequently, this ensures improved digestion, which means that toxic substances are flushed out of the body more quickly. And that’s what makes eating beetroot so valuable. Also, note home remedies to lower liver values.

3) Helps you detoxify your body

It is important to detoxify the body and eliminate toxins. Therefore, a colon cleansing makes sense. And this can be done without medical help. Consider natural home remedies for colon cleansing. The red tubers are a good way to accelerate the cleansing of the intestines.

4) Beets to regulate blood pressure

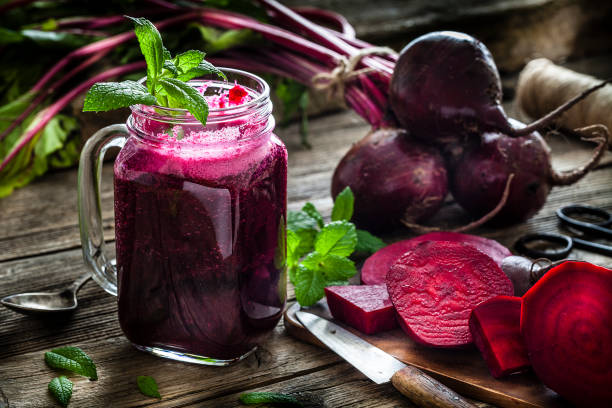
You can also support the regulation of blood pressure by regularly eating beets. Accordingly, you should drink two glasses of beetroot juice every day to lower high blood pressure. These results are confirmed by medical studies. In addition, note other home remedies for high blood pressure.

5) Use as a mood enhancer

Betaine is also considered a mood enhancer. Because it can increase the happiness hormone serotonin. Consequently, regular consumption can improve your bad mood. So it’s worth a try. After all, other vitamins also have a positive effect on bad moods, read our useful tips for depressive moods.

Tasty recipes with beetroot

As already mentioned, you can use the beetroot both cooked and raw. In its cooked form, it tastes particularly delicious as a soup, while you can transform the raw version together with apple into a nutritious salad. Below are our personal four best beetroot recipes. No matter which recipe you want to cook, don’t forget to peel the tuber well before further processing and to wear gloves.

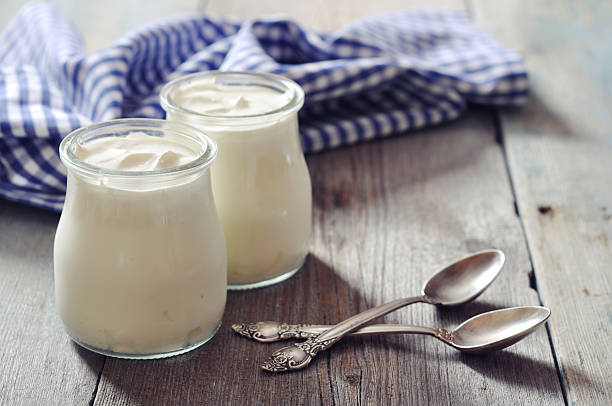
Yogurt is delicious and healthy. There is a huge selection on the supermarket shelves. But making yogurt yourself is also very easy.

Just make your own yogurt

The advantage: the yogurt ingredients are free of artificial flavors and preservatives. But you can refine your homemade milk product with a wide variety of ingredients such as almonds, honey, or fruit according to your personal preferences. But there are many more yogurt recipes. We will tell you how the in-house yogurt production works. You will be amazed at how easy it is to prepare.

There are several ways to be able to make yogurt. For newbies, it’s probably easiest to use a store-bought probiotic dairy product to start with. Once complete, simply save some of the product to grow your own yogurt cultures in the future. But you can also use store-bought cultures. You can then make your own tzatziki with dehydrated yogurt.

Yogurt cultures

The following cultures are particularly suitable for yogurt production and can ensure a healthy intestinal flora:

  • Lactobacillus acidophilus
  • Bifidobacterium lactis
  • Streptococcus thermophilus

You also need milk, milk powder, and optionally inulin, which provides more creaminess. You don’t necessarily need a yogurt maker, which is often mentioned in recipes, to be able to make your own yogurt.

Yogurt production without a preparer

Ingredients:

  • 1 liter of milk
  • 150g natural yogurt or optionally a pinch of yogurt cultures
  • milk powder
  • optionally a pinch of inulin

Step 1:

The milk must first be boiled to kill germs. Then let the milk cool down to around 50 degrees.

Step 2:

Now you can stir the natural yogurt or the cultures into the milk. If you want to make a firm yogurt, use about four tablespoons of powdered milk. And to increase the creaminess, you can use prebiotic fiber inulin. Inulin is also a useful source of food for the good intestinal bacteria and this, in turn, leads to a healthy intestinal flora.

Step 3:

The finished milk product can now be filled into jars and then placed in the middle rack of the oven at 50 degrees for 30 minutes. It is important that you no longer move the glasses.

Step 4:

After 30 minutes you can switch off the oven. But the glasses are left in the oven overnight. The next day the jars are closed and can be put in the fridge. You should have used up the yogurt within 3 to 4 days.

Make lactose-free yogurt

To produce lactose-free yogurt, the yogurt ingredients hardly change. Simply use goat’s milk or soy milk instead of cow’s milk.

Yogurt smoothie recipe with raspberries

Ingredients:

  • 250 grams of raspberries
  • 300 grams of homemade yogurt
  • 1 packet of vanilla sugar
  • 40 grams of sugar

Step 1:

You can use either fresh or frozen raspberries. Fresh fruits should be washed first. If you are using frozen raspberries, allow the fruit to defrost a little.

Step 2:

Now puree the raspberries and then strain to get rid of the pits.
Half of the mark can now be filled into glasses.

Step 3:

The other half is stirred together with yogurt and sugar and then poured onto the raspberry pulp in the glass. You should make sure that both components do not mix with each other in order to maintain the two-color effect.

Yogurt Ginger Dressing

Ingredients:

  • 20 grams of ginger
  • 150 grams of yogurt
  • 2 tbsp lime juice
  • 1 tablespoon apricot spread
  • 1 pinch of salt
  • chili
  • cane sugar

Preparation

  1. Peel ginger and cut it into small cubes
  2. Mix all the ingredients well and you’re done.
  3. The dressing is wonderfully refreshing and goes well with leaf salads and raw vegetables.

In this post, you will find three recipes for healthy jam. They are simple and proven housewife recipes. You can cook your own healthy jam from fresh berries and fresh fruit. You will find a jam recipe for summer, one for fall, and one for winter.

First, you only need two to five fresh ingredients. Secondly, you can cook your own jam creations yourself. And third, your health will benefit. Instead of buying jam, you can make your own jam. If you want to make jam yourself, you need fresh fruit or berries and preserving sugar.

1) berry jam in the fall

Preserving summer’s harvest in jam jars is tempting. Fresh blackberries can be picked well into October. You can easily make this grandmother-style jam with fresh berries yourself. If you want to make jam without sugar, there are alternative sweeteners like dates or honey. The recipe for blackberry jam makes four to five jars of jam.

Ingredients for the berry jam

  • 1 kg of blackberries
  • 500 g preserving sugar (2:1)
  • 4-5 jam jars

Step-by-step instructions for making berry jam

The preparation of the berry jam is very easy. The delicious jam is on the table in three steps.

  • Boil the sugar with 40 ml water to a clear, thick syrup.
  • Add the berries and cook for 30 minutes while stirring.
  • Then pour into jars that have been rinsed with hot water and close them immediately.

2) Summer strawberry rhubarb jam

When the strawberries are ripe in the fields, this summer jam is quickly conjured up on the table. You can pick the ingredients for this delicious jam fresh from the field or buy them at the weekly market. Make sure that you get ripe, sweet strawberries, because then the fruits will develop their full aroma. And this is how you succeed in cooking the healthy strawberry and rhubarb jam yourself step by step.

Ingredients for the strawberry rhubarb jam

  • 750 grams of strawberries
  • 500 g preserving sugar (2:1)
  • 250g rhubarb
  • Juice half a lemon
  • 4-5 jam jars

Preparation instructions for the summer jam

Summer is the peak season for fresh fruit and berries. The strawberries grow so numerous that they can be made into jam for the time after the strawberry season.

  • First, clean the strawberries, wash them, and cut them in half.
  • Mix the berries with the jam sugar.
  • Then puree the mixture with the hand mixer.
  • Wash the rhubarb and cut off both the leaves and the stalks.
  • Peel the rhubarb and cut it into small pieces.
  • Mix the rhubarb pieces with the lemon juice into the strawberry puree.
  • Then bring it all to a boil in a saucepan.
  • Let the jam cook for about 3 minutes while stirring.
  • Fill the jam quickly into jars that have been rinsed with hot water and seal them.

3) Winter jam from apples and raisins

In this jam recipe with apples, you can also try other spices such as vanilla, cloves, or ginger, depending on your taste. This delicious jam also tastes great in winter with Christmas spices such as cinnamon. When the days get colder, the wintry jam also tastes good warm on waffles or pancakes. An alternative for apple lovers is home-cooked applesauce.

Ingredients for the winter jam

  • 900 g peeled apples
  • juice of a lemon
  • 500 g preserving sugar (2:1)
  • 100 grams of raisins
  • 1 pinch cinnamon

Step-by-step instructions for apple jam

You can get the preserving sugar for making jam in any well-stocked supermarket. Especially in autumn and winter, you can buy it in stock if you like to make jam.

  • First wash the apples, peel and core them, and cut them into small pieces.
  • Then bring the apple pieces with lemon juice and preserving sugar to a boil in a saucepan.
  • Then add the raisins.
  • Then cook the mixture for 4 minutes while stirring.
  • Remove the saucepan from the heat and stir in the cinnamon.
  • Fill the jam quickly into jars that have been rinsed with hot water and seal them.

A hot soup is good in winter. Here you will find five delicious soup recipes to cook at home. Not only Suppenkasper, but the whole family will enjoy the five best soup recipes for the cold winter. The simple preparation of the classics invites you to cook them again.

The best cold winter soup recipes are tasty and filling. In addition, soups provide your body with important nutrients. In addition, a hot soup warms us from the inside and is a “soul comforter” in grief. Chicken soup helps with colds.

1) Potato soup with sausage

Who doesn’t love them, the classic among winter soups? Firstly, this hearty dish was already served on my great-grandmother’s day, secondly, this hearty soup is easy to prepare, and thirdly, the fresh vegetables provide minerals and vitamins. In winter potatoes and sausages taste good, both for children and adults.

Ingredients for the potato soup with bockwurst

If you are vegetarian or vegan, you can replace the bacon with vegan bacon and the sausages with vegan sausages in the recipe. It’s especially nice if you have your own herbs on the windowsill and can use them to season your soup.

  • 1 kg potatoes – ideally floury
  • 4 carrots
  • 1 celery
  • 2 onions
  • 1 leek
  • 20 g bacon
  • salt and pepper
  • 1-liter vegetable or meat broth
  • marjoram, parsley
  • 1 tablespoon sour cream
  • 4 sausages

Preparation of the soup

As is often the case with stews, the soup tastes even better the next day. You can also find tips for fresh kitchen herbs at home here. With them, you season your soup particularly tasty.

  1. Dice the onions.
  2. Fry the bacon in the pot, then remove.
  3. Sauté the onions in the remaining fat.
  4. Peel, wash, and dice the potatoes before adding them to the pot with the onions.
  5. Season with salt and pepper.
  6. Then pour in the hot broth.
  7. Wash and clean the vegetables.
  8. Chop into small pieces and add to the pot. Cook for 20 minutes.
  9. Meanwhile, cut the sausages into slices and add them to the soup.
  10. Wash the herbs thoroughly, pat dry, and chop very finely.
  11. Now stir in the cream.
  12. Arrange on plates or in soup bowls, garnish with the chopped herbs and serve.

2) Chicken soup for a cold

Chicken soup helps with a cold. You should eat them hot because flu viruses and other pathogens are sensitive to heat. The soup moistens your mucous membranes and warms you from the inside. Definitely one of the best cold winter soups! That’s how it works:

Chicken soup ingredients

You can also buy a soup chicken frozen. But then it’s important to thaw it overnight in the fridge before you cook it.

  • 1 soup chicken
  • 2 cups of rice
  • 3 liters of vegetable broth
  • 1 onion
  • Fresh greens
  • Salt pepper
  • Parsely

Preparation of the chicken soup

This soup will keep in the fridge for a few days. During the wet and cold seasons, it is also good to freeze the broth in portions in deep-frozen food storage containers.

  1. Add the soup chicken without giblets to the cold vegetable broth and bring to a boil.
  2. Add salt and pepper and simmer on low heat for 1 ½ hour.
  3. Clean the soup greens, cut the onion into small cubes.
  4. Take the chicken out of the pot.
  5. Cook the vegetables and onion in the chicken broth for about 20 minutes.
  6. In the meantime, put the rice in another pot – also let it simmer for 20 minutes.
  7. Cut the chicken into bite-sized pieces. Put the bones and skin into the soup.
  8. Add the rice. Boil everything again briefly.
  9. Sprinkle with the chopped parsley and apply immediately.

You should eat this soup as hot as possible. It warms the body and helps against colds and feverish infections.

3) Hot Tomato Soup (vegan)

Tomatoes are a very healthy vegetable. By the way, they protect against heart and circulatory diseases and also strengthen the immune system. A hot tomato soup tastes good and is also eaten by children. And is therefore also one of the best soups for the cold winter! That’s how it works:

Ingredients for the tomato soup

Due to its high proportion of tomatoes, this soup contains a lot of vitamin C, vitamin A and also calcium, magnesium, and iron. The healthy and tasty onions also enrich the soup with nutrients.

  • 2 onions
  • 1 small clove of garlic
  • 75 g oil
  • 1 kg of tomatoes
  • Salt pepper-
  • Some savory and marjoram, parsley
  • 1½ liters of water

Preparation of the tomato soup

This soup is quick and easy to prepare. In 15-20 minutes, this cold winter soup is ready, which also contains garlic as a healthy remedy.

  1. First, sauté the chopped onions and crushed garlic in the oil.
  2. Add the chopped tomatoes, salt, pepper, and herbs.
  3. Fill up the hot water and let it boil. Pass through a sieve after about 15 minutes.
  4. Pour into soup bowls and serve garnished with the chopped parsley.

4) Pumpkin soup with ginger (vegetarian)

This soup is warming. Important: Properly prepared pumpkins provide valuable ingredients. Potassium, beta carotene, vitamin C and silicic acid are the most important vital substances. Ginger not only stimulates the appetite but also aids digestion. It generates heat in the body and relieves pain. If you’re freezing, the delicious pumpkin soup with ginger is really good. It is also suitable as a starter soup for a hearty meat dish because it tastes delicious. That’s how it works:

Ingredients of pumpkin soup with ginger

This soup tastes great with Hokkaido squash, but can also be made with nutmeg or butternut squash. The ginger as a healthy home remedy turns this soup into a winter soup that strengthens your immune system.

  • small pumpkin – preferably a Hokkaido pumpkin
  • a thumb-sized piece of ginger
  • clove of garlic
  • 1 onion
  • salt, pepper, curry powder
  • 1 can of coconut milk
  • Some oil
  • 1 tablespoon sour cream
  • 550 ml vegetable broth

Preparation of the soup

For this soup, you need a hand blender or a blender.

  1. Wash the pumpkin, then deseed and cut into cubes.
  2. Dice the onion very small, crush the garlic and grate the ginger.
  3. Heat up some oil. Sauté the onions, as well as the garlic and ginger.
  4. Sauté the pumpkin cubes briefly as well.
  5. Pour in the hot broth and simmer on a low flame for 20 minutes.
  6. Remove from the stove, and stir in the coconut milk.
  7. Finely puree everything with a hand blender before seasoning with curry powder, salt, and pepper.
  8. Serve the soup on a plate and garnish it with sour cream.
  9. Finally, you can roast and dry the pumpkin seeds in a pan and add them to the soup.

5) Rosehip soup (vegetarian)

Rose hips contain a lot of vitamin C. Rose hips were used both in the Middle Ages and among the Celts to treat diseases. For colds, stomach and intestinal problems, inflammation, and rheumatic pain. Rose hips also contain vitamins, minerals, and trace elements.
A hot rosehip soup is therefore both healthy and strengthens your immune system. That’s how it works:

Rosehip Soup Ingredients

Rosehip soup contains vitamin A, vitamin C, potassium, calcium, magnesium, and iron.

  • 125 g fresh or 50 g dried rose hips
  • 1 liter of water
  • 2 tablespoons of cornstarch
  • 75 grams of sugar
  • pinch of salt
  • lemon juice
  • some sweet cream

Preparation of the rosehip soup

The fruits of various wild rose species are called rose hips. The nutrient content is highest fresh from the bush, for example, 430 milligrams of vitamin C per 100 grams. In contrast, 100 grams of lemon contain just 50 milligrams of vitamin C.

  1. Wash the fresh hips or soak the dried ones in cold water overnight.
  2. The soaking water is then used to cook the fruit. Cooking time: about 20 minutes.
  3. After boiling, run the brew through a fine sieve.
  4. Continue to boil briefly.
  5. Thicken the soup with the cold-mixed cornstarch.
  6. Add the sugar and let it simmer again.
  7. Also, season with salt and lemon juice.
  8. Pour into a soup bowl, garnish with a dollop of sweet cream and serve.

Valentine’s Day now has a permanent place in the calendar of festivals and celebrations and is a great occasion for eating together with your partner. You don’t even have to go out.

Give away a romantic dinner for Valentine’s Day

With a great selection of ideas and tips, we show you how to conjure up a great Valentine’s Day meal at home. Because here you can best enjoy togetherness and spend a relaxing evening. Also, note the tips to win back the lost love.

1. Heart is trump

Of course, the heart is the most important symbol on Valentine’s Day. If you don’t have a heart-shaped plate available, you can still put a heart on the plate with a very simple trick. Simply arrange the prepared food in the shape of a heart. Whether rice, pasta, or other side dishes – with a little patience and a spoon you can put the side dishes on the plate in the shape of a heart.

2. Candlelight dinner

Stage your own private candlelight dinner for Valentine’s Day. You should think about the menu sequence in advance. How about a tomato cream soup as a starter, spaghetti vongole (with mussels) as the main course, and a strawberry cupcake as dessert. Much more important than the food on this day, however, is what’s around it: decorate the table nicely with heart-shaped napkins, light long candles, and put on romantic piano jazz – and you’ll have a real candlelight dinner feeling at home.

3. A delicious strawberry smoothie

Of course, February isn’t the best time for fresh strawberries – but you’re sure to find fresh strawberries for Valentine’s Day in a specialist shop. You can also use frozen fruit in a pinch. Mix the chopped strawberries with a little banana and milk or yogurt in a blender to make a delicious smoothie. A few chia seeds provide an interesting effect in the smoothie.

4. It can also be stimulating

Valentine’s Day is about nothing but love. And as we all know, love goes through the stomach. A libido-increasing effect is attributed to certain foods and foods, i.e. sexual desire increases after eating these foods. So why not give love a little boost this Valentine’s Day by preparing a “stimulating” menu? Foods that can be used are asparagus, coriander, celery, ginger, chili, spinach, or artichokes.

5. Start Valentine’s Day in bed

Even if Valentine’s Day doesn’t fall on the weekend, you can start it off with breakfast in bed. This is how this special day gets off to an extraordinary start. Prepare everything in the evening so that you don’t have to stand in the kitchen for half an hour to prepare everything in the morning. How about, for example, pancakes with coffee or banana syrup or scrambled eggs with prawns and parsley. If you serve a glass of sparkling wine or Prosecco with your coffee, your circulation will really get going.

6. It can also be something special

On Valentine’s Day, you can also treat yourself to something that you might otherwise not consider in everyday life for cost reasons. How about e.g. fresh truffle. It is ideal for truffle spaghetti or other pasta. Or have you ever thought of caviar? The sturgeon eggs are still considered the epitome of luxury. It tastes great as an accompaniment to smoked salmon with egg. And of course, you can also dig deeper into your pocket for champagne. It doesn’t have to be a Dom Perignon, but in the price range of around 30 euros, you get excellent champagne.

7. Valentine’s Day menu suggestion

There is no such thing as the perfect menu for Valentine’s Day, but here’s a suggestion for you: Start the menu with a hearty toast. To do this, cut a heart out of a slice of toast with a cutter, fill the opening with an egg, for example, and then fried in the pan. A juicy pepper steak flambéed with a little cognac is a good main course. And for dessert, serve a strawberry pudding with pink ground pepper.

8. Recipe for friends without Valentine

Maybe you have someone in your circle of friends or acquaintances who doesn’t have Valentine’s and can’t celebrate the day the way you would imagine. You might be able to cheer them up with a Broken Heart cake. To do this, bake a cake in the shape of a heart, but cut it in two. And on one side there is a “little man figure” with which the recipient can use toothpicks to get rid of her Valentine’s frustration in a voodoo way.

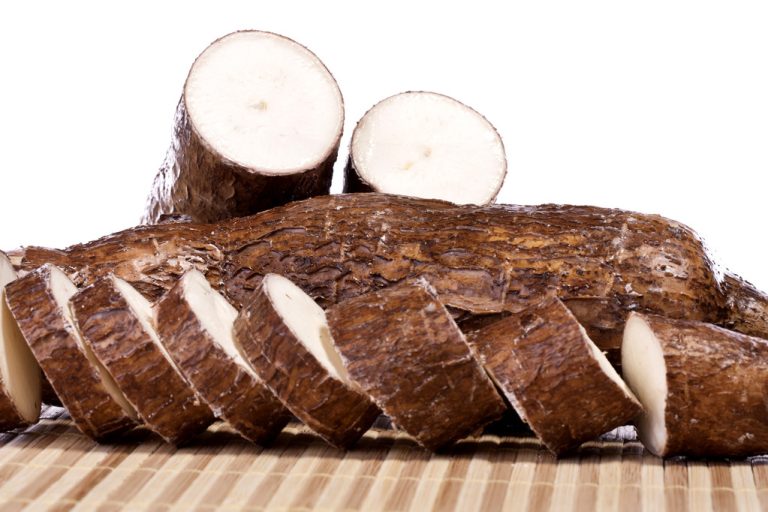
Cassava flour is a good alternative to conventional wheat flour. It is gluten-free and grain-free and yet can be used almost like wheat flour. You can find out more about cassava root flour here.

Cassava flour is being hailed as the new star among alternative flours. It is a flour that is gluten-free, grain-free and rich in fiber.

Cassava flour is made from the starchy tubers of cassava. This is a plant species that belongs to the Spurge family. Manioc originally comes from South America and the natives are said to have fed on the plant. There are now cassava growing areas in many tropical and subtropical regions around the world. Even today, cassava is one of the staple foods of millions of people in South America and parts of Asia and Africa.

However, the cassava roots are poisonous when raw because they contain hydrocyanic acid. However, they can be processed in such a way that the hydrocyanic acid boils down and the tubers become edible. For this reason, cassava tubers are often fermented, boiled or ground into flour and washed.

Cassava Flour: Nutritional Values

Manioc flour is an interesting flour alternative for people who (have to) eat a grain-free or gluten-free diet. It has a high starch content, a mild taste and a fine texture. Thus, cassava flour mimics the consistency and properties of conventional flour very well. Unlike other gluten-free flour alternatives (such as buckwheat or quinoa flour), cassava flour can often be used as a one-to-one substitute for conventional flour containing gluten, such as wheat flour. Other gluten-free flours usually require additional ingredients to make a working dough.
Energy: 371 kcal
Carbohydrates: 88.6 g
Protein: 0g
Fat: 0g
Calcium: 57 mg
Potassium: 303 mg
What is striking about the nutritional values ​​is the high proportion of carbohydrates. In comparison, wheat flour has about 70 grams of carbohydrates per 100 grams of flour. Cassava flour is therefore a good source of energy. However, it has no protein and only a few essential amino acids. After all, wheat flour has 11 grams of protein. Cassava flour also lacks micronutrients such as vitamins. Therefore, where cassava is a staple food, nutritional deficiencies can occur. For this reason, scientists have been trying for some time to breed cassava varieties whose tubers contain more nutrients. On the positive side: cassava flour contains a lot of calcium and potassium.

However, there is nothing wrong with including cassava flour in a balanced diet from time to time. Especially in a gluten-free diet, cassava flour provides a lot of variety.

Use cassava flour: bread, pancakes and more

To make cassava flour the traditional way, the tubers are peeled, grated, and then soaked. The mass is then pressed out, washed and roasted in an oven. What remains is the cassava flour.

Depending on the region, the cassava flour is processed differently. It often turns into a bread-like cake or farofa (Brazilian side dish). A Brazilian drink is also based on cassava flour. In some African areas, the flour is also used for fufu or foufou, a kind of dumpling dough.

Tip: Incidentally, finely ground cassava flour is often also called fufu or foufou in European trade. You can find it in Asian or Latin American supermarkets.

If you have never used cassava flour, you can approach it and replace part of the conventional flour with cassava flour in existing recipes. You can use cassava flour to make breads, rolls, wraps, pancakes, cakes and cookies. Depending on the dough and recipe, you may need a little less liquid in your baked goods. Cassava flour is also suitable for binding sauces or making breading.

Recipe with cassava flour: Fufu from West Africa

Fufu (also foufou) is widespread in West Africa and popular as a main ingredient or side dish in many dishes. Fufu refers to a type of solid porridge or dough that is formed into small dumplings and served with a sauce, soup or stew.

Ingredients for fufu (dumplings made from cassava flour):
cassava flour
water
Cassava flour binds a lot of water. Therefore, the rule of thumb is that you should always use a little more water than you use cassava flour. If you take 100 grams of cassava flour, add about 120 milliliters of water.

How to prepare fufu:
Boil the water.
Pour the boiling water over the flour in a saucepan.
Heat the mixture, stirring constantly, bring to the boil and then continue to simmer for about 10 to 12 minutes. Keep stirring the porridge.
Then take the pot off the stove to let the mixture cool down a bit.
Then form small dumplings with your hands. You can serve these with various vegetable dishes, or use them traditionally as an ingredient in soups, stews or sauce dishes.
Tip: The balls are often so sticky that they are difficult to chew. That’s why they are usually dipped into the sauce or soup and swallowed whole.

Recipe with cassava flour: Farofa from Brazil

Another classic cassava flour recipe is the Brazilian farofa. This is a popular side dish, for which the cassava flour is sautéed in a pan with butter, onions and herbs until golden brown. Eggs are often added as well.

We recommend that you use organic ingredients that come from the region whenever possible. In this way you support an agriculture that does without many synthetic pesticides and in which animal welfare is better guaranteed. In addition, with regional products you avoid long transport routes that cause high CO2 emissions.

You need these ingredients for four servings:
200 g cassava flour
3 tbsp butter (or margarine if vegan)
2 spring onions
1 bunch coriander or parsley
5 sprigs of fresh mint
1 teaspoon zest from a lemon
Salt
How to prepare the farofa:
Wash the herbs and chop them up.
Cut the spring onions into rings.
Heat the butter or margarine in a pan and sweat the onion in it.
Add the cassava flour and toast until golden brown in color.
Stir in the herbs, lemon zest and spring onions.
Tip: If you want to eat eggs, add them to the pan along with the cassava flour. The farofa goes well with rice or bean dishes.

Life cycle assessment: cassava flour is so sustainable

The life cycle assessment of cassava flour:
On the one hand, cassava grows very well even in long periods of drought and therefore does not need to be watered heavily. This is particularly beneficial in regions where water is often scarce.
On the other hand, buying cassava flour in Germany is not very ecological. Because the flour is imported and therefore travels long distances. Transport causes so many climate-damaging emissions.
Therefore, you should carefully consider to what extent you want to integrate cassava flour into your diet. Conscious handling of cassava flour is important in any case. Also, you can try mixing cassava flour with other locally sourced gluten-free flours. This includes, for example, buckwheat flour.
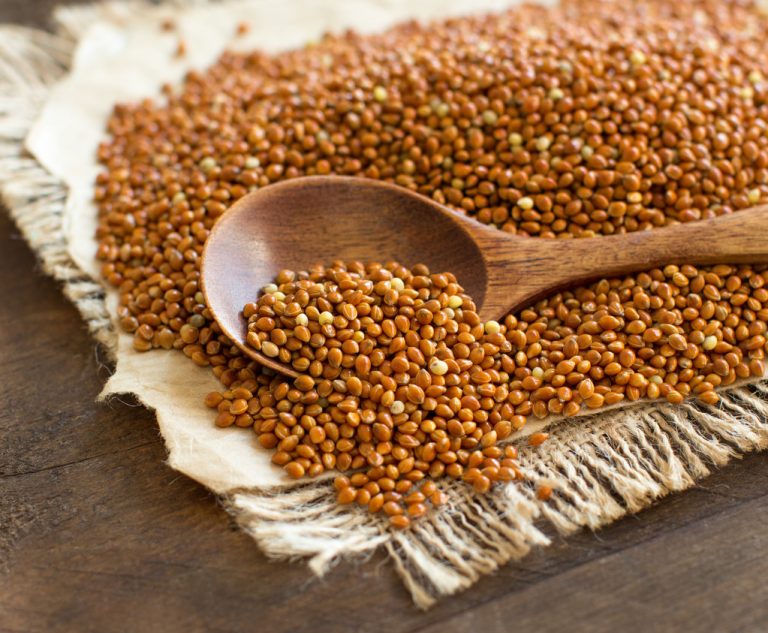
Brown millet is still a largely unknown type of grain. In this article you will find out what distinguishes the millet variety and how you use it.

Brown millet: characteristics and ingredients

Brown millet is the red-orange form of the so-called proso millet. Millet has become better known as a healthy grain in recent years: According to the Bavarian consumer advice center, it is rich in minerals and vitamins and contains a particularly large amount of iron, vitamin B6 and silicon. Millet is also gluten-free and therefore also suitable for people with celiac disease.

The better-known golden millet has yellowish seeds. It is peeled before use. Brown millet, on the other hand, is processed with the peel and husk. This preserves important nutrients such as fiber and B vitamins. However, the peeled type of millet is easier to digest and contains fewer pesticides and other problematic substances such as tannins, oxalic acid and phytic acid.

Excessive amounts of these substances in brown millet can have a negative effect on your health: phytic acid impedes the absorption of calcium and iron, among other things. Tannins make protein absorption and starch digestion more difficult. Oxalic acid can also promote the formation of kidney stones, especially in people who already have kidney problems. That doesn’t mean you have to give up brown millet entirely. However, you should consume them in moderation and make sure you eat a balanced diet.

In terms of calories and macronutrient distribution, brown millet does not differ significantly from other types of millet: Govinda organic brown millet, for example, contains around 308 kilocalories per 100 grams. It consists of around 51 percent carbohydrates. About 10 percent is plant-based protein and 4.5 percent is fat. Of these, 3.8 grams are unsaturated fatty acids.

Use and sale of brown millet

You can get brown millet in organic shops and health food stores. Here it is mostly sold in ground form. You can add brown millet flour to muesli, yoghurt and smoothie bowls, for example. You can also stir it into liquids like soups or juices. It is also suitable as an ingredient for bread, cakes and other baked goods. In these cases, however, be careful not to use excessive amounts: brown millet should not be the main ingredient, but only used as a supplement.

You can also sometimes find brown millet as a dietary supplement. Manufacturers advertise the supposedly health-promoting effects of the millet variety. For example, brown millet is said to help against hair loss, nail diseases, arthrosis, tooth decay or osteoporosis.

However, none of these assumptions has been scientifically proven so far, according to the Bavarian consumer advice center. There are also no studies to date on the possible side effects and risks of consuming too much brown millet.

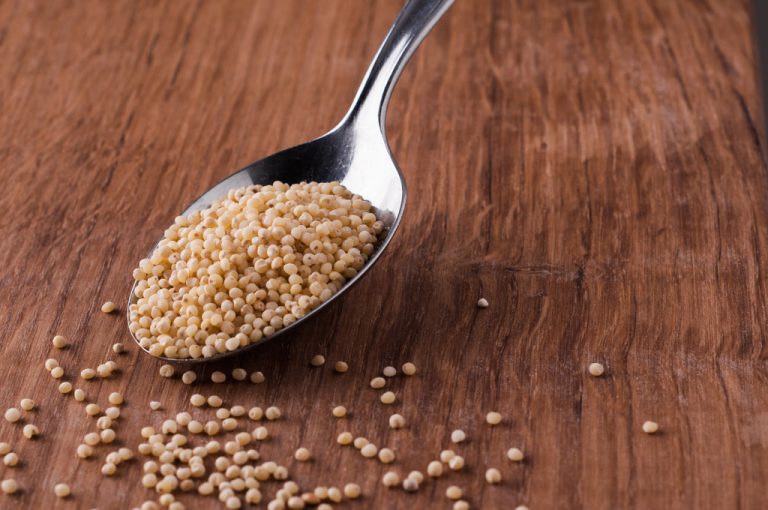
Golden millet is a subspecies of millet. It gets its golden color from its particularly high proportion of beta-carotene. You can read here what else is in the healthy grain and how you can use it.

A special type of small-grain millet is called golden millet. It owes its name to its yellowish colour, which in turn indicates its high beta-carotene content.

Millet is an important part of the world’s food supply and is one of the oldest cultivated grains. Golden millet is a natural variation among millets.

Even if it prefers to grow in warmer areas, golden millet is also cultivated in Europe, for example in Austria. The grain is robust and resistant to pests. Golden millet is often imported from China, India or Canada. In order to avoid unnecessarily long transport routes, you should make sure when buying that the millet comes from Europe.

You can read here which nutrients the grain contains and what you can prepare from it.

This is what makes golden millet so healthy

The ingredients of millet also differ depending on their color. Golden millet contains a lot of beta-carotene, also known as provitamin A, and is therefore particularly healthy for your eyes. In addition, the grain is rich in iron and vitamin C. In addition, the grain is gluten-free and therefore also suitable for people with gluten intolerance.

You can also benefit from the other nutrients of golden millet per 100 grams:

Carbohydrates: 69 g, of which sugars: 2.20 g
Fat: 3.90 g
Protein: 11 g
Fiber: 3.80 g
The complex carbohydrates and fiber it contains will keep you full for a particularly long time. The high protein content makes millet a valuable vegan source of protein and thus supplies your muscles.

There are about 363 kilocalories in 100 grams of uncooked golden millet. This is roughly comparable to oatmeal. Even if the value may seem high at first glance, millet is definitely suitable for nutrition-conscious people, as the grain keeps you full for a long time, contains hardly any fat and provides you with valuable nutrients.

You should pay attention to this with golden millet

You can get golden millet from organic farming in organic shops or in health food stores. But more and more conventional supermarkets also have the grain in their assortment.

In addition to many healthy ingredients, millet also contains the problematic substance phytic acid. This binds minerals that are no longer available to your body. To avoid this effect, it is best to soak the millet in water overnight before cooking. Change the water before you then boil the golden millet. This is how the substance is released from the grain. According to the consumer advice center, soaking foods with phytic acid overnight can help. If you eat a balanced diet, you don’t have to worry about a nutrient deficiency caused by phytic acid.

Golden millet is dehusked before it is sold. Therefore, it is not a whole grain cereal. However, because the nutrients are distributed throughout the grain, millet is just as nutritious as whole grain products. The millet germ can be damaged when the husks are removed. If this happens, the grain is no longer germinable. In addition, the released germ oil wraps itself around the grain. This oxidizes quickly and can lead to a bitter taste in the grain. To avoid this, wash the golden millet thoroughly with warm water before processing it.

Ideas for recipes with golden millet

Golden millet is an incredibly versatile food that enriches your dishes with its nutty note. You can prepare the grain both savory and sweet.

Sweet recipe ideas with golden millet:

Just like you cook porridge from oatmeal, you can also prepare a delicious breakfast porridge from millet. Just try our recipe for millet porridge.
If you cook the millet longer, you can then puree it and season it with a little cinnamon and applesauce to make a fruity dessert cream.
You can use golden millet flour to make bread or other pastries. You can replace all or part of the flour with millet. However, the flour behaves a little differently and gives a softer and slightly stickier consistency than wheat flour.
The cooked golden millet is also an ideal basis for fruity fruit salads.