Tag

remedy

Browsing

The avocado plant is healthy. Hence our information on planting and storing avocados correctly. You will also get to know the valuable nutrients of the fruit and what you can use the avocado plant for. Because this offers many possibilities from consumption to skincare.

In the meantime, it has become indispensable in our supermarkets. The avocado is versatile. For example, you can promote your health and improve your complexion. But what should you pay attention to? We have collected all the facts for you.

Interesting facts about the avocado plant

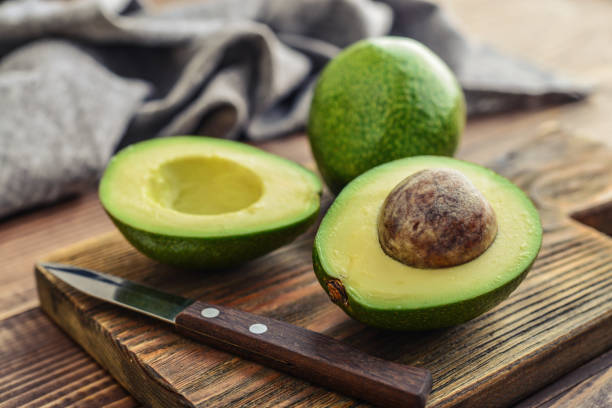
The avocado fruit, hyped as a superfood, is actually a berry. This grows on trees and originally comes from Central and South America. Here it was already cultivated and used by the indigenous peoples living there. After Spanish conquerors conquered the continent, they also came across this valuable fruit. Thus, their global distribution began, with intensive trade starting later. Nowadays you can find a healthy avocado plant in every supermarket. And this can be used in different ways. So you can use them as a spread, make dips or enjoy them in salads. You can also use it to make delicious smoothies yourself or use them for your skin, hair, or effective hand care.

Is the avocado healthy?

Yes, this delicious fruit is healthy! Because it contains valuable nutrients for your body. It provides healthy unsaturated fats and vitamins such as vitamins E, C, K, and B vitamins. Potassium and magnesium can also be found in this superfood. It also contains little fructose and can therefore be eaten by people with fructose intolerance. Thus, you can promote your health by enjoying the avocado plant in good measure. In addition, note interesting facts about healthy oatmeal.

The avocado nutritional values

As already mentioned, depending on the quality, avocado is one of the healthy foods that you can have more often on your menu. In addition to the valuable nutrients, the avocado has the following nutritional values. Keep in mind that the numbers may vary depending on the size and weight of the fruit.

Plant your own avocados

However, you can plant an avocado yourself. For this, you need the core, which you can find in the middle of the pulp. But you need some patience. It doesn’t always work on the first try and it can take several months for the seed to germinate. If you want to plant avocado, you can use two different methods. Either you stick the core directly into the soil and keep it moist. Or you use the water glass method. To do this, fill a glass with water. Then wash the core and make a small cut in it. Then stick three to four toothpicks into the tip of the core and place the frame on the glass so that the core protrudes into the water. You should also note the following things:

  • Change the water regularly.
  • Choose a sunny location.
  • Make sure you have enough heat.

Store avocados properly

The avocado plant is delicious and very healthy. But surely you know the problem that avocados turn brown quickly in the fresh air. And even the beautiful salad quickly looks unappetizing. But lemon juice helps! To do this, sprinkle some lemon juice on the avocado pieces. Then they stay attractive longer.

You should also store this food properly. If you bought an unripe avocado and now want to speed up the after-ripening process, you should store it at room temperature. You can also put them in a paper bag with apples and bananas to speed up the process. If you have a ripe avocado, you can put it in the fridge. This will slow down the ripening of the fruit.

Delicious avocado recipes

Since the avocado is usually eaten raw, you can use it for salads, dips, or a spread. It has become indispensable in vegetarian and vegan cuisine and the number of recipes is endless. You can use the fruit in many ways, especially for brunch. So make a delicious avocado spread with a ripe avocado, a squeeze of lemon, and salt and pepper. If you like, you can refine the whole thing with cream cheese and delicious garlic. Also our avocado recipe for a hearty avocado and potato soup.

Butter can convince with useful information and tips as a home remedy. With the right application, it can do much more than just baking and cooking. You can find out here how butter can help around the house.

Butter as a home remedy for cleaning or washing? It sounds unusual that butter can do so much more. But we’ve collected tips and ideas on how you can also use butter.

Butter – the all-rounder

The term comes from the ancient Greeks and actually means only cow’s milk quark. Because it is made from the milk of cows. In the past, milk was left to stand for two days for this purpose. Then the cream that settled on top was skimmed off and worked until the butter was formed. Today, on the other hand, production is done by machine. Then she goes to the supermarket. And in this country, it is very popular. And we use them for baking, cooking and as a spread. But she can do much more! In addition, they come in many varieties. Because this can also be made from sheep’s milk or goat’s milk. It can also be obtained from buffalo or donkey milk. But the most well-known form is that made from cow’s milk. In addition, note the helpful information on margarine and its use.

Use of butter in the home

Butter, like margarine, is spreadable fat. This refines the taste of bread and rolls. Refrigeration will minimize spreadability. It refines many a meal. In addition, it is often used as frying fat. However, butter should be consumed in moderation as the fat is high in calories. But don’t worry, a study shows no negative health effects from eating butter.

1) Remove grass stains with butter

When you discover a grass stain on your clothes, it’s annoying. But then reaching for the butter will help you! To do this, spread a little of this over the affected area. Then you leave it on for a while. You can then wash the stain with lukewarm water. Of course, you can also wash the garment in the washing machine. Other alternatives for removing grass stains are also possible.

2) Remove oil stains

Got an oil stain on your clothes? Then you can remove the oil stain with the popular spread fat. Because butter has a fat-dissolving effect due to the butyric acid it contains. Again, you apply it to the stain. Then wash your clothes with warm water. But beware, margarine cannot be used as an alternative!

3) Keep onions fresher longer with butter

Do you often only use half an onion for cooking? Then the other half often goes into the fridge. But once you cut it, it starts to dry. This makes further use of the onion unlikely. If you want to slow down this process, smear the center of the onion with some butter. You can then cover them with cling film. Now it can be put in the fridge and stays fresh longer.

4) Treat squeaky cabinets

Annoying noises when opening the cupboards? Who does not know it! If your cupboards are squeaking, you can stop it with the popular spreadable grease. To do this, lubricate the affected cabinet hinges with this. After that, the problem should be solved. Other aids such as oil, wax, or Vaseline can also help. You can treat jammed drawers in a similar way.

5) cleaning of wooden surfaces

The spread of fat can do more. But as a cleaning agent for wooden surfaces? Yes, you heard me right. This is because it is suitable for cleaning wooden surfaces. Instead of using expensive chemical products, try butter. If you discover a stain from wet glasses on your wooden table, this will help you quickly and easily. To do this, spread a little on the spot. After allowing it to take effect, wipe it off with a cloth. Now the butter has restored the lost moisture.

6) Remove stubborn resin

Your children come back from playing in nature and have really sticky hands? If you’re dealing with sticky tree sap, you can use butter here as well. For this, you lubricate your hands with this beforehand. You can then easily remove the resin.

7) Relieve a dry cough

Sounds very unusual, but should help. If you want to get rid of your dry cough, you need tools. If you don’t have any medicines from the pharmacy at hand, they can be the savior in need. To do this, smear your chest with some butter before you go to sleep. Then cover yourself up and relax. You can also make an envelope out of butter. My grandma always did it like this. Spread this on a cloth and place it on your chest.

8) Buttermilk

Likewise, the buttermilk obtained as a by-product can work wonders. Because buttermilk helps to create natural beauty. In addition, it can be very effective as a home remedy for sunburn treatment.

Hop tea is not beer, but rather a tried and tested remedy. Hops have a calming effect and have a positive effect on our sleep.

Hops belong to the hemp family. Long before the plant was used to brew beer, it was valued as a medicinal plant.

Hops are now cultivated throughout Europe and in parts of Asia and America. The plant sprouts anew every year and climbs up to twelve meters. Hops are dioecious. This means there are male and female flowers. For hop tea you only use the female flowers.

This is how hop tea works

The most important active ingredients in hop tea include:
Bitter substances: humulone and lupulone
flavonoids
tannins
essential oils
The bitter substances in particular are said to have a calming and sleep-inducing effect. In the meantime, the effect of hops and its ingredients has also been extensively scientifically investigated:
The positive effect of hops on the human psyche was proven in a pilot study. Test persons who consumed dried hop extract daily for four weeks reported reduced anxiety, depression and a lower stress level compared to the placebo group.
In an animal experiment with quail, it was shown that hops regulate the day-night rhythm and improve sleep at night. The birds should have a comparable sleeping rhythm as we humans. However, it is unclear to what extent the data can be transferred to humans.
In addition to the calming effect, hops also have antibacterial and antioxidant effects, according to a 2019 study. The authors of the study conclude that hops extract could help against acne. Because of the same properties, hops are also often used in folk medicine for digestive problems and other complaints such as loss of appetite. However, research is still needed here.

Hop tea and other hop products

The main uses of hop tea include:
nervous restlessness
sleep disorders
anxiety states

In addition to hop tea, there are other ways in which you can benefit from the effects of the medicinal plant:
In the pharmacy you can get capsules or tinctures made from hops. Hop essential oil is used in aromatherapy.
Hops are also suitable for a soothing bath for mind and body. To do this, boil a liter of water, pour it over 20 grams of hop blossoms and mix it into your bath water.
Another option for better sleep is a scented pillow filled with hop blossoms. You can just put that next to your pillow.

How to prepare hop tea

For the soothing tea you use the female flowers of the hops. You can recognize them by growing cone-shaped, spike-like bud sites, while male flowers hang more loosely. You can easily prepare hop tea yourself:
Pour 250 milliliters of boiling water over 2-3 teaspoons of dried female hop flowers.
Let the tea steep for five to ten minutes.
Then remove the plant parts.
You can have three cups a day. To help you sleep better, you should drink the tea about half an hour before you go to bed.

To increase the calming effects of hops, you can combine them with valerian or St. John’s wort. Lavender and chamomile are also good.

We show you home remedies and tips for removing felt-tip pens. Whether a scribble needs to be removed from a child’s face or a line from other materials. Felt pen stains can be gently removed with household tricks. You can certainly be spared the expensive trip to the next cleaning.

It’s annoying when felt-tip pens adorn the sofa. You can get marker stain remover at the drugstore. However, household items such as milk, hairspray, vinegar, and nail polish remover are also inexpensive ways to remove markers. In the following list, we show which home remedies are suitable for which stain.

Check the material before removing the stain

A felt-tip pen stain is not only quickly but also inexpensively removed with the right agent. However, always bear in mind that it is possible that the stain will disappear, but that a light stain can appear due to the material fading with the appropriate home remedy. So always check a hidden spot before use to see if the material is sensitive to the home remedy in question. However, there is one exception. Your child’s skin will not fade, don’t worry! After removing the felt-tip pen, simply care for it with one of our home remedies for smooth skin.

1) Remove felt pen from skin

Every mother knows the problem: If it’s been very quiet in the house for a while and you’re happy to see how nicely the children are playing, then there is usually a very big and often very creative surprise for the parents. For example this one: The offspring comes out of the children’s room and has painted on itself with a felt pen. Keep Calm! It all goes away over time as the skin rapidly renews itself. But if you or the children do not want to have the original tattoos on the children’s skin until the skin is renewed, there are ways to clean it. There are some very simple tricks: water and soap, milk, or even lemon juice. Take a damp cloth and gently rub the child’s face clean. Also, note our tips on removing adhesive and adhesive residue.

2) Removal of a felt pen from fabric

Use more or less mild home remedies to easily remove felt-tip pen stains from textiles. But be careful: Always check a harmless part of the fabric! (Draw a line with the felt-tip pen in a place that is not visible and check the effectiveness of the remedy there first.) It would be a shame if the remedy ruined the fabric. In addition, always dab carefully from the outside so as not to worsen the stain by wiping. Of course, you can also buy a stain remover in the drugstore, but there are six ways to inexpensively remove a felt-tip pen stain from fabric with home remedies:

  • Milk: Soak the fabric in milk and leave it soaked for a day. After that, wash your clothes immediately.
  • Baking soda: Take a little baking soda, make a paste with water and leave it on for just a few minutes. Wash the fabric immediately afterward.
  • Lemon Juice: Put some juice on the stain and wait 30 minutes before washing the clothes in the machine.
  • Caution: lemon juice can bleach your fabric.
  • Vinegar: Mix 1 part vinegar with 2 parts water and leave the mixture on for 30 minutes. Warning: the vinegar can bleach your fabric.
  • Hairspray: Spray the stain with hairspray and let it dry. Then put it in the regular wash. No risk of bleaching!
  • Acetone: Glass cleaner or nail polish remover contains acetone and can loosen felt tip stains. This home remedy is not suitable for sensitive fabrics as it is a very strong agent.

3) Remove felt tip pen from plastic

As far as it is a water-soluble marker, removing it is easy. With a bit of hot water and soap, this is quickly done. But what can you do if it’s a permanent marker? Either get a specialty stain remover from the drugstore, or put on cleaning gloves, grab a microfiber or cotton cloth, get a bucket of warm water, and use the following home remedies. The same applies again: first try out how the material reacts in an inconspicuous area and then go to work with the following home remedies:

  • Soap and Water: This simple option removes only water-soluble markers from plastic. But it’s definitely worth a try.
  • Special eraser: This can be used to break up and remove color pigments.
  • Deodorant: Spray the deodorant on the felt-tip pen stain and let it soak in for a moment. Then wipe with the rag. If necessary, repeat the application until the pen is gone.

4) Remove marker

Edding is a special kind of felt pen. It is insoluble in water and very broad and strong. In addition, it is often used in the colors red and black and has a strong color effect. It is very annoying when this strong pen of all things accidentally lands on an object in the household. But, especially when there are children in the house, this kind of thing happens.

Simply remove lint. Garments made from natural materials pill quickly and this gives the clothing an unkempt appearance. Therefore, now use means against fluffy sweaters. This makes removing lint from the sweater child’s play.

Easy ways to remove lint

Anyone who likes to wear woolen clothing knows the problem of fluff formation, also known as pilling. Regardless of whether the garment is made of sheep’s wool or cashmere, at some point, unsightly fluff will form where the material rubs against each other or other garments. However, there are a few sweater lint removal methods you can use. You will also learn how to properly wash and care for your woolen clothing.

1) Remove lint from sweaters with a roller

If you are looking for a suitable remedy for fluffy sweaters, the classic is a lint roller. You can get these in drugstores or online. You can choose between different variations. You can either use a sticky lint roller or a reusable brush. This also effectively removes animal hair.

2) Simply remove lint with tape

If your favorite piece of clothing has lint and you don’t have a lint roller handy, use duct tape. To do this, wrap the tape around your hand so that the sticky side is facing out. Then gradually go over the fluffy sweater. This works best with light fluff or to remove long hair from the carpet.

3) Using a razor against pills

You can also remove lint with a wet razor. To do this, wet your razor and then gently run over the pills on your sweater. In the video below you can see how well different methods work. The method with the wet razor performs best. But always test carefully on a small area before you really get started. You can also buy special lint shavers online.

4) Dryer as a remedy for fluffy sweaters

If you have a dryer for drying laundry at home, you can use it to effectively remove lint. For this, you have to put the clothes in the dryer. Then set the ‘ventilate’ program. After about 20 minutes, the beautiful pieces are lint-free again.

Prunes are healthy and taste wonderfully sweet. Here you can find out more about the ingredients and how the dried fruit is used as a household remedy and kitchen ingredient.

Prunes: Rich in healthy nutrients

Prunes are dried plums, which is why you can also find them under the names prunes or prunes. Through the process of drying, the healthy ingredients are concentrated in them. Prunes are high in fiber and contain the following nutrients:

carotene
Vitamin B2
iron
copper
zinc
potassium
sodium
calcium
phosphorus
The combination of calcium and phosphorus in prunes strengthens bones and has been shown to protect against bone diseases such as osteoporosis.

In addition, like all blue and black fruits and vegetables, prunes are rich in anthocyanins. These secondary plant substances belong to the group of flavonoids. They lower cholesterol levels, strengthen the body’s immune system and offer protection against infections and inflammation.

Prunes as a home remedy for constipation

Prunes can be used as a natural home remedy to help with constipation and flatulence. After consumption, they swell up in the intestines, stimulate digestion and also take unwanted waste products and toxins with them.

That’s how it’s done:

At night, soak five to ten prunes in water.
Consume them and the soaking water as soon as you get up the next morning.
Caution: You should not eat more than 150 grams of prunes per day. Otherwise, the dried fruit will swell up in your stomach so much that it will have the opposite effect and you will experience abdominal pain and bloating.

Prunes as a kitchen ingredient

In addition to their health benefits, you can also use prunes as a sweet ingredient, including in savory dishes.

Pureed or chopped, prunes can replace industrial sugar in cakes, desserts and biscuits.
They are also suitable as a butter substitute. To do this, simply puree a few prunes with a little hot water to a smooth mass and then use them as a low-fat alternative when baking. Replace half the butter with two-thirds prune puree. Remember that the mass tastes sweet.
As an ingredient in hearty dishes, they go well with vegetable couscous or chopped up with bean stew.
Due to their high fiber content and calorie content, prunes are also a good snack against cravings or provide you with energy on long hikes.

Sloe juice is fruity and healthy. It is said to have a positive effect on the immune system and on the stomach and intestines in particular. This simple recipe will show you how to make the juice yourself at home.

Sloe juice recipe: the ingredients

You should collect the sloes that you want to use for your juice after the first frost. As soon as they freeze, the bitter substances they contain break down. This gives them a fruitier, less tart taste. Alternatively, you can put fruit collected before the first frost in the freezer for a day or two before processing it.

For about one and a half liters of homemade sloe juice you need the following ingredients:

1 kg of sloes
about 1.5 liters of water
100 grams of sugar
2 tbsp lemon juice
You should also have ready:

a sieve
two saucepans
two glass bottles with caps

Prepare sloe juice: This is how it works

Preparing sloe juice is not difficult, but it is quite time-consuming. The actual work is done quickly – you still have to plan about three to four days in total until your juice is ready.

Clean and wash the sloes. Drain briefly in a colander, then transfer to a large saucepan with a lid
Boil the water in a second pot and then pour it over the sloes. Put the lid on the pot and let it sit for a day.
After 24 hours, pour the entire contents of the pot through a sieve and collect the water in a saucepan. Boil it again, pour it over the sloes and let them steep again for a day.
Repeat this process at least three times, preferably four or five times. The more often you boil the sloes, the more intense the juice will be.
On the last day, catch the sloe juice in a saucepan, add the sugar and lemon juice and let it boil until bubbling. Tip: If you like, you can season the juice with a little cinnamon. This gives it a special aroma that goes particularly well with the Christmas season.
Pour the hot sloe juice directly into clean glass bottles and seal tightly. Then store it in a cool, dark place, such as the basement. The sloe juice keeps for many months up to several years.

The health effects of sloe juice

Many naturopaths mention the positive effect that sloe juice is said to have on the body. However, it has not been scientifically proven. Sloes contain vitamin C and flavonoids as well as various tannins and bitter substances. The tannins are of particular interest. For example, they are said to have the following effects:

anti-inflammatory
diuretic
appetizing
help against bladder infections
Use for colds
Sloe juice is therefore used in natural medicine, especially for inflammation in the mouth and throat. Overall, sloes are also said to strengthen the immune system and have a positive effect on the gastrointestinal tract.