Tag

should

Browsing

If you freeze broccoli, you can still enjoy the summer vegetable in the fall and winter. We’ll show you how it’s done – and tell you the best way to defrost the florets again.

Broccoli is a relative of cauliflower, grown in Europe mainly in Italy. From June to October he is also in season in Germany. The vegetable with the dark green florets is very healthy: broccoli is rich in minerals such as potassium, iron and zinc. It also contains various B vitamins and lots of vitamin C.

Freezing broccoli: How to cook it

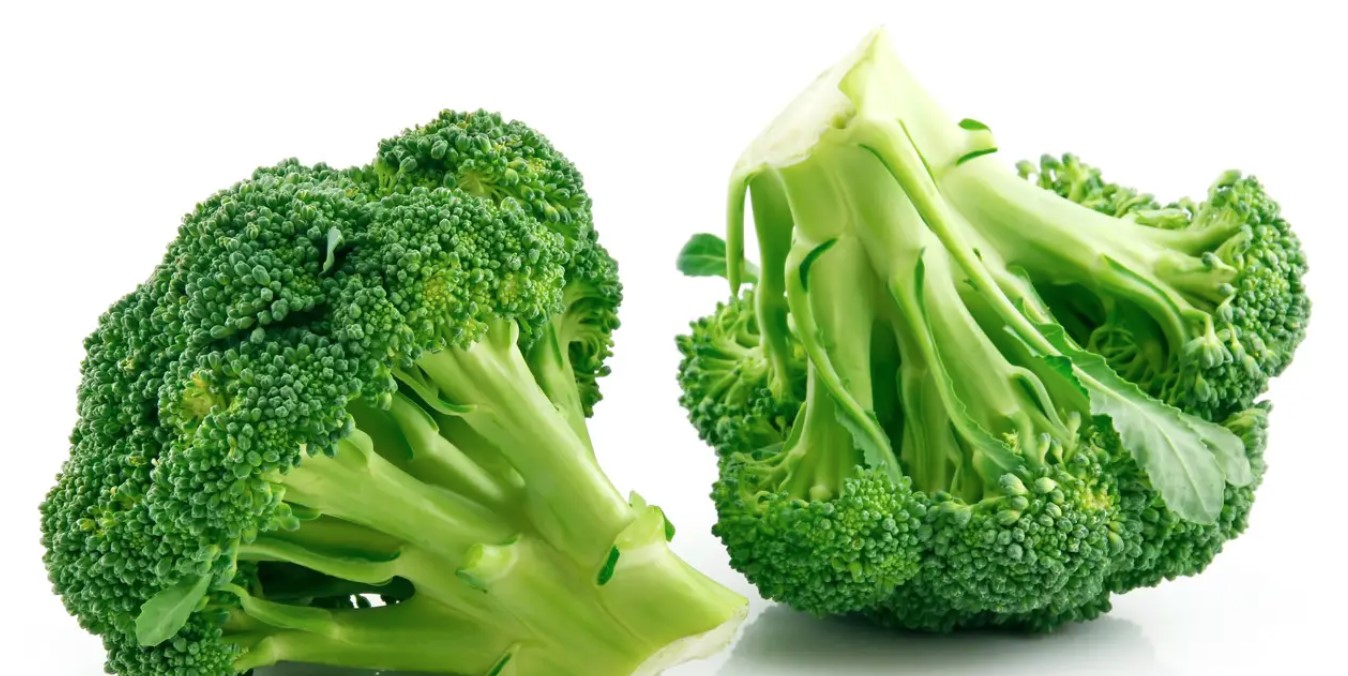
It is best to buy the broccoli at the market during the season, where you can get it unpackaged. The florets should look fresh and green and still be connected. Avoid broccoli that is already bruised or discolored.
At home, wash the broccoli thoroughly, removing the leaves and the woody end of the stalk. Cut the florets into 1-1/2 inch pieces and the stem into 1/4 inch slices.
If you like, you can now put the broccoli pieces in a bowl with water and some lemon juice for five minutes. This is how the broccoli keeps its green color.
Tip: If you buy organic broccoli, you avoid chemical-synthetic pesticides.

Also: If you want to eat the broccoli right away, don’t worry about bruises when you go shopping – they are quickly removed and the vegetables taste just as good.

Blanch the broccoli before freezing

Before freezing, you should blanch the broccoli briefly. Otherwise it will get mushy later when defrosting. Boil a few liters of water in a large saucepan. Place the chopped broccoli in the boiling water for about 2 minutes, then scoop out the pieces with a slotted spoon. Now let the broccoli cool in a colander.

How to freeze broccoli

To freeze the broccoli, fill a freezer container, such as a glass one, and place it in the freezer. The broccoli can be kept for up to a year.

If you later want to thaw the broccoli pieces individually, you should prefreeze them before freezing. Place the broccoli florets a little apart on a board or tray and place in the freezer for half an hour. This will prevent the broccoli pieces from sticking together when you freeze them. You can then freeze them as described above.

Thaw frozen broccoli

There are several ways you can defrost the broccoli:

You can thaw the broccoli at room temperature or in the refrigerator. Depending on the ambient temperature, this can take a few hours.
Broccoli can be thawed much faster in a large pot: Bring water to a boil and blanch the frozen broccoli in it for a maximum of 90 seconds. This also keeps the vegetables nice and crunchy. Attention: For this method you need a large pot with a lot of water so that the liquid does not cool down too much due to the cold broccoli. Caution: Consider whether you can still use the broccoli water after cooking. If not, another method might be more water-efficient.
In the oven, you can defrost and roast the broccoli at the same time. To do this, place the broccoli pieces in a mold, drizzle them with a little olive oil and season with salt and pepper. Then place the mold in the 200 degree oven for 15 minutes.

Buying too much bread or you want to stock up? Then you can also freeze the bread. You can find out how this works without plastic in our practical tips.

The right container for freezing

Plastic containers are not recommended for storing bread. In the worst case, plastic cans contain harmful plasticizers and are difficult to dispose of in an environmentally friendly manner. Instead, it’s better if you freeze bread and other foods in glass or stainless steel containers.

You can easily freeze sliced bread in it for a few weeks and then only take out as many slices as you need. The fresher the bread is when frozen, the longer it will keep in the freezer. However, it also loses its freshness and flavor over time, which is why you should generally not freeze baked goods for longer than a month or two.

Freeze bread in a cloth bag

In addition to plastic cans, plastic freezer bags can still be found in many households. You can use them several times, but sooner or later they end up in the trash. A good alternative to this are, for example, simple cloth bags. You can freeze the bread whole loaf or in slices. A cotton bag also works well to absorb excess liquid when you thaw the bread in it.

Tip: If you are only freezing your bread for a few days, for example over the weekend, you can even leave it in the paper bag. Well wrapped, the bread can also be frozen in it without any problems. You should only take it out of the paper bag to thaw it.

After freezing – thaw the bread properly

Give the frozen bread some time to thaw. One to three hours at room temperature is usually sufficient for this.
You can also let your bread thaw overnight, covered in a cotton bag or under a clean cloth.
If you defrost the bread in the oven, you should not heat it up for too long. This can make it hard and dry. However, it is possible to briefly bake the defrosted bread again in the oven. Then it tastes fresh again after the time in the freezer.
If you have frozen your bread in slices, you can also defrost it in the toaster. Simply toast the frozen slice a few seconds longer than fresh bread.

Eating rose petals is a great way to use the decorative flowers for culinary purposes. In this article you will find out what you should consider when eating.

Above all, roses are an expression of love. But the flowers are not only a popular decoration: You can also use their petals in the kitchen.

However, you have to pay attention to a few pointers. There are now up to 250 different varieties and new varieties are constantly being added through breeding. Only a few of them are actually suitable for consumption.

Eating rose petals: You should pay attention to that

To eat rose petals, you should always use wild and cultivated roses. In addition, they must belong to the genus Rosa. Other types of roses, such as peonies, Christmas roses or hollyhocks are not suitable for consumption. They are mostly poisonous because, despite their name rose, they belong to other plant genera.

You should also avoid eating bouquets of roses or potted roses that you have bought, as they can be heavily contaminated with pesticides. Also read: “Blooming business”: the global trade in flowers.

You can, for example, eat the rose petals of the following varieties without hesitation:

Gallica
Centifolia
damescena
All three species are fragrant roses. That’s why they taste particularly intense.

How to use rose petals

If you want to eat rose petals, you can use them either fresh or dried:

The leaves themselves are particularly suitable as a topping for salads, vegetable pans, but also for sweet dishes such as desserts or cakes.
If you pour hot water over them and let them steep, you can make rose tea.
The petals are also suitable as an ingredient for cold drinks such as lemonades, cocktails or punch.
Chopped rose petals add an interesting flavor to butter, spreads, cream cheese, hummus or other dips.
You can also add the edible flowers to oils or vinegar and let this mixture steep for a few days. So you can easily make rose vinegar and rose cooking oil yourself.
You can also use the rose aroma in the kitchen in the form of rose water. Originally, this comes from the Arab world and is often used in the kitchen as a condiment. Other products that contain rose petals are, for example, rose coffee, rose petal salt, rose pepper or rose syrup.

Rose Petals: Buying and Harvesting Tips

You can buy many products with rose petals ready-made. However, you also have the option of buying dried rose petals and using them yourself. If you want to use fresh petals, you can grow your own wild roses and harvest the leaves. You can find more information about growing roses here: Wild roses: important varieties, care and cultivation.

When harvesting, you should then observe the following tips:

Harvest the buds just before use. So they don’t wither.
Always choose buds that have just opened.
The morning is the best time. Then the essential oils have not yet evaporated due to the sunlight.
Carefully twist the petals off the calyx to avoid breaking them.
Wash your buds carefully.
Keep the buds fresh in a bowl of water if you decide not to use them immediately.
If you want to dry them, gently pat them dry and spread them flat on a smooth surface.

You want to reheat potatoes that are left over from the day before? Then you should pay attention to a few tips. Here you can find out what is important when heating up the potatoes.

Whether jacket potatoes, boiled potatoes, fried potatoes or mashed potatoes: the earthy tubers are a popular side dish for various dishes. If there are a few potatoes left over from a meal, you can enjoy them warmed up later. Since bacteria and fungi can easily multiply in potatoes that have already been boiled, you should follow a few guidelines.

Important: When buying potatoes, make sure that they are organic if possible. You are supporting ecologically integrative agriculture that, for example, does not use chemical-synthetic pesticides.

Warming up potatoes: the right way to store them

If you want to reheat leftover potatoes, there are a few rules you should follow when storing them:

Pack the potatoes in a clean, airtight container as soon as possible after they have been prepared.
Don’t put the potatoes in the fridge right away, let them cool until they’re lukewarm. If you immediately cool hot and warm food, the entire refrigerator temperature rises. This not only wastes energy, but also ensures that other products that require refrigeration may spoil faster.
Stored in the refrigerator, you can eat the potatoes up to two days after they are prepared.

Warm up potatoes: Here’s how

Basically, you shouldn’t use the microwave to warm up potatoes. This is because they cannot be heated sufficiently in it to ensure that any possible bacteria are killed.

The following methods are more suitable:

In the saucepan: Put some oil in a saucepan and let the potatoes simmer for at least ten minutes at at least 70 degrees.
In the pan: Fry the potatoes in a little oil in a pan at at least 70 degrees for at least ten minutes.
In the oven: Place the potatoes in an ovenproof dish and mix them with a little oil. Then bake them at around 180 degrees for at least 15 minutes.
Tip: You can tell that you have heated the potatoes sufficiently by the fact that they are consistently hot after heating them up.

Possibilities for further processing

Once the potatoes have been warmed up, you can process them in different ways:

Potatoes that have already been boiled, for example, are good for preparing fried potatoes from them the following day.
You can also bake the potatoes in the oven until they are crispy.
Another option is to use them to make a potato casserole.
The advantage: Since the potatoes are already cooked, these recipes don’t take that long to prepare.

Should it go a little faster? Then simply serve the reheated potatoes with a herb dip and a simple green salad.

Are you looking forward to an aromatic glass of wine, but then realize that it corks? Read here what you can do if the wine corks – and why you should still not dispose of it.

When wine begins to cork, you don’t see it visually at first. Because the cork changes neither its color nor its appearance. You can primarily tell from the smell that the wine is corked. It then gives off an odor that smells like damp cardboard or cardboard. This makes the wine appear less fresh. In technical jargon, this is also known as a “cork error”.

Tip: If you are unsure whether the wine really corks, you can easily check this by adding some carbonated water. This will enhance the smell and make it easier for you to tell if the wine is corked.

Why does wine cork?

Wine is corked by the breakdown product trichloroanisole (TCA), which reacts with certain substances in natural cork. However, you only notice the obvious smell when (invisible) mold has already formed on the cork and is producing the strong-smelling chemical. Nevertheless, according to current knowledge, corking wine is not harmful to health because the harmful substances are not available in sufficiently high quantities.

By the way: not only bottles with a cork, but also bottles with a screw cap are affected. In these cases, the TCA gets into the alcohol via barrels, hoses or cartons, for example. Ideal conditions for TCA to be released could also exist in wine cellars. Since the warm, humid cellar climate offers microorganisms an ideal breeding ground, they could react chemically and thus release the odorous anisole.

What else can you do with corked wine?

Before you pour the wine down the drain, you can try the following trick: Clean the neck of the bottle with a clean cloth and pour the wine into another container. Place a large piece of cling film in the wine. This attracts the TCA and reduces the cork taste. You can theoretically enjoy the wine again after 15 to 20 minutes, when the cork taste has reduced.

Alternatively, you could also try making vinegar from the leftovers of the wine. All you need is wine, water and naturally cloudy apple cider vinegar. Follow these steps to prepare the vinegar:

Take a larger glass jar, wash it out and let it dry well.
Pour the wine and water into the jar.
Add the apple cider vinegar to the wine and water mixture. Mix everything well with a wooden spoon.
Secure a piece of cloth over the jar with a rubber band to act as a “lid” and store in a warm place.
Now the acetic acid bacteria do the rest. They multiply and convert the alcohol so that after a few weeks you get acetic acid. During this time, you can let the vinegar “rest” and don’t have to stir it extra.
Tip: You have to decide for yourself whether you want to use the wine for cooking or not. In principle, it can still be used, but it can happen that the bland taste takes over the food and makes it inedible. However, if the cork smell isn’t too strong, you could still use the wine for cooking. Alternatively, you could also try to exchange the corked wine with the manufacturer. Smaller traders and winegrowers sometimes take back the fine wine as a gesture of goodwill.

Flexigans eat vegan, but not always. From time to time they also reach for animal products. We will explain the advantages of the diet and what you should pay attention to.

Flexigans mainly eat vegan food, but occasionally also eat animal products. The term is made up of the words “flexible” and “veganer:in”. With this diet, you can decide for yourself how often or rarely you consume animal products. Because as a Flexigan:in you don’t do without all animal products directly, the changeover is easier compared to a purely vegan diet.

This is what a flexible diet can look like

The flexible diet is individual and can look different for every person. So you can decide for yourself how often you eat animal products and which ones.

For example, you can only eat vegan during the week and only vegetarian at the weekend.
Or you only eat vegetarian on special occasions, for example in a restaurant, on birthdays or other celebrations.
Vegan alternatives to minced meat, schnitzel or sausage are available in many supermarkets, but also in online shops such as Vantastic Foods**. In addition to vegetables and carbohydrates, you also have a protein-rich component on your plate. However, some vegan substitute products contain many additives. On the other hand, they make it easier to get started with a plant-based diet.
Try the variety of plant-based alternatives for milk and yoghurt. Soy, almond or oat milk are good alternatives for the milk in muesli or coffee.
This is how you become a Flexigan:in
There is no exact diet plan that you can follow. But there are many ideas and tips that can help you if

You want to become a Flexigan

Set goals. Plan how often you want to eat animal products each week. In the beginning it can still be several days. If this works well, you can reduce the vegetarian days.
If you buy animal products, look for organic quality. Organic animal husbandry is more environmentally friendly than conventional animal husbandry. In addition, the organic seal also stands for more animal welfare.
Get inspired. There are many recipes for vegan alternatives and reports from vegans on the internet.

It is often recommended to only clean mushrooms and in no case wash them under running water. But is that really true? You can find out here how best to clean mushrooms before preparation.

Whether mushroom pan, mushroom cream sauce or mushroom cream soup: mushroom recipes usually recommend cleaning the mushrooms before preparation. This means removing any soil residue with a brush or a special mushroom brush. Cleaning, unlike washing, is a dry process. Washing the mushrooms with water is often strongly discouraged. But why?

Clean or wash mushrooms?

The advice not to wash mushrooms under running water is common. They are said to become soaked with liquid and lose their taste.

In fact, mushrooms absorb a small amount of extra liquid when they come into contact with water. Unlike vegetables such as peppers, aubergines or courgettes, they do not have a solid shell that water could roll off. They can therefore absorb some of it.

However, mushrooms already contain a lot of water – in the case of button mushrooms, for example, it is up to 91 percent. This leaves little room for additional water intake. An experiment by the US author Harold McGee confirms this assumption: According to the British Guardian, McGee soaked 252 grams of mushrooms in a water bath for five minutes. They then weighed 258 grams, just six grams more. Since the mushrooms come into contact with water for a significantly shorter time when rinsing, they should absorb significantly less liquid. You can read about this experiment in McGee’s book “The Curious Cook”.

Still, there is slight disagreement as to whether or not washing affects the taste of the mushrooms. According to McGee, there was no loss of taste in the washed mushrooms. According to the Guardian, on the other hand, the British Mushroom Bureau advises against washing mushrooms for too long: the longer the water contact lasts, the more the flavor fades. Nevertheless, the advice center does not completely advise against cleaning mushrooms under water. Wiping them off with a damp cloth or rinsing them under running water is not a problem.

Cleaning mushrooms: is it even necessary?

Self-collected mushrooms can certainly have heavy soil residues or other dirt. In this case, it is advisable to clean the mushrooms and wash them if necessary.

The situation is different with cultivated fungi: They are usually little or not at all contaminated when they are sold. In the case of slight residues, cleaning with a brush or brush is sufficient.

If you don’t want the mushrooms to come into contact with running water, you can wipe them off with a damp kitchen towel afterwards. You can find more detailed tips and hints in these guide articles:

Clean mushrooms: simple step-by-step instructions
Cleaning porcini mushrooms: 3 tips for mushroom pickers
You should be particularly careful when cleaning if you want to prepare mushrooms raw, for example in a mushroom salad. According to the consumer advice center, you should always heat other types of mushrooms before you eat them. They are more digestible and possible pathogens are killed.

Lamb’s lettuce is one of the few vegetables that can be harvested in winter. We give you four tips on how to properly harvest, wash, store and prepare leafy greens.

Lamb’s lettuce is healthy and one of the most nutritious types of lettuce. It contains valuable vitamins and minerals that contribute to a balanced diet.

However, there are a few things you should keep in mind when storing and preparing lamb’s lettuce. Only if you harvest, store, wash and use them correctly can the leafy vegetables unfold their healthy effect, preserve them and stay fresh for a few days.

We explain which mistakes you should avoid and give you tips on how to do it right.

Mistake #1: Not harvesting lamb’s lettuce properly

You can easily sow lamb’s lettuce yourself in the garden. It is undemanding and with proper care you can harvest it all year round. The main season for lamb’s lettuce is from October to December. So you can still prepare delicious dishes with the leafy vegetables from your garden even in winter.

However, there are a few things to keep in mind when harvesting:

Cutting: Cut the rosettes of the lamb’s lettuce individually. Always use a sharp knife for this. This way the cut will be smooth and the plant will be less susceptible to diseases and pests. Also, make sure you never cut too deep so the lettuce can grow back properly.
Picking: Lamb’s lettuce can grow back best if you pick individual leaves and do not cut them off. Pick the large leaves so that young shoots can grow. Take just a few leaves from each plant at a time so they can keep growing year-round.
Nitrate: Lamb’s lettuce stores nitrate in its leaves. Nitrate in water and food is initially harmless. It only becomes critical when we absorb too much of it. In the evening, the nitrate in lamb’s lettuce is lower because it has been broken down over the course of the day. Therefore, harvest the lettuce in the evening to be on the safe side.
If you don’t grow lamb’s lettuce yourself, but buy it, then make sure it’s organic. Especially tender leafy greens can easily absorb pesticides or chemical-synthetic fertilizers – these end up in and on your food. When shopping, you can use the organic seals from Demeter, Bioland and Naturland as a guide, as they require particularly strict criteria.

Whether from your garden or from the organic market: Wash the lamb’s lettuce thoroughly before eating.

Mistake #2: Wash lamb’s lettuce under running water

Before eating, it is important to wash the lamb’s lettuce properly. The leafy greens are often full of sand or soil and may have fertilizer residues on them.

You should not wash lamb’s lettuce under running water. The soil often hides on the individual rosettes of the leaves and is not rinsed off under running water. In addition, the sheets can quickly stick together under running water and thus prevent thorough cleaning. Anyway, you save water if you don’t wash the lamb’s lettuce under running water.

Prepare a cold water bath for the lamb’s lettuce instead:

Remove wilted or dried leaves from the lamb’s lettuce rosettes.
Fill a large bowl with cold water (it will go limp quickly in warm water).
Submerge the lamb’s lettuce in the cold water and let it soak for five minutes. The heavy earth sinks down.
Carefully remove the leaves from the surface and discard the water along with any soil that has collected at the bottom. Tip: Catch the water and use it to water the flowers.
Fill the bowl again with cold water and add the lamb’s lettuce. Now toss the individual leaf rosettes in the water and check them for sandy residue.
Place the washed leaves on a clean tea towel and let them dry.
Remove the roots with a sharp knife so that only the individual leaves or fine rosettes of leaves remain.
Spinning in a salad spinner is not recommended for lamb’s lettuce, or if so, then only very carefully. The lettuce quickly loses its loose structure and sticks together.

If you do not prepare the lamb’s lettuce directly, it is particularly important to dry it well and store it appropriately.

Mistake #3: Storing lamb’s lettuce incorrectly

Lamb’s lettuce is delicate and doesn’t keep very long after harvest. That’s why you should eat it as fresh as possible. If you do want to store it for a few days, then follow these tips to keep the leafy green crisp:

Store lamb’s lettuce cool. This keeps the leaves crisp and fresh.
Avoid wetness. Lamb’s lettuce quickly becomes mushy and can only be stored if it is well dried.
Condensation damages the lettuce and causes it to rot quickly. Therefore, do not store lamb’s lettuce in airtight packaging. If you buy it in a box, always unwrap it for storage.
It is best to wash and dry the lamb’s lettuce thoroughly before storing it. Wrap it in a kitchen towel and put it in the fridge. It can stay fresh for up to a week.

Tip: Place lettuce that is a few days old in a cold water bath for a few minutes. This has an invigorating effect and makes the leaves fresh and crisp again.

Mistake #4: Preparation without vitamin C

Lamb’s lettuce is a real vitamin bomb and rich in valuable minerals and trace elements. It is valued above all for its high iron content and can counteract iron deficiency during pregnancy (caution: do not eat pre-packaged and/or pre-cut lettuce during pregnancy, as it can provide an increased surface area for bacteria to attack. If you are unsure, also avoid lamb’s lettuce in the restaurant – you don’t know how freshly and thoroughly washed it was.). Iron is an important trace element that influences many bodily functions.

The body needs vitamin C to properly absorb iron. Therefore, always prepare the lamb’s lettuce with a dressing containing vitamin C.

You can easily make dressing for lamb’s lettuce yourself. Orange or lemon are particularly suitable as they contain a lot of vitamin C.

Have you ever had two yolks in your egg? Here you can find out how the so-called double yolk occurs and whether it has an effect on your egg.

How is an egg with two yolks formed?

Double yolks develop naturally: In general, every hen has two ovaries. However, the right ovary regresses fairly quickly and the eggs then mature in the left ovary. Through the storage of nutrients in the ovary, yolk balls develop from the egg cells over time. You will then find these yolk balls in your egg and theoretically a chick can also develop from them.

A double yolk can develop in different ways.

For one, it may have something to do with the age of the hen. It is mostly young animals that are affected, as the egg formation process first has to settle down hormonally. This means that sometimes two instead of one yolk ball migrate from the ovary into the fallopian tube and are then packed into an egg there. In fact, it can also happen that up to four yolk balls end up in an egg.
In addition to age, the breed of chicken can also have an influence on the formation of a double yolk. Especially large chicken breeds with a high dead weight also tend to produce double yolks. In addition, these eggs are often those of sizes L and XL. That’s why you often find such eggs at the weekly market or from a farmer of your choice: Here they are not sorted out industrially.

Can I still eat the egg with two yolks without hesitation?

Yes, you can eat double-yolk eggs without hesitation. They differ from other eggs in nothing except the number of yolks. Because they are often larger than the eggs, which only have one yolk, you actually have a little more egg and more protein.

You can also often find organic eggs at markets or farms that are larger than the norm or even advertise that they likely contain a double yolk. Since all of these eggs are not pre-sorted industrially, this is also more sustainable because the eggs are not disposed of because they deviate from the norm. So the next time you go shopping, maybe even deliberately choose eggs with a double yolk.

Responsible farmers also refrain from the so-called chick shredding: The male chicks are killed immediately because they cannot produce any eggs later. So you can contribute to animal welfare by paying attention – no matter how many egg yolks.

You can reheat leftover scrambled eggs to avoid wasting food. Here you can find out what you should definitely pay attention to.

Warm up scrambled eggs: yes or no? It is often not recommended to reheat scrambled eggs. This is due to the fact that if stored improperly, harmful salmonella, for example, can multiply in the egg. In addition, the protein structure of the egg can change – if you have a sensitive stomach, this quickly leads to nausea or diarrhea.

However, if you follow certain instructions, there is nothing wrong with reheating leftover scrambled eggs. Basically, however, it is advisable to eat scrambled eggs only freshly prepared.

Important: When buying eggs, always pay attention to organic quality. You can support more species-appropriate animal husbandry. However, an organic seal does not automatically guarantee that the male chicks will also be reared. You can find out in which supermarkets you can find eggs without shredding chicks in our guide.

The right storage

So that you can still enjoy your scrambled eggs the following day without hesitation, you should first make sure that they are stored correctly. These rules apply:

Pack leftover scrambled eggs into a clean, airtight container as soon as possible after making them.
Place the container in the refrigerator immediately, even if the egg is still slightly warm.
The scrambled eggs keep refrigerated throughout for about 24 to a maximum of 30 hours.

Warming up scrambled eggs: This is how it works

When reheating scrambled eggs, keep the following tips in mind:

You can reheat scrambled eggs in the microwave, oven, or pan. In the microwave and oven, however, it can happen that the scrambled eggs become quite dry.
The best method is to re-fry leftover scrambled eggs in a pan with a little oil.
With all methods, you should make sure that you heat the scrambled eggs to at least 70 degrees for at least ten minutes. You can tell by the fact that it is evenly hot after warming up and not just lukewarm.