Tag

sprouts

Browsing

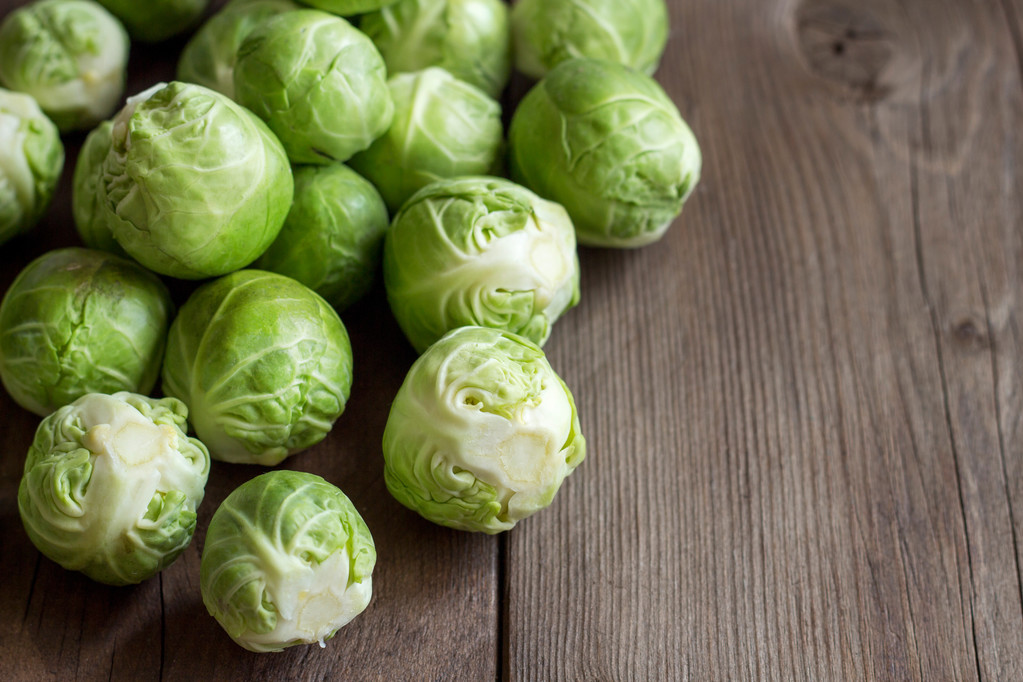
There are foods where opinions differ. Brussels sprouts are definitely one of them. But the cabbage variety is healthy and properly prepared and also very tasty. We will therefore tell you our top Brussels sprout recipes. You should definitely try these, too.

1. Fancy a salad

Most people only know Brussels sprouts as an accompaniment to meat or roasts. But cabbage also tastes great in a salad. Together with orecchiette pasta and dried tomatoes, the vegetables are simply delicious.

2. Pizza with a difference

Salami, Hawaii, or Caprese were yesterday. Be sure to try the Brussels sprouts pizza. The small florets provide more than half of the daily recommended amount of vitamin C and also provide fiber. In addition, our Brussels sprout pizza has only 16 grams of fat, making it ideal for enjoying without regrets.

3. For poultry fans

Chicken wrapped in ham on a bed of couscous with Brussels sprouts. What sounds like a star chef, you can easily cook at home. Here is the recipe.

4. Puree with a difference

Brussel sprouts puree with sesame potatoes – this dish fills you up and is not only suitable for children. In addition to vitamin C, cabbage also contains a lot of vitamin B6, which is important for nerves and concentration. So feel free to vary it and instead of mashed potatoes or carrots, try the variant with Brussels sprouts.

5. Pasta, that’s it!

Pasta always tastes good, doesn’t it? So be sure to try our tagliatelle with Brussels sprouts and parsley pesto. A completely new taste experience.

6. Do you speak English?

Potatoes, Brussels sprouts, bacon, and some spices. That’s all you need for this delicious English dish. Simple, but very very tasty in every coat.

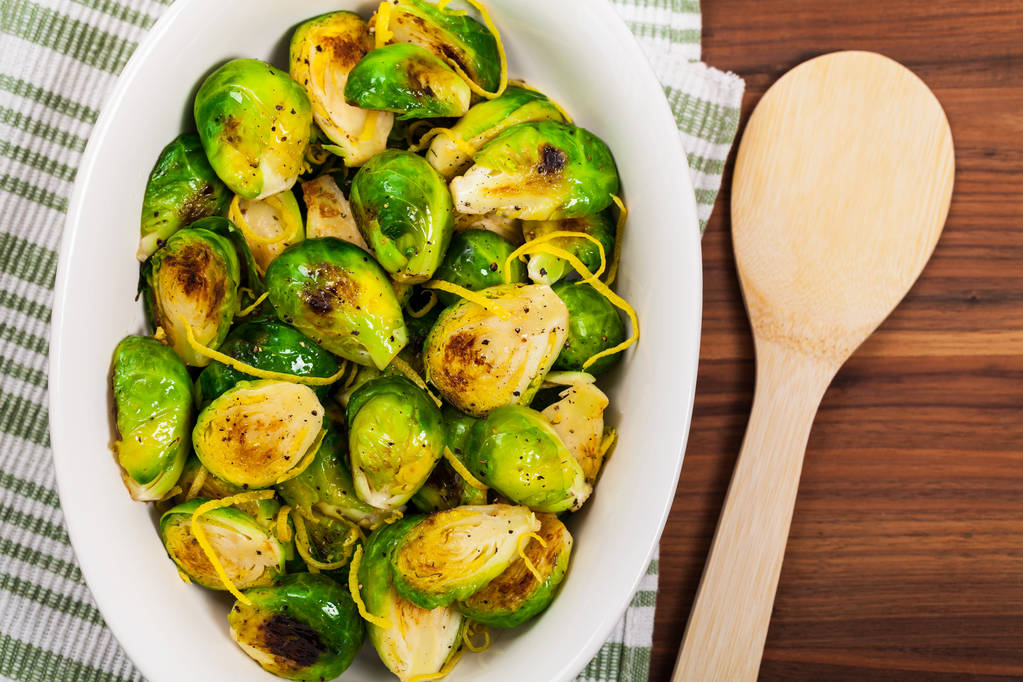
7. Blanched Brussels sprouts

We usually cook the Brussels sprouts whole. But for this recipe, the individual leaves are only briefly blanched. Together with chicken breast and pine nuts, this creates a healthy and low-calorie dish.

8. Off to the pot

This stew is just the thing for winter. The two cabbage sisters rose and flower, green beans, and wheat are put into the pot. Looks delicious, doesn’t it?

9. Orange and green combo

Salmon provides the omega-3 fatty acids that are essential for our body. Together with Brussels sprouts and dill, it makes a big impact on this recipe. The additional plus point of the salad? It’s quick to prepare.

10. For soup clowns

Have you ever eaten Brussels sprout soup? No? But you should. Because this tastes very delicious and is suitable either as a starter or main course.

11. Exotic delicious

A curry with Brussels sprouts? Sounds unusual, but it’s delicious and definitely something different. Of course, coconut milk and lots of spices should not be missing from this dish.

12. Now it’s time to get down to business

Would you like to have some Brussels sprouts for longer? Then just canning the cabbage variety. It’s easier than you think. So you can enjoy Brussels sprouts on any occasion.

Brussels sprouts are in season and we just can’t get enough of them. So that it doesn’t get boring, we have come up with a Brussels sprouts pesto – perfect as a winter pasta dish, to give away and to keep. You can read here how healthy the homemade Brussels sprout pesto is and how easy the recipe is.

Pasta always works, pesto too. And Brussels sprouts pesto is the perfect way to celebrate winter. Brussels sprouts are a real vitamin bomb: just 100 grams cover the daily requirement of vitamin C with 155 milligrams. In addition, there are B vitamins, some potassium, zinc, vitamin K and fiber in the small balls.

Although it is slightly higher in calories than other types of cabbage because it contains relatively little water, it has almost 0 grams of fat. So figure-conscious people can also access it. In our do-it-yourself Brussels sprouts pesto, good olive oil with unsaturated fatty acids and protein-rich almonds are also used.

Ingredients for 2 glasses of Brussels sprouts pesto:

  • 300 grams of Brussels sprouts
  • 2 garlic cloves roasted without fat
  • 1 tbsp extra virgin olive oil
  • 100 g almonds (or other nuts)
  • 60 ml extra virgin olive oil
  • 25g basil
  • 1 tsp lemon juice
  • pepper from the grinder
  • Salt

Preparation steps:

  1. Wash Brussels sprouts, remove the outer leaves, and cut them into the stalk. Peel the garlic cloves. Place both on a baking sheet, and drizzle with olive oil, salt, and pepper. Bake at 200 degrees for 15 to 20 minutes.
  2. Roast the almonds in a pan. In a blender, puree the nuts, olive oil, basil leaves, lemon juice, and Brussels sprouts. If necessary, add a little water to make the consistency creamier. Season with salt and pepper.
  3. Pour into a jar, cover with a little olive oil and seal tightly. Keeps in the fridge for about a week or two.

The Brussels sprout pesto you can make yourself is an easy recipe that is perfect for winter. In any case, we wish you a good appetite!

Crunchy sprouts from alfalfa, lentils, radishes or mung beans are high-quality foods rich in vitamins and minerals. Especially in winter, when there are few seasonal fruits and vegetables, sprouts enrich our diet. You can easily grow sprouts yourself at home.

Light, air and water – that’s all sprouts need to thrive. Growing sprouts means: fresh greenery in the kitchen and on the plate all year round. The germinated sprouts not only impress with their easy handling, they also have a lot to offer: vegetable protein, vitamins, fiber and minerals make them a valuable companion, especially for vegan diets. We’ll show you how easy it is to grow sprouts at home.

pull sprouts: please soak

For growing sprouts at home you need a germination jar and a sprouts mixture, both of which can be bought in organic or health food shops and also in drugstores. The advantage of special sprouting jars with a sloping holder: Excess water can drain off and the sprouts are not standing in water.

Here’s how the Grow Sprouts project works: Place a tablespoon of seeds in a colander and rinse under water. Then fill the seeds in the sprouting jar and cover them with twice the amount of water. Depending on the seed mixture, soak the seeds for between one and eight hours and then pour off the water. You can usually find an exact indication of the soaking time on the seed packet.
Tip: Use the soaking water from the sprouts to water the flowers.

Grow sprouts: rinse and wait

At the end of the soaking time, sort out any non-soaked seeds and empty seed coats. Since these would not germinate, they could rot in the moist environment of the sprouting jar – not tasty and unhealthy.

Then put the swollen seeds back into the sprouting jar and screw the strainer onto it. Turn the glass upside down and lean it at an angle on a saucer. This means that excess water drains away and collects on the plate.

To grow the sprouts, rinse the glass with the sprouts two to three times a day with water (see also the instructions on the product packaging) and put them back on the saucer to drain. You can simply let the water run through the holey lid, then swirl it around in the glass a few times and pour it off again through the closed lid.

Draw sprouts: quick harvest

Depending on the variety, you can harvest fresh sprouts after just four days and use them to enrich your salad or sprinkle on breakfast bread, for example. Either you use the sprouts directly in salad or on bread after the end of the germination time, but you can keep them in the fridge for up to two days. However, it is best to use up the sprouts as soon as possible.

Incidentally, you can completely clean the sprouting jar in the dishwasher – and then start over and grow new sprouts.

Draw sprouts: pay attention to this

The consumption of sprouts from your own cultivation entails a certain health risk, because a humid environment at room temperature is a perfect breeding ground for mould. Therefore, be sure to pay attention to the following points in the “Drawing Sprouts” project:
Quality: Use organic seeds and only those that are specially designed for sprouting.
Don’t take too many seeds per grow cycle: one to two tablespoons is enough.
When growing sprouts, the room temperature should not be below 18 °C and not above 22 °C.
Rinse the sprouts with water several times a day, for example in the morning after getting up and then when you get home.
Do the sensory test: Do the sprouts smell musty? Do they look weird? If you are unsure about the quality, it is better to start the “Drawing Sprouts” project from the beginning.
Note: The fibrous roots sometimes develop a small white fuzz (especially on radishes and radishes) – do not confuse this with mould.
Clean the germination jar after each germination cycle and rinse it with hot water or put it in the dishwasher with the lid on.

Grow sprouts: blanch first, then enjoy

Growing sprouts is really not difficult and if you follow these rules when growing sprouts at home, you can regularly enjoy healthy and fresh sprouts. The German Society for Nutrition (DGE) advises risk groups such as people with a weakened immune system, small children, the elderly and pregnant women not to eat sprouts raw, but only after cooking or roasting them.

The Lower Saxony State Office for Consumer Protection and Food Safety (LaVes) also advises all consumers to “absolutely blanch the sprouts”. In the case of some legumes, substances that are harmful to health are produced during germination, “which cannot be broken down at all or only partially,” informs LaVes. Blanching renders these substances harmless.

And this is how blanching works: Place the sprouts in a sieve and immerse the sieve in a pot of boiling water for half a minute. Then rinse the sprouts in cold water.

Grow sprouts: make your own seed jar

To grow sprouts, you can either buy the seed jar with the perforated lid – or you can make one yourself. Here’s how it works: Grab an empty screw-top jar with a plastic lid and drill small holes in it. You can also use screw caps with metal, but these rust quickly and this affects the quality of the sprouts.

And what about the classic cress? Unlike the “growing sprouts” project, you can simply grow cress on kitchen paper without a germination jar. For example, line a casserole dish with kitchen paper, moisten the paper and sprinkle the moist cress seeds over it. Wet the whole thing with water once a day and watch the little brown cress seeds sprout green. As with the sprouts, you will have “green offspring” after just a few days.

Tip: When it comes to kitchen paper, it’s best to use recycled kitchen paper and pay attention to the blue environmental angel.

Leftover Brussels sprouts can be easily frozen: we will show you how to preserve the green winter vegetables for a long time and what you need to consider when freezing.

Brussels sprouts can be prepared in many ways – the winter vegetable is also very rich in vitamins and nutrients. If you have your own plant in the garden, you will quickly notice how productive it is: A single Brussels sprouts plant can produce up to 40 florets. If you can’t use up the entire harvest at once, it’s worth freezing Brussels sprouts – we’ll explain how to do that here.

Freezing Brussels sprouts: Clean and blanch

Before you freeze the Brussels sprouts, you should prepare them well:
First, the Brussels sprouts must be cleaned thoroughly. To do this, cut off the stalk and remove the withered and outer leaves.
Wash the Brussels sprouts in a large bowl of lukewarm water or rinse them under the faucet.
In the last preparatory step, you blanch the Brussels sprouts: Put them in a pot of boiling salted water for two minutes. Then scare him off with cold water.

Tip: This is how frozen Brussels sprouts don’t stick together

To prevent the florets from freezing together in the freezer, you should snap freeze them. This way you can always take as many florets out of the glass as you need later.

How it works:
Drain the Brussels sprouts or dry them with paper towels.
Line a baking sheet with parchment paper. If you don’t have a baking sheet at hand, you can also use a board or a large plate.
Arrange the florets on the tray so they don’t touch each other.
Now place the tray in the freezer or freezer for 1.5 to 2 hours. It is best to set your device to a particularly low temperature during this time.
When you take it out again, the Brussels sprouts are flash frozen. You can now freeze it as normal.

Freezing Brussels sprouts: Here’s how

How to freeze Brussels sprouts:
Store the Brussels sprouts in freezer-safe containers. If you haven’t flash frozen it, you should fill the Brussels sprouts in portion sizes – otherwise there will be some left over after defrosting.
Now place the filled containers in your freezer compartment.
The Brussels sprouts can now be kept for at least half a year. Later, thaw it directly in boiling water.

Alfalfa sprouts often end up as a topping on the salad. Here you can find out whether the small seedlings are really that good for your health.

Origin and active ingredients of alfalfa sprouts

Alfalfa sprouts are the germinated seeds of a popular forage crop, lucerne. Alfalfa is a legume and originally comes from Asia, where it has been cultivated for many centuries. The name alfalfa means something like “father of food”, which is very apt given the many nutrients it contains. The alfalfa sprouts contain, among other things:
lots of plant-based protein
Vitamin A, strengthens eyesight and skin
Vitamin B1 and B6, important for the nervous system and a well-functioning metabolism
In addition to the immune system, vitamin C also promotes fat metabolism
Vitamin E protects the body from free radicals
essential amino acids such as tryptophan and tyrosine 7
lots of magnesium, iron, potassium, calcium, zinc and phosphate
Furthermore, alfalfa is characterized by the large amounts of antioxidants and chlorophyll. Antioxidants also help scavenge free radicals, while chlorophyll balances acid-base balance.

Saponins for a strong immune system

Perhaps one of the greatest health benefits of alfalfa sprouts is their high saponin content. Saponins are particularly useful for the intestines because they have an anti-inflammatory effect and strengthen the intestinal flora. According to some studies, saponins can also prevent some cancers and ensure a strong immune system.

These modes of action are also attributed to saponins:
Saponins ensure that harmful bacteria are combated and bacteria that are beneficial for the intestinal flora are encouraged to grow.
Saponins bind cholesterol in the intestine. As a result, they do not get into the bloodstream as quickly.

Alfalfa sprouts as a remedy for autoimmune diseases

In autoimmune diseases such as lupus erythematosus, the body’s own defenses turn against the body. The antibodies then inflame the tissue and organs. In medical tests, these symptoms could be reduced by saponin. Therefore, alfalfa sprouts might actually be helpful for treating such diseases.

Preparation of alfalfa sprouts

It is best to always buy organic alfalfa sprouts. But you can also easily draw them yourself. After you have briefly rinsed the fresh sprouts with water, you can use them in many different ways:
Sprinkle raw sprouts on bread with cream cheese or hummus for a healthy topping.
Mix alfalfa with some quark and you have a delicious dip for vegetable sticks.
Top off a tasty salad with a few alfalfa sprouts.

Growing and eating sunflower greens as microgreens? This healthy alternative to enjoying the small seeds of the flower brings you a lot of valuable nutrients and vital substances at any time of the year.

Growing sunflower greens yourself: you need that

You can easily grow fresh sunflower greens yourself. However, you should take a look at them every day and give them a little nurturing. The nice thing is that you can grow the vitamin-rich mini greens in a bright place in your apartment at any time of the year and you don’t need a balcony or garden.

For your sunflower microgreen cultivation you need the following material:

For pre-germination: A germination jar and a dark cloth to cover. Possibly a bowl and colander for rinsing.
For growing: A shallow dish, ideally with drainage holes, and a dense dish or tray to stand on. You can also upcycle used plastic packaging from salads, fruit or vegetables.
The best way to get seed soil is from a garden center. Look for an organic seal and that the soil does not contain peat. As a result, the CO2 balance is better and you protect the moors.
Sunflower seeds: You can use both peeled and unpeeled seeds for sunflower greens. In both cases you should have at least a handful ready and pay attention to organic quality.

Sow and harvest: This is how you get fresh greenery from the windowsill

Whether spring, summer, autumn or winter – you can grow your sunflower greens all year round just like other healthy offspring. For this you do the following:

Soak the sunflower seeds in plenty of water in a saucepan or similar. Cores with shells need about 12 hours, without shells about 6-8 hours soaking time.
After this pre-swelling, which acts like an initial spark for the seeds, you pour off the water and rinse the seeds two or three times with fresh water.
Now fill the seed in your germination jar and let it germinate at room temperature. Because sunflowers germinate in the dark, it is better to protect the seeds from light and cover them with a cloth if necessary. It takes about two to three days for the first sprouts to appear.
Hygiene is important during these first three days: Rinse the germinating seed thoroughly with water every day. At the same time, the kernels receive sufficient moisture for further germination. If you use peeled sunflower seeds, you can now easily detach and skim off the loosening fine seed membrane.
If the white sprouts on the kernels have broken through the shell or are visible on the peeled kernels, you can plant the sprouts to grow. Fill the bowls with about two centimeters of soil and distribute the seed so that there is still some space between the individual plants. Then sprinkle some more soil over it.
Now all you have to do is practice the right feeling for the water supply: Just pour a little at the beginning. There should be no waterlogging, otherwise the seed can become moldy. Always add a little water in the following days.
Place the plant bowls with your “sunflower field” in a room-warm place that offers sufficient sunlight. After about eight to 12 days, the plantlets develop juicy, green cotyledons and begin to develop the next set of leaves.
Now it’s time for the harvest: most of the black shell caps have fallen off. If not, brush them off with your hand. Then cut off the fresh sunflower greens above the ground. You don’t actually have to wash it before you eat it. Unless there is obviously dust or dirt on it.

Germinate sunflower seeds – why?

Sunflower seeds are small packets of fuel. When they germinate, they develop additional qualities. You can harvest the sprouts, which grow into green seedlings, like cress and then process them further.

The tender little plants taste sweet and nutty and are even a little crunchy when they are freshly harvested.
This makes the fresh greens the perfect partner for soups, sandwiches, pan-fried vegetables and anything else that calls for an upbeat topping.
If you want to use a lot of the sunflower bambinis, you can use them to prepare a salad or mix a smoothie. In any case, you should make sure that you eat the sunflower seedlings fresh.
You can process sunflower green better in larger portions than some other microgreens (e.g. from radishes, broccoli, mint), which have a more intense taste and spiciness.
The main advantage: the young plants have a very high nutrient density. In other words, measured in terms of total weight, they contain more vitamins, minerals and trace elements than ordinary vegetables. In addition, there is fresh chlorophyll and antioxidant substances (e.g. flavonoids).

Brussels sprouts are a very healthy winter vegetable. Here you can find out what you should consider when preparing Brussels sprouts and find suitable recipe ideas.

Brussels sprouts are a classic winter vegetable: they are in season from October to February and provide us with valuable nutrients during the cold season. Brussels sprouts are rich in vitamin A, vitamin C, iron, potassium, calcium and magnesium.

To ensure that the vitamins and minerals are retained during preparation and that the Brussels sprouts remain crisp, you should observe the following instructions.

Cook Brussels sprouts: This is the ideal cooking time

How long Brussels sprouts should cook depends on its size. If the florets are rather large, the cooking time is about fifteen minutes. If they are small, you shouldn’t cook the sprouts for more than 10 minutes.

To keep the Brussels sprouts from overcooking and becoming crunchy, you should follow these steps:

Before cooking, remove any eaten leaves and wash the Brussels sprouts florets thoroughly in cold water. In another article you will find tips for cleaning Brussels sprouts.
Then bring plenty of salted water to the boil in a saucepan and then add the Brussels sprouts. Turn the heat down to medium-low and let the florets simmer in the salted water for 10-15 minutes. Periodically check with a fork to see if the cabbage is done. As soon as the tines sink relatively easily into the rosette without falling apart, it’s done.
Then pour the Brussels sprouts into a sieve and briefly rinse them under cold water. So its green color is preserved.

Steam Brussels sprouts

Another preparation method that is gentle on the Brussels sprouts is steaming. How to do it:

Before cooking, remove any eaten leaves and wash the Brussels sprouts florets thoroughly in cold water.
Put water in as wide a pot as possible. The water should only be deep enough for you to put a steamer basket in without it leaking through the holes. Alternatively, you can also hang a large sieve in the pot.
Place the Brussels sprouts in the steamer basket or colander and let the water boil. Then immediately turn the heat down to medium-low and let the Brussels sprouts steam for 10 minutes.
Finally, quench it with cold water to give it its light green color.

Brussels sprouts are a healthy and delicious winter vegetable. We will show you the best way to cook Brussels sprouts and what vitamins they contain.

We recommend that you buy vegetables such as Brussels sprouts that are seasonal and organic.

Before you start cooking Brussels sprouts, you should remove any dirt from them.

Cooking and roasting Brussels sprouts: basic recipe

If you want to cook the Brussels sprouts, put them in a saucepan of boiling salted water. The winter vegetables are cooked quickly and only need about 12 to 16 minutes.
The little florets don’t take long to fry, either. Depending on whether you left it whole, halved, or quartered, it will take 5 to 7 minutes with the lid on to cook.

Store Brussels sprouts properly

Brussels sprouts are a true winter vegetable, ideally harvested after the first frost. It is best to buy it freshly harvested from regional cultivation so that transport and storage times are as short as possible. Brussels sprouts don’t keep for long.

You should also consider this if you want to store purchased Brussels sprouts. It will keep in the fridge for about four days. You shouldn’t keep it next to apples or tomatoes, though. These secrete a substance that accelerates ripening.

That’s why Brussels sprouts are so healthy

Brussels sprouts are healthy because the small winter vegetable is a real vitamin and nutrient bomb:

It is high in fiber and contains more plant-based protein than many other types of cabbage.
Brussels sprouts contain more vitamin C than almost any other vegetable. It offers good protection against flu-like infections in the cold season. However, the vitamin C content is reduced by cooking. Therefore, you should cook it as gently as possible.
There is also a lot of potassium in Brussels sprouts. This can prevent high blood pressure.
It also contains iron.
In addition, regular consumption protects white blood cells from cell damage.
There is sulforaphane in Brussels sprouts. The antioxidant is said to prevent tumors and have an anti-inflammatory effect, for example in arthritis.

Eating Brussels sprouts raw is possible in principle, but can put your digestion to the test. Here you can find out how to prepare the small cabbage florets as easily digestible as raw food.

Brussels sprouts are in season in Germany between September and March. It is therefore a popular ingredient, especially in autumn and winter cuisine. It is usually served boiled, fried or gratinated – for example as a Brussels sprouts casserole, Brussels sprouts in a pan or Brussels sprouts stew. Recipes with uncooked Brussels sprouts are rarer.

In principle, it is possible to eat brussels sprouts raw – the uncooked kale florets are not poisonous or otherwise harmful. However, they can be difficult to digest. You can prevent this by preparing them as gently as possible on the stomach.

Eat brussels sprouts raw – this is the most digestible way

Brussels sprouts have a slight bitter note both cooked and uncooked. For this reason, the prejudice persists that the raw leaves are poisonous. In fact, a bitter taste in some types of vegetables is a warning signal: in zucchini or pumpkins, for example, it can indicate that the toxic substance cucurbitacin has formed. With Brussels sprouts, on the other hand, the slightly bitter aroma is normal and therefore not a cause for concern.

Cooked Brussels sprouts are one of the more digestible types of cabbage. However, it is harder to digest raw and can lead to flatulence and other digestive problems. This is mainly due to its high fiber content. If raw cabbage always causes problems for your stomach, you should also be careful with Brussels sprouts. Then try a smaller amount first to see how your body reacts to the uncooked Brussels sprouts.

Eating Brussels sprouts raw: Preparation and recipe ideas

The florets harvested from November are best suited for recipes with raw Brussels sprouts. They have usually been exposed to freezing temperatures and taste milder and sweeter as a result. When cleaning Brussels sprouts, it is also best to remove the outer, dark green leaves. They are usually dry, fibrous and taste less pleasant than the light green inner leaves, especially when raw.

You can eat Brussels sprouts raw, for example, by preparing them as a salad. Some recipes for Brussels sprouts salad use pre-steamed Brussels sprouts—the florets are usually cut in half. If you use raw Brussels sprouts for salad, you should chop them up as finely as possible. This makes it easier to digest and easier to digest. For example, cut the florets into thin slices, grate them or pluck off the leaves individually.

You can dress the raw Brussels sprouts salad with a classic vinaigrette, a honey-mustard dressing or a lemon dressing, for example. Walnuts are particularly suitable as a topping because they harmonize with the slightly bitter note of the cabbage. You can add other ingredients to taste. A few Brussels sprouts also add an interesting touch to a classic mixed salad.

Tip: It is best to buy your groceries seasonally and regionally and, if possible, pay attention to organic quality. We can recommend the organic seals from Demeter, Bioland and Naturland, as they follow stricter criteria than the EU organic seal. In this way you contribute to biodiversity and soil protection.

Brussels sprouts casserole provides vitamins and warms in cold temperatures. The hearty, vegetarian dish brings variety to the winter kitchen.

Brussels sprouts casserole: the ingredients

A hearty Brussels sprouts casserole is a particularly flavorful way to prepare the classic winter vegetable. It is best to use fresh Brussels sprouts for this recipe. Frozen cabbage florets taste soggy in the casserole because they lose too much water.

Note: Pay attention to the organic quality of the ingredients, especially animal products. In this way you avoid chemical-synthetic pesticides and support more sustainable agriculture.

For four servings of Brussels sprouts casserole you need the following ingredients:

700 g potatoes (mainly waxy)
400 grams of Brussels sprouts
Salt
Seasoned Salt
pepper
nutmeg
ground cumin
2 eggs or 2 tablespoons soy flour
250 ml cream or oat cream
100 g hard cheese or vegan cheese
Tip: The ground cumin helps you to digest the cabbage better and avoid bloating. If you don’t like cumin, you can easily omit it.

Preparation time: 30 minutes
Cooking time: 15 minutes
Baking time: 30 minutes

Brussels sprouts casserole: the preparation

You should plan about 15 to 20 minutes to prepare the vegetables. The oven does the rest of the cooking.

How to prepare the vegetables for the Brussels sprouts casserole:

Wash and peel the potatoes.
Clean the Brussels sprouts carefully. You can find detailed instructions in our article Cleaning Brussels sprouts.
Cut the potatoes into quarters or eighths, depending on their size.
Boil the potato wedges in salted water for 10 minutes.
Now add the Brussels sprouts and cook the vegetables for another five minutes.
Strain the vegetables and let them evaporate briefly.
How to prepare the Brussels sprouts casserole:

Spread the potato wedges and Brussels sprouts evenly in the casserole dish.
Sprinkle the vegetables with some herb salt, pepper, nutmeg and ground cumin.
Mix the spices with the vegetables.
Whisk the two eggs with the cream or the soy flour with the oat cream and pour the mixture evenly over the Brussels sprouts casserole.
Grate the (vegan) cheese over the casserole.
Bake the Brussels sprouts casserole at 200 degrees Celsius top/bottom heat in the oven for 30 minutes.

Brussels sprouts casserole: tips for preparation

You can prepare the vegetables for the Brussels sprouts casserole very well the day before. If you don’t have much time to cook, cut down on the time by planning ahead.

Fast kitchen by chain cooking:

Serve boiled potatoes and boiled or roasted Brussels sprouts as a side dish with the meal the day before.
Boil a large batch of potatoes and keep the leftovers unpeeled in the fridge for the next day.
Also keep some of the Brussels sprouts covered in the fridge.
The next day, all you have to do for the Brussels sprouts casserole is peel the potatoes, cut them into slices or wedges and mix them with the cooked Brussels sprouts and the spices.
Complete the casserole using the instructions above.
Since the vegetables are fully cooked, the baking time is reduced to 20 to 25 minutes.
In this way, the preparation time for the Brussels sprouts casserole is reduced from 45 minutes to around ten minutes. The Brussels sprouts casserole then cooks alone in the oven and you can use the time gained for other things.

Things to know about Brussels sprouts

Brussels sprouts are a typical winter vegetable from the cabbage family. Harvest time in Germany begins at the end of September. Brussels sprouts are in high season between November and December. Since cabbage can be stored very well, you can buy regional Brussels sprouts until March.

It is best to buy fresh Brussels sprouts in organic quality and from regional suppliers. Organic food tends to contain far less residual pesticides because synthetic pesticides are banned from organic farming. Brussels sprouts from the region also have shorter transport routes – that saves CO2.