Tag

this

Browsing

Modified starch is an additive that is subject to authorization and is based on ordinary food starch. In this article you will find out exactly what modified starch is, how the additive is used and whether you should avoid it.

Additives E1404 to E1450

Modified starch is not a single additive: A total of eleven different variants of modified starch can be found in the list of food additives (E number list). However, the substances with the E numbers from E1404 to E1450 all have one thing in common: They are based on chemically modified cornstarch.

Ordinary starch mostly comes from potatoes, corn or wheat. In this form you will find the substance as a “starch” on the list of ingredients. Even if starch is modified physically (by heat or pressure) or enzymatically, it is still considered an ingredient according to the Bavarian Consumer Advice Center – and is therefore listed as “starch”. However, as soon as the substance has been chemically modified, it is, according to the definition, an additive with an E number that is subject to authorization. In the list of ingredients you will then find the additive as “modified starch”. Background: The chemical modification profoundly changes the structure of the substance.

Depending on the process, the starch is chemically modified once or several times. In addition to physical or enzymatic modification, according to the BVL, the starch is treated with acid or alkali solution, oxidized or bleached, among other things.

Use: Modified starch in food

Normal cornstarch and modified starches are used in the food industry primarily as binding agents: the substances can be used to make sauces, puddings and soups creamier, but also to hold finished products such as French fries together. Modified starches can also be found in dressings, mayonnaise, instant products, frozen products and dairy products.

Compared to conventional starch, modified starch is less sensitive to cold, heat and acid and/or swells better.

These properties are used primarily for finished products that are deep-frozen or heated in the microwave. Thanks to the modified starch, the consistency of the products does not change even when cooking or freezing.

Modified Strength: Buying Tips and Advice

In general, we recommend using natural, unprocessed foods as often as possible instead of industrially processed products. This is not only more environmentally friendly, but also healthier. By cooking with natural foods as often as possible instead of eating ready-made products, you have full control over all the ingredients. For this reason, we generally advise against products that contain additives such as modified starch. Tip: Follow the ten rules for a balanced diet.

In addition, you should always use organic food whenever possible. Controlled organic farming is not only more environmentally friendly, but also dispenses with chemical-synthetic pesticides. In addition, fewer additives are permitted for processed organic foods. If you pay attention to an organic seal when buying, you automatically avoid modified starch, because according to the Bavarian consumer advice center, this is not allowed in organic food.

That being said, food manufacturers must always list modified starches as an additive on the ingredients list. How to read the food ingredient list correctly is explained in another article.

From a health point of view, modified starch is no different from ordinary cornstarch because the body processes it in the same way. The additive itself is therefore less of a concern than the product in which it is used: Such products are mostly highly processed foods with many questionable ingredients such as a lot of salt or sugar, flavorings and other additives. In addition, modified starch is based in part on genetically modified corn.


Something went wrong in the kitchen? Most of the time you can still save your food. We give you tips on typical problems.

You weren’t paying attention for a moment, the salt slipped or the recipe didn’t work. This can happen, but don’t worry: you can usually save your food. Before throwing it away, avoid wasting food and try one of our tips.

Save oversalted food

Almost everyone has probably oversalted a meal at some point. This can often be prevented by adding small amounts of salt step by step and tasting in between. However, this is not easy with some dishes such as casseroles and it can also happen that you add too much salt all at once.

How to save oversalted food:

If you’ve just slipped the salt, you may still be able to skim it off the surface of the food.
Cut a raw potato into large pieces and cook them for a few minutes. It absorbs some of the salt. Then remove them from the pot. The same works with carrots, bread or prunes. Cook the latter for about 15 minutes.
Sweeten your dish slightly, for example with honey or maple syrup. If it tastes too sweet afterwards, you can counteract it with a little acid (e.g. lemon).
Serve unsalted side dishes with the dish, such as lettuce leaves or yogurt.
The following tips also work for foods that are too sweet, spicy or sour:

Mix soup, sauce or your stew with water, wine, milk, cream or a vegan cream or plant-based milk. You can then thicken the liquid – there are tips for this below.
Prepare the dish again unsalted (or without spiciness, sugar or acid, as required) and mix both variants together.

Too spicy food? you can do that

Sharpness is not always easy to dose. Some chili peppers are very hot, others hardly at all. In addition, everyone perceives sharpness differently.

How to save overly spicy food:

Capsaicin, which makes the chili hot, is fat-soluble. You can often save overly spicy food by skimming off the fat on the surface.
Again, add a tablespoon or two of honey or maple syrup to the food. You can then compensate for too much sweetness with acid.
Serve the dish with bread and/or yoghurt or quark or provide milk. These foods help mitigate spiciness.
You can also save food that is too spicy by cooking raw potato pieces in it for a few minutes.

Save too sweet food

Sweetness is also a matter of taste – in both savory and sweet dishes. For both variants, you have different options for saving food that is too sweet:

A pinch of salt can help tone down the sweetness of savory foods.
You can season both savory and sweet foods with acid to balance out the sweetness. Lemon juice or vinegar, for example, help with savory dishes (note: some vinegars contain sugar). You can also round off some sweet dishes with lemon juice. For others, it is a good idea to add sour fruit to compensate – for example a berry sauce or rhubarb compote.
As with other taste flaws, you can sometimes salvage food that’s too sweet by stretching it. This works especially well with rather liquid foods. Stretch them with water or a dry wine, for example, and taste them again.

What to do when your food burns

Charred or burnt food is annoying for two reasons: The black spots don’t taste good and contain harmful substances like acrylamide. So you better always keep an eye on your food. Still, you can salvage burnt or charred food.

If something burns in the pot, you may still be able to salvage your food. Be sure not to stir so the burnt doesn’t mix with the rest. Instead, carefully skim off the unharmed portion of the food and place it in a new pot. You can continue cooking the food in it. It may still taste slightly roasted – either that goes well or you can try to cover the roasted flavor with spices.
A few spots have become too dark when roasting or baking? It is best to cut them off generously. Unfortunately, it doesn’t look so nice, especially with a cake. However, you can cover up the broken spots by covering the cake with icing, vegan frosting or whipped cream, for example.

Save food that is too liquid

Soups and sauces don’t always have the desired consistency – they often just don’t want to be creamy. However, food that is too liquid can be saved easily:

If you still have time, you can let the soup or sauce simmer uncovered. This is useful if you are not that far from the desired result. If so, this method is very time-consuming and energy-consuming.
Mix about a tablespoon of flour or starch with a little water, wine, or milk. Stir the mixture into the food and cook again until thick.
(Vegan) cream or crème fraîche (substitute) can also make dishes that are too liquid creamier.
Grate a raw potato and stir it into the food. Cook them until the shavings dissolve and combine with the rest of the sauce.
Stir cold (vegan) butter into the food in chunks.

Overcooked food? You can save even that

Some people don’t mind if the vegetables are soft and the noodles have a wobbly texture. For others, overcooked food is inedible. Unfortunately, the cooking process cannot be reversed – you can still save the food:

Prevent worse by immediately removing the food from the stove. You can also rinse noodles or vegetables under cold water to interrupt the cooking process.
Garnish the food with a crunchy topping. You have many options for this – for example (roasted) nuts or seeds, homemade croutons or crispy fried tofu.
You can prepare a delicious mash, puree or vegetable soup from overcooked vegetables and potatoes.
Sear overcooked foods or gratinate them in the oven until they get a crispy surface. This works particularly well with starchy foods such as pasta or potatoes.

Cake base is broken

Cakes are often served on festive occasions, which makes it all the more important that they turn out well. A broken cake base is therefore very annoying. It can break for a variety of reasons:

You took the dough out of the mold too soon. It should always cool down first.
The pan wasn’t greased well and the dough stuck in one spot. You can prevent this by very carefully removing the dough from the mold and, if necessary, using a knife or something similar.
You tried to cut through the cake base.
Even if it is broken, you can of course still eat the cake base. How to save him:

The easiest thing to save is a cake with multiple bases, only one of which is broken. Simply use this as a middle or top pie crust by piecing it back together. In the latter case, you can cover the mishap with a layer of whipped cream or fruit, for example.
If you only have the one cake base, you can also puzzle it back together. When cutting, some pieces may be a bit crumbly later. However, a creamy filling or a layer of fruit with icing will hold the cake together.
For example, if the cake base is very crumbled, you can layer the crumbs in muffin cups, alternating with the filling. With some fruit, for example, they become delicious apple muffins. Or you turn the broken cake base into a mole cake.

Wild apple is a small tree that attracts attention in summer with its lush flowers and provides you with numerous fruits in autumn. Here you can find out what you should consider when planting, caring for and eating.

The winter apple (also known as the crab apple) is a native plant: it has been cultivated regionally and its fruits eaten for centuries. Today, however, the winter apple is rarely found in Germany. It is also a popular refuge for birds and mammals and an important food source for various insects.

Characteristic is the thin trunk, which only reaches a diameter of two to four centimeters, and the slightly woody consistency. Some branches have thorns. Some varieties also have slightly wrinkled skin. However, this does not affect the health of the tree or the taste of the apples.

The flowering period of the tree extends from April to May and lets it shine in a white to light pink splendour. The apples ripen in early autumn and are yellowish to reddish in color, depending on the variety. Be sure to choose local varieties for planting.

Plant wild apple: The basic conditions

Before you plant wild apples, you should think about the time and place of planting. Please note the following:

Timing: Autumn is the best time to plant. In principle, however, it is possible all year round.
Location: Choose a sunny to partially shaded spot. The tree likes sun and warmth and should not be overshadowed by other plants. Otherwise it is quite robust, so that wind and rain cannot harm it. Note that the apple tree can grow between 3 and 6 meters tall. However, this varies depending on the variety. At the same time, the roots grow quite extensively and close below the surface of the earth. There are also varieties that are suitable for hedge planting.
Soil: Since the wild apple tree is a wild tree, it can get along with almost any soil. He just doesn’t particularly like extremely wet soil like moor. Nevertheless, you can enrich the particularly nutrient-poor soil with nutrients and sand.

This is how you plant the wild apple

Planting a wild apple is not difficult. To do this, follow the steps below:

Place the young tree in a bucket of water so the roots can soak.
Dig a planting hole. This should be at least twice as large as the plant ball of the wild apple tree.
Enrich the soil with some compost or other organic fertilizer.
Place the small tree in the hole and refill the soil. Squeeze them tight.
Water the freshly planted wild apple tree properly.
Depending on the location, it may make sense to initially secure the young tree with a stake.
If you sprinkle bark mulch around the tree, you prevent weeds and at the same time protect the tree from unwanted competing plants.

Caring for a tree: tips and hints

The wild apple tree is robust and quite undemanding. For care, it is sufficient if you observe the following tips:

The most important thing is that you protect the wild apple from drought. Especially when young, you should water the tree regularly during long periods of drought. We recommend collecting rainwater and using it to feed your plants.
If you want to do something good for your wild apple, you can fertilize it in the first half of the year (spring to June), preferably with compost.
Basically, it is not necessary to trim the wild apple tree. However, if it is not developing in the way that is best for your garden and other plants, or if you want to shape it, you should cut it from time to time. You can read here how to best make the cut: Cutting an apple tree: The right tree cut in spring and autumn
Wild apple is hardy. So you don’t have to take any special precautions for the cold season.
If you want to propagate the apple, the best way to do this is by sowing: Scatter the seeds of the fruit in a pot outside in autumn and keep it moist. Cutting a cutting and cultivating it is often not successful.
Diseases and pests do not worry the wild apple tree for the most part. However, typical apple tree diseases such as apple scab or fire blight can sometimes occur.

Here’s how you can use the wild apple

Wild apples are edible. However, young apples of the tree are rather sour and tart because they contain a lot of tannin. You can cook them to tone down the flavor. In addition, the kernels of wild apples, like other apples, contain the substance amygdalin, which is converted to toxic hydrocyanic acid in the body. Even if you bite into the seeds, they are harmless in small amounts.

Wild apples contain a comparatively large amount of pectin. You may know the substance as a vegan gelling agent. They also have a firmer consistency than cultivated apples. You can take advantage of these two properties by using the fruit for homemade applesauce or apple jelly. You can also make tea, juice or syrup from wild apples.

The fruits are also often used as a decorative element in arrangements or wreaths.

The stinging nettle is very popular again today because of its healthy nutrients. With these five recipes you can conjure up delicious dishes from the “weed”.

Nettle recipes – you should know that in advance

There are many reasons to cook more recipes with stinging nettles: The garden herb contains an active ingredient that inhibits the growth of bacteria. Stinging nettles also provide a lot of nutrients: In addition to minerals such as iron, magnesium and potassium, they even contain more vitamin C than citrus fruits!

In order to be able to enjoy the stinging nettle in your mouth without irritation, you must first break off the stinging hairs. For that there are different possibilities:

Briefly boil the nettle. This destroys the plant structure so much that the stinging hairs no longer work.
Roll the collected nettle parts with a rolling pin. This is how you break off the stinging hairs.
Puree or mix your nettle harvest: Here, too, the hair is broken off mechanically.
After you have pre-processed your nettle harvest in this way, you can overcook it without hesitation. Try the following recipes:

Recipe: Nettle as a spinach substitute

Cooked nettle leaves are an excellent substitute for spinach and can be used in the same way.

Ingredients for 4 persons:

500g nettle leaves
1 onion
olive oil
Salt pepper
Preparation:

Remove the stalks (with gloves) from the nettle leaves.
In a covered pot, boil the nettle leaves in a little water for about 10 minutes. It is enough if the water fills the pot by about 1 – 2 cm. Any overlying leaves are cooked by the steam.
Drain the cooking water, but don’t throw it away. It is rich in nutrients and can be used in a soup, for example, or drunk as is.
Finely dice the onion and sweat it in a pan with the oil.
Mix nettle, onion and spices and puree everything.
Tip: The cooked nettle leaves also taste good as “spinach” on pizza or with pasta.

Recipe: nettle pesto

Nettle leaves are also ideal for a tasty, healthy pesto. You can use our basic recipe for homemade pesto as a guide, or try the following recipe idea:

Ingredients for a jar of pesto:

100 ml olive oil
approx. a muesli bowl of nettle leaves
1 large clove of garlic
30 grams of walnuts
20 grams of pine or sunflower seeds
1 dash of balsamic vinegar
juice of half a lemon
1 tsp salt
Black pepper to taste
Preparation:

Briefly roast the nuts and seeds in the pan without fat.
Place the nuts and any other ingredients in a suitable container.
Blend everything with a hand blender until you get the consistency of pesto you want. Alternatively, you can use a mortar and pestle to complete this step. However, this is significantly more time-consuming.

Recipe: Refine the salad with stinging nettles

You can also add nettle leaves raw to any salad. Make sure to break off the stinging hairs first, as explained above. If possible, you should only use young plants or the top leaves of older nettles, especially for the salad. These are particularly tasty.

You can add just a few leaves to your salad or use the nettle leaves as the main ingredient. You can’t go wrong with one of our delicious salad dressing ideas.

Recipe: Nettle Soup

Nettle leaves are also a great side dish for soups. There are practically no limits to your creativity: You can, for example, cook one of our vegan soups and simply add one or two handfuls of nettle leaves.

Nettle soup is often prepared with potatoes and carrots. You can orientate yourself on an ordinary potato soup by adding the nettle leaves about ten minutes before the end.

Recipe: Nettle in a smoothie

Smoothies are popular, versatile and can be really healthy with the right ingredients. So it makes sense to also use the healthy nettle leaves for a delicious green smoothie.

For example, you can use our recipes for green smoothies as a guide – or just get creative yourself. Bananas, strawberries or raspberries, for example, go well with nettles, but also other wild herbs such as dandelion. In any case, a handful of nettle leaves will give you a delicious health boost.

Mohnstriezel is a sweet pastry from Silesia. It is traditionally eaten at Christmas or Easter. We show you a delicious recipe with a vegan version.

Originally Mohnstriezel comes from the former Silesia. The area is now mostly in Poland. The Silesian Mohnstriezel are still served in these regions as a traditional pastry at Easter or Christmas. They consist of a sweet yeast dough filled with poppy seeds or almonds. There are also delicious sprinkles and a sweet glaze. You too can make the Silesian Mohnstriezel yourself. We will show you a recipe for the sweet pastry with a vegan version.

Pay attention to the organic quality of the ingredients. In this way you can support species-appropriate animal husbandry and avoid chemical-synthetic pesticides. Above all, we can recommend the organic seals from Demeter, Bioland and Naturland, as they comply with stricter criteria than the EU organic guidelines. Also, make sure to buy eggs without chick shredding.

Buy ingredients that are locally and seasonally sourced. This avoids long transport routes and reduces global CO2 emissions. You can also support local providers in your region.

Mohnstriezel: The recipe

Ingredients:

600 gwheat flour
42 g yeast
630 mlmilk
230 g butter
260 gsugar
1vanilla bean
0.5 untreated lemon
100 g marzipan raw mass
2 tablespoons starch
1 egg
180 g blue poppy seeds
100 gicing sugar

Directions:

Put 500 grams of flour in a large mixing bowl and make a small well in the middle.
Crumble the yeast and pour it into the well.
Heat 130 milliliters of milk until lukewarm. Pour the warm milk over the yeast and let it soak briefly.
Cut 150 grams of butter into flakes and add them to the mixing bowl.
Now add 100 grams of sugar and process the ingredients with the hand mixer to form an even dough. Cover and let the dough rise for about an hour.
In the meantime, you can make the sprinkles. Put the remaining flour and 80 grams of sugar in a bowl.
Halve the vanilla bean and carefully scrape out the pulp with a knife. Put this in the bowl as well.
Wash the lemon thoroughly and grate half of the lemon zest into the bowl.
Now add the remaining butter in flakes and mix the ingredients into a crumbly dough. You can put the finished crumbles in the fridge.
Then it’s time for the filling. To do this, cut the raw marzipan into small pieces. Pour the marzipan into a pot.
Pour half of the remaining milk into a measuring cup. Whisk together the cornstarch or cornstarch substitute and egg until smooth.
Heat the marzipan with the remaining milk and sugar. Stir constantly so it doesn’t burn. Let the ingredients boil up briefly.
Then take the marzipan off the stove and stir in the blue poppy seeds and the milk with starch. Reheat the filling and keep stirring until you get a smooth mass. Then let them cool down.
On a floured work surface, roll out the dough into an oval shape.
Spread the poppy seed filling evenly over the pastry base. Roll up the Striezel from the two longer sides towards the middle.
Place the finished Mohnstriezel on a baking sheet lined with baking paper. Spread the crumbles evenly over the pastry and press lightly.
Bake the Mohnstriezel at 180 degrees top and bottom heat for about 45 to 50 minutes. Then let it cool down completely.
Halve the lemon. Use the half that you already scraped off the skin. Squeeze out the juice from this lemon half and stir in the icing sugar (tip: make your own icing sugar). Brush the cooled Mohnstriezel with the glaze as you like.

Mohnstriezel: Tips for the preparation

The Silesian Mohnstriezel need a certain resting and baking time. However, the effort is worth it for the tasty treat. With a little practice and patience, even baking beginners can prepare the sweet Striezel. The following tips will help you with a sustainable, varied or even vegan preparation:

Blue poppy consists of the seeds of the opium poppy. It contains alkaloids that are used in the production of intoxicants and narcotics. The well-known morphine is also obtained from the opium poppy. The poppy seeds usually do not contain morphine, but they can become contaminated with it during harvest. The Federal Institute for Risk Assessment therefore recommends a maximum intake of 6.3 micrograms of morphine per day and kilogram. This corresponds to around 94.5 grams of poppy seeds per day for a person weighing 60 kilograms.
Vanilla originally comes from Mexico. Madagascar is now the largest cultivation area for vanilla beans. Unfortunately, pods from Germany or Europe are not available. Since the vanilla has to travel long distances, you should use it sparingly. Consume them consciously and preferably buy them with the Fairtrade seal.
You can refine the Mohnstriezel with various ingredients. For example, healthy raisins, almonds or other chopped nuts taste great in the filling. Jam or pieces of apple also give the filling a whole new taste. If you replace the wheat flour with wholemeal spelled flour, your pastries will be more nutritious and rich in fibre. However, the dough may need more liquid.
If you want your Striezel to be less sweet, you can reduce the sugar as you like.
You can also prepare your Mohnstriezel vegan. Replace the milk with plant-based milk and the butter with vegan margarine. You can use an egg substitute instead of eggs.

In itself, the preparation of the miracle tuber Jerusalem artichoke is not difficult. However, there are a few things you should keep in mind when peeling and cooking.

Jerusalem Artichoke: Good for digestion and a slim figure

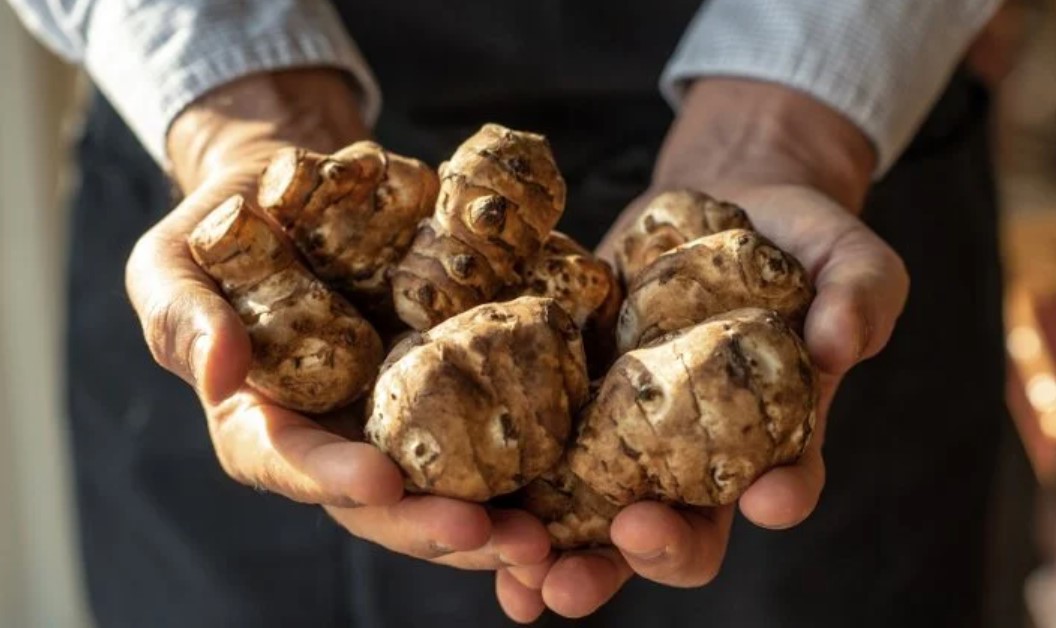
Jerusalem Artichoke is a perennial sunflower with bright yellow flowers. Like the tomato or the potato, the tuber was brought to Europe by French emigrants from North America in the 17th century. Visually, it resembles ginger, but tastes more like parsnip, but with a nuttier taste.

The tuber can be processed in many ways, for example to:

soups
puree
Casserole
potato pancakes
and even raw in a salad.
In addition to its excellent taste, Jerusalem artichoke has other positive properties. The tuber has 30 kilocalories per 100 grams and is high in fiber, which is important for good digestion. This includes, for example, the water-soluble dietary fiber inulin. This makes them particularly interesting for diabetics, as their consumption does not affect the blood sugar level, but has a positive effect on the intestinal flora. It is also rich in potassium and iron.

You have to pay attention to this when cooking and peeling

First, use a good vegetable brush to thoroughly scrub and clean the mostly earthy tubers in cold water.
Remove dark spots with a knife.
You don’t need to peel it as the skin is very thin and can be eaten. If it still bothers you, you can peel Jerusalem artichoke thinly with a paring knife. This is particularly recommended for larger tubers. Alternatively, you can peel the peel after cooking. That’s a little easier.
The Jerusalem artichoke is now ready for further processing: In contrast to potatoes, you can also eat it raw, for example in a salad or on a raw vegetable platter. If you want to prepare the tuber as a Jerusalem artichoke soup, casserole or puree, you should cook it for 15 to 30 minutes.

Undesirable side effects of Jerusalem artichoke

In addition to its many positive properties, Jerusalem artichoke unfortunately also has a few unpleasant side effects. Consuming them can cause severe gas and even diarrhea if you overeat. This is due to the large amount of roughage, which the intestinal flora often has to get used to digesting. It’s best to approach it slowly and start with very small portions. This gives the intestine time to adjust to the new food.

How about a frappé as a refreshing iced coffee variation? We will show you how you can easily prepare the frothy coffee specialty yourself. Thanks to numerous possible variations, there are hardly any limits to your taste.

What does Frappe mean?

The word derives from the French verb “frapper” which means “to shake” in German. Based on the French word “lait frappé” (milkshake), the “Café frappé”, i.e. “shaken coffee”, was created.

Step 1: Mix instant coffee and water

For the classic version, put a teaspoon of instant coffee and about a teaspoon of sugar in a tall glass or bowl. Now add enough cold water to just cover the mixture.

Step 2: Beat until fluffy

Now stir the mass until foamy until about half of the glass is full. Ideally, you should use a small milk frother. Alternatively, you can shake the mixture for about a minute or froth it up with a small whisk.

Step 3: Add ice cubes

Finally, add some cold water, a dash of milk/milk alternative and a few ice cubes until the glass is completely full – done.
Important: When buying instant coffee, make sure that it contains as little oil as possible. A good guideline is no more than 1.5% fat. As a rule, the manufacturers offer instant products specially developed for frappé. If the instant coffee contains little fat and therefore little oil, small bubbles are formed when stirring, which create a stable layer of foam.

What is the difference between frappé and iced coffee?

While iced coffee is usually cooled with vanilla ice cream, a classic frappé only contains ice cubes and a dash of water. The number of calories is therefore significantly lower. In the meantime, however, there are also numerous preparation variants in which the frappé is refined with milk ice cream.

Why is a frappé preferable to an iced coffee? You not only make the healthier choice, but also the more refreshing one: By adding water instead of milk or cream ice cream, the body gets more liquid. In the Mediterranean region, the frappé is often preferred to a cappuccino.

Emmer flour is an ancient grain flour with a strong, nutty taste. Not only can you use it to bake bread and rolls, you can also use it in other areas. We present you with various ideas.

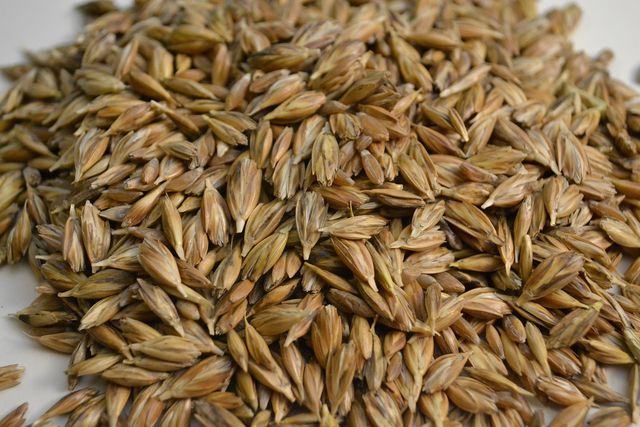
Emmer is one of the oldest ancient grains and is considered the forerunner of today’s wheat. After higher-yield types of grain had long supplanted the emmer, today it is once again being appreciated. On the one hand, this is due to its aromatic taste, on the other hand, emmer flour contains numerous healthy nutrients. In particular, it is very rich in protein and provides important minerals such as zinc, iron and magnesium.

In the kitchen you can use the flavor characteristics of emmer in many ways – not only for baking bread, but also for cakes or pasta, for example. We give you an overview of the possible uses of emmer flour and present a simple recipe for emmer spelled bread.

Whether wheat, spelt or emmer: Flour is best bought in organic quality and from regional suppliers. Organic flour comes from ecologically sustainable agriculture and is therefore not treated with chemical-synthetic pesticides. If you use regionally produced products for cooking and baking, you also save on unnecessary transport routes and know exactly where your food comes from.

Incidentally, because emmer is less productive than other varieties when cultivated, conventional emmer flour is rare. That’s why most of the flour comes from organic farming anyway. To be on the safe side, look out for an organic seal.

Emmer Flour: Nutty basis for breads

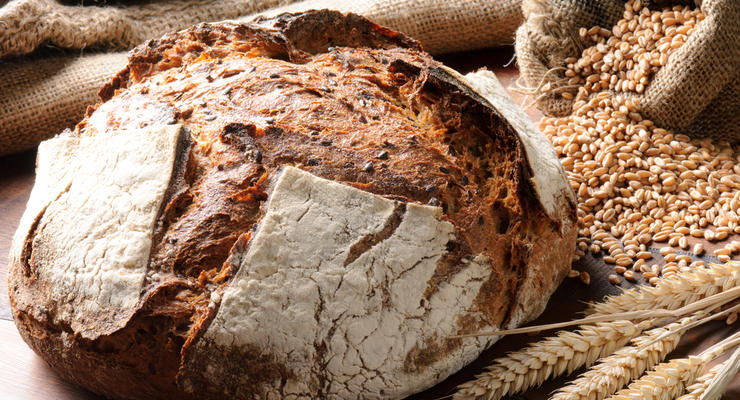
Emmer flour provides a good basis for bread or rolls with a hearty, spicy taste. You can either use pure emmer flour for baking bread or combine it with other types of flour to form a mixed dough. In terms of taste, emmer flour and spelled flour go particularly well together.

Mixtures have the advantage that the ingredients bind better to form a dough – pure emmer flour does not stick as well as, for example, wheat flour. Doughs made from pure emmer flour therefore have a slightly softer consistency, but can still be processed.

In most wheat or spelled-based bread recipes, you can simply substitute the same amount of emmer flour for the amount of wheat or spelled flour. In this case, however, it is best to add water or milk carefully and gradually: If you change the type of flour, you may need a little more or less liquid than in the original recipe. Depending on the consistency of the resulting dough.

Recipe: mixed bread with spelled and emmer flour

Ingredients:

300 g emmer flour
250 g spelled flour (type 630)
1 tsp sugar
2 tsp salt
2 teaspoons bread spice
20 g fresh yeast
200 ml lukewarm water
130 ml cow’s milk or plant milk
flour for sprinkling

Directions:

In a large bowl, mix the emmer and spelled flour with the sugar, salt, and bread spices.
Make a well in the middle of the mixture and crumble in the yeast. Then add the water and milk to the well and stir in the yeast until dissolved.
Knead all ingredients with the dough hook of the hand mixer to a smooth dough. Cover the bowl with a kitchen towel and let the dough rise for an hour.
Sprinkle a work surface with some flour and knead the dough well again with your hands. Then shape it into a ball.
Line a baking sheet with baking paper (or a sustainable baking paper substitute). Place the ball of dough on the baking sheet and cover with a kitchen towel. Let the dough rise again for an hour.
Cut the emmer spelled bread in a diamond shape and brush generously with water. Then bake it at 200 degrees for about 45 minutes.

Emmer flour: not only suitable for bread

You can not only use emmer flour for baking bread. Its nutty taste also lends an interesting note to sweet baked goods and goes well with spices such as cinnamon, anise or fennel seeds. This means that emmer flour is also suitable, for example, as a basis for Christmas cakes.

The strong emmer aroma goes particularly well with apples. In apple pie recipes, it is therefore worth replacing part of the flour with emmer flour. As with baking bread, you can usually do this in a 1:1 ratio. For example, try the following recipes with emmer flour for a change:

Apple pie with shortcrust pastry
Covered apple pie from the tin
Vegan apple pie

You can also make pasta dough partially or completely with emmer flour. Because emmer grains are a bit firmer than wheat grains, the pasta gets not only a strong wholemeal flavor but also an additional bite when you prepare it al dente.

A cheap alternative to conventional coffee preparation is the French Press. We will explain how the French press works and what the pot has to do with France, Denmark and Italy.

What is a french press?

With a French press, also known as a press pot or coffee press, you can easily prepare coffee with hot water and ground coffee. The hot drink is prepared directly in the pot, which can also be used as a serving vessel. This method is called the full immersion method. In contrast to the pour-over method, in which water is poured over the coffee powder, with the full immersion method the ground coffee is directly in the water.

Where does the stamp pot come from?

As the name suggests, the device was invented in France around 1850. However, the pot was not patented until 1929 by the Italian Attilio Calimani. The shape we know today was only introduced to the market in the 1970s by the Danish manufacturer Bodum.

How is a French Press constructed?

Every French press is basically the same. Only the design varies from model to model. In most cases, a French press is made of glass, but there are also variants made of stainless steel or directly as a thermos flask. French presses are commercially available in different sizes from 0.35 to 1.5 liters filling volume. It consists of a holder in which a mostly glass, removable jug sits. A press stamp is integrated in the lid, on which a metal sieve is located. When preparing the coffee, the plunger is pressed down and the coffee grounds are separated from the finished coffee through the sieve.

How does the preparation of coffee in a French press work?

With the French Press, the coffee is ready to serve within minutes. All you need is hot water and ground coffee.

Ingredients required for 1 liter of coffee from the French Press:

Coffee beans for 60 grams of coffee powder
1 L of water with a temperature of about 96 degrees

Step 1: grind the coffee beans

The degree of grinding should not be too fine for preparation in a French press. Choose a medium to coarse grind. As a guide: The degree of grinding should be similar to that for filter coffee. If you don’t have a coffee grinder, you can also buy ready-made coffee powder. However, be sure to pay attention to the degree of grinding when buying.

Step 2: Boil the water

Before the water comes into contact with the ground coffee, the temperature should be around 86 to 96 degrees. Too high a temperature would result in a bitter taste.

Step 3: Fill in the coffee powder

Check the capacity of your French Press and how much coffee you want to prepare. As a guideline: If you have a pot with a capacity of one liter, put 60 grams of coffee powder in the French press. Then pour the appropriately tempered water completely into the pot. Make sure all the powder is wetted and don’t stir the mixture.

Step 4: Break open the crust

After four minutes, break up the crust that has formed on the liquid with a spoon. This process interrupts the extraction and most of the coffee powder sinks to the bottom.

Step 5: Continue Infusing (Optional)

Then wait five to eight minutes again. During this time, the fines (fine coffee particles) and the coarse particles of the coffee grounds sink to the bottom. This will make the cup a little clearer. However, this is only a recommendation and not a must. The coffee itself is ready to serve after four minutes of extraction (step 4). The longer you let the coffee steep, the stronger it gets. Of course, you can also influence the intensity of the coffee by choosing the coffee beans.

Step 6: Press down the stamp

Place the lid on the jug using the stamp press. Press down slowly and steadily using only the weight of your arm. This prevents the coffee powder from being stirred up again and nothing sloshing out.

Cozy afternoons can be perfectly enjoyed with a Pumpkin Spice Latte. We explain why pumpkin coffee is so popular, where it comes from and how you can easily make it yourself.

What is a Pumpkin Spice Latte?

A Pumpkin Spice Latte is a coffee variation that is essentially made with espresso or strong coffee, pumpkin puree, spices and milk froth. Depending on the season, mainly autumnal spices such as cinnamon or cloves are used.

The drink was made famous by the American coffee chain Starbucks, which offers the drink in its branches every year around Halloween. The first Pumpkin Spice Latte went over the counter in January 2003. At that time, the company tried to extend the Christmas season with the drink by launching a hot drink with Christmas spices.

Since the drink was very well received by customers, but the pumpkin season generally begins in autumn, the decision was subsequently made to sell the pumpkin coffee in the branches as early as September. Since then, the Pumpkin Spice Latte has developed into a real cult drink that is so popular that Starbucks was already offering the drink in selected branches in mid-August.

This is how the Pumpkin Spice Latte works

If you are looking for a pumpkin and coffee recipe to take home, you’ve come to the right place. The recipe is quite simple, but requires some preparation if you want to make all the ingredients yourself.

List of ingredients for about 0.4 l Pumpkin Spice Latte:

1-2 tbsp fine pumpkin puree
1 tsp Pumpkin Spice spice mix
2 tbsp agave syrup
Milk/milk alternative for milk froth
espresso
Options:
Coffee syrup for refining or sweetening, such as vanilla or caramel

Step 1: Prepare the pumpkin puree

In the USA you can get the ready-made pumpkin puree in almost every supermarket. In Germany you can occasionally find the puree at the weekly market or in some delicatessens. You can also easily prepare pumpkin puree yourself in just three steps:
cut pumpkin
Cut a Hokkaido pumpkin into four equal parts and remove the seeds.
Cook Pumpkin
Put the pieces, including the peel, in boiling water and leave them there for around 15 to 20 minutes.
puree
Using a hand blender, mash the soft pumpkin pieces into a puree.
Storage Tip: You’ll probably need a lot less puree than you get from a whole squash. But that doesn’t matter. If you pack the puree airtight, it will keep in the fridge for about a week for further processing. Of course, you can also plan ahead and store the finished puree in the freezer.

Step 2: Preparation of the spice mixture

The listed ingredients for our pumpkin recipe can be found in almost every supermarket or easily ordered online. You can also make the spice mixture yourself and create your own individual taste. Depending on your preference, you can change the proportion accordingly. To make it, simply mix the following ground ingredients together:
3 tbsp cinnamon
2 tsp ginger
2 tsp nutmeg
1.5 tsp allspice
1 tsp cloves

Step 3: Prepare Pumpkin Spice Latte

Now the ingredients for the pumpkin coffee can finally be mixed together:
Pour pumpkin puree into a glass
Prepare a large glass and fill it with 1-2 tablespoons of fine pumpkin puree. To get it particularly fine, you can scrape it through a sieve into the glass again.
mix ingredients
Take a small bowl and mix 1 teaspoon of the spice mixture with the 2 tablespoons of agave syrup. Then spread the mixture over the pumpkin puree.
Add milk froth
In the next step you need milk foam. You can open it yourself or get it quickly and easily from a fully automatic coffee machine. Then add the milk froth to the glass.
Add espresso
Now it is important to make a particularly strong espresso. This is only possible with the help of a fully automatic machine or portafilter. A strong coffee can be made with an espresso maker, for example. Now pour the espresso into the glass very slowly so that the individual layers do not mix with each other. This creates a great visual effect when serving.
Stir
The Pumpkin Spice Latte is ready and ready to be enjoyed. Just before drinking, you should stir the drink well with a long-handled spoon so that all the ingredients mix together and the typical pumpkin taste can unfold.
Optional: Add syrup and cream
If you would like to refine your pumpkin coffee, you can optionally add cream to the PSL as a topping or add coffee syrup instead of agave syrup.

Vegan Pumpkin Coffee

For the vegan variant of the Pumpkin Spice Latte, you can also easily become a milk alternative. Soy milk or oat milk are best suited for frothing. Rice, coconut, almond or spelled milk are less suitable. After all, the milk froth is an essential part of the pumpkin latte. But in the end it’s a matter of taste.

Pumpkin Spice Latte without coffee – the version for children

For people who don’t want to drink coffee, malt coffee is an alternative preparation option. It’s actually not real coffee, since it’s made from grain, but the taste is similar and the pumpkin malt coffee is also very tasty. So that it doesn’t get too sweet, you can also do without the agave syrup and use honey instead.

How many calories does a Pumpkin Spice Latte have?

You may have guessed it: Starbucks finished PSL is anything but a diet drink. A 12 ounce Tall cup contains approximately 300 calories. The calories of the Pumpkin Spice Latte are divided into about 10 g of fat and 40 g of sugar, which corresponds to about 10 sugar cubes. This increases the daily energy requirement. If you prepare the coffee with pumpkin puree at home, you can of course control the addition of sugar and fat. This delicious and homemade alternative is not quite as impressive. A glass (250 ml) with fine puree and 1.5% milk has approx. 135 Kcal.