Tag

this

Browsing

Radicchio can be used in many ways in the kitchen. In this article we would like to show you a recipe on how to make radicchio fried and full of flavor.

You probably know radicchio as a salad ingredient. With this recipe you can also prepare the radicchio fried wonderfully.

It belongs to the chicory family and is particularly rich in vitamins, minerals and bitter substances as well as secondary plant substances. In particular, vitamin C, B vitamins, iron, potassium, calcium and anthocyanins are included.

Raddichio is mainly grown in Italy and can be found in supermarkets all year round. However, we recommend that you buy your ingredients from seasonal and regional cultivation, because this way you avoid long transport routes and CO2 emissions. In Germany, radicchio is in season between June and October. You can find a larger overview of other types of fruit and vegetables in our seasonal calendar. In addition, we recommend that you buy the ingredients in organic quality if possible. This is how you can avoid chemical-synthetic pesticides.

A recipe for fried radicchio

Ingredients:

1Radicchio
2 clove(s) garlic
4 tablespoons olive oil
1 tbsp almond butter
0.5 EL horn syrup
0.5 tsp salt
1 pinch(s) of pepper

Directions:

Wash the radicchio and cut it lengthwise into four equal pieces. Remove the stalk.
Peel the garlic and cut it into pieces as fine as possible. Alternatively, you can also press it and use it accordingly in the third step.
Mix together the 2 tablespoons olive oil, garlic, almond butter, maple syrup, and salt and pepper. To help the ingredients mix better, add a small sip of warm to hot water.
Spread the marinade evenly over the cut surfaces of the four radicchio pieces, so that some of the marinade can penetrate into the interior when frying.
Heat the remaining 2 tablespoons of olive oil in a pan. Fry the radicchio for about 2 to 3 minutes per side over medium heat.
Now you can serve the fried radicchio.

Carrot salmon is quick to make and a surprisingly good substitute for smoked salmon. We will explain how to make the spicy carrot strips yourself.

Salmon is one of the most popular edible fish, but there are many reasons not to eat it: Overstocked aquaculture, ethoxyquin, endangered wild stocks – the fish comes with many problems on the plate.

The carrot salmon does not have these problems. In addition, it looks quite similar to smoked salmon and even tastes like the original. Carrot salmon is also a great way to rediscover the vegetable.

Carrot Salmon: The Recipe

Ingredients:

3carrots
2 tablespoons rapeseed oil
2 tsp soy sauce
0.5 tsp smoked salt
1 teaspoon horn syrup
1 tbsp apple cider vinegar

Directions:

Peel the carrots and slice them lengthways into thin strips with a vegetable peeler.
Boil the carrots in unsalted water for 3 to 4 minutes. Rinse them with cold water and let them drain.
Mix together the remaining ingredients for the marinade.
Mix the carrots thoroughly with the marinade. Tip: The carrot salmon tastes particularly good after it has been allowed to sit in the fridge for a day or two. Keep it airtight and shake the storage jar every now and then to distribute the marinade well. The carrot salmon tastes particularly good on bread with (vegan) sour cream. Sprinkle with freshly ground pepper and finely chopped dill for added flavor.

Ingredient tips for carrot salmon

The carrot salmon comes even closer to the original if you also stir finely chopped seaweed into the marinade. For example, you can use dried nori seaweed or wakame. You should note a few things:

Many seaweed farms are far away in Southeast Asia, so the seaweed has to travel a long way to reach us. However, there are also algae farms in Europe. If possible, buy seaweed that has been proven to come from Europe.
An organic seal certifies that the algae come from a body of water with good water quality.
Algae sometimes contain a lot of iodine. If possible, buy products that list the iodine content – ​​because while iodine is very important for the body, an overdose can cause problems. Important: If you have thyroid problems, an iodine overdose can be particularly critical. It is therefore better to avoid algae or seek medical advice.

Tip: You can also use Liquid Smoke instead of smoked salt. You can also give the carrot salmon even more flavor with a pinch of smoked paprika.


The Pinsa Romana is similar to an ordinary pizza, but is said to be more digestible. We will explain to you what is behind the trend from Italy and how you can prepare Pinsa yourself.

For several years, a trend dish has been spreading from Italy that not only resembles pizza in name: the pinsa. They are also called Pinsa Romana, because the Romans are said to have enjoyed eating the pastry. But the recipe was forgotten until it was rediscovered in the last decade.

What makes the pinsa romana so popular? Above all, it is their dough that is said to be more digestible than pizza dough. It consists of a mixture of wheat, rice and soy or chickpea flour and Italian sourdough (“lievito madre”). The rice flour is supposed to loosen up the dough, the soy flour ensures good binding and proteins and the sourdough is supposed to make the pinsa romana easier to digest.

The long rising time also contributes to this: the dough of the pinsa should rest for up to 72 hours or more. The ongoing fermentation processes not only make the dough very airy, but are also supposed to relieve the digestive tract of some of its work. However, there are still no systematic scientific comparative studies between the digestibility of pinsa and pizza. More about this here: This is why many people can no longer tolerate bread.

In the next sections you will find out how you can bake and topping Pinsa Romana yourself without Lievito Madre.

Pinsa Romana: The recipe for the special dough

For four pins you need:

350 g flour type 405 or 550
50 g wholemeal spelled flour
75 g rice flour
25 g chickpea flour or soy flour
0.5g of fresh yeast or 0.2g of fresh yeast and 50g of Lievito Madre
approx. 300 ml cold water
1 tsp salt
1 tsp olive oil

Directions:

Mix the flours together in a large bowl.
Dissolve the yeast and salt each in a portion of the water.
Add yeast water, salt water, olive oil and, if necessary, Lievito Madre to the flour mixture. Knead the ingredients for about ten minutes until you have a smooth dough. Add some more water if needed.
Cover and let the dough rest for 30 minutes, kneading it briefly every ten minutes.
Place the dough in a large sealable container and refrigerate for 48 to 72 hours.
On baking day, take the dough out of the fridge 2-3 hours before you use it to let it come to room temperature.
Knead the dough briefly and divide it into four pieces of dough. Cover them with a tea towel and let them rise again for an hour.
Preheat the oven to 240 degrees circulating air. Note: For most dishes you can do without preheating the oven and thus save energy. Preheating the pinsa romana (just like pizza or tarte flambée) makes sense, however, because it only needs to be baked for a short time, but it should be nice and crispy. The ovens of professional pizzerias reach much higher temperatures.
Pull the dough pieces apart in an oval or round shape. Be careful to break as few air bubbles as possible. The dough does not have to be as thin as pizza dough.
Place the pins on an oiled baking sheet and top them with ingredients of your choice.
Bake the pins for about 10 to 15 minutes.

Tasty toppings for pinsa romana

You can eat the Pinsa pure or top it like a pizza, for example with:

  • tomato sauce
  • fresh seasonal vegetables
  • cheese or vegan yeast melt
  • fresh herbs
  • aromatic olive oil

The only thing to keep in mind is that the Pinsa Romana is only briefly in the oven, just like a pizza. This means that you should pre-cook vegetables or cut them very thinly. It’s also a good idea not to cover the pinsa too thickly, as that could make them mushy (and harder to eat).

If you dry wild garlic, you can also use the delicious wild herb out of season. Here you can find out how you can dry wild garlic yourself and what you should consider.

It is worth drying wild garlic. The weed is only fresh and ready to harvest in spring, but you can use it dried all year round.

Wild garlic normally grows outdoors as a weed. But you can also plant wild garlic in the garden. Find out beforehand when wild garlic season is.

To dry wild garlic, you have two options: let the leaves dry in the air or in the oven. We recommend that you air-dry the wild garlic if possible to save energy.

Dried wild garlic can be kept for a few months if you store it in a dry place that is protected from light.

Wild garlic dry in the air: This is how you do it

How to air dry wild garlic:

Wash the leaves and gently pat dry with a kitchen towel.
Tie the leaves at the stems into a small bouquet. Use a cord made of natural materials, such as raffia, or kitchen twine.
Hang the bouquet in a dark and dry place. Make sure the place doesn’t have high humidity.
Let the wild garlic dry for about a week or two.
Pick up the dried bouquets. If necessary, you can crumble the wild garlic or keep it in the form of a leaf. Store the dried wild garlic in a dry and cool place, preferably in an opaque container.
Tip: You can tell if the leaves are done drying by the fact that they rustle when they rub against each other. You can also easily rub the dried leaves between your fingers and snap off the stems.

Dry wild garlic in the oven

If you don’t have a suitable place for air drying, you can alternatively dry the wild garlic in the oven. However, this process is very energy-intensive.

How to do it:

Wash the leaves and gently pat dry with a kitchen towel.
Remove the stalks from the wild garlic leaves.
Spread them out on a wire rack or baking sheet so they don’t touch each other
Set the oven to 40 degrees Celsius and put the tray in the oven.
Leave the door slightly ajar to allow the moisture to escape.
Turn the leaves regularly so they dry evenly.
After three to four hours, the leaves should be dry. However, check the degree of drying regularly beforehand to avoid burning the leaves.

Use dried wild garlic

Wild garlic is a popular herb for cooking and seasoning. The taste is reminiscent of garlic and gives your food a subtle spiciness. Use your dried wild garlic in a variety of ways in the kitchen.

Make your own wild garlic butter or wild garlic soup. Dried wild garlic is also a suitable spice for wild garlic bread or wild garlic dumplings, or you can use it to refine a wild garlic pizza.

If you want to prepare shiitake mushrooms, there are a few things to consider. We will tell you how best to clean, cook and store the aromatic mushroom.

Shiitake mushrooms have been known in Asia for two thousand years as a food and medicinal product. The edible mushroom is very aromatic and a popular delicacy. It is used in a variety of ways, especially in Chinese and Japanese cuisine.

Cultivating mushrooms is not difficult and shiitake can also be cultivated without any problems in our climate zone. They grow particularly well on the deadwood of oak and hornbeam. The first harvest is possible after about 12 months. After that, you can continue harvesting from the same wood for a few more years.

Things to know about shiitake mushrooms

When you buy shiitake, it is best to find out about the origin and quality of the mushrooms. Make sure the mushrooms are organic and locally sourced. In this country, shiitake mushrooms are often imported from Asia. However, such products have a long transport route behind them and cause high CO2 emissions. If possible, buy the mushrooms in the mushroom season, i.e. in the fall.

Choose shiitake that look plump and juicy. You should not eat mushy specimens. Small cracks, spots or scales are also typical of the appearance of the mushrooms. You can easily rub them off when cleaning before you prepare the shiitake mushrooms.

Whether you have to wash mushrooms is a question that cannot be answered unequivocally. It is usually not recommended to wash fresh mushrooms under running water. It is enough if you wipe the shiitake mushrooms with a brush or a damp cloth. With mushrooms from the field, there is often more dirt that can only be washed off with water. In any case, make sure that the shiitake mushrooms are clean before preparing them.

Preparing shiitake mushrooms: you should pay attention to this

There are a few things to keep in mind when preparing the shiitake mushrooms:

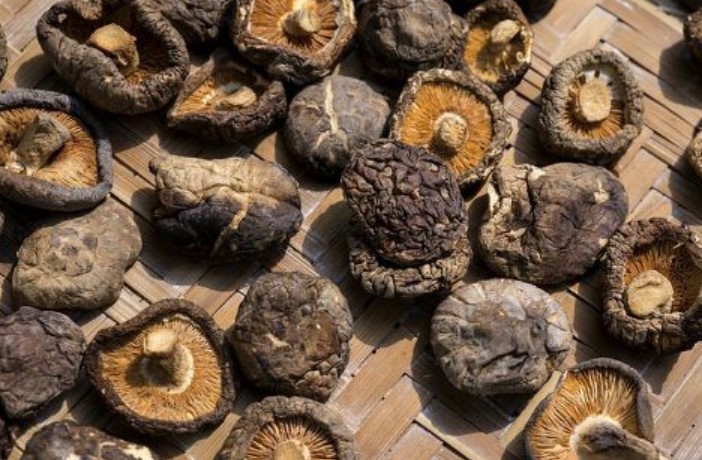
You can get shiitake mushrooms fresh or dried. The dried mushrooms are particularly aromatic because they no longer contain any moisture. The fresh mushrooms are fleshier in consistency and slightly milder in taste.
In dried form, shiitake are used in Asia as dried mushrooms for sauces or soups. The advantage: dried, the mushrooms can be kept for many months and can also be eaten outside of the mushroom season.

The best way to store fresh shiitake mushrooms is in the fridge. Store them in an air-permeable container, paper bag, or wrapped in cotton cloth. So they can be kept for a few days. Attention: In a plastic bag, the mushrooms mold very quickly and can form toxic substances.
Traditionally, shiitake mushrooms are fried, steamed or dried. Edible mushrooms cannot be boiled. You can use small mushrooms whole. It is best to cut larger specimens into fine slices so that they can cook through.
In principle, you can also eat shiitake mushrooms raw. However, the consumer center advises against excessive consumption of raw mushrooms. They can be contaminated with pollutants and are usually difficult to digest. The consistency of the shiitake mushrooms is also very firm to the bite. If you are preparing shiitake mushrooms, you should heat them well and slice them thinly.

Prepare Shiitake Mushrooms: Easy Mushroom Skillet

This simple shiitake mushroom pan is suitable as an accompaniment to warm dishes, as a snack between meals or with fresh bread and salad. Due to the simple method of preparation, the mushrooms develop their own aroma particularly well.

Season the mushroom pan with the herbs of your choice. Parsley, chives or thyme, for example, go well with the mushrooms.

Ingredients:

200g shiitake mushrooms
50g butter or margarine
1 pinch(s) of salt
1 pinch(s) of pepper
1 handful of fresh herbs as needed

Directions:

Wipe the shiitake clean and cut into 2-inch slices. You can also fry small mushrooms whole.
Melt the butter in a frying pan. Use plant-based margarine if you want to prepare the shiitake mushrooms vegan.
Add the shiitake to the pan and stir to coat all of the mushrooms in butter.
Fry the mushrooms over medium heat for four minutes until they turn slightly brown.
Remove the mushroom pan from the heat and season the shiitake with salt and pepper.
Serve the shiitake mushroom stir-fry with your choice of chopped herbs.

Tip: You can also add variety to other mushroom dishes by preparing them with shiitake mushrooms. Simply replace the mushroom varieties in the recipe with shiitake.

Get inspired by simple recipes with chanterelles and porcini mushrooms.
Try the shiitake in a mushroom soup as an alternative to porcini mushroom soup or chanterelle soup.
A classic mushroom dish is pasta with chanterelles. You can also prepare this classic with shiitake mushrooms.
If you want something a little more unusual: Shiitake taste great in risotto. You can use our recipes for porcini mushroom risotto or chanterelle risotto as a guide.
Use the mushrooms as a meat substitute, for example in a mushroom goulash.

You can either completely replace the mushrooms in the recipes or add just a portion of the shiitake. But keep in mind that the aroma of the shiitake is very intense and can quickly mask the flavors of the other ingredients.

The special thing about dandelion honey is that it is actually not real honey. Instead, it’s a mixture of sugar and dandelion flavor in syrup form. We reveal how you make the vegan “honey” yourself.

General information about dandelion honey

In contrast to bee honey, dandelion honey does not contain any animal components and is therefore vegan. However, it tastes similar to real honey and has a similar consistency – hence the name.

Collecting dandelion flowers requires some effort. But it’s worth it. When collecting, make sure that:

  • you collect the dandelions in places with little or preferably no traffic.
  • you take the young, juicy blossoms.
  • you don’t remove the whole plant. Unless you want to remove the dandelions from your vegetable beds.

The flowering period of the dandelion is in April and May.

Dandelion honey recipe

First, you need enough dandelion flowers – depending on how much “honey” you want to make. For starters, 200 grams should be a good guideline.

You also need:

  • 1 liter of water
  • 1 kg of sugar
  • 1 half organic lemon

Proceed as follows:

Put the flowers in a pot and pour the water over them.
Cover the pot with a lid and let the mixture steep for about two hours.
Bring the mixture to a boil and then let it cool down again.
Let the water and dandelion blossoms sit overnight and drain the blossoms with a colander.
Add the sugar and some grated zest of the lemon.
Bring the mixture to a simmer.
To test whether the mixture has the right consistency, you can put a small amount on a plate and let it cool. If the consistency is similar to that of “normal” honey, then the dandelion honey has simmered long enough.
If it is not firm enough, let the mixture simmer a little more and test the consistency at regular intervals.

Store dandelion honey properly

There are a few things to note:

  • Use sterilized jars to bottle the “honey.”
  • Be careful not to pour the dandelion honey into jars that are wet or too cold. Otherwise, the spread will crystallize. Therefore, use well-dried glasses.
  • Protect the “honey” from too much light and heat as well as cold. Store it in the closet or pantry. It can be kept there for about a year.

You can use an egg test to find out whether a chicken egg is still good. Because even if the best-before date has passed, most eggs are not yet spoiled.

On each egg carton you will find a sticker with the best before date of the eggs. As a rule, the eggs themselves also have a stamp with the date on the shell. The minimum shelf life is 28 days from the laying day.

If the best before date has passed, many eggs are still good. They will keep for up to three weeks without the fridge. You can then keep them in the fridge for another week or two. To be on the safe side, however, you should not eat expired eggs raw, but only eat them as boiled eggs or well-fried fried eggs.

There are also various egg tests that you can use to find out whether older eggs are still good.

Egg test: the water check for breakfast eggs

The best known is this egg test with water to find out whether an egg is still edible. Simply put the raw egg in a glass of water.

  • If the egg sinks to the bottom, it’s still fresh.
  • If the egg floats on the surface of the water, it is spoiled.
  • If the egg is slightly slanted in the water, it should only be eaten well heated through.

Why is the egg floating on top? The older the egg is, the more water evaporates from the yolk through the shell. The free space fills with air, which allows the egg to rise up in the water glass. If the egg floats to the surface of the water, you should not eat it.

Egg test: what does the yolk look like?

The egg yolk also shows you whether the egg is still good. Accordingly, this method is not suitable for a boiled breakfast egg. But for all recipes with raw eggs, you can use this egg test:

  • Carefully crack an egg on a plate.
  • It is important that the plate really has a flat surface.
  • If the yolk is evenly distributed in the middle, the egg is still fresh.

Why does the yolk float in the middle? As an egg gets older, the white becomes more runny and can no longer hold the yolk in the middle. Then the yolk slips to the edge or runs out. It should then only be eaten well heated through.

Shake eggs or hold up to the light

There are two other egg testing methods to distinguish fresh eggs from spoiled ones. However, they are not always very clear. We therefore only recommend them in combination with the methods mentioned above:

Shake eggs

When you shake spoiled eggs, you can sometimes hear a gurgle. This occurs in older eggs because the egg whites are no longer quite solid. It then sloshes around inside the egg when you shake it.

Hold the egg up to the light

You can also hold the egg in front of a strong lamp or directly in front of the lightbulb. Because fresh eggs have a very translucent shell. You will then see the egg yolk through the shell.

Fermenting radishes is a quick and healthy way to preserve the tubers for a few months. You also benefit from their healthy nutrients in winter. We’ll give you a simple recipe to make yourself.

If you ferment radishes, you can enjoy them all year round. Root vegetables are usually in season from May to October. That’s when the little red bulbs taste best.

By fermenting you can preserve their taste and the valuable ingredients for the other months. Radishes owe their hot note to their mustard oils. They are good for the immune system and make radishes so healthy.

Radishes originally come from Asia. However, they are also available from regional cultivation. When buying, make sure that they come from organic farming. This protects your health and the environment, since no chemical-synthetic pesticides are used.

Tip: Prefer radishes and plant radishes yourself. This can be done in the garden or on the balcony.

Fermenting radishes: How to do it

Ferment radishes quickly with this easy recipe. You need for this:

  • Cutting board and knife
  • Sterile mason jar with a capacity of 1.5 l (tip: this is how you can sterilize jars)
  • Fermentation weight: the weight is important to keep the radishes covered in liquid. Purchase special glass or ceramic weights from specialty retailers. Alternatively, use acid-resistant items. It is important that you can take the weight off easily. For example, place the weights in a reusable freezer bag. There are also weights that come with a handle so you can take them out easily.

Ingredients:

1 bunch of radishes
20 grams of salt
1 liter of water
1 tsp black peppercorns
1 tsp mustard seeds

Directions:

Mix the salt with the water and stir until the salt is completely dissolved. Here’s how to make 2% brine.
Remove the leaves from the radishes and wash the radishes thoroughly. Tip: reuse the radish leaves to avoid wasting food.
Cut off the tops of the radishes. Optional: Halve or quarter your radishes so you can enjoy them as a snack afterwards. Of course, you can also ferment them whole.

Now put the pepper and mustard seeds in the glass. Add the radishes to weigh the spices down.
Place a fermentation weight on the radishes and top up the jar with the brine. Leave a small rim of about an inch so the jar doesn’t overflow when fermentation begins. Close your jar and label it with the contents and the date.
Store the radishes at room temperature for the first week to allow fermentation to begin. Then put them in a cool place or in the fridge for at least two weeks.
After three weeks, the radishes are fully fermented. Keep them cool and make sure they are always covered by the brine. Then the radishes will keep for a few months.
The fermented radishes taste delicious as a snack between meals and go great as a side dish with bread or in fresh salads.

Fermenting: why does it make sense?

Fermenting radishes and other foods is a traditional way of preserving fresh produce longer. As a result, important nutrients and vitamins are retained. This was particularly important in the past, when there was no imported food from the south in winter.

Fermented radishes are probiotic. This means that they contain living microorganisms that have a positive effect on the stomach and intestinal flora. The fermentation process is called lactic acid fermentation. Don’t let the name put you off. Lactic acid is formed when food begins to ferment. The product remains completely vegan. Also read: Is lactic acid vegan? You should know that.

If you want to ferment your radishes, use the right helpers. This allows you to ferment quickly and safely.

By the way: If you store your radishes properly, they will stay crisp longer. Freeze radishes to make them last longer.

Torshi is Persian-style pickled vegetables. The recipe is ideal for preserving vegetables longer. Here you can find out how to make torshi yourself.

Torshi is widely used in Middle Eastern, Eastern European and Central Asian cuisines. The name Torshi derives from the Persian word “torsh” for “sour”. For torshi, vegetables such as white cabbage, cauliflower, carrots, aubergines, peppers, cucumbers and pumpkin are often marinated in a vinegar-salt brine together with garlic.

Torshi is particularly popular in Iran. There are hundreds of different types of torshi, reflecting local traditions and served for different occasions.

Torshi is ideal for processing seasonal vegetables and preserving them. Especially in summer it is a good idea to help yourself to the abundance of regionally available vegetables and make torshi out of them. In our seasonal calendar you can see when which vegetables are in season. We recommend buying organic vegetables whenever possible. In this way you support ecological agriculture that does not use chemical-synthetic pesticides and thus protects nature, biodiversity and health.

Recipe: How to make torshi yourself

The recipe yields about a liter of torshi. Have several small, sterilized, screw-top jars handy. Also make sure that you dry the vegetables as well as possible before you put them in the jars. This will avoid adding too much water to the mixture, which could cause the torshi to go moldy.

Ingredients:

1 small eggplant
1 small cauliflower
3carrots
1 green pepper
1chili pepper
3 cloves garlic
1 tsp dried parsley
1 tsp dried mint
0.5 tsp dried tarragon
0.5 tsp ground pepper
0.5 tsp ground turmeric
200 ml white wine vinegar (alternatively: apple cider vinegar)
Salt

Directions:

Wash the vegetables Slice the eggplant and carrots, break the cauliflower into florets and cut the stem into chunks. Cut the peppers into bite-sized pieces and the chilli into rings. Peel the garlic cloves and cut them into quarters.
Bring salted water to a boil over medium heat. Add the cauliflower and carrots and blanch for 2-3 minutes. Take the vegetables out of the pot with a slotted spoon and let them drain well in a colander. Blanch the eggplant in the same cooking water. It only takes a minute.
Put all the vegetables in a bowl and mix them with the herbs and spices.
Pour the mixture into glasses and squeeze them firmly so that they come to an inch below the rim.
Fill the glasses with the vinegar so that the vegetables are completely covered. Sprinkle a teaspoon of salt on the vegetables for each glass. Then close the jars tightly.
Let the torshi steep in a dark, cool place for 3 to 4 weeks. The longer you let it steep, the more flavorful the torshi will be.

Tips for your torshi

When unopened, the torshi can be kept for at least half a year. Store opened jars in the fridge and use the torshi within a week. Make sure you always remove the torshi with a clean spoon so that as few germs as possible get into the glasses.

You can modify the torshi as you like:

  • Try other vegetables, such as cabbage, cucumber, beans, and squash
  • Add other spices like cinnamon or cumin

Traditionally, torshi is served as an appetizer, but you can also use it as an accompaniment to other dishes. For example, it tastes good with chickpea soup, Arabic bread, ful medames, an Arabic bean stew, or with vegan meatballs.