Tag

this

Browsing

Emmer flour is an ancient grain flour with a strong, nutty taste. Not only can you use it to bake bread and rolls, you can also use it in other areas. We present you with various ideas.

Emmer is one of the oldest ancient grains and is considered the forerunner of today’s wheat. After higher-yield types of grain had long supplanted the emmer, today it is once again being appreciated. On the one hand, this is due to its aromatic taste, on the other hand, emmer flour contains numerous healthy nutrients. In particular, it is very rich in protein and provides important minerals such as zinc, iron and magnesium.

In the kitchen you can use the flavor characteristics of emmer in many ways – not only for baking bread, but also for cakes or pasta, for example. We give you an overview of the possible uses of emmer flour and present a simple recipe for emmer spelled bread.

Whether wheat, spelt or emmer: Flour is best bought in organic quality and from regional suppliers. Organic flour comes from ecologically sustainable agriculture and is therefore not treated with chemical-synthetic pesticides. If you use regionally produced products for cooking and baking, you also save on unnecessary transport routes and know exactly where your food comes from.

Incidentally, because emmer is less productive than other varieties when cultivated, conventional emmer flour is rare. That’s why most of the flour comes from organic farming anyway. To be on the safe side, look out for an organic seal.

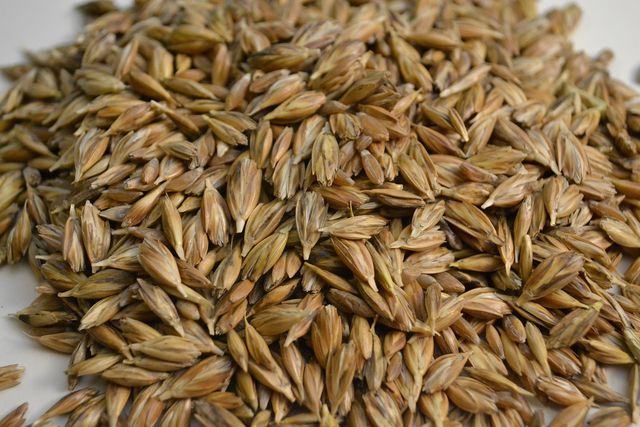
Emmer Flour: Nutty basis for breads

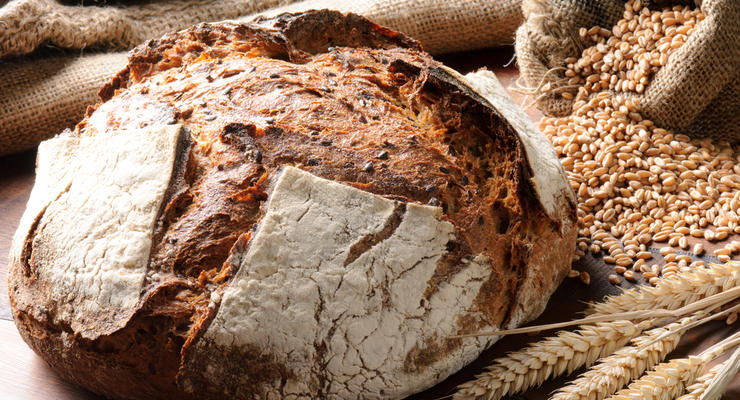
Emmer flour provides a good basis for bread or rolls with a hearty, spicy taste. You can either use pure emmer flour for baking bread or combine it with other types of flour to form a mixed dough. In terms of taste, emmer flour and spelled flour go particularly well together.

Mixtures have the advantage that the ingredients bind better to form a dough – pure emmer flour does not stick as well as, for example, wheat flour. Doughs made from pure emmer flour therefore have a slightly softer consistency, but can still be processed.

In most wheat or spelled-based bread recipes, you can simply substitute the same amount of emmer flour for the amount of wheat or spelled flour. In this case, however, it is best to add water or milk carefully and gradually: If you change the type of flour, you may need a little more or less liquid than in the original recipe. Depending on the consistency of the resulting dough.

Recipe: mixed bread with spelled and emmer flour

Ingredients:

300 g emmer flour
250 g spelled flour (type 630)
1 tsp sugar
2 tsp salt
2 teaspoons bread spice
20 g fresh yeast
200 ml lukewarm water
130 ml cow’s milk or plant milk
flour for sprinkling

Directions:

In a large bowl, mix the emmer and spelled flour with the sugar, salt, and bread spices.
Make a well in the middle of the mixture and crumble in the yeast. Then add the water and milk to the well and stir in the yeast until dissolved.
Knead all ingredients with the dough hook of the hand mixer to a smooth dough. Cover the bowl with a kitchen towel and let the dough rise for an hour.
Sprinkle a work surface with some flour and knead the dough well again with your hands. Then shape it into a ball.
Line a baking sheet with baking paper (or a sustainable baking paper substitute). Place the ball of dough on the baking sheet and cover with a kitchen towel. Let the dough rise again for an hour.
Cut the emmer spelled bread in a diamond shape and brush generously with water. Then bake it at 200 degrees for about 45 minutes.

Emmer flour: not only suitable for bread

You can not only use emmer flour for baking bread. Its nutty taste also lends an interesting note to sweet baked goods and goes well with spices such as cinnamon, anise or fennel seeds. This means that emmer flour is also suitable, for example, as a basis for Christmas cakes.

The strong emmer aroma goes particularly well with apples. In apple pie recipes, it is therefore worth replacing part of the flour with emmer flour. As with baking bread, you can usually do this in a 1:1 ratio. For example, try the following recipes with emmer flour for a change:

Apple pie with shortcrust pastry
Covered apple pie from the tin
Vegan apple pie

You can also make pasta dough partially or completely with emmer flour. Because emmer grains are a bit firmer than wheat grains, the pasta gets not only a strong wholemeal flavor but also an additional bite when you prepare it al dente.

A cheap alternative to conventional coffee preparation is the French Press. We will explain how the French press works and what the pot has to do with France, Denmark and Italy.

What is a french press?

With a French press, also known as a press pot or coffee press, you can easily prepare coffee with hot water and ground coffee. The hot drink is prepared directly in the pot, which can also be used as a serving vessel. This method is called the full immersion method. In contrast to the pour-over method, in which water is poured over the coffee powder, with the full immersion method the ground coffee is directly in the water.

Where does the stamp pot come from?

As the name suggests, the device was invented in France around 1850. However, the pot was not patented until 1929 by the Italian Attilio Calimani. The shape we know today was only introduced to the market in the 1970s by the Danish manufacturer Bodum.

How is a French Press constructed?

Every French press is basically the same. Only the design varies from model to model. In most cases, a French press is made of glass, but there are also variants made of stainless steel or directly as a thermos flask. French presses are commercially available in different sizes from 0.35 to 1.5 liters filling volume. It consists of a holder in which a mostly glass, removable jug sits. A press stamp is integrated in the lid, on which a metal sieve is located. When preparing the coffee, the plunger is pressed down and the coffee grounds are separated from the finished coffee through the sieve.

How does the preparation of coffee in a French press work?

With the French Press, the coffee is ready to serve within minutes. All you need is hot water and ground coffee.

Ingredients required for 1 liter of coffee from the French Press:

Coffee beans for 60 grams of coffee powder
1 L of water with a temperature of about 96 degrees

Step 1: grind the coffee beans

The degree of grinding should not be too fine for preparation in a French press. Choose a medium to coarse grind. As a guide: The degree of grinding should be similar to that for filter coffee. If you don’t have a coffee grinder, you can also buy ready-made coffee powder. However, be sure to pay attention to the degree of grinding when buying.

Step 2: Boil the water

Before the water comes into contact with the ground coffee, the temperature should be around 86 to 96 degrees. Too high a temperature would result in a bitter taste.

Step 3: Fill in the coffee powder

Check the capacity of your French Press and how much coffee you want to prepare. As a guideline: If you have a pot with a capacity of one liter, put 60 grams of coffee powder in the French press. Then pour the appropriately tempered water completely into the pot. Make sure all the powder is wetted and don’t stir the mixture.

Step 4: Break open the crust

After four minutes, break up the crust that has formed on the liquid with a spoon. This process interrupts the extraction and most of the coffee powder sinks to the bottom.

Step 5: Continue Infusing (Optional)

Then wait five to eight minutes again. During this time, the fines (fine coffee particles) and the coarse particles of the coffee grounds sink to the bottom. This will make the cup a little clearer. However, this is only a recommendation and not a must. The coffee itself is ready to serve after four minutes of extraction (step 4). The longer you let the coffee steep, the stronger it gets. Of course, you can also influence the intensity of the coffee by choosing the coffee beans.

Step 6: Press down the stamp

Place the lid on the jug using the stamp press. Press down slowly and steadily using only the weight of your arm. This prevents the coffee powder from being stirred up again and nothing sloshing out.

Cozy afternoons can be perfectly enjoyed with a Pumpkin Spice Latte. We explain why pumpkin coffee is so popular, where it comes from and how you can easily make it yourself.

What is a Pumpkin Spice Latte?

A Pumpkin Spice Latte is a coffee variation that is essentially made with espresso or strong coffee, pumpkin puree, spices and milk froth. Depending on the season, mainly autumnal spices such as cinnamon or cloves are used.

The drink was made famous by the American coffee chain Starbucks, which offers the drink in its branches every year around Halloween. The first Pumpkin Spice Latte went over the counter in January 2003. At that time, the company tried to extend the Christmas season with the drink by launching a hot drink with Christmas spices.

Since the drink was very well received by customers, but the pumpkin season generally begins in autumn, the decision was subsequently made to sell the pumpkin coffee in the branches as early as September. Since then, the Pumpkin Spice Latte has developed into a real cult drink that is so popular that Starbucks was already offering the drink in selected branches in mid-August.

This is how the Pumpkin Spice Latte works

If you are looking for a pumpkin and coffee recipe to take home, you’ve come to the right place. The recipe is quite simple, but requires some preparation if you want to make all the ingredients yourself.

List of ingredients for about 0.4 l Pumpkin Spice Latte:

1-2 tbsp fine pumpkin puree
1 tsp Pumpkin Spice spice mix
2 tbsp agave syrup
Milk/milk alternative for milk froth
espresso
Options:
Coffee syrup for refining or sweetening, such as vanilla or caramel

Step 1: Prepare the pumpkin puree

In the USA you can get the ready-made pumpkin puree in almost every supermarket. In Germany you can occasionally find the puree at the weekly market or in some delicatessens. You can also easily prepare pumpkin puree yourself in just three steps:
cut pumpkin
Cut a Hokkaido pumpkin into four equal parts and remove the seeds.
Cook Pumpkin
Put the pieces, including the peel, in boiling water and leave them there for around 15 to 20 minutes.
puree
Using a hand blender, mash the soft pumpkin pieces into a puree.
Storage Tip: You’ll probably need a lot less puree than you get from a whole squash. But that doesn’t matter. If you pack the puree airtight, it will keep in the fridge for about a week for further processing. Of course, you can also plan ahead and store the finished puree in the freezer.

Step 2: Preparation of the spice mixture

The listed ingredients for our pumpkin recipe can be found in almost every supermarket or easily ordered online. You can also make the spice mixture yourself and create your own individual taste. Depending on your preference, you can change the proportion accordingly. To make it, simply mix the following ground ingredients together:
3 tbsp cinnamon
2 tsp ginger
2 tsp nutmeg
1.5 tsp allspice
1 tsp cloves

Step 3: Prepare Pumpkin Spice Latte

Now the ingredients for the pumpkin coffee can finally be mixed together:
Pour pumpkin puree into a glass
Prepare a large glass and fill it with 1-2 tablespoons of fine pumpkin puree. To get it particularly fine, you can scrape it through a sieve into the glass again.
mix ingredients
Take a small bowl and mix 1 teaspoon of the spice mixture with the 2 tablespoons of agave syrup. Then spread the mixture over the pumpkin puree.
Add milk froth
In the next step you need milk foam. You can open it yourself or get it quickly and easily from a fully automatic coffee machine. Then add the milk froth to the glass.
Add espresso
Now it is important to make a particularly strong espresso. This is only possible with the help of a fully automatic machine or portafilter. A strong coffee can be made with an espresso maker, for example. Now pour the espresso into the glass very slowly so that the individual layers do not mix with each other. This creates a great visual effect when serving.
Stir
The Pumpkin Spice Latte is ready and ready to be enjoyed. Just before drinking, you should stir the drink well with a long-handled spoon so that all the ingredients mix together and the typical pumpkin taste can unfold.
Optional: Add syrup and cream
If you would like to refine your pumpkin coffee, you can optionally add cream to the PSL as a topping or add coffee syrup instead of agave syrup.

Vegan Pumpkin Coffee

For the vegan variant of the Pumpkin Spice Latte, you can also easily become a milk alternative. Soy milk or oat milk are best suited for frothing. Rice, coconut, almond or spelled milk are less suitable. After all, the milk froth is an essential part of the pumpkin latte. But in the end it’s a matter of taste.

Pumpkin Spice Latte without coffee – the version for children

For people who don’t want to drink coffee, malt coffee is an alternative preparation option. It’s actually not real coffee, since it’s made from grain, but the taste is similar and the pumpkin malt coffee is also very tasty. So that it doesn’t get too sweet, you can also do without the agave syrup and use honey instead.

How many calories does a Pumpkin Spice Latte have?

You may have guessed it: Starbucks finished PSL is anything but a diet drink. A 12 ounce Tall cup contains approximately 300 calories. The calories of the Pumpkin Spice Latte are divided into about 10 g of fat and 40 g of sugar, which corresponds to about 10 sugar cubes. This increases the daily energy requirement. If you prepare the coffee with pumpkin puree at home, you can of course control the addition of sugar and fat. This delicious and homemade alternative is not quite as impressive. A glass (250 ml) with fine puree and 1.5% milk has approx. 135 Kcal.

How does the heart actually get into the milk froth of a cappuccino? Anyone who has always wondered how the artistic motifs get into the milk crown of a coffee drink will find out all the important information about latte art in this article.

What is latte art?

Latte art is the predominant method for creating beautiful patterns and decorations on the surface of coffee. By pouring the milk froth – or the milk – in a special way, patterns and images are worked into the surface of the drink. Popular patterns are the heart, the fern leaf and the swan. The motifs can even be combined with a little practice.

In addition to simple pouring, there are also many tools that can be used for more precise and extensive creations. For example, pens, stencils or chocolate syrup can be used. The master of latte art is the so-called barista. He is responsible for artistic and tasty coffee creations. In the meantime, even championships for the most beautiful latte art are held.

Dense crema thanks to Robusta

Since the espresso is first poured into the bulbous cup, the crema should have a thick consistency and a hazelnut-brown colour. In this way, optimal motifs can be created in it. If a part of Robusta is in the coffee beans, a stable crema should succeed. The slightly reduced oil content compared to Arabica is an advantage here.

Milk (alternative) needs protein

The quality of the milk foam plays an important role so that the barista can fully develop his artistic streak, after all, the foam is the artist’s canvas. The milk froth must be of optimal consistency, temperature and density.

Which milk or milk alternative is used to prepare the milk froth can be decided individually. The most important thing is the protein content. The protein gives the foam its stability and density. The fat content makes the milk foam creamy and looks good.

Many prefer fresh whole milk, but condensed milk and UHT milk work just as well. Milk alternatives are also suitable for producing a nice milk froth. Frothing works particularly well with soy, oat, almond or spelled milk. We even recorded this in an in-house test.

In general, care should be taken to ensure that the milk froth has a dense, creamy consistency that is not too firm.

Equipment needed

Mastering latte art is a lot harder than it first appears. The barista needs:

Espresso, either from the portafilter or the fully automatic coffee machine
Milk frother or a steam wand
milk jug
Bulbous cup, e.g. for cappuccino

Good to know: milk can be foamed on professional fully automatic machines or produced manually using a steam lance. Both are possible.
The cup should ideally have a round bottom and open upwards. A wide opening offers space for pouring in the motifs. The ideal size for the milk jug is 0.6 to 1 liter. The espresso is now used as the basis for the new coffee creation. The actual work begins with pouring the milk froth.

Step 1: Frothing the milk

For frothing, the milk jug should only be filled halfway, as the volume can quickly double during the frothing process. In addition, the milk should be chilled before frothing, as the milk froth must not be warmer than 60 to 70 degrees. Otherwise it will fall apart.

The most important factor in frothing is the pulling and rolling movement of the milk in the jug. It doesn’t matter whether the milk is set in motion via the frother of the portafilter machine or by means of an electric milk frother. First, air is drawn under the surface of the milk. The rotation of the milk distributes the air in the milk and creates foam. For even better creaminess, the milk froth is then swirled around. You can find out more about this in our article on milk foam.

Step 2: Pour in the milk froth

Incidentally, after frothing, pouring should be done quite quickly, since the foam and milk can separate again within about 20 seconds. The desired pattern is now created when pouring the milk froth into the espresso.

The cup with the espresso must be held at a 45 degree angle. Begin pouring from the deepest part of the cup, pouring in the frothed milk in a circular motion to create a base. The crema rises to the edge of the cup and the color is a nice, even brown. Now place the pot with the spout close to the surface of the coffee and carefully pour the pattern into the crema. The angle of the cup becomes smaller and smaller until the cup is full.

The most popular motifs for latte art

Not every motif is equally suitable for learning latte art. We have compiled a few of the most popular milk froth artworks per level for you here.

beginner

The following works of art are ideal for beginners:
heart
Sun
shamrock

Advanced

If you already have some barista skills, then you will like these motifs:
fern leaf
Rosette
star

professional

The absolute latte art professionals can be recognized by these motifs in the coffee:
swan
Angel

ZavtrĂ¡k is the name of the traditional Russian breakfast. If you like it hearty, this is the right place for you in this country, because things get really rich here early in the morning.

Milk porridge (kascha), sausages, fried potatoes, scrambled eggs, pancakes (blini), quark pancakes (syrniki), bread, butter, jam, kefir and much more are what Russians love to eat with their morning meal. In this way, despite the harsh climate, they are already equipped with enough energy for the day in the morning.

These Russian specialties are very popular at breakfast: a national dish called kasha, a porridge made with milk, mostly made from buckwheat, but also made from oats, barley or rye, and blini – also affectionately called blinchiki – the traditional Russian pancakes.

For all lovers of hearty, hearty cuisine, this delicious breakfast offers a really tasty and energetic start to the day.

Food culture in Russia

In general, Russian cuisine is very diverse: this is because in this large country different ethnic groups live together and mix their traditions. In addition, the food culture in the city differs greatly from that in rural areas: Most people in the country eat richer and heartier food, while people in the city are also influenced by international eating habits and eat a little more “globalized”.

How do you prepare a Russian breakfast?

get hungry and want to prepare a breakfast like in Russia? Then let’s see together how to do it and what ingredients you need for it.

The first thing you should do is open your fridge and see what’s left over from yesterday, because Russians often have leftovers from the day before for breakfast, such as rice, noodles or fried potatoes.

Now set up a hearty sausage and cheese platter, warm up a few sausages and prepare the eggs – either scrambled or fried, just as you like. Don’t forget the bread: white bread is fine, although the Russians themselves prefer black bread. Just like in Russia, your morning meal should not be without various dairy products such as cottage cheese, kefir and sour cream.

That was the easiest part, now comes the preparation of the Russian kasha (milk porridge) and the blini (Russian pancakes). For this we give you the following breakfast recipes:

1. Recipe kasha – Russian milk porridge:

Ingredients (2 people)
75 grams of buckwheat
250 ml milk (1.5% fat)
1 pinch of salt
2 tbsp poppy seeds
As you like: some sugar, butter, jam, fruit or meat preparation

preparation

Briefly toast the buckwheat in a saucepan and add the cold milk, salt and poppy seeds. Let the porridge cook on low heat for about 10 minutes. Stir the kasha from time to time.
Russians usually serve their kasha with sugar and melted butter, more often with fruit, or sometimes with meat dishes for a savory version.

2. Recipe Blini- Russian pancakes:

Ingredients (2 people)
150 grams of wheat flour
12 grams of yeast
250ml milk
12 grams of butter
1 egg
50 ml cream
1 tsp sugar
½ tsp salt
some oil
At will: jam, sour cream

preparation

Dissolve the yeast in the milk and add half the flour and the melted butter. Leave the mixture to rest for about 30 minutes. Now separate the egg and mix the yolk with the sugar in a bowl. Now whip the cream and then the egg white until stiff. Then fold it into the whipped cream. Stir the dough and add the remaining flour, salt, egg yolks with sugar while continuing to mix. Finally, add the cream and egg white mixture and let the dough rest for a few hours. Now heat some oil in the pan, add some batter and fry your Russian blinis on both sides.
In Russia, blinis are either filled with jam or served folded, then dipped in sour cream.

Have you ever made coffee with the Chemex? No? No problem, we’ll explain how you can use the glass filter carafe to make a particularly clear and aromatic coffee.

What is a Chemex?

The Chemex is a traditional way of preparing filter coffee. The German chemist Peter Schlumbohm invented the filter carafe in the mid-20th century by building a glass funnel onto a simple Erlenmeyer flask. You may remember the latter from your school lessons, because the Erlenmeyer flask is normally used for chemical experiments. Schlumbohm traveled to the United States to sell patents for other inventions there. In 1941 Schlumbohm registered the patent for the invented filter carafe. To this day, the Chemex and its special filters are manufactured by the Chemex Corporation in Chicopee (Massachusetts, USA) and distributed worldwide.

At the time, Schlumbohm was probably not aware that he had invented a real cult device. The shape of the machine is reminiscent of an hourglass. The heat-resistant wooden belt that connects the two pieces of glass and also serves as a handle is striking.

What is special about a Chemex?

In 1958, thanks to its design, the Chemex even made it into the New York Metropolitan Museum of Modern Art, one of the most important art museums in the world, and it is still there today. However, the long-standing popularity of the machine can be explained above all with the consistently high-quality coffee result. Its secret lies in the extra thick coffee filter, in which oils, suspended matter or sediments are retained. This gives you a very pure and tasty coffee without a lot of bitter substances. In addition, the filter is shaped like a cone, which means that the coffee is extracted very evenly with this pour-over method. You usually have to buy the coffee filters separately.

How to make coffee with a Chemex

Preparation with a Chemex is quick and easy. Nevertheless, it is important that you follow the individual steps in order to be able to enjoy the full coffee aroma at the end. This is the pour-over method with a filter, which we will now present in more detail.

Ingredients needed for one liter:

60 grams of ground coffee with a medium to coarse grind
1 L of water with a temperature of 96 degrees

Step 1: Heat the water

The ideal water temperature is about 96 degrees. If you don’t have a thermometer, heat water in a kettle and then wait two minutes. The water is then almost at the perfect temperature.

Step 2: Unfold and insert the filter

When you unfold the filter, you get a page with three layers of paper. It is very important that this side is on the Chemex spout. This makes the filter paper more stable on this side and prevents it from getting stuck in the spout during extraction and preventing air from escaping from the carafe.

Step 3: Rinse the filter

Pour hot water into the filter without coffee in it. In this way, you already warm up the filter and can use the water that has passed through to remove any residue from previous preparations. At the same time, the inherent odor of the filter disappears. Then throw away the water that has run through. Then reinsert the filter.

Step 4: grind coffee

Grind the coffee on a medium to coarse setting. After grinding, the coffee should resemble the structure of sea salt.

In general, the more coffee you use, the coarser the grind should be.

Maybe try a little bit here. You have found the best result when the extraction of the coffee, i.e. the process in which the coffee runs through the filter, takes between four and five minutes.

Step 5: Start blooming process

Put the appropriate amount of coffee  in the filter and add some water. The amount of water depends on the amount of coffee. For blooming, you should always take twice as much water as coffee. It is advisable to add the water slowly and in circles from the inside out. The ground coffee should be completely covered with water. Now wait about 40-45 seconds. During this time, the remaining CO2 escapes and the coffee soaks up the water. By allowing the CO2 to escape, blooming ensures a more even extraction and a more stable coffee bed.

Step 6: Add water

Slowly pour in the rest of the water in a circular motion. There should be at least an inch of space between the water and the top of the funnel. Avoid pouring water directly onto the filter. In this case, the water would pull through the paper and not come into contact with the coffee. You may have to refill several times.
If the coffee has seeped into the lower part of the Chemex, remove the filter. The Chemex coffee is ready!

To keep peppers fresh and crisp for a long time, you can freeze the delicious vegetables. Here we explain what you should pay attention to and how to do it without plastic.

Freezing peppers: how it works

Whether as a side dish in a pasta sauce or as a healthy snack in between: paprika can be used in many ways. However, you should use up the crunchy vegetables within a few days. If you want to store peppers longer, you can freeze them.

Prep: Unlike other vegetables, you don’t need to blanch peppers beforehand. You don’t have to skin the peppers either.

This is how easy it is to freeze peppers:

Wash the peppers thoroughly.
Cut them into smaller pieces. For example, you can cut the peppers lengthwise into thin strips and then dice them further.
Put the chunks of pepper in a small tin and store them in the freezer.

Alternatives to plastic

Freezing peppers or other vegetables in plastic bags is often recommended. However, we recommend avoiding plastic as far as possible. There are some greener alternatives to plastic freezer bags:

You can use lunch boxes made of wood or glass several times.
Stainless steel cans are also suitable for freezing vegetables.
You can also freeze peppers in glasses (e.g. washed jam jars).
You can even freeze peppers in cotton or jute bags. You should first pat them as dry as possible with a kitchen towel.
By the way: A great alternative to freezing is to soak peppers in oil or vinegar. This way the vegetables will last longer.


Creamy coffee just like in Bella Italia: With the right recipe and professional know-how, you can make your own cappuccino at home, the taste of which will immediately take you back to your last holiday in Italy.

Warming rays of sunshine, the hustle and bustle on the piazza and a cappuccino with perfect milk foam topping – the ingredients for a relaxing holiday! At least the luxurious drink can easily be taken home. Because the recipe for classic Italian cappuccino is very simple: it consists of equal parts espresso, milk and milk froth.

Already knew?

Italians only drink cappuccino in the morning. Due to its high milk content, it is considered to be stomach-filling. In Germany, on the other hand, we enjoy it all day long: with a long breakfast or in the afternoon with pastries.

It all comes down to the beans

First things first: The espresso beans should be of the best quality so that the cappuccino really tastes as good as it does on holiday. You are guaranteed to be on the right track with the high-quality coffees from Mamis Caffè. Which variety you choose is up to your personal preferences.

Gran Crema impresses with the fine crema of the Arabica beans from Brazil, which settles perfectly on the milk.
The full-bodied espresso crema has a soft, intense crema, which unfolds its aroma in the interplay of Arabica beans with a strong Robusta note.
The sweet Amabile with its generous, soft body brings together seductive Dolce Vita with aromatic notes from India and South America.
Dolce Vita already carries the pleasure in the name. Sweet and with a certain spice, Arabica and Robusta beans bring the Italian attitude to life into your cup.
The smooth Deca Coffee is suitable for a delicious decaffeinated cappuccino variant.

What else makes a good cappuccino? That’s right: a creamy, dense foam. For this to succeed, you need milk with a high fat content. Whole milk with a fat content of 3.5 percent is ideal. Without fat, the foam will be watery and won’t stay solid.

All good things come in threes: the cappuccino recipe

Everything together? Now it depends on the mixing ratio. A cup of cappuccino consists of:

â…“ espresso
â…“ warm milk
â…“ milk froth.
For this you need:

Espresso (approx. 25 – 30 milliliters)
milk (approx. 100 – 150 milliliters)

Cappuccino preparation: start with the espresso

Professionals brew their espresso in a portafilter machine. Such a high-end coffee machine has its price and requires a relatively large amount of effort to prepare. However, if you regularly enjoy cappuccino at barista level, the investment can be worth it. You like it less complicated? A small espresso pot for the stove, a so-called Bialetti, also does a good job. The espresso is quick and easy with a fully automatic coffee machine, a pad or capsule machine.

Of course, you know best which method best suits your everyday life. At Mamis Caffè you will find your favorite variety for every type of preparation: as a whole bean, ground coffee, pad or capsule.

It’s all in the milk: this is how the perfect milk froth succeeds

In order to produce a stable milk froth, it is important that the milk is not too hot. As the owner of a portafilter machine with a steam nozzle, you are on the safe side. Here you use hot steam to heat milk in a jug and froth it at the same time. It’s even easier with a fully automatic machine. Most models conjure up a decent amount of milk foam at the touch of a button.

Alternatively, simply heat the milk on the stove. A temperature below 65 degrees is ideal, it should never boil.

You can then either froth the warm milk with a special milk frother or use a hand blender or a whisk. What actually works: a sufficiently large, empty mason jar. Pour in the warm milk and shake vigorously: a fine froth forms.

For your cappuccino you need milk froth, milk and espresso in equal parts. Froth until the volume of the milk has roughly doubled.

Expert tip: Professional baristas briefly knock the pot onto the table after heating the milk. In this way, unwanted bubbles escape from the milk and the froth becomes more even.

The final touch: Serve the cappuccino

Once you have prepared your espresso, first pour it into a preheated cup. Now it’s time for the milk, which you pour into the cup with a flourish. First hold back the foam with a spoon. You use it in the last step to crown your drink with it.

Et voilà: the homemade cappuccino is ready and tastes at least as good as in your favorite café in Milan or Rome.

Art in coffee: create latte art like a barista

Professionals refine the cappuccino with artistic motifs in the milk froth, the so-called latte art. The patterns in the crema are created when you pour the milk onto the espresso with a lot of energy and small, targeted movements. This requires finesse and practice. Would you like to surprise your guests with artistic masterpieces on milk froth? Most major cities have barista classes that will teach you the basics in just a few hours.

Cappuccino – the popular coffee and milk drink from Italy

A classic cappuccino consists of an espresso and milk and milk froth in equal parts. While cappuccino is drunk throughout the day in Germany, things are different in Italy. In the homeland of cappuccino, it is only consumed in the morning because it is considered to fill the stomach due to its milk content. From midday, the Italians rely on espresso, which awakens the spirits, makes you lively and is easier to digest.

In addition to cappuccino, latte macchiato is a popular drink in both Italy and Germany. Both coffee specialties are prepared with milk, but they look different and taste different.

The difference between cappuccino, latte macchiato and milk coffee

The mixing proportions between coffee and milk in a cappuccino are 1/3 espresso, which is poured into the cup, and 2/3 lightly frothed warm milk and milk froth are poured over it. The typical crema of the espresso settles on the milk froth of the cappuccino. The look of the cappuccino is white on the surface with a golden-brown crema, which is also often drawn into the milk froth with patterns using a spoon. There are now even competitions in which the most beautiful patterns that can be conjured up with the crema in the milk foam are evaluated. This can be leaves, hearts or even faces. A cappuccino is usually served in a bulbous cup.

With a latte macchiato, three layers can be seen in the tall glass. First, milk is poured into the glass, then the milk froth is poured over it. Finally, the espresso is slowly poured in through the milk froth. The layers are created by the air contained in the milk froth, which remains on the surface. The espresso stays on top of the milk, which is at the bottom of the glass, because it has a higher temperature and density.

Unlike cappuccino and latte macchiato, a classic latte does not use espresso to prepare it, but normal coffee mixed in equal parts with warm milk.

How to properly prepare cappuccino

Classic Italian cappuccino is now also at home in Germany and the times when coffee was whipped cream and then called cappuccino are long gone.

To prepare a good cappuccino, a metal jug is filled with cold milk. This is heated with the hot water nozzle. Care should be taken to ensure that the nozzle remains below the surface while the milk is being heated. If this is neglected, the milk may splatter.

The milk is frothed until it has doubled its volume in the jug. It is often observed with professional baristas that the jug is briefly knocked onto the table after the milk has been heated. This is done to get unwanted bubbles out of the milk.

The higher the fat content of the milk, the creamier and denser the foam. Whole milk or semi-skimmed milk is ideal for cappuccino. Almost fat-free milk is not suitable because the foam does not become firm and remains watery.

Of course, you can also prepare cappuccino at home in fully automatic coffee machines that already have an integrated milk container. Here the milk is frothed at the push of a button and automatically applied directly to the coffee. With fully automatic coffee machines, always make sure to clean the milk nozzle or the milk hose so that they do not stick.

You can also prepare cappuccino with pads and capsules. You either froth the milk separately or you have a device in which the appropriate milk capsules can be used to prepare coffee and milk drinks.

In summer, watermelons are a refreshing dessert. You don’t have to throw away the shell, you can use it. We’ll show you what else you can use watermelon peel for.

Of course, many people think of the fruity-sweet and refreshing watermelon flesh first when they think of watermelons. In fact, all parts of the watermelon are edible, including the seeds and the skin. There are many easy ways you can use watermelon rind in delicious recipes. We introduce them to you below.

Use watermelon peel quickly

Do you have some leftover peel and you are cooking anyway? Then try one of these ideas:

1. Grated watermelon peel

The simplest method: grate the zest and mix into salads. For example, you can spice up a coleslaw with watermelon peel or add it to a cucumber and dill salad. Or you mix the finely grated zest with cold soups.

Tip: Roasted watermelon seeds are a good topping for soups and salads.

2. Smoothie with watermelon peel

The next time you make a watermelon smoothie (or any other fruity blended drink), just throw the watermelon rind into the blender. So you don’t have to throw away the leftovers, but give the smoothie additional fiber.

Tip: How about a breakfast smoothie bowl or summer smoothies with regional ingredients? Both recipes are good for using watermelon peel in an uncomplicated way.

Recipe for pickled watermelon rind

The watermelon peel is also welcome to take the leading role in some recipes. In other countries this is nothing unusual. For example, in the United States, pickled or candied watermelon peels are common. For example, you can pickle the peel of the watermelon in a sweet and sour way.

For about two to three glasses, each with 400 milliliters of pickled watermelon peel, you need the following ingredients:

1 large watermelon
3 tbsp salt
1 organic lemon or 1 organic lime
1/2 l balsamic vinegar
750g brown sugar
1-2 cm fresh ginger
2-3 cinnamon sticks
8 cloves
8 allspice corns
Now follow these steps:

Eighth the watermelon. Remove the red pulp. There should now be about an inch of peel left.
Remove the dark green, bitter outer skin with a sharp knife or vegetable peeler.
Cut the peel into bite-sized pieces.
Mix the zest with the salt and the juice of half a lemon and leave to stand under a kitchen towel overnight.
After the brewing time, wash the bowl off briefly.
Put the bowl in a saucepan. Fill it with water until the bowl is just covered.
Bring everything to the boil and simmer gently for 15 minutes. Strain the peel and catch the water.
Finely slice the ginger and the other half of the lemon. Coarsely grind the cinnamon, cloves, and allspice.
Mix a quarter of the cooking liquid with the balsamic vinegar and sugar, add the spices and bring to the boil.
Add the melon cubes and let the brew simmer over low heat for about 50 minutes. The skins should now be translucent.
Pour the hot mixture into sterilized jars and seal immediately. Let them rest for at least two to three weeks. Serve the pickled watermelon peels as a sweet and sour side dish, for example.

Watermelon rind jam recipe

You can also use the watermelon peel to make jam.

For about six to seven jam jars with a capacity of 250 milliliters you need the following ingredients:

1 kg watermelon peel
2.5 liters of water
200 ml apple cider vinegar
1 lemon
1 kg preserving sugar
1 packet of vanilla sugar
How to make jam from watermelon rind:

Eighth the watermelon. Remove the red pulp. There should now be about an inch of peel left.
Remove the dark green, bitter outer skin with a sharp knife or vegetable peeler.
Cut the peel into bite-sized pieces.
Add two liters of water and 200 milliliters of apple cider vinegar and let everything boil for two hours over medium heat.
After cooking, drain the shells and rinse them in cold water.
Put the peels back in the saucepan, add half a liter of water, the juice of the lemon, a kilo of preserving sugar and a sachet of vanilla sugar. Cook everything until the mass has thickened. You can now puree them completely or partially.
Pour the hot jam into jars. Close the jam jars and turn them upside down for five minutes. Wrap the jars in a kitchen towel and let them sit for half a day.

2 good reasons to use watermelon peel

1. Watermelon rind contains many nutrients

There are many valuable ingredients in the watermelon peel: it contains a lot of fiber that quickly fills you up. It also contains amino acids, which support the body in muscle building, among other things, as well as lots of vitamin A.

There is still a white layer between the green outer skin and the red flesh of the fruit, which is considered to be one of the best sources of the amino acid citrulline. The body converts citrulline into the amino acid arginine, which is said to dilate blood vessels and thereby improve blood flow.

According to US researchers, arginine can increase male potency. Whether you can produce this effect by eating watermelon, however, is considered controversial. According to critics, the concentration of amino acids is too low.

2. Watermelon rind is not food waste

Food waste is a big problem of our time. According to the consumer center, 12 million tons of food end up in the garbage every year in Germany alone. Much of what we throw in the bin is actually still edible.

If we waste food, this also has disadvantages for the environment: Because to produce food you need energy, water and other raw materials. If we consume too much of it, our ecological footprint increases – we use up the resources that should be available to future generations.

The climate is also negatively influenced by food waste. For example, according to the consumer association, the annual food waste in the EU causes the same amount of CO2 as the entire Netherlands.

34 percent of the food waste in households consists of fruit and vegetables. If you start recycling peels and other “waste” items, you too can eliminate waste and reduce litter.

Buy organic watermelons

If you want to use the peel, you should make sure that the melon comes from controlled organic cultivation. Conventional watermelons are usually sprayed with pesticides. In China, for example, forchlorfenuron is used as a growth regulator. (More information: Watermelon: The summer fruit really is that healthy)

Pesticides not only harm pests but also other animals and insects – in this respect they threaten biodiversity. In addition, many of the agents are suspected of being harmful to health – glyphosate is just one of many examples. Even after washing, there could still be residues of pesticides on the bowl. Organic watermelons, on the other hand, are not treated with chemical pesticides.