Tag

with

Browsing

Whether on coffee, cocoa or chai latte: frothed milk is part of it. Here you can find out which methods you can use to froth milk.

There are countless ways you can froth milk – from whisks to fully automatic milk frothers. The reason why you can whip the milk at all is mainly due to the natural protein content in milk. It is around three and a half percent. However, how good the froth is depends on the temperature of the milk: about 60 to 70 degrees is ideal, but you can also produce milk froth from cold milk.

Finally, the waiting time also has an effect on the milk froth: it is creamy immediately after frothing, a little later some of the milk becomes liquid again and solid, coarse-pored froth settles on top. Depending on how you like the milk best, you can use it straight away or wait a moment before mixing it with your drink.

Frothing milk – with which accessories?

There are different types of milk frothers on the market. You will find electric or mechanical hand milk frothers, fully automatic devices or cups with a movable sieve insert. But you can also use some household items to froth milk.

Froth milk with a hand blender

Almost everyone has a hand blender in their house. Have you ever used it to whip creamy soup? You can also use it to froth milk.

Since the milk squirts quickly, you should pour it into a tall, narrow container.
Note that the volume of the milk can almost double when frothed. Fill the container only half full with milk.
You can either froth the milk cold or warm it up beforehand on the stove or in the microwave. If it’s steaming but not yet boiling, it’s at a good temperature.

Froth milk by shaking

You can get by without electricity if you fill the milk in a screw-top glass and shake it vigorously for 30 to 60 seconds. Again, you should not fill the glass more than half full. Accordingly, this method is more suitable if you only want to froth a small amount of milk. If you want to heat the milk in the glass before or after frothing it in the microwave, the glass must be microwaveable.

Froth milk with a whisk or hand milk frother

Frothing milk with a whisk takes some strength and practice. You’ll get better and easier frothed milk if you use a hand-held milk frother instead. There are both electrically operated and mechanical variants. You can buy them for just a few euros, but they sometimes differ greatly in the quality of the milk froth. You can froth both small and large amounts of milk.

Mechanical milk frother for the stove

From around 15 euros you can get milk frothers made of glass or stainless steel. They usually come with strainers that you slide up and down to create foam. With a little practice you will get very good milk froth in this way.

Depending on the capacity of the vessel, you can froth different amounts of milk. A disadvantage is that most stovetops have a larger diameter than the milk frother and therefore some of the energy is lost during heating. You can also froth the milk cold or heat it up in a saucepan and then decant it. When buying such a milk frother, you should make sure that the sieve insert can be cleaned easily

Warm up and froth milk with an electric milk frother

Electric milk frothers are the most convenient option: they not only froth the milk, but also heat it to the right temperature. This works either by induction or by a concealed heating coil at the bottom of the vessel.

Stiftung Warentest tested milk frothers in 2017 and found that most electric milk frothers produce much better froth than you can with a hand blender or hand-held milk frother. However, the test also showed that really good devices are comparatively expensive at at least 50 euros.

From an environmental point of view, it is difficult to say whether electric milk frothers have a higher consumption than heating milk on the stove or in the microwave. There are milk frothers that consume more or less. However, electric milk frothers are more resource-intensive to produce than, for example, a screw-top glass. So before you buy it, you should think twice about whether you will really use the milk frother on a regular basis.

Which milk is the best to froth?

When shopping in the supermarket you will find a large variety of animal milks and plant-based milk alternatives. Since the latter usually have a lower protein content than cow’s milk, they do not froth as well. Of the plant-based milk alternatives, soy milk is the best for frothing.

In the meantime, however, you can also find oat milk in stores that has been enriched with proteins so that it foams better. However, it is cheaper if you make your own plant-based milk with a suitable protein content.

In principle, the fat content of the milk is irrelevant for frothing. However, the fat makes the foam creamier and also serves as a flavor carrier. The same applies to the degree of freshness of the milk: You can froth both long-life milk and fresh milk, but you will get the better taste result with the latter.

Coconut flour is gluten-free, high in fiber and low in carbohydrates. We explain what is important when baking with coconut flour and what you should pay attention to.

Coconut flour can be an alternative to wheat flour. Those with celiac disease and a sensitive digestive system will equally benefit from coconut flour. It is gluten-free, low-carb, high-fiber, low-fat and cholesterol-free. It is used in a variety of healthy recipes. For example in cakes, smoothies, sauces, soups, spreads and desserts.

To obtain coconut flour, the fresh flesh of the coconut is dried, de-oiled and then ground into flour. Since coconut flour has traveled a long way and the coconuts used are usually harvested and processed by hand, it is important that you use fair, organic products.

In most recipes you cannot substitute coconut flour 1:1. This is mainly because coconut flour is very absorbent. One option is to replace just a portion of the wheat or whole wheat flour with coconut flour. You can easily replace a quarter of the flour with coconut flour without having to change the rest of the recipe. But there are also ways to completely replace the flour.

A commonly mentioned variant is to add one egg for every 30 grams of coconut flour. Depending on the quantity, however, this can lead to a fairly high number of eggs, which unfortunately neutralizes the positive property of coconut flour to be low in cholesterol. Another option is to increase the liquid content. You have to add water, oil and (plant) milk accordingly until the dough has the desired consistency.

The easiest way is to look for recipes that are specifically tailored to use coconut flour. We show you how to bake delicious brownies with coconut flour.

Baking brownies with coconut flour: the ingredients

The brownies are not only gluten-free, but also vegan and sugar-free. This makes them ideal for a vegan or gluten-free diet. You need the following ingredients:
115 g ground almonds
30 g coconut flour
60 grams of cocoa powder
1 tbsp baking powder
140 g agave syrup
120 g vegetable margarine
7 tablespoons unsweetened applesauce

Bake brownies gluten-free

Mix almonds, coconut flour, cocoa powder, and baking powder in a bowl.
Mix the margarine and agave syrup together until the mixture is foamy.
Add the applesauce to the margarine and agave syrup while stirring.
Now stir in the dry ingredients.
Place the batter in a springform pan or on a small baking sheet.
Bake the whole thing at 175 °C top/bottom heat for about 40 minutes.
Let the cake cool down well and then cut it into pieces.

If you want to make jam or preserve fruit yourself, you should definitely sterilize your jars beforehand. We’ll show you three easy ways to get them germ-free fast.

If you want to try your hand at making jam or preserving fruit and vegetables, you can’t avoid using mason jars. You don’t have to buy these again – just collect your old jam jars, vegetable jars and other screw-top jars.

Before you reuse these jars, it’s important to rid them of any germs. Otherwise you risk that your filled compote etc. will become moldy or go bad. Glasses are sterilized with the help of heat, i.e. germs and bacteria are killed. Below we present three simple methods of how this works.

Sterilize jars in boiling water

The first variant is also the most well-known method of sterilizing glasses. All you need is a large pot.
Pour water into a large pot.
Place the open jars and lids inside. The glasses must be completely covered by water.
Bring the water to a boil and let the glasses boil in it for ten minutes.

Sterilize jars in the oven

You can also sterilize glasses in the oven. This is useful if you want to clean a lot of or large glasses. You do this as follows:
Rinse the glasses with hot water first. For example, pour water from the kettle over them.
Then place the jars in the oven. Caution: You should not put the lid down with you. These are only sterilized with hot water (step 1).
Then set your oven to around 130 degrees Celsius and put the jars in for 15 minutes.
Then let it cool down first or take it out of the oven with gloves on.

Sterilize glasses in the dishwasher

The third and last variant is also suitable for a larger number of preserving jars. What do you need for this? Just your dishwasher!

Put the glasses in your dishwasher like normal dishes. You put the lids in individually.
Choose the hottest level of the machine and start the program. You don’t have to add dishwashing detergent or dishwasher tabs.
Remove the glasses after the round and fill them up as quickly as possible.

Important: The preserving jars must be alone in the dishwasher. You should not put other dirty dishes in it.

Also: No matter which variant you choose – you should always clean the glasses immediately before filling them. This guarantees sterility.

There are many diet trends that are gaining more and more followers these days, and going raw and vegan is one of them. Here you can find out what makes vegan raw food special, how it works and what you should consider when making a change.

According to the definition from the Gießen Raw Food Study, raw food nutrition is a form of nutrition that largely or exclusively contains unheated plant-based (sometimes also animal) foods. The raw vegan diet also avoids animal products such as raw milk and dried meat and is therefore a special form of veganism.

Vegetables and fruits, lettuce, herbs and other edible leafy greens as well as nuts, mushrooms, seeds and seeds can be consumed. The main aim is to preserve the heat-sensitive vitamins, trace elements and minerals in the food, which is why they must not be heated and processed at more than 45 degrees.

Behind the decision to eat raw vegan is often an increased awareness of their own consumption of food – most raw vegans therefore pay particular attention to eating seasonal and regional food of organic quality.

It is better not to eat these foods raw

Although raw foods are usually on the menu even with a conventional diet, caution is required when consuming raw foods, especially for raw vegans who are just starting out.

Not all plant-based foods can be consumed raw: this is especially true for potatoes, aubergines, beans, rhubarb, elderberry, legumes and cassava – they must be heated before consumption. One of the few legumes that can also be eaten raw is the mangetout.
In addition, the consumer advice center warns against a high nitrate content in rocket, lamb’s lettuce and lettuce and the consumption of raw spinach and chard.
You should be particularly careful when you go looking for wild herbs and mushrooms that you want to eat raw later – there is often a high risk of confusion with poisonous specimens.
Note: Consuming only raw foods puts more strain on your teeth than a traditional diet. You should therefore make sure that you eat fruit and vegetables not only whole, but also grated or pureed.

Of course, you can continue to enjoy all foods that you usually eat raw when you switch to raw vegan food without hesitation – or try one of the various preparation methods of raw vegan cuisine.

Raw Vegan Diet: Methods of Preparation and Processing

Raw vegans don’t just nibble on raw vegetable sticks, they have a more varied diet than you might think: the various preparation methods, all of which do not require excessive heating, result in an amazing wealth of raw vegan recipes.

Soaking: This method is mainly used for nuts and seeds. On the one hand, they can be processed better, on the other hand, certain seeds start to germinate after a certain soaking time, which should have a positive effect on digestion if consumed in moderation.
Drying: Food is dried for several hours in a dehydrator or at a maximum of 45 degrees in a convection oven, thus preserving it. Among other things, vegetable chips and raw food bread can be made in this way.
Pureeing fruit and vegetables: You can no longer avoid smoothies and vegetable juices made from all imaginable ingredients. Many raw vegan soups are also prepared in this way.
Fermenting: pickling vegetables in water and salt. All nutrients are retained during the fermentation process and lactic acid bacteria are formed, which promote a healthy intestinal flora. White and red cabbage are particularly often fermented, but basically all types of vegetables are suitable.
If you’re planning on sticking with the raw vegan diet for a longer period of time, it’s worth getting certain kitchen appliances, like a food dehydrator or a good blender. If you’re just starting out with raw vegan food, or aren’t sure yet if you want to stick with it, you can make most recipes without these expensive equipment.

Raw and vegan – and still all the nutrients?

A sufficient supply of vitamins A, C and E as well as folic acid, selenium and antioxidants has been found in people who eat a raw vegan diet. Deficiency symptoms, on the other hand, existed for vitamins D, B2 and B12 as well as for zinc, calcium, iron and proteins. It is therefore particularly important with a limited form of nutrition such as vegan raw food nutrition to eat a varied diet and in this way to take in as many different nutrients as possible.

You can get enough calcium from a green vegetable juice made from broccoli, fennel or kale.
You can prevent zinc and iron deficiency by eating pumpkin seeds, unpeeled flaxseed and sesame seeds.
You can also get certain essential fatty acids from high-fat foods such as avocados or olives.
Even pure vegans have problems with vitamin B12: The safest way to get it is through animal products. Plant sources are said to be chlorella algae or fermented foods such as sauerkraut – but this has not been clearly proven.
You can achieve a sufficient supply of other minerals and trace elements with mineral-rich water.

Vegan raw food: tackle the change in diet the right way

There are many reasons to consider switching to a raw vegan diet: Because it largely avoids processed foods, the raw vegan diet is considered extremely healthy. Avoiding animal products is also advantageous in terms of the environment and animal welfare. Last but not least, people are also increasingly concerned with their own consumer behavior and are taking more time for eating again.

However, you shouldn’t rush the switch to a raw vegan diet: It’s better to increase the proportion of raw food in your usual diet step by step – this way you don’t immediately overwhelm your digestive system. Stomach complaints, a feeling of fullness and diarrhea are typical symptoms of switching to raw food too quickly.
Inform yourself well beforehand about the type of diet by exchanging ideas with others or by buying a guide book with detailed tips and information.
If you suffer from chronic deficiency symptoms or illnesses, discuss the change in diet with a doctor.
In general, every person is different and every body has different needs. If you notice that you don’t feel comfortable with an exclusively raw vegan diet, you can also reduce the raw food proportion as you wish. It is important to eat a wholesome diet, in which you pay just as much attention to your own health as to the well-being of animals and the environment.

The yo-yo effect destroys any success in losing weight. You can find out what is behind the effect, how it is promoted and which diet you can use to maintain your desired weight in the long term in our guide.

With a lot of willpower and discipline, the desired weight is reached, but within a very short time the pounds that have been painstakingly slimmed down are back on your hips. When things go really bad, it’s even more than when you started the diet. This is the yo-yo effect.

The goal of losing some weight is desirable for many people: According to the German Society for Nutrition, 59 percent of men and 37 percent of women are overweight. This is accompanied by an increased risk of a variety of diseases, such as cardiovascular problems.

This is the yo-yo effect

This is how the yo-yo effect is created:
When dieting, you avoid certain foods and often reduce portion sizes as well. The more you restrict your calorie intake, the more your brain interprets an imminent danger from starvation. So to give you a good chance of surviving during a food shortage, your metabolism works more slowly. Muscles are broken down and the basal metabolic rate decreases.
If you have now reached your desired weight after tedious weeks, the restrictions in your diet are a thing of the past. You’re consuming your usual amount of calories again. However, your body still metabolizes them too slowly and puts them on so that you are prepared for the next famine. You’ll be back to your starting weight in no time.
Another problem is that when you eat less, your brain releases stress hormones. When stress persists, cravings and cravings for sweets increase. These have a particularly high glycemic index, which causes the blood sugar level to rise rapidly. Even if saturation occurs quickly, the sugar is immediately stored in the liver. When insulin levels drop, the food cravings begin again.

Prevent yo-yo effect – tips & tricks

The real problem with losing weight isn’t the yo-yo effect, it’s the diet itself. Every body is different and should therefore be treated differently. A diet can never work the same for everyone. In addition, utopian promises tempt you to restrict yourself completely insanely and one-sidedly.

Use these tips to prevent the yo-yo effect:
Give up diets! In order to reduce your weight, you should monitor your diet closely for a few days. What are you eating and drinking? Do you take your time with your meals? Where is hidden sugar?
Approach your diet carefully and slowly. Become aware of which foods are unhealthy and not good for you. Gradually remove them from the menu. This can include replacing fruit juices with unsweetened tea in the first week, for example. Next, the frozen pizza can give way to a healthy evening of cooking with friends. Get used to the change step by step so that you don’t get the feeling that you have to do without something.
In particular, remove ready-made products from your menu and replace them with fresh recipes that you can prepare yourself. We recommend that you use regional and seasonal fruit and vegetables. With short transport routes you can reduce your CO2 footprint. In addition, fruit and vegetables are rich in vitamins and important nutrients.

According to the New England Journal of Medicine, you should eat a high-protein diet and make sure your food is low on the glycemic index. This means cutting out sweet and fatty foods. Instead, you grab too many vegetables, nuts, legumes and tofu. Lean meat or fish is also recommended. However, due to the overfishing of the seas, we advise against the latter.
There is often a deeper reason behind excessive eating habits. Does stress or grief make you overeat? do you eat out of boredom If you are aware of the trigger, you can counteract it more easily. For example, by integrating more relaxation and deceleration into your everyday life.

Eat a balanced diet and lose weight

Here’s what you can do every day to lose weight:

Start your day with a balanced and high-fiber breakfast to lose weight. This fills you up, boosts your metabolism and prevents annoying cravings.
Drink a glass of water before every meal. This fills the stomach and makes you feel full faster.
Don’t over-pack your plate. Try moderate sizes and get a second helping if you’re not full.
Take your time to eat. Practice mindfulness and avoid distractions like the TV or cell phone.
Protect yourself from impulse buying by only going shopping with a list once a week. This saves you additional trips and money.
Integrate movement into your everyday life. Muscles increase your basal metabolic rate and ensure that you burn more calories. You don’t necessarily have to go jogging. Maybe you’ll find a great club in your area or try to walk 10,000 steps a day.

Quickly prepare natural home remedies for inflammation. Tips against inflammation. Treat inflammation yourself without medication.

Inflammation is a completely normal and healthy defense reaction of the body to various stimuli. Not every inflammation requires medical treatment. Inflammation can often be treated with home remedies or antibacterial foods.

What is inflammation?

Inflammation is the body’s defense reaction to external stimuli or pathogens. The inflammatory process begins with reduced blood flow, followed by increased blood flow. White blood cells (leukocytes) are transported to the focus of inflammation in order to fight foreign bodies such as viruses and bacteria. Therefore, the leucocyte count in the blood is a clear indicator of inflammation.

If there is an inflammation, the question arises as to whether it is absolutely necessary to go to the doctor. If the inflammation is mild and the cause is known, the healing process can usually be completed without medical products such as e.g. B. painkillers or antibiotics taking place. The body has self-healing mechanisms that are stimulated by using appropriate methods. Various natural remedies that you can quickly make yourself are able to slow down the spread of the inflammatory focus and alleviate the symptoms.

1) Cold against inflammation

Acute inflammation on the skin’s surface often feels hot. In such a case, cooling pads can relieve the symptoms. An ice pack from the freezer can be wrapped in a kitchen towel and placed directly on the inflamed area. The external inflammation should be continuously cooled for a period of at least 20 minutes.

2) Balm for external use in inflammation

Open, inflamed wounds can be treated with marigold ointment. You can easily make this yourself:

Melt 2 tablespoons of clarified butter (how-to video for making clarified butter) in a saucepan. Then 2 tablespoons of marigold blossoms (available online or in pharmacies) are added. Swirl the compound in the pot over low heat for 12 minutes. The butter must not turn brown, if necessary the temperature must be reduced. Then the mixture is passed through a sieve, separating the marigold blossoms from the butter.
The finished skin cream can be stored in the refrigerator for a few weeks.

3) Curd soap for inflammation and splinters

If the nail bed on the hand or foot is inflamed, the curd soap is suitable. It is a pure soap product without fragrances and can therefore also be used by allergy sufferers without hesitation. Curd soap has a stronger cleaning character than conventional soaps. It can also be used for splinters on hands or feet. you do this, a warm water bath is enriched with some curd soap. The affected part of the body is soaked in soapy water for several minutes and then not rinsed with clear water, but only dried.

4) Medicinal plants against inflammation

Chamomile preparations have a soothing effect on inflammation. Chamomile can unfold its antiseptic effect in a variety of ways: as a tea to drink or to gargle with inflammation of the throat (mix peppermint leaves, chamomile blossoms, rose blossoms, and Dabei in the same ratio and pour boiling water over it). Or as a bath additive e.g. B. for impure skin (2 chamomile tea bags and 1 bag of lemon balm tea are added to the bathwater. The water temperature should not exceed 38 degrees. After 20 minutes, the chamomile water is drained and the body is rinsed with clear water so that the pores of the skin close again ).

5) Anti-inflammatory foods

allium plants

Garlic and onions are antibacterial leeks. These contain sulfur compounds (onion in A and the antioxidant quercetin in onions, ajoene, and allicin in garlic), which strengthen the immune system and thus have an anti-inflammatory effect. Onions and garlic can help with internal inflammation by taking them orally (neat, juice, powder).

Ginger


Ginger is particularly good for fighting inflammation in the muscles and boosting metabolism. The ginger can simply be added to the food when cooking or consumed in the form of homemade tea. For homemade ginger tea, water is first boiled. The ginger is peeled and cut into small pieces. The pieces of ginger are then added to the already cooled water if it is still at a pleasantly warm drinking temperature.

Omega-3 fatty acids

Omega-3 fatty acids, such as those found in e.g. in fish, and linseed oil. Nuts and seeds are of crucial importance in nutritional therapy for infections, but also preventively.

Arachidonic acid is responsible for the increased production of inflammatory cells. Omega-3 fatty acids contain alpha-linolenic acid, which can neutralize arachidonic acid.

Alpha-linolenic acid is an essential fatty acid that can be obtained from food alone. For this reason, it is particularly important to regularly consume foods that contain omega-3 fatty acids.

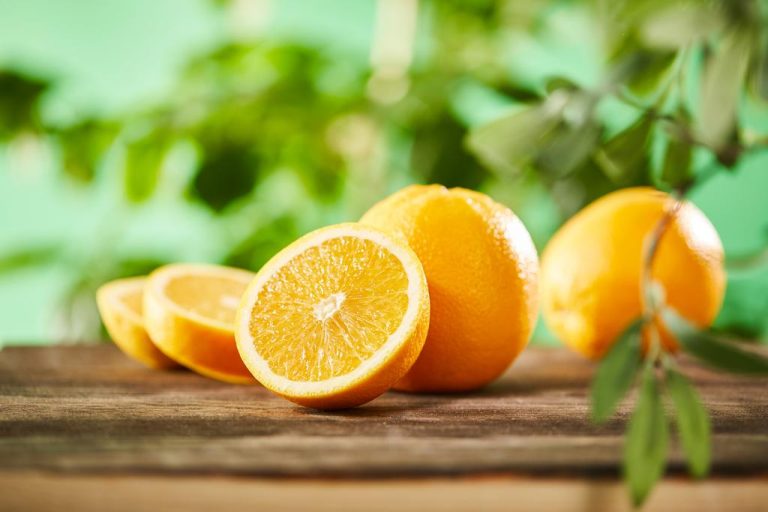
To fillet oranges, all you need is a sharp knife and a little finesse

Filleting oranges: Roughly cut off the peel

Before you start, you should wash the outside of the orange with hot water – this also applies to organic oranges. This prevents you from transferring possible germs and pollutants from the shell to the inside. Then you can fillet the orange. You don’t need a special filleting knife for this – a sharp kitchen knife will do.

1. Cut off the top and bottom of the orange, revealing the flesh.

2. Then remove the entire peel piece by piece by cutting slightly round downwards.

Tip: You don’t have to throw away orange peels. Instead, you can continue to use them in a variety of ways, for example as a rinse aid substitute, for skin impurities or as a tea.

Fillet oranges: remove the remains of the peel

3. Carefully remove the remaining pieces of white shell with the knife.

Tip: It’s best to hold the orange over a bowl while you’re doing this to catch any escaping juice. You can either drink it later or use it for desserts or sauces.

Filleting oranges: Scoop out the flesh

4. Carefully drive the knife into the flesh next to the fine dividing wall. Cut deep enough to be able to separate the piece in the next step. Be careful not to accidentally cut into other pieces, though.

5. Remove individual pieces of orange by cutting along the divider on the other side as well.

6. Repeat steps 4 and 5 for all other pieces.

You can use the tender orange fillets for delicious desserts, for example, or bake them in a fruit tart. You can also fillet other citrus fruits, such as lemons or grapefruits, in this way

Natural home remedies for headaches are ideal for successfully combating symptoms. With clever tips and tricks that stop and prevent headaches in a natural way. For a life without headaches.

Headaches are the enemy of everyday life. They cause a deterioration in one’s mood and level of performance. Taking painkillers can help. But it is not always recommended. It is therefore good to know which home remedies guarantee an effective effect.

Natural home remedies for headaches

Below we show you various home remedies for headaches. They should help to take action against the number one widespread disease and prevent headaches in a natural way. This means reaching into the medicine cabinet is no longer necessary. In addition, the use of natural home remedies ensures better body tolerance. Natural remedies are particularly suitable for counteracting headaches. It is therefore advisable to use natural remedies that do not contain chemical additives and perfumes and are effective against headaches.

1) water and liquid

Not drinking enough fluids can cause headaches. Drinking too much coffee and not enough water can cause headaches. It is therefore very important to always drink enough liquid. As a result, the metabolism gets going and is supplied with sufficient nutrients. However, a nice cup of coffee can also help against headaches. Because the caffeine it contains dilates the arteries and thus improves blood flow. Here, however, less is more!

2) Fresh air and sports

Headaches are often due to a lack of oxygen. Too much stuffy air and a lack of exercise promote the onset of symptoms. But there are simple home remedies for this: fresh air and exercise. It is therefore helpful to air the room frequently or to go for a walk in the fresh air. A break in nature can push the hustle and bustle of everyday life into the background and counteract headaches. If you like it more sporty, then regular endurance sports in the fresh air can help reduce the frequency and intensity of headaches.

3) Apple cider vinegar for headaches

The natural remedy apple cider vinegar can work wonders for headaches. And it can be found in almost every household. Even our grandmothers knew how to use apple cider vinegar to treat headaches. To do this, mix 1 tablespoon of apple cider vinegar with 1 drop of peppermint oil. The tincture must be stirred well. Then add some water and mix well until you get a pleasant scent. Soak a cloth in the liquid, wring it out and place it on your forehead. Be careful not to run into your eyes. Leave on for about 10 minutes. Then soak it again and put it on your neck. Repeat this several times.

4) Tea and other hot beverages

The right tea can work wonders. In addition, they are natural. Consequently, the vitality of the body can be promoted and the headache does not become a problem in the long term. An old home remedy is the classic hot lemon. Because freshly squeezed with a little sugar and poured into hot water, the use of the lemon can unfold its full effect. Lemon balm tea or black tea can also get to the root of a headache and relieve the symptoms in a mild way.

5) Fragrances help against headaches

Scents help against a terrible headache. Put a few drops of peppermint oil in a fragrance lamp and breathe in the scent deeply. In addition, the China balsam is a very good antidote. You can get this as an oil or in the form of a balm in any pharmacy. By applying the China balm to the temples and the back of the head or massaging it into the tense areas as oil, it unfolds its effect. Although it smells unusual, it convinces with its fast and good effectiveness. A real treat for your head! Also, note our ideas and tips for making your own Christmas scents.

6) Peppermint Oil and Lavender Oil

Using essential oils is a tried and true method. You can apply the oils to your forehead and temples with a gentle massage. Peppermint oil or lavender oil is particularly suitable here, as they not only have a relaxing effect but also eliminate headaches. The cooling effect of peppermint oil has a pain-relieving effect. In the best case, the temples and forehead are rubbed with peppermint oil several times a day. This is said to have the same effect as the medical painkiller ASA. Clearly, these miracle oils should not be missing in your household.

7) Herbs for Headaches

Herbs and spices can work wonders. Take a mixture of one teaspoon each of cinnamon, ginseng, licorice root, and the effective and healing ginger. Bring this to a boil with four cups of water. After 10-15 minutes you can pour this mixture through a sieve. Then let the tea stand for another 5 minutes. About 2-3 cups a day of this delicious tea and you will notice how relaxing and calming such a simple home remedy for headaches can be.

8) Colors against headache attacks

Color therapies affect our souls. The right colors relieve pain and activate self-healing powers. Colors effective against headaches include violet and blue. If no colored light bulbs or rope lights are available, candles can be used. Most of the time, every good housewife has these at home. Just sit relaxed in front of one of these candles and look relaxed into the flame. If you don’t have colored candles, you can paint mason jars. Or you cover them with masking tape. Then put a tea light in and relax. Your soul will thank you. Also, read our article on making your own paints.

Anyone who likes capers appreciates their piquant taste, which is created by fermentation. In addition, they are considered healthy – as long as no germs spread…

What exactly are capers and caper apples?

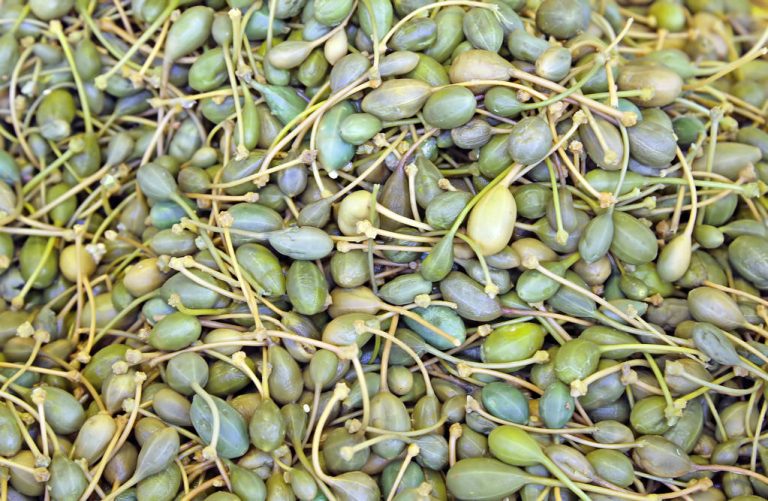
Most people only know capers pickled in salt or brine in a jar. If you pass one of the thorny caper bushes on a journey through the Mediterranean region, you may not recognize the capers: They are the closed flower buds of the “true caper bush”. Its flowers are white-violet and smell like capers as we know them. Capers, on the other hand, are the fruit that develops when the buds are not harvested.

The raw buds are comparable to freshly picked olives: they are bitter and inedible. Only when the capers ferment in brine or vinegar are the bitter substances broken down by microorganisms. The capers are then pickled or salted in vinegar or oil.

Enterococci in capers: helpers with hooks

Mustard oils are responsible for the savory taste of capers – capers and cabbage are closely related. Capers also contain other secondary plant substances: They are among the foods that are particularly rich in quercetin, as are apples and onions.

According to current knowledge, the secondary plant substances have a health-promoting effect on human metabolic processes: According to the German Society for Nutrition, studies suggest that they can protect against cancer and cardiovascular diseases.

However, capers are only healthy if no germs such as enterococci end up on the plate with them. The none can get into the glasses due to lack of hygiene.

The lactic acid bacteria enterococci have a fundamentally important function in fermentation and maturation processes: They not only give foods such as capers, cheese or raw sausages their desired taste, but are also important for a healthy intestinal flora. Fermentation is therefore a common way in many cultures to preserve food and – as has now been scientifically proven – to improve health. However, only as long as poor hygienic conditions do not lead to food being contaminated with undesirable strains of enterococci. These can cause infections in immunocompromised people.

Caper buds as a cooking ingredient

In southern Europe, caper apples are known as tapas or as a side dish, in this country the caper buds are used as a spice with a fine acidity. The rule of thumb with them is: the smaller, the better, the more expensive. You can also find different sizes in grocery stores. The smallest are called “Nonpareilles” in French.

Well-known kitchen classics with capers are:

Meatballs
Vitello tonnato
Beef tartare
chicken fricassee
Spaghetti alla puttanesca
Tips for preparing capers:

To prepare: taste some capers to check their intensity. Vinegar and salt could spoil your dish. If the taste is too strong for you, you can wash the capers, squeeze them out lightly or cut them into small pieces. You should definitely soak salted capers first.
For hot dishes: Do not cook the capers, but add them at the end, otherwise the aroma will be lost.

Melon is as much a part of summer as sunscreen or bathing. But slicing melon can sometimes be a challenge.

Both muskmelons and watermelons hide their tasty flesh under a thick and hard rind. Watermelons in particular are also very large, which makes them even more difficult to cut.

With these tips you will succeed:
Use a sharp knife with a blade longer than the melon.
Place the melon on a slightly rough surface, such as a wooden board, so it doesn’t slip.
Caution: Always cut away from your hands.
Depending on whether you want to eat the melon right away or process it further, you can cut it differently. You can find out how to do this below.

Cut melon into sticks: Ideal as a child-friendly snack

This method is especially great for kids who can’t get enough of melon in the summer and prefer to nibble on it themselves. Unlike melon boats, these pens do not leave a mustache on your face and children’s small hands can easily hold the melon pens.

It’s that easy:
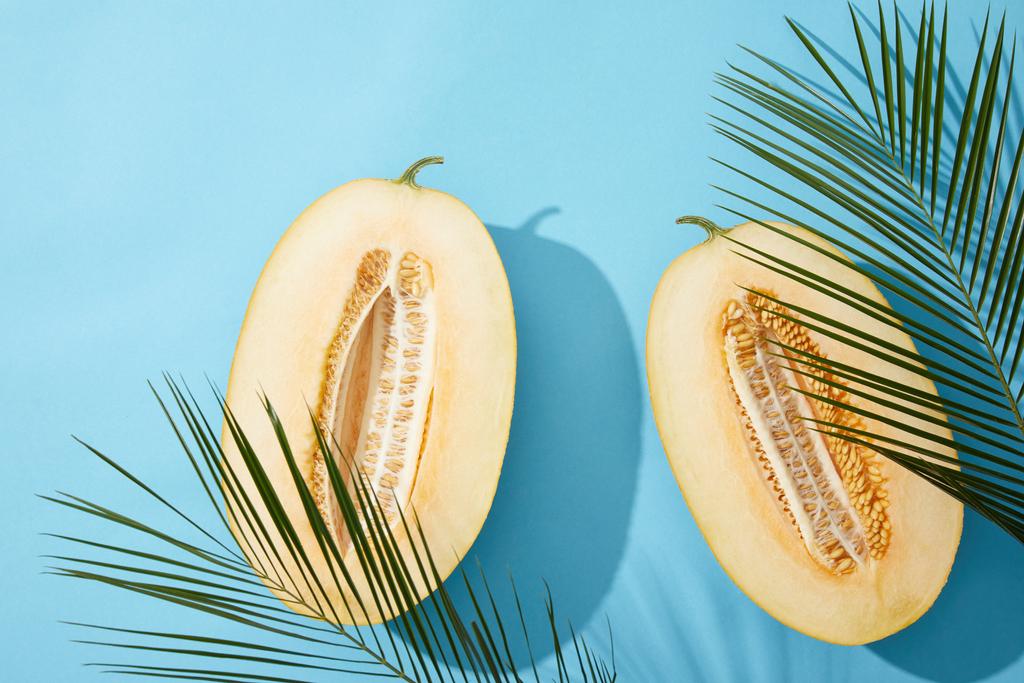
1. Halve the melon on the long side.
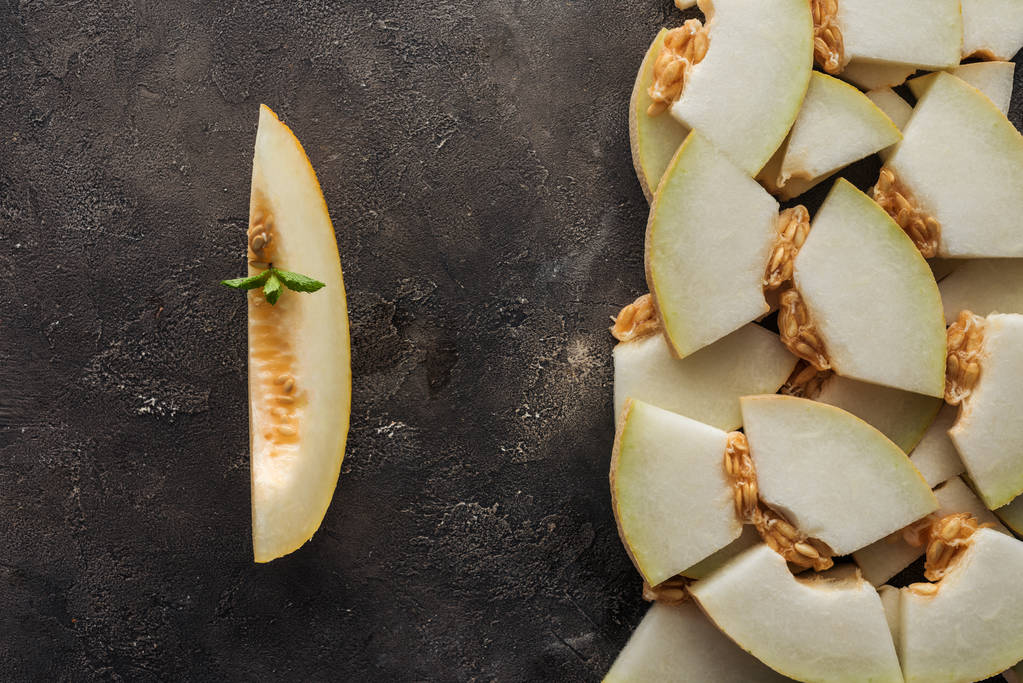
2. Cut the melon along the grain into strips about two thumbs wide.
3. Then repeat this process against the grain to create a checkerboard pattern. You may need to hold the melon to keep it from falling apart.
4. And your melon sticks are ready. You can eat them simply by holding them by the shell.