Tag

yourself:

Browsing

Bath bombs, also known as bath bombs, make bath time an exciting experience for children and adults alike. But these are not very cheap commercially. That’s why we show you simple recipes for making bath bombs yourself.

Making bath bombs yourself is easy and saves money and packaging. And the best thing is you can create them according to your wishes and ideas. You can use natural home remedies as ingredients that are good for your skin. And then you can let it bubble properly.

What are bath bombs?

Bath bombs are also called bath bombs or bath chocolates. You can add these round balls to your relaxing full bath as a bath additive. Then they unfold their exciting effect, as they begin to release scents, colors, and essential oils in connection with water. Consequently, they color the water and make it fizz. In addition, the balls may contain skincare ingredients that properly care for your skin.

Make your own bath bomb ideas

Since bath bombs are quite expensive in stores, but you shouldn’t miss out on bathing fun with these balls, we’ve collected recipes and ideas for making bath bombs yourself. Because this bath additive ensures body relaxation and is an effective remedy against stress. You can also make these together with your children and it is a great gift idea.

Ingredients for homemade bath bombs

You can get the natural ingredients in the drugstore or in the health food store. And you can buy some ingredients on the Internet since there are large quantities for a small price. This is particularly worthwhile for the home remedy baking soda and the all-around talent of citric acid. Consequently, you need the following ingredients for approx. 4 – 6 servings:

  • 250 g baking soda
  • 125 grams of citric acid
  • 60 g cornstarch
  • 60 g coconut oil
  • Essential Oil (your choice)
  • food coloring
  • Decoration (dried flowers, tea, or similar)
  • Possibly spherical shapes

Instructions for making bath bombs yourself

After you’ve got all the natural ingredients, you’re good to go. Prepare different bowls for this. And if you don’t have ball molds, you can also shape the bath bombs by hand. But you can also use other shapes, for example, silicone molds can be used for baking.

1) Mix the dry ingredients

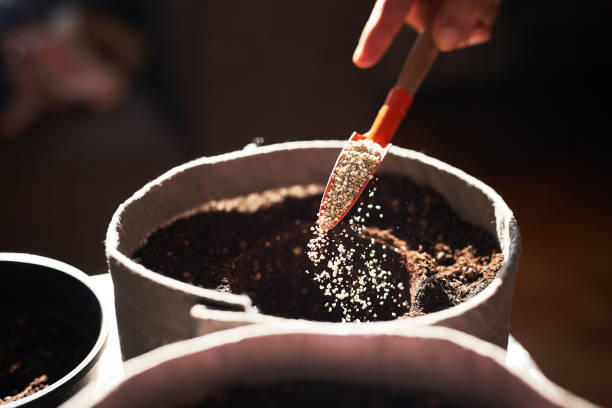
First, you have to mix the home remedy baking soda with the other powdery ingredients citric acid and cornstarch. If you want to make colorful bath bombs yourself, then divide the mixed powder into different bowls. Because in the next step, the powder is colored.

2) Mix liquids together

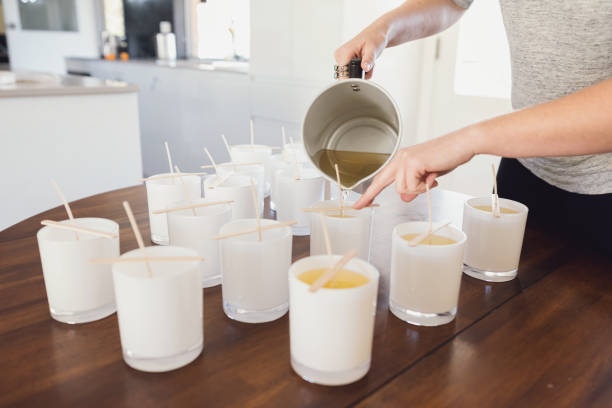
Now you need to process the liquid ingredients. Accordingly, put the miracle cure coconut oil in a pot and let it melt at a low temperature. Then put it in a bowl and mix it with a few drops of essential oil. Also, add the respective food coloring. If you use different colors, you will need different bowls here as well. Also, note our instructions for making your own paints.

3) Mix the powder with liquid

Then you have to mix the liquid mixture with the previously prepared powder mixture. Add the liquid very slowly to the powder so that the consistency remains powdery. Now the crowd should feel like wet sand. If the perfect consistency hasn’t been reached, either add some vegetable oil or more cornstarch.

4) Shape and decorate bath bombs

After mixing the powder with the liquid, you need to shape the bath bombs well and tightly. And then you can decorate them. There are no limits to your imagination. You can dry flowers beforehand and then integrate them into the bath bombs. Or add dried herbs.

5) Dry homemade bath bombs

Finally, you have to put the finished, homemade bath bombs in the fridge for a few hours. Then remove it from its shape and let it dry for a few more days. And then you can give away the bath bombs to make yourself or use them for yourself. In addition, read our instructions on how to make a base bath yourself.

Effects of bath bombs

Depending on which essential oils you add, the bath bombs can have a certain effect. Consequently, the addition of effective lavender oil can have a calming and antispasmodic effect. The scents of bergamot, jasmine, and rose can be used as natural mood enhancers. And using tea tree oil in the bath bombs can have a disinfecting effect. Consequently, you can use it as a supplementary home remedy against skin fungus.

Shelf life of homemade bath bombs

You will usually find an expiry date on purchased bath bombs. But how long do the homemade bath bombs last? Do-it-yourself bath bombs can be kept for a few months. It is important that you let them dry and harden sufficiently. In addition, they should then be packed airtight and dark. As a result, you can use them for a long time as a natural remedy for soft and delicate skin.

Good potting soil is a prerequisite for beautiful, healthy plants. We will show you how you can easily create good soil for your plants yourself.

There are different types of soil; include garden soil, blind soil, vegetable soil, and potting soil. Appearances are often deceptive because the quality of purchased soil is very important so that the plants can thrive at all. It is best to make your own nutrient-rich soil.

Benefits of homemade potting soil

Unlike commercial soil, you are not dealing with an industrial mass-produced product, but with a carefully selected mass. It goes without saying that your own soil will benefit the plants. They grow better, have less to do with pests, and appear healthier all around. Because the soil contains more nutrients, you naturally need less fertilizer. However, homemade potting soil can be excellently supplemented with home remedies such as plant fertilizer.

What has to go into the ground

There are many different types of potting soil. In general, compost, sand, and leaf soil are suitable for potting soil. In addition, coconut fibers, humus bricks, garden soil, vermiculite, perlite, horn shavings, or cornmeal can work wonders. In general, it can be said that homemade soil consists of different components. You always need a base. For example, garden soil or coconut fibers. In addition, you always need nutrients, e.g. B. Compost. And possibly something for the water capacity and loosening. Vermiculite or perlite are used for this.

1) The universal soil for almost all plants

The all-around soil is well suited to supply plants with nutrients for a longer period of time. It is versatile and has a good structure and good water drainage. What you need for this earth:

  • 2/9 compost
  • 5/9 garden soil
  • 2/9 sand

In addition to suitable soil, you should also pay attention to the correct watering of your plants. Because there are a few things to keep in mind.

2) Acidic soil is suitable for heather and bog plants

This soil is also called azalea soil and is particularly suitable for heather and bog plants, i.e. for plants that need acidic soil. Also almost all softwoods, as well as z. B. Rhododendrons need such soil. What you need for this:

  • 2/4 compost
  • 1/4 sand
  • 1/4 leaf soil

3) A special herbal soil with many nutrients

This very lean mixture is also known as light soil. It is ideal for plants that hardly tolerate nutrients, as this soil hardly contains any. For this you need:

  • each 2/6 coconut fibers, garden soil, and sand
  • add 1/6 crushed lime if necessary (for Mediterranean herbs).

4) The perfect soil for fresh tomatoes

As with the other soil mixtures, you should pay attention to the required PH value of the plant so that it can grow well. Tomatoes do best in slightly acidic to almost neutral soil. The following components are good for this:

  • 1.5/10 earth
  • 4/10 perlite
  • 1/10 hummus
  • 1/10 sand
  • 2.5/10 compost

5) Production of own rose soil

Roses grow in a neutral to a slightly acidic environment. You should also pay attention to how you then plant the roses correctly. The soil must not be too acidic under any circumstances, so you need the following to make the rose soil:

  • garden soil
  • compost
  • sand
  • Fertilizer mixture made from rotted cattle manure
  • horn shavings
  • bedrock meal

6) The right potting soil for cacti (substrate)

A special potting soil is required for cacti. The same applies to succulents (succulent plants). These plants have adapted to special climate and soil conditions. For this, you need soil with more mineral substances, for example with more sand and clay as components. This also includes the actual place where cacti normally grow, deserts. These are characterized by dryness and sandy soil.

You should therefore pay attention to their natural proportions when producing cactus soil. You only need the following ingredients to make it:

  • coarse sand
  • peat
  • Clay
  • humus soil

7) Make garden soil with Bokashi

Bokashi comes from Japanese and describes a process in which organic material is fermented by adding effective microorganisms. You can then use the resulting compost for your potting soil, as it is great as a liquid fertilizer. Soil mixtures can also work wonders in other areas. The healing earth helps you as an effective home remedy, for example, to eliminate facial blemishes, but also complaints such as flatulence and with a diet.

Create great wall decoration ideas and wall decals yourself. So that your home has that certain extra, let your creativity run free. You can be inspired by our clever tips and design murals yourself.

Whether wall decoration made of metal or wood, self-made wall and wallpaper pictures, or creative wall tattoos from the Internet. With simple tricks, you can design your home creatively and bring your own personal flair to your apartment.

Wall design tips for your home

Even small changes in the home can have a big impact. You influence the overall picture of your apartment by painting a new wall color, staging pictures, or decorating bare walls. You can also give the rooms a fantastic atmosphere by choosing your light sources, colors or vases, and associated plants. Since modern wall decoration ideas are diverse, you can let your creativity run free. Also, note great tips for bedroom design and furnishing.

1) Make wall decorations yourself for the living room and bedroom

So that you feel comfortable on your own walls, you can design them according to your own taste and ideas. The focus is usually on the creative furnishing of the living room and bedroom. In addition to beautiful furniture and a tidy overall picture, the wall design plays a major role. As a result, you can make wall decorations yourself and attach picture walls or pinboards, asymmetrically placed picture frames, special lamps, and high-quality shelves and sideboards. You can also hang up vintage world maps, macramés, or posters. They all give such rooms the necessary expressiveness.

2) Design or buy wall decals yourself

Wall decals are stickers or decals used to design walls. Whether motifs, posters, sayings, and quotes, or city pictures, there is a huge selection and there is something for every taste in the personal design of all living spaces at home or at work. You can buy stencils or stickers in specialist shops and on the Internet. It is also possible to create your own creative designs. You can also buy Dc-fix adhesive film and get creative yourself.

Sayings and quotes

If you are a fan of creative sayings or motivational quotes, then a wall decal is just right for you! You can use them in many ways, e.g. as a nice reception in the hallway or as daily motivation in the study. The decisive factor when choosing the sayings is that you like them and that they mean something to you. Consequently, you can use life mottos or special quotes that leave room for interpretation. So how about a motivating saying in the bathroom? Also, read our furnishing tips for the bathroom.

Skylines and world maps

Skylines and world maps are just as popular. Because these remind you of your favorite city, your own home, or your last travel destination. They are available in different shapes and colors so that you can use them according to your own personal taste. You can also design your own personal wall tattoo, e.g. a world map with your life motto. This means that even small rooms can be optimally designed.

3) Wall decor as a wall decal alternative

An alternative to wall tattoos with sayings and quotes is wall decorations – so-called wall decor. So you can make wall decorations yourself, e.g. by attaching picture frames glued to the wall, which are filled with photos of friends and family. Or use stickers with floral patterns to bring a breath of fresh air and a positive attitude to life into your home. Also, note useful tips for setting up with little money.

4) Paint your own wall motifs for the children’s room

Not every decoration or color suits every person and there are reasons for this. A good example of this is the children’s room. Because every child has its own character traits and perceives its surroundings in its own way. With wall paints or decorative elements, in particular, you can quickly and inexpensively set accents without having to remodel the entire room.

Consequently, you can create your own mural. Because great pictures on the wall of the room are easily made by printing any picture on foil, throwing it on the wall with a projector, and coloring it in with colors. This idea is also great for the children’s room. Especially when you are renovating, it is a good idea to make the walls more interesting for your children with beautiful paintings. And it would also be a great activity to do with your child for the weekend.

The right color choice in the children’s room

A restless child, who may also be struggling with concentration problems, is well advised to use calming and warm colors. These include, for example, a harmonious blue or a balanced green. Yellow has the reputation of exuding security and supporting the ability to concentrate. If you now match the furniture and a few accessories to the selected wall color, you can transform the children’s room into a real sanctuary that every child could wish for.

Instructions and tips for making the dough yourself. You can easily make your own putty yourself. In addition, the children have a lot of fun and enjoy making the dough themselves. Making the clay is ideal for a rainy afternoon. Because kneading is always a lot of fun for children.

Putty from cornstarch toothpaste

The easiest way to make playdough is to mix together cornstarch and toothpaste. If there is no cornstarch in the house, a normal white sauce binder will do. Simply mix the two ingredients together until dough is formed. Always knead the measurements.

Making the dough from flour

The variant with flour is somewhat reminiscent of salt dough but remains supple for much longer. You need the following ingredients to make the dough yourself:

  • 500g flour
  • 150g salt
  • 500ml boiling water
  • 2 tbsp citric acid
  • 4-6 tbsp cooking oil

Simply mix the flour and salt with the citric acid well. In addition, mix the hot water with the cooking oil. Now slowly mix both mixtures together and knead well. The putty is ready after it has cooled down. If you add a little more oil to the water, the dough will end up being smoother. The finished dough will keep for up to half a year if you pack it airtight.

Working with salt dough is a lot of fun. Great decoration can be created at cheap prices. The salty dough has to be really easy to work with. We show how easy it is.

Children love the salt dough to play with and paint, as do many adults. It is important that this is produced in a healthy way and we would like to show you how this can be done.

The salt dough only needs four ingredients

You only need four ingredients to make the salt dough yourself. Children love this salty dough because they can finally muddle and do handicrafts. Wonderful works can be created with salt dough. Toys can be made, pendants, decorations, and even ashtrays if you have a little patience. Salt dough definitely encourages children’s spirit of discovery. Basically, everyone has already tinkered with the dough, you just have to make sure that you make good salt dough.

For the perfect salt dough, you only need 2 cups of wheat flour, preferably type 405, plus 1 cup of salt, 1 teaspoon of vegetable oil, and then another cup of water. Everything has to be mixed well and you can knead the dough perfectly and use it for yourself. Children also have a lot of fun here, many a child loves to knead the dough until it is perfectly smooth. If the dough is still a little sticky, add a little more flour.

Another salt dough recipe

Yet another recipe for making salt dough would be 1 cup flour type 405, 1 cup potato starch, 1 cup salt, 1 cup water, and 1 teaspoon vegetable oil. The whole thing is kneaded well and can be used immediately. You could also just use potato starch if you want the items to last a long time.

Important for the salt dough

Salt dough is best stored in airtight containers. You can always take out as much dough as you need. The dough can be kept fresh in the refrigerator for up to several weeks without drying out. So children could do a little tinkering every day. By the way, the salt dough doesn’t always have to go in the oven. It can also be air-dried. But this can take several days. The oven is a bit faster there. But here, too, one should proceed with caution. It is best to set the oven to 50 degrees and let the finished works of art bake for an hour. The work then has to cool down and harden. Some people also set the oven to 120 degrees, but then the salt dough becomes darker, but also harder. Cracks can also be avoided in this way, which are annoying if you set the oven too hot.

Paint or pre-dye salt dough

If you want to let off steam creatively with the salty part, you can color the dough in advance or paint the finished works later. Children usually enjoy it more if they are allowed to paint the works of art later. If you want to color the dough, it is best to use food coloring or Easter egg coloring. Even cocoa can be used or beetroot. Curry and other spices also add color to the salt dough. After baking and cooling, the salt dough can be painted with watercolor, poster paint, or even acrylic paint.

Here are instructions and tips for making candles. Candle making and candle pouring are the most well-known techniques.

Candlelight for a more feel-good atmosphere

Candles provide a cozy living light and a special atmosphere. They are also nice for decoration and are well suited as small gifts. If you would like to make candles yourself, you don’t actually need much to create something really beautiful and individual. Depending on whether the candles are drawn or poured, different shapes and color patterns can arise.

Materials for making candles yourself

You can buy the wax you need in the form of granules, but you can also use old leftover candles that are then melted down again. White wax granules can be colored with special color pigments that you can get in craft supplies.

You also need candlewick and – if you want to pour candles – heat-resistant containers to fill them with.

The wax can be heated and liquefied in a tin or bowl in a water bath. You should make sure that the water does not boil and that the wax does not come into contact with the water. It is best not to use grandma’s good crockery for this, the wax residue cannot be removed so easily!

Candle making

A knot is first tied at the lower end of the wick so that it stays straight when it is immersed in the wax. The wick is then repeatedly dipped into a container of liquid wax in several passes. This creates several layers of wax. This technique works especially well for multicolored candles. For this, you need several containers with different colored wax. The length and thickness of the candles can be varied according to taste. The finished candle is hung up to dry by the wick. With thicker candles that are to stand without a candlestick, you can smooth the underside with a knife before the candle has completely hardened.

Candle making

When casting candles, the liquid wax is poured into a heat-resistant mold. For example, small glasses are suitable for this. The wick is first knotted to a skewer or something similar, which is placed over the glass so that the wick hangs down from the center. The liquid wax is then carefully poured into the jar.

Tip: To keep the wick straight, you can attach it to the bottom of the mold with some modeling clay. If you want to have several layers, you only fill the glass partway and let the first layer harden. It is important not to fill in the next layer too early, otherwise, the colors will mix.

You can be creative when choosing the shape. Various glasses or bottles, but also small flower pots, eggshells, paper cups, and other vessels can be used. Containers in different shapes, such as spheres or pyramids, are also available for purchase.
Except for the jewelry glasses, the molds are carefully removed from the candle after it has hardened.

Tips for making candles

If you not only make candles yourself but also want to design them in a very special way and add a highlight, you can add special scented oils to the wax. The finished candles can also be decorated with glitter powder and napkin glue. Here the imagination can run away with you a bit. Also, note ideas for making Christmas candles yourself.

What should you pay attention to?

You can also make candles with children. Since the liquid wax can get quite hot, children should never be left alone with it. When working with granules, it is also important to ensure that they are kept out of the reach of small children.

Make varied dog food yourself without any additional effort with many healthy recipes for dogs. Whether rice, potatoes or oatmeal, meat, and bones, dairy products and eggs, fruit or vegetables, numerous foods are suitable for diversifying the dog’s diet. And all without any additional effort for you.

Well-tolerated staple food for dogs

One swears by ready-made dry food from the discounter, the other feeds his dog with fresh organic products. In between, there is a whole range of options for dog nutrition. But the dog is also happy if it doesn’t get the same thing in front of it every day. In every household, there are food preparation products that dogs also tolerate well and like and that can contribute to a varied diet. No matter what you feed, you can see the criteria for recognizing a good staple food for your dog in the animal itself. The dog:

  • has a shiny, non-greasy coat
  • clear eyes, wet nose
  • does not scratch excessively
  • has little and solid defecation, because he can digest the main part of the food
  • is neither ribbed nor fat

If these criteria apply, the main food is well suited for your dog. If the dog has food-related problems, the varied design of the menu is of no use; instead, a suitable main food must be found. Also note remedies for diarrhea and vomiting in dogs, as well as tips on bathing dogs properly.

Grain free dog food

Be careful with grain-based dog food. Most dry foods consist mainly of grains such as corn and wheat. So if you want to feed grain products such as boiled rice, pasta, or oatmeal, you should reduce part of the amount of dry food so that grain doesn’t just end up in the predator’s stomach.

Fruits and Vegetables for Dogs

Fruits and vegetables are good for dogs if they are pureed or boiled. It is therefore not a problem to add crushed potatoes, carrots, and small amounts of other vegetables to the dog. The fruit must be very ripe. It is best to always try out small portions, whatever the dog likes and tolerates well.

Meat for dogs

Meat can be fed raw or cooked, of course, a delicacy for the dog. You should avoid pork. Other meat must not be seasoned. Only give raw meat in small amounts at first and slowly increase it until the dog’s stomach acid production has adjusted to it again. Boiled chicken with rice and carrots is an excellent bland diet for dogs.

Bones for dogs

Contrary to popular belief, dogs can even eat chicken bones if, firstly, they are uncooked and, secondly, the dog is slowly getting used to them. The dog should get meaty bones that have a good amount of meat. Chicken necks or soft veal ribs are suitable for beginner dogs. Later, the dog will certainly be happy about a beef leg slice. Don’t overdo it with the bones as it can cause constipation. In addition, the dog should be given fresh, raw meat regularly for some time beforehand, so that the stomach is properly adjusted to the utilization of the food.

Other animal products

Quark and cottage cheese are also very digestible for dogs and very healthy due to the high calcium content. Eggs can also be fed. You should only give the egg yolk raw, but the dog can also have a whole egg including the crushed shell when cooked.

Rules for healthy dog ​​nutrition and feeding

Despite all the variety, a healthy feeding policy should be observed. On the one hand, the total amount of food must be adapted to the dog. The basic rule for the feeding plan is one-third each of meat, grain, and fruit/vegetables. However, this distribution does not have to be achieved on a daily basis but should be achieved on a weekly average. After a meal, especially with bloating feed such as fresh tripe, rest is the order of the day. Otherwise, the intestinal obstruction could occur. If possible, meat and grain should not be fed together, but should be given at different meals. The daily ratio is best spread over two to three meals.

Design great wall decoration ideas and wall decals yourself. So that your home has that certain extra, let your creativity run wild. You can be inspired by our clever tips and design murals yourself.

Whether wall decoration made of metal or wood, self-made wall and wallpaper pictures, or creative wall tattoos from the Internet. With simple tricks, you can design your home creatively and bring your own personal flair to your apartment.

Wall design tips for your home

Even small changes in the home can have a big impact. You influence the overall picture of your apartment by painting a new wall color, staging pictures, or decorating bare walls. You can also give the rooms a fantastic atmosphere by choosing your light sources, colors or vases, and associated plants. Since modern wall decoration ideas are diverse, you can let your creativity run free. Also, note great tips for bedroom design and furnishing.

1) Make wall decorations yourself for the living room and bedroom

So that you feel comfortable on your own walls, you can design them according to your own taste and ideas. The focus is usually on the creative furnishing of the living room and bedroom. In addition to beautiful furniture and a tidy overall picture, the wall design plays a major role. As a result, you can make wall decorations yourself and attach picture walls or pinboards, asymmetrically placed picture frames, special lamps, and high-quality shelves and sideboards. You can also hang up vintage world maps, macramés, or posters. They all give such rooms the necessary expressiveness.

2) Design or buy wall decals yourself

Wall decals are stickers or decals used to design walls. Whether motifs, posters, sayings, and quotes, or city pictures, there is a huge selection and there is something for every taste in the personal design of all living spaces at home or at work. You can buy stencils or stickers in specialist shops and on the Internet. It is also possible to create your own creative designs. You can also buy Dc-fix adhesive film and get creative yourself.

sayings and quotes

If you are a fan of creative sayings or motivational quotes, then a wall decal is just right for you! You can use them in many ways, e.g. as a nice reception in the hallway or as daily motivation in the study. The decisive factor when choosing the sayings is that you like them and that they mean something to you. Consequently, you can use life mottos or special quotes that leave room for interpretation. So how about a motivating saying in the bathroom? Also, read our furnishing tips for the bathroom.

skylines and world maps

Skylines and world maps are just as popular. Because these remind you of your favorite city, your own home, or your last travel destination. They are available in different shapes and colors so that you can use them according to your own personal taste. You can also design your own personal wall tattoo, e.g. a world map with your life motto. This means that even small rooms can be optimally designed.

3) Wall decor as a wall decal alternative

An alternative to wall tattoos with sayings and quotes is wall decorations – so-called wall decor. So you can make wall decorations yourself, e.g. by attaching picture frames glued to the wall, which are filled with photos of friends and family. Or use stickers with floral patterns to bring a breath of fresh air and a positive attitude to life into your home. Also, note useful tips for setting up with little money.

4) Paint your own wall motifs for the children’s room

Not every decoration or color suits every person and there are reasons for this. A good example of this is the children’s room. Because every child has its own character traits and perceives its surroundings in its own way. With wall paints or decorative elements, in particular, you can quickly and inexpensively set accents without having to remodel the entire room.

Consequently, you can create your own mural. Because great pictures on the wall of the room are easily made by printing any picture on foil, throwing it on the wall with a projector, and coloring it in with colors. This idea is also great for the children’s room. Especially when you are renovating, it is a good idea to make the walls more interesting for your children with beautiful paintings. And it would also be a great activity to do with your child for the weekend.

The right color choice in the children’s room

A restless child, who may also be struggling with concentration problems, is well advised to use calming and warm colors. These include, for example, a harmonious blue or a balanced green. Yellow has the reputation of exuding security and supporting the ability to concentrate. If you now match the furniture and a few accessories to the selected wall color, you can transform the children’s room into a real sanctuary that every child could wish for.

This is how you make your own Christmas tree decorations from salt dough. Make simple decorations from salt dough and use them to decorate the tree at Christmas and Advent. How to make salt dough and make great ornaments for Christmas and other salt dough painting and decorating ideas.

The Christmas tree is often the focal point of the Advent season. It shines brightly in all colors and the balls glitter and sparkle everywhere. Unfortunately, most tree decorations are short-lived: something often breaks and you end up with a lot of plastic waste. We spend too much money on colorful Christmas decorations. Isn’t that cheaper and better for the environment? Salt dough is a cheap and easy alternative, and it’s even fun to make tree ornaments. We’ll show you how to easily make your own Christmas tree decorations from salt dough.

Just make salt dough

All you need is flour, water, and salt, i.e. ingredients that are usually in the kitchen cupboards anyway. It is best to use two cups of flour, one cup of water, and one cup of salt so that the ratio is 2-1-1. However, individual changes can be made during the kneading process so that the dough becomes kneadable accordingly. If your dough is too sticky, add some water. If the dough is too dry, add some water. Knead the dough into an even mass and then roll it out on a floured surface. Salt dough is not edible due to the high salt content! Those who prefer to bake something edible with their children are better off baking cookies with children.

Ideas for the salty dough

Substituting cornstarch for the flour will make the dough whiter and softer. If you want colorful dough, you can color it with food coloring. If you add about a tablespoon of oil, the dough will be even smoother and more malleable, so you don’t necessarily need cookie cutters and you can even try to form figures by hand.

On the other hand, if you add a tablespoon of wallpaper paste to your batter before you add water, the dough will become firmer. Consistency and shelf life can also be improved by replacing half the wheat flour with potato flour. You can find out more under Making salt dough yourself.

Make tree ornaments out of salt dough

If you still want to make ornaments for your Christmas tree, you can make them out of the salty dough. Because it’s fun and looks good. In the following video, you can watch instructions on how to make Christmas tree decorations from salt dough.

Make pendants out of the homemade dough

Just like normal cookies, salt dough figures are now created with cookie cutters. For example, stars, fir trees, gift packages, shooting stars, and everything else related to Christmas come into question. Use a straw to poke a hole in your cut-out salt dough cookies so you can hang them up later. After that, the dough has to dry at room temperature. You must not bake it directly, otherwise, it may bubble.

Either you dry your cookies in the air for a day and turn them every now and then, or you dry them in the oven at 50°C with circulating air and the oven door slightly open, which you can also hold open with a wooden spoon inserted between them so that air can escape. Only when your salt dough cookies are dry and light on both sides can you bake them.

Put the cookies in the oven for about 60 minutes at a top and bottom heat of about 130-140 degrees. Depending on how thick your cookies are, the temperature should be adjusted. You can then cool the various shapes and paint them as you wish and tinker with the salt dough. You can also give away the finished pendants. Here are more ideas for homemade Christmas gifts.

Decorate Christmas ornaments from salt dough

You can then cool the various shapes and paint them however you like. But the salty dough is sensitive to water, which is why you should avoid painting with watercolors and use water-free paints. Acrylic and poster paints are well suited, but also finger paints, clear varnish, and even nail varnish with good coverage. Gold and silver stars are particularly pretty and can still be decorated with glitter dust.

So if you don’t want to spend a lot of money on your Christmas tree decorations, but still don’t want to do without great and individual pieces of jewelry, you can make them out of salt dough for Christmas. You can find out more under make beautiful and cheap Christmas decorations yourself.

Even if the range of available Christmas candles is very large, a completely individual Christmas decoration can be created at home with the candle foundry. And when you make your own Christmas candles, you can create shapes and colors that match the rest of the atmosphere, resulting in a harmonious picture.

Beautiful Christmas candles for home

The Christmas decorations begin in the pre-Christmas period. Then Christmas accents and candlelight create a nice feel-good atmosphere. But candles are often expensive and it is not always possible to find the right candles for your own Christmas decorations. If you are a person with special ideas, then you should make your Christmas candles yourself in the future. So use this guide and perfect your Christmas decorations:

1) Tools for making Christmas candles yourself

No previous knowledge or manual skills are required for candle casting and making Christmas candles yourself. All you need are the following things from the handicraft supply and the hardware store:

  • candle wicks and candle wax,
  • heat-resistant vessels and skewers of metal,
  • two different sized pots,
  • Decorative wax, decorative foils, and candle pens.

2) The preparations for the candle foundry

If you want to make thick Christmas candles yourself, it’s best to save empty tin cans to save on the expense of the prepared candle jars from the craft store. The bottom of the jar needs a small hole in the middle. Pull the wick previously dipped in liquid wax and knot it. Then cover the hole. Then attach the other end of the wick to a skewer placed across the jar. You have to make sure that this knot is also in the middle so that the homemade Christmas candles don’t burn unevenly later.

3) Prepare wax to make Christmas candles yourself

To avoid damaging the wax, do not heat it above ninety degrees Celsius. Consequently, it is best to heat the wax in a water bath. To do this, put water in the larger pot and the stearin used for the candle crafting in the smaller pot. Then put the smaller ones in the larger pot. Before you put the stearin in there, you should line the pot with aluminum foil. So it can still be used as a cooking pot after the candle foundry. Also, note other tips for cleaning pots.

4) Pouring Christmas candles

First put just a few drops of liquid wax in the container so that the hole in the bottom is closed tightly when it cools down. Then you can fill the container with the liquid wax up to the desired height of the Christmas or Advent candle. This is how you can make the perfect candles for your personal Christmas wreath. There should always be some wax leftover because a hollow usually forms around the wick when it cools down. Consequently, you can fill them with the remaining wax. Nice shades are also created when filling wax shavings in different colors into the pouring vessel before the liquid wax is added.

5) Make individual layered candles

Making Christmas candles with multiple layers is also easy. To do this, stearin in different colors is gradually poured into the pouring vessel. To avoid mixing, let the individual layers cool down briefly. If the candles you have poured yourself cannot be removed from the molds straight away, a short stay in the refrigerator will help. Alternatively, you can rinse the outside of the watering vessel with hot water. For a better illustration, watch the following video on how to make candles yourself. You should also know tips for removing wax stains and candle wax.