Tag

bake

Browsing

Introduction to Traditional Sausage Roll

A traditional sausage roll is a classic British pastry snack that has been enjoyed for generations. It consists of a mixture of seasoned sausage meat wrapped in puff pastry and baked until golden. Sausage rolls are a popular food item in bakeries and cafes and also great as a party snack or lunchbox filler. They are easy to make and are a tasty treat that everyone can enjoy.

Ingredients and Method for Making Sausage Roll

The ingredients for making a traditional sausage roll are simple and easy to find. You will need some puff pastry, sausage meat, and some seasonings. To make the sausage meat, simply mix together pork mince, breadcrumbs, herbs, salt, and pepper. Roll out the puff pastry and cut into long strips. Spread the sausage meat in a long sausage shape along the center of the pastry, then brush the edges with beaten egg to seal it. Roll up the pastry and place it on a baking tray. Brush the top with more egg wash and bake in the oven for around 20-25 minutes or until golden brown.

Tips for Achieving a Golden and Flaky Sausage Roll

To achieve a perfectly golden and flaky sausage roll, there are a few tips to keep in mind. Firstly, make sure to use cold puff pastry and chilled sausage meat. This will help to keep the pastry flaky and prevent it from becoming soggy. Secondly, don’t overfill the pastry with sausage meat as this can cause it to burst during baking. A good rule of thumb is to use one-third of the pastry for the meat filling. Lastly, brush the pastry with a generous amount of egg wash before baking. This will give it a shiny and golden finish.

In conclusion, the traditional sausage roll is a tasty and easy-to-make snack that is perfect for any occasion. With simple ingredients and a little bit of know-how, you can create a delicious pastry that will impress your friends and family. So why not give it a try and enjoy a classic British snack today?

How to Make Chicken Parmigiana: A Step-by-Step Guide

Chicken Parmigiana is a classic dish that originated in Southern Italy and has become a popular favorite around the world. This dish consists of breaded and pan-fried chicken breast, topped with tomato sauce and melted cheese. It is typically served with a side of pasta and a salad.

Making Chicken Parmigiana is relatively easy, and it can be done in just a few simple steps. First, bread and pan-fry the chicken breast until it is golden brown. Then, top the chicken with tomato sauce and grated cheese, and bake it in the oven until the cheese is melted and bubbly. The result is a delicious and satisfying meal that is perfect for any occasion.

Whether you are a seasoned chef or a beginner in the kitchen, making Chicken Parmigiana is a great way to impress your friends and family with your cooking skills. With a little bit of preparation and patience, you can create a meal that is both delicious and nutritious.

Ingredients and Preparation: Bread and Pan-Fry Chicken Breast

To make Chicken Parmigiana, you will need a few key ingredients, including chicken breast, bread crumbs, eggs, flour, tomato sauce, and grated cheese. Begin by pounding the chicken breast until it is a uniform thickness, then season it with salt and pepper. Next, dip the chicken in flour, then in beaten eggs, and finally in breadcrumbs until it is fully coated.

To pan-fry the chicken, heat a large skillet over medium-high heat and add enough oil to cover the bottom. Once the oil is hot, add the chicken and cook for 3-4 minutes on each side, until it is golden brown and cooked through. Remove the chicken from the skillet and place it on a baking sheet lined with parchment paper.

Topping and Baking: Creating the Perfect Chicken Parmigiana

Once you have breaded and pan-fried the chicken breast, it is time to add the toppings and bake it in the oven. Start by spreading a thin layer of tomato sauce over each chicken breast, then sprinkle grated cheese over the top. Place the baking sheet in the oven and bake at 375°F for 15-20 minutes, or until the cheese is melted and bubbly.

When the Chicken Parmigiana is ready, remove it from the oven and let it cool for a few minutes before serving. Garnish with fresh parsley or basil, and serve with a side of pasta and a salad for a complete meal. With its crispy exterior, tender chicken, and flavorful toppings, Chicken Parmigiana is a dish that is sure to please everyone at the table.

What makes a good sourdough bread? A crispy crust and a medium-firm crumb! We will explain how you can bake your own wholemeal bread with sourdough and what you need to pay particular attention to. So nothing stands in the way of your next breakfast or dinner with your “own” bread.

After we presented you with a real lightning-fast bread recipe last week, we now come to the slow-food variant: baking a wholemeal bread with homemade sourdough that takes several days to prepare. Rest assured: this effort is worth it! Enjoying the first slice of home-baked sourdough bread just makes you proud – apart from the fact that the home-baked bread tastes really good too! Incidentally, you do not have to go through the effort of preparing a sourdough for every bread. Because once it has been prepared, you can use the sourdough starter later to bake other bread.

Bake wholemeal bread yourself: the preparation

Ingredients for the sourdough:

  • 250 ml warm water
  • 1 tsp honey
  • 150 g wholemeal rye flour

Preparation:

  1. In a large bowl, stir the water with the honey until the honey has dissolved. Add the flour and mix with a wooden spoon to form a smooth batter.
  2. Cover the bowl with a suitable lid and leave it in a warm place (at least 20 °C) for 3 days, stirring vigorously once a day – in the morning and in the evening.
  3. The dough starts to form bubbles as a result of fermentation and increases in volume in the bowl. The vigorous stirring makes it collapse again and again. The finished dough is viscous, smells fresh and sour, and has bubbles.

Bake wholemeal bread yourself: prepare the wholemeal bread dough

Ingredients:

  • 250 ml warm water
  • 500 grams of sourdough
  • 500 g wholemeal rye flour
  • 1 tbsp sea salt
  • 1 tsp bread spice (a mixture of aniseed, fennel, coriander, and cumin) to taste
  • For sprinkling kernels or seeds to taste

Preparation:

  1. Place all ingredients in a large bowl and knead.
  2. Pour the batter into a loaf pan lined with baking paper and cover with a kitchen towel. Leave for another 12 hours.
  3. The next morning the dough should have risen a bit. Preheat the oven to 270°C (top and bottom heat) and place a small saucepan filled with water on the oven floor.
  4. Wet the surface of the bread with a little water and sprinkle with sunflower seeds or pumpkin seeds if you like. Then put the bread in the loaf pan in the oven. After 5 minutes reduce the temperature to 200 °C and let the bread bake for another 40 minutes.
  5. After 40 minutes the bread is ready. If you prefer a slightly darker crust, turn out of the loaf tin and bake for a further 5 minutes at 200°C.

What does the new year bring? Maybe a fortune cookie can tell us. The little lucky charms from your own oven taste much better than the ready-made variant. And the great thing is: You can make your loved ones happy with personal wisdom.

Full of hopes and wishes we start the dewy year on New Year’s Eve: A new love… a new job… the longed-for marriage proposal… What will it bring?

Hardly anyone is immune to kitsch and superstition on New Year’s Eve. How else could it be explained that adult humans hold up misshapen drops of lead to the light and claim they are seeing a dragon/sword/flower?

Chinese fortune cookies are also very popular at the New Year’s Eve party. Bake the little crescents yourself this year! It’s very simple and your place as a lucky fairy is guaranteed.

Sayings for your fortune cookies

Before you start preparing the cookie dough, it is best to write down the small wish lists. Song lyrics, Bible verses, the funny saying on the house wall: Everything is allowed. For anyone lacking inspiration, we’ve rounded up some fortune cookie all-time favorites.

Of course, the best thing is if you make the sayings for the fortune cookies as personal as possible. If you don’t have much time or are going to a larger party where you don’t know all the guests, these evergreens are suitable, for example:

  • “If the old year was successful, then look forward to the new one. And if it was bad, then even more so.” (Albert Einstein)
  • “The new year has a clean slate until you put it on.” (Hans Fallada)
  • “Greet the new year with confidence and without prejudice, then you’ve already half won it as a friend.” (Novalis)
  • “Is it getting better? Is it getting worse?” is the question asked every year. “Let’s be honest: life is always life-threatening!” (Erich Kästner)
  • Note: This cookie may contain traces of happiness.
  • “He who knows how to enjoy life does not need riches.” (Chinese proverb)
  • “Before you set out to change the world, go through your own house three times.” (Chinese proverb)
  • “Anyone who asks is a fool for five minutes. He who does not ask remains a fool forever.” (Chinese proverb)
  • “Don’t be afraid to walk slowly, just be afraid to stand still.” (Chinese proverb)
  • “Habits are first cobwebs – then wires.” (Ancient Far Eastern wisdom)
  • Bake fortune cookies yourself – this is how it works

Ingredients

(for about 20 fortune cookies)

  • 1 egg white
  • 1/8 tsp vanilla flavoring
  • 1 pinch of salt
  • 30 grams of flour
  • 30 grams of sugar

That is how it goes:

  1. Using a hand mixer, beat the egg whites with the vanilla essence until fluffy but not too stiff.
  2. Sift the flour into the egg white mixture and also add salt and sugar. Whisk everything well until a liquid dough forms.
  3. Preheat the oven to 180°C.
  4. Grease a baking sheet and place teaspoonfuls of batter on it. Using the teaspoon, spread out the dough in a thin circle.
  5. Place the sheet in the hot oven for 3-5 minutes, until the edges of the cookies are brown.
  6. While still hot, remove the biscuits from the tray with a spatula. Now put a small folded sheet of paper with a motto on each biscuit and fold the biscuit loosely into a crescent.
  7. With a glass or mug rim, you give the fortune cookie its characteristic crease.
  8. Let the cookies cool and harden on a wire rack.
  9. Look forward to the surprised faces of family and friends on New Year’s Eve! 🙂

It’s bright orange and extremely juicy and delicious: we’re talking about pumpkin bread. But the autumn baked goods are rarely found in stores. So now it’s time to bake pumpkin bread!

You only need a few ingredients and a little patience to bake pumpkin bread, because the pastry is made from yeast dough. When it comes to choosing the type of pumpkin, the only limit is your imagination – we chose the Hokkaido pumpkin because it doesn’t even have to be peeled.

Bake pumpkin bread – healthy ingredients

Pumpkin bread not only scores points in terms of taste with its fluffy and juicy consistency and the slightly sweet and nutty aroma, the ingredients are also impressive thanks to good ingredients.

The wholemeal flour in the dough provides a good deal of fiber and B vitamins, while the pumpkin contains few calories (25 kilocalories per 100 grams) and plenty of beta-carotene, the plant-based precursor of vitamin A. Pumpkin seeds also score points with polyunsaturated fatty acids and iron.

Bake Pumpkin Bread

The ingredients for 1 pumpkin bread:

  • 450 g pumpkin of your choice (makes approx. 300 g pulp)
  • 500 g wholemeal spelled flour
  • 1 cube of yeast (42 g)
  • 1/2 tsp honey
  • 350 ml of lukewarm milk of your choice (e.g. goat milk, buttermilk)
  • 110 grams of butter
  • 1 tsp salt
  • 60 g pumpkin seeds

The preparation:

  1. Wash or peel the pumpkin, clean and cut into small cubes. Place the diced pumpkin in a saucepan, cover with water and cook covered for about ten minutes. Then drain, finely puree, and leave to cool.
  2. Meanwhile, put the flour in a bowl, make a well in it and crumble the yeast into the well. Mix the honey, milk, and some flour from the edges to form a pre-dough, cover, and leave to rise for 15 minutes in a warm, draft-free place. Melt 100 grams of butter.
  3. Add butter, salt, pumpkin puree, and 50 grams of pumpkin seeds to the pre-dough and knead everything into a smooth dough.
  4. Grease a loaf pan with the remaining butter and fill in the batter. Cover and let rise for another 15 minutes. Sprinkle the bread with the remaining pumpkin seeds and bake the pumpkin bread in a preheated oven at 200 °C (180 °C fan oven; gas: level 3) for approx. 60 minutes.

Coconut flour is gluten-free, high in fiber and low in carbohydrates. We explain what is important when baking with coconut flour and what you should pay attention to.

Coconut flour can be an alternative to wheat flour. Those with celiac disease and a sensitive digestive system will equally benefit from coconut flour. It is gluten-free, low-carb, high-fiber, low-fat and cholesterol-free. It is used in a variety of healthy recipes. For example in cakes, smoothies, sauces, soups, spreads and desserts.

To obtain coconut flour, the fresh flesh of the coconut is dried, de-oiled and then ground into flour. Since coconut flour has traveled a long way and the coconuts used are usually harvested and processed by hand, it is important that you use fair, organic products.

In most recipes you cannot substitute coconut flour 1:1. This is mainly because coconut flour is very absorbent. One option is to replace just a portion of the wheat or whole wheat flour with coconut flour. You can easily replace a quarter of the flour with coconut flour without having to change the rest of the recipe. But there are also ways to completely replace the flour.

A commonly mentioned variant is to add one egg for every 30 grams of coconut flour. Depending on the quantity, however, this can lead to a fairly high number of eggs, which unfortunately neutralizes the positive property of coconut flour to be low in cholesterol. Another option is to increase the liquid content. You have to add water, oil and (plant) milk accordingly until the dough has the desired consistency.

The easiest way is to look for recipes that are specifically tailored to use coconut flour. We show you how to bake delicious brownies with coconut flour.

Baking brownies with coconut flour: the ingredients

The brownies are not only gluten-free, but also vegan and sugar-free. This makes them ideal for a vegan or gluten-free diet. You need the following ingredients:
115 g ground almonds
30 g coconut flour
60 grams of cocoa powder
1 tbsp baking powder
140 g agave syrup
120 g vegetable margarine
7 tablespoons unsweetened applesauce

Bake brownies gluten-free

Mix almonds, coconut flour, cocoa powder, and baking powder in a bowl.
Mix the margarine and agave syrup together until the mixture is foamy.
Add the applesauce to the margarine and agave syrup while stirring.
Now stir in the dry ingredients.
Place the batter in a springform pan or on a small baking sheet.
Bake the whole thing at 175 °C top/bottom heat for about 40 minutes.
Let the cake cool down well and then cut it into pieces.

Bake grandma’s cookies vegan easily: Vegan visits are announced at Christmas time and all recipes contain animal ingredients? This is how you replace butter, egg, and milk in Christmas recipes.

Bake classic vegan cookies

Cinnamon stars, vanilla crescents, gingerbread… Grandma’s cookies are so delicious, but unfortunately not vegan. We will show you how you can enjoy the pre-Christmas period to the fullest and easily replace butter and co in the recipes. The list of sweet Weinach delicacies is long and when you think of the beguiling smell of cookies in the kitchen, the Christmas season can’t come quickly enough. But what to do if you want to do without animal products or are planning a vegan visit? The following tips will help you to replace butter and co easily and successfully.

Replace butter

You can simply replace butter with margarine or oil in many recipes. In the meantime, there are often vegan products with butter flavor in the supermarket, so the taste is hardly changed. If the consistency is crucial, it is best to use a plant-based butter alternative, such as Alan.

Replace egg

Vegans also do without eggs, as egg production is perceived as the exploitation of the hens and as unnatural. However, eggs belong in many cookies and cakes – you can easily exchange that for a vegan product. However, it depends on what kind of pastry is needed.

In cakes and stollen

Instead of an egg in the cake and stollen batter, you can use half a mashed banana or two tablespoons of applesauce. The applesauce is almost impossible to taste. Depending on your taste, you can decide in the vegan stollen, as in the original, whether you want to add lemon peel, raisins, and the like or rather leave them out. The recipe variations there are as varied as the tastes of the tasters.

In cookies

Seeds soaked in water are particularly good for replacing eggs in cookie dough, for example, linseed (1 tbsp seeds plus 3 tbsp water) or the trendy superfood chia seeds (1 tbsp seeds plus 3 tbsp water). Depending on the seeds, you can also get important omega-3 fatty acids, mucilage, linamarin, protein, and lecithin (linseed) or vitamin A, niacin, thiamine, riboflavin, and folic acid (chia seeds).

As whipped cream

Whipped egg white is probably the product that is the most difficult to replace, but that can also be done: aquafaba, the water from chickpea cans or jars, is the keyword here. Thanks to its high protein content, you can easily whip it up. At the latest after the addition of icing sugar and other delicious ingredients, there is no longer any taste of the legumes’ own taste.

Replace milk

Vegan milk alternatives are now available in every discounter. Soy milk and oat milk are the most common there, but try almond milk for your vegan Christmas treats (e.g. for marzipan pastries), and coconut milk if you want it to be a bit more exotic. But you can go there according to your personal taste and availability in your favorite supermarket.

Happy vegan baking

You can quickly and easily modify and bake any of your grandma’s favorite recipes for vegan food lovers and those who want to try something new. And with the thought of the scent of cinnamon and freshly grated orange peel, we wish you a lot of fun trying out and eating the vegan cookies and a contemplative (before) Christmas season!

Blind baking means that a dough is first pre-baked and then filled. Find out here what exactly blind baking is all about and how the baking technique works in the most resource-saving way possible.

If you plan to bake a (vegan) quiche, tart or pie, you may have to blind bake the dough first. This means that you pre-bake the dough without the filling. When baking blind, this is replaced by a “blind” filling made from dried legumes or uncooked rice. Blind baking is a baking technique that does two things:

The base will be crispy and not soggy when the moist filling is added afterwards.
The blind filling also stabilizes the edges of the dough so that they do not collapse.
You remove the “blind” filling after baking. Depending on the recipe, you can let the dough cool down completely before adding the right filling. Or you can put the filling in immediately and then continue baking the cake.

Bake blind: this is how it works

Blind baking only requires a few extra steps:
Roll out a dough, grease a baking pan and line it with the dough.
Poke the dough a few times with a fork. This way no air bubbles form during baking.
Place a piece of baking paper on the dough and then fill the dried legumes or uncooked rice into the baking pan. The “blind” filling ensures that the base of the dough is weighed down, no bubbles form and the edge of the dough stays in shape.
Put the dough and the filling in the oven for about 10 to 15 minutes.
Take the pre-baked dough out of the oven and remove the legumes and the parchment paper.
Now you can process the dough further:
Cold filling: If the dough has a filling that doesn’t need to be cooked, you can put the pre-baked dough back in the oven without the blind filling. This makes the base nice and crispy and gives it a golden yellow colour. Then let the base cool down before you put the right filling on top.
Warm Filling: Some fillings require cooking. So put them on the pre-baked base and finish baking the dough including the filling.

Sustainable blind baking: Here’s how

Save energy: You don’t need to preheat the oven when blind baking the dough. Preheating is usually only useful for very sensitive dough. Depending on the oven, it may take a different amount of time for the dough to pre-bake. So make sure that your dough doesn’t get too dark during blind baking. Also, use the time that the dough is blind-baked and prepare the filling in the meantime.
Reuse: You can use the baking paper several times. You can also use the legumes more often for blind baking. Just let them cool and store them in a screw-top jar. Label them as baking legumes appropriately, because you shouldn’t cook them after they’re baked. Incidentally, special blind baking balls are also available in stores, which you can use as often as you like.

What could be more delicious than a nice piece of fresh bread? We Germans can call ourselves quite spoiled in this respect: where else can you find so much choice of different types of bread? But baking your own bread with a bread maker is also becoming increasingly popular.

It doesn’t matter whether it’s wheat or mixed wheat, grain, spelled or pure rye bread. There is the right bread for every taste. And if you want to bake your own bread, that’s no problem either. Because now baking with a bread maker has become very easy. But which model is really good?

Bake your own bread with lots of options

The first people to bake bread were the Egyptians. And even today, the number of people who now bake their own bread is increasing. Interested people exchange tips and recipes on social networks. The trend towards baking bread yourself is becoming increasingly popular. There are also more and more shops and online providers that offer a wide range of accessories for baking bread. Consequently, we will show you three variants of how you can make your own bread. You will also learn about the advantages of a bread maker.

1) Simply bake bread in the oven

If you want to make your own bread, you can easily get a baking mix from the supermarket. Then you can bake them in the oven according to the instructions and in a loaf pan. But if you’d like to have it customized and don’t want to use ready mixes, you can now find many different recipes for bread on the internet. Like the following video. In addition, also note our tips for storing bread and rolls correctly.

2) Delicious bread from the stone oven

Some even go so far as to buy a special stone oven (usually outside for the garden or terrace) in order to be able to prepare their bread or pizza in a particularly stylish way. In the long run, you not only have tasty and fresh bread, but it is often cheaper to make it yourself than at the bakery. And if you sometimes wonder where to put all the bread, read our tips on freezing and baking bread.

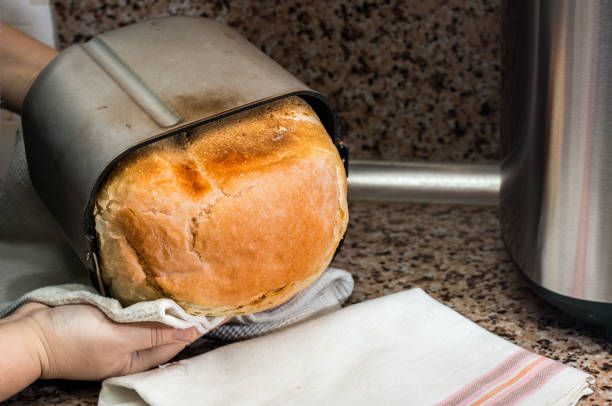
3) Bake your own bread with the bread maker

The bread maker, also known as the bread maker, does a good job. Because with it you can easily bake your own bread. In addition, you know what is in your bread and it is always fresh. For many who regularly bake their own bread, the bread maker has become an integral part of the kitchen. And there are good reasons for that, for example, it can reduce energy consumption and consequently you can save electricity.

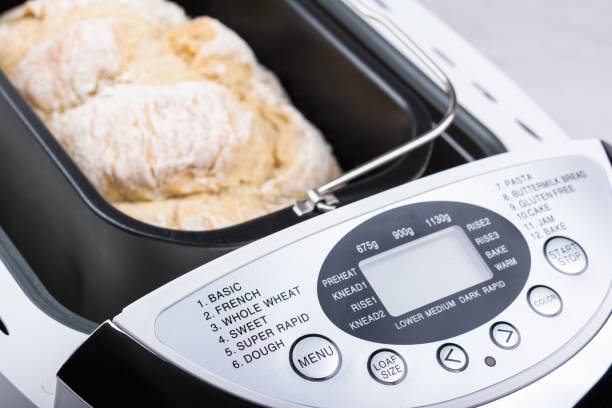
How does baking work with a bread maker?

Since making your own bread with a bread maker is much easier and faster, the modern models are very popular in the home. The desired ingredients are filled into the integrated baking mold of the machines. In the middle of this baking pan is a dough hook, which then mixes the ingredients into a dough. The necessary resting time for the dough is also regulated automatically. Then the required baking process takes place. Depending on the quality of the device, you can adjust the degree of browning differently. Some appliances even have a timer function that you can use to program the start of baking. Also, note our basic recipe for gluten-free bread.

The best bread makers from the internet

The advantages show that purchasing a bread maker is worthwhile. But which one is right for you? We have the following a selection of the three best baking machines:

The all-rounder Panasonic bread maker

This bread maker comes with several useful components. These include measuring cups, measuring spoons, baking pans, and much more. You can use this to bake bread of different sizes and set any degree of browning. In addition, this device has a timer function and is easy to use.

Price-performance winner Unold bread maker

This model is not only convincing with its design. With this machine for baking bread yourself, you can use many different programs and sometimes make jam or pasta dough. You can also set the degree of browning and pre-program the baking time. It is also a device with a viewing window and is suitable for gluten-free bread. And last but not least, this bread maker is reasonably priced.

WMF Kult X bread maker for lovers

Anyone who knows WMF appreciates the quality. It’s the same with this bread maker. Because it has 12 different programs and a timer function for fresh bread in the morning. You can also use this to set three degrees of browning and keep your bread warm for 60 minutes. In addition, it convinces with its low wattage of 450 and is, therefore, a little more environmentally friendly than the other models.

Advantages of the bread maker for the home

Many wonders if a bread maker is even necessary. Because it is another device that takes up space in the kitchen. And yet the purchase of a baking machine can be worthwhile. Consequently, we have collected the most important advantages over baking bread yourself in the oven and bought bread for you. In addition, note our tips for healthy baking.

  • The bread is always fresh, unlike store-bought bread. And if you love your breakfast bread, you can taste the difference between homemade and ready-made bread.
  • Homemade bread contains no unknown ingredients and additives. Bread often contains additives that are supposed to make it last longer.
  • The production takes place according to individual taste. Consequently, you can add your favorite spices or delicious pumpkin seeds.
  • Making bread is faster and easier with a bread maker. This means less effort is required and you save time.
  • Baking with a bread maker is cheaper. The purchase is a bit expensive, but the long service life of the devices ensures that baking yourself is worth the price.
  • The bread-making does not need to be supervised. This means you can do other important things without having to constantly check the baking process.
  • The bread maker is environmentally friendly and economical to use. Because it requires less energy than your oven and you save energy costs.
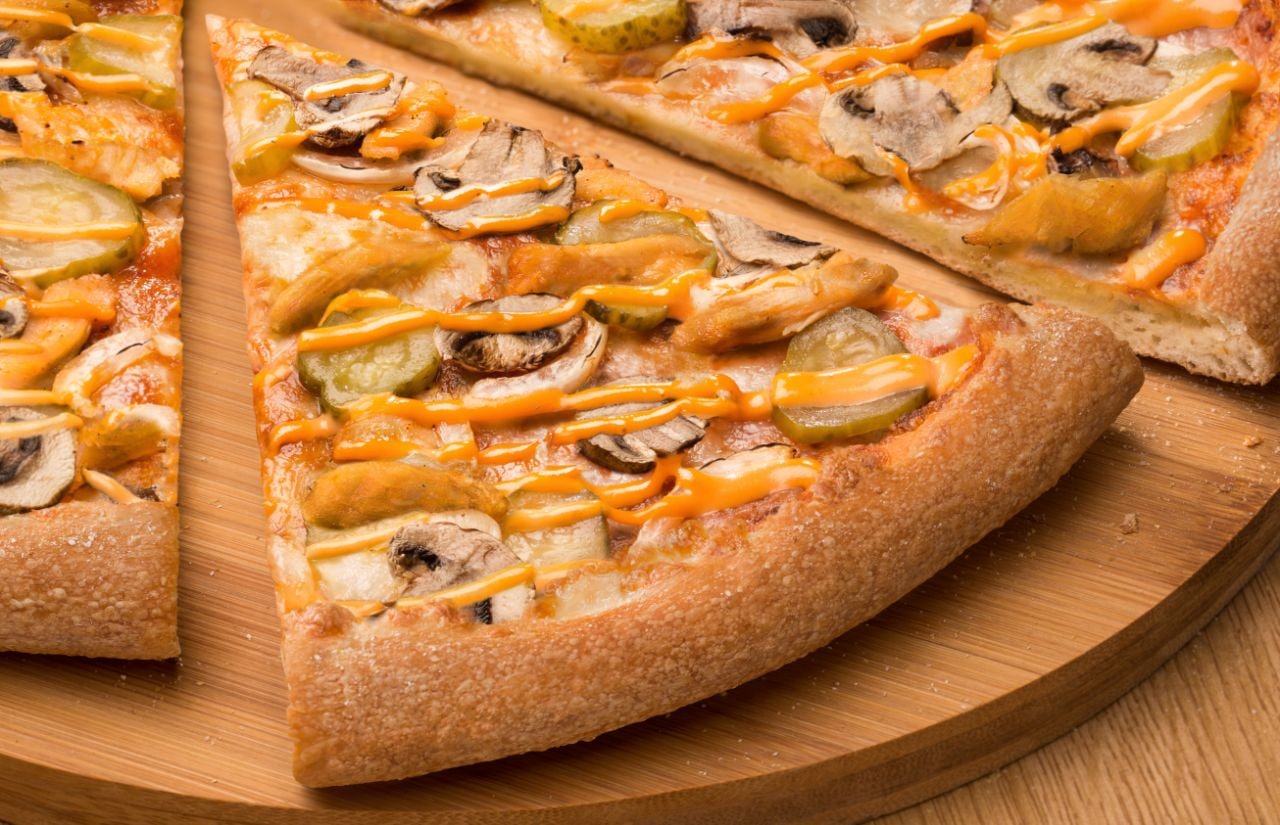
  • Used to make different types of dough. So you can also use it to make your pizza dough or dough for cakes.
  • The baking temperature can be optimally regulated. As a result, you don’t run the risk of the bread drying out.

Have you announced a spontaneous visit for “afternoon coffee” again? While making coffee is not a big challenge, preparing a delicious cake is a bigger challenge. After all, the end result should not only taste good but also be visually convincing. Now use simple recipes to bake cakes quickly.

Bake a cake quickly

It can happen that spontaneous visitors announce themselves. Then you rarely have time for unusual and exotic recipes. In addition, you usually only have the basic ingredients for cakes in the household. But who doesn’t want to offer their guests more than a few biscuits? So that you and your visitors can eat delicious cake, we have put together simple and popular recipes and give tips on how to spice up your cake. Because grandma’s cakes are back in fashion. In addition, note our tips for an affordable fruit cake.

1) The classic: crumble cake from the tin

To bake a cake quickly, you can choose the classic crumble cake. Because this is quite easy to prepare and it tastes good to many. In addition, it can be easily produced in large quantities on sheet metal. To do this, proceed as follows (take the ingredients from the table):

  • Preheat the oven to 200°C and line a baking tray with baking paper.
  • Knead the ingredients for the crust together and roll out the part on the baking sheet.
  • Then pierce the ground with a fork. Pay attention to regular intervals.
  • Then spread the bottom with jam.
  • Knead the ingredients for the crumble together and sprinkle over the jam.
  • Then bake the crumble cake for about 15 minutes in the preheated oven.

2) Quickly prepare a sponge cake

You can also prepare a classic sponge cake for spontaneous visitors. Because this is very uncomplicated and can be spiced up as you wish. So you can certainly impress your guests. All you need are the ingredients below.

And this is how it works: To bake a cake quickly, first, stir the butter with the sugar and eggs until fluffy, and then add the baking soda, cinnamon, cocoa powder, and rum. Then mix everything with flour and yogurt. Then chop the chocolate into pieces and mix them in as well. Finally, put the dough in a loaf pan and bake the sponge cake at 200 °C for about 35 minutes. A quick cherry cake from the tin also tastes good.

Ingredients for a sponge cake

  • 125 grams of butter
  • two eggs
  • 1.5 cups of sugar
  • 1 tsp baking soda
  • a little cinnamon
  • 2 cups flour
  • 1 tbsp cocoa (powder)
  • 1 cup of yogurt
  • ½ bar of chocolate (preferably whole milk)
  • depending on your taste maybe a little rum

3) Bake a vegan cake quickly

The tastes and food preferences of your visitors can vary greatly. If your visitor eats vegan, you should consider that. But don’t panic! Because you can quickly and easily make a moist vegan chocolate cake with just a few ingredients. Use the following ingredients for this. All you have to do is mix them together. Then put the dough in a greased form and let the whole thing bake for about 35 – 40 minutes at 180 top and bottom heat. Then you can decorate it with a chocolate glaze and fresh fruit. Or how about classic powdered sugar?

Ingredients for vegan chocolate cake

  • 200 grams of flour
  • 35 g baking cocoa
  • 180 grams of sugar
  • 1 tsp vanilla extract
  • half a pack of baking powder
  • 240ml water
  • 100 ml sunflower oil

Incidentally, the trend toward “healthy snacking” is unbroken. Accordingly, it can be worthwhile for many simple recipes to bake completely without eggs, sugar, or flour. Because the market now offers many replacement items. In addition, also note tips for grandma’s classic plum apple cake.