Tag

baking

Browsing

Instructions and tips for choosing the right baking pan for cakes. The cake is still one of the most popular delicacies: There are plenty of delicious recipes for the most diverse types of cake. What many people forget, however, is that it’s not just the recipe that counts, but also the right baking pan.

Choose the baking dish according to the recipe

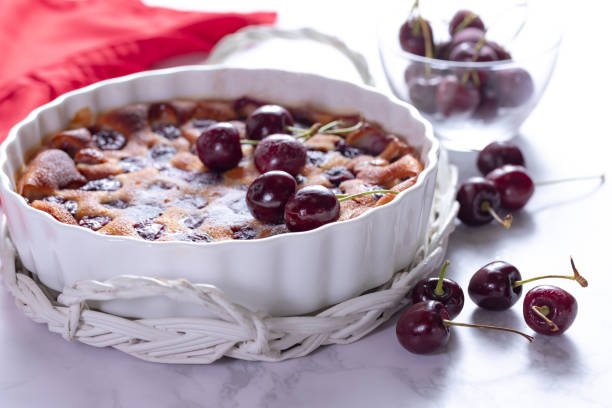
When baking, it’s not just about the right recipe, but also the right cake pan. This is determined by the baking mold and there are many different ones: silicone baking molds and sheet metal molds made of various metals, with and without a special coating.

There are also ordinary standard forms, as well as very complex motif baking forms. And in a wide variety of sizes. Not only the material is fundamentally different, but actually also the later cake form. Therefore, think about which cake recipe is used to find the right shape. For an affordable canned fruit cake, you can use a baking sheet or round springform pan. These molds are also ideal for grandma’s simple plum apple cake. While other cakes cry out for more unusual shapes.

Know-how of the right baking pan

But which form of buck is the right one for the individual? Every baker and every hobby baker has its own preferences and requirements. This applies to the taste of the cake, but clearly also to the texture of the baking pan.

For example, I prefer silicone baking pans, but my sister-in-law has always sworn by metal baking pans with a high-quality enamel coating. So far we have tried both variants – always with good and less good results. In order to be able to make an individual choice, you should take a closer look at the properties, advantages, and disadvantages of each type of baking pan.

Silicone or metal? With or without coating?

As mentioned, my favorite is the silicone baking pan. Molds made of silicone are very flexible and heat-resistant and there is no need for annoying greasing beforehand and then attaching cardboard afterward. After baking, the finished cake can almost always be removed from the mold easily and without much effort – and above all without unsightly crumbling. In addition, silicone can be used not only in the oven but also in the refrigerator. Today, however, this also applies to many sheet metal shapes.

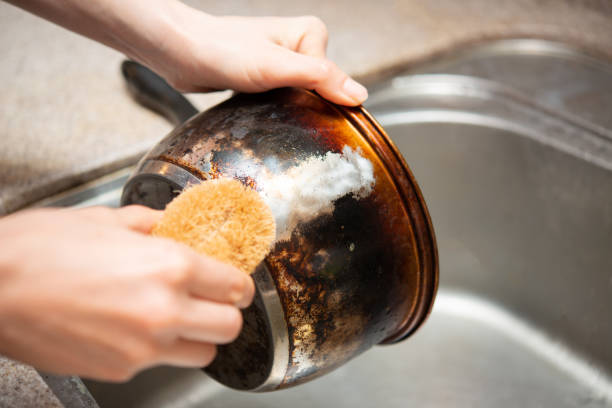
Metal baking molds, on the other hand, are a lot more robust than silicone baking molds. They wear out slower and last a lot longer than a silicone cake pan. Here, however, the quality of the individual mold is very important – the lifespan of the baking mold can therefore vary greatly. But that doesn’t have to mean that a cheap baking pan has to be a bad one. When buying, simply check the workmanship, the impression of the material, and possible seams or transitions. With the right care, you can conjure up delicious cakes and tarts even with a cheap baking pan and you will enjoy them for a long time.

By the way, if the dough sticks to the mold despite everything, it often helps to simply put the still lukewarm mold in the fridge or on the cool balcony for a few minutes. In my experience, a wet towel wrapped around the mold only helps to a limited extent and only with a metal mold.

Which baking pan and which cake go together?

Finally, the question arises as to which baking pan is the right one for which cake. Here, too, there are numerous variants, motifs, and types of sheet metal. My children love playful shapes for their birthday cakes, but these are really only suitable for very simple and dry types of cake: for example marble, chocolate, or sand cakes. Unfortunately, sensitive and rather sticky types of dough quickly stick to the “details” of a motif mold – even if it is very well greased or made of high-quality silicone.

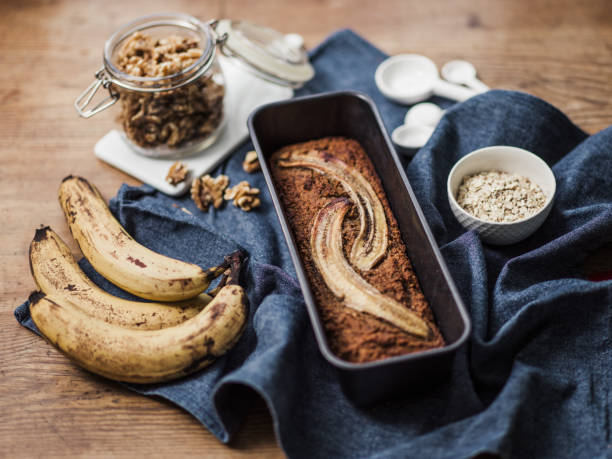
The commercially available standard forms are somewhat less complicated: springform tins, baking trays, and loaf tins. Incidentally, cool and fresh fruit tarts are best baked in springform pans, warm fruit cakes on a baking tray or also in a springform pan, and sand or bundt cakes in a Gugelhupf or loaf pan.

Potash is a traditional baking ingredient for Christmas cookies. The raising agent ensures that even heavy dough rises and becomes fluffy despite nuts, honey and fruit. Here you can find out how to use potash for baking.

Honey, nuts, and dried fruit can make dough heavy. Potash is often used here: It is a special raising agent that has a very special effect. In contrast to yeast and sourdough, which allow dough to rise, dough made with potash is wider and slightly looser.

Potash: ingredients of the leavening agent

Potash is potassium carbonate (potassium salts of carbonic acid). As a baking ingredient and as a raising agent, it is also referred to as potassium carbonate and has the E number E 501. The food additive is permitted without maximum quantity restrictions and is tasteless and odorless.

In the run-up to Christmas, potash is available in almost all supermarkets and at Christmas markets. You rarely find them there outside of the Christmas season. But potash is usually also available in pharmacies.

Using Potash: Tips for Baking

Potash is a baking ingredient with a long tradition: it has been used for centuries as a leavening and loosening agent, for example in ginger nuts, honey cake, various types of cookies and gingerbread.

Gingerbread in particular benefits from the special effect of potash: If you want to process gingerbread into a gingerbread house, the individual “components” must not be too thick. Rather, they should be broader. Make sure, however, that you leave enough space between the gingerbread and a generous distance from the edge of the baking sheet. Of course, this also applies to cookies and other pastries that you bake with potash.

More tips for baking with potash:
Dissolve potash in some liquid (water, milk, egg) before adding it to the dough. As with cornstarch, the driving force also unfolds optimally with potash.
Do not store potash with other spices. The powder absorbs other smells and flavors very easily.
Potash has a very long shelf life after opening. Outside of the Christmas season, you can also use it for other cookies and cakes that you don’t want to rise.
Together with deer horn salt, another raising agent used in Christmas baking, potash gives honey cake and gingerbread their typical, spicy taste. If you use potash together with staghorn salt, dissolve both substances separately and work them into the dough one at a time.
Dough with potash can be left at room temperature for up to two days. This is particularly recommended for heavy dough such as honey cake dough. Unlike baking powder, potash does not lose its raising power when exposed to humidity.

Cleaning the baking tray with home remedies does not necessarily have to involve a lot of work. Food leftovers and burnt-in grease stains are not uncommon and can interfere with baking. After baking, dirt often appears that needs to be removed. Kitchen cleaning tips will make cleaning easier for you.

With the help of the baking tray, you can not only heat up pizza, but you can also conjure up delicious dishes. After baking, however, soiling occurs that must be removed quickly. Our tips will tell you how you can clean your baking sheet with various home remedies and water.

1) Clean sheet with soda and hot water

For example, the first variant is to use soda in combination with hot water. Soda actually means sodium carbonate. As mentioned above, hot water is used more often, only the tools vary. In this case, soda is taken to the rescue. Soda becomes strong lye when combined with hot water. The strong lye can be used to combat incrustations. However, soda should be used, which contains a larger amount of sodium. Mix 2-3 teaspoons with hot water, spray the lye on the crusts, after a few hours remove everything and rinse with clean water.

2) Cleaning the baking sheet with salt

Our second tip for cleaning is salt, by the way, salt can even be used to remove rust from pans and baking trays. Rinsing is particularly easy if half a pack of commercial salt is used. After opening the package, the salt is spread on the crusty sheet. It is important that all affected areas are covered. The baking tray is then pushed back into the oven. The temperature should be set to around 50 degrees so that the salt can loosen the incrustations. After about 30 to 60 minutes, the tray can be removed again. The salt should then have a brownish tone. Now the baking tray can be easily cleaned. Both salt and crusts come off easily.

3) Use of dishwasher tabs

Another helpful trick is to use dishwasher tabs. Alternatively, you can also use a denture cleaner tab. First, cover the dirty sheet with hot water and a tab. The tab will start to dissolve. For more foam or more stubborn stains, we recommend additional tabs. After about an hour of exposure, the sponge is used. With it, you can now loosen the incrustations more easily. From time to time it can happen that certain areas are still crusted. For this purpose, part of the hot residual water is poured out. in addition, now use a new tab to rub lightly over the remaining incrustations until everything is clean.

4) Baking soda against dirty sheet metal

There is also the option of cleaning with baking soda. Baking powder has proven to be a good household remedy for cleaning baking trays. Here, too, hot water is first poured onto the baking sheet. Then you pour in a pack of baking soda and let the mixture work. You can then wipe the sheet metal with a sponge. For more stubborn dirt, instead of one pack, put three to four packs in a bowl together with water and some vinegar and mix everything to form a paste. The paste works best on the dirt all night so that you can simply rinse it off with water the next day.

5) Baking soda as a deterrent

Furthermore, baking soda is a way to clean a baking sheet with home remedies. Baking soda is actually sodium bicarbonate. Put 50g of baking soda on the baking sheet with some sparkling water and put it in the oven at 100 degrees Celsius. After 20 minutes the water will have evaporated and you can remove the tray to cool. You can use a sponge to remove the baking soda and dirt from the pan. In addition, another advantage develops from the use of baking soda in the oven. The oven can also be cleaned with evaporating water. Baking soda has a basic effect and can dissolve incrustations. You can buy it at the supermarket or pharmacy.

Baking alkaline bread is not difficult and does not take long. We present three recipes with which you can bake the healthy and low-acid bread in your kitchen.

Alkaline bread differs from conventional bread in the way it is made: For alkaline bread, the grain must first begin to germinate before it is crushed. The baking result most closely resembles crispbread. Basic bread is said to prevent an overly acidic diet. However, this has not yet been scientifically proven.

The big advantage is rather that with basic bread you do without unhealthy foods such as white flour or sugar.

Alkaline bread can consist not only of germinated (!) grain, but also of germinated oilseeds such as pumpkin seeds or sesame. In addition to herbs and spices, fruit and vegetables can also be part of alkaline bread. This works for example with bananas, zucchini and celery.

We recommend that you use organic food from regional suppliers for the following recipes. In this way you can support food with a low transport distance and a good carbon footprint.

Bake basic bread: Recipe for buckwheat bread

The first recipe is for a basic bread with grains. You can prepare it with chia seeds or alternatively with sunflower seeds or sesame:

You need these ingredients for a buckwheat bread:

500 grams of buckwheat flour
2 tbsp chia seeds
120 grams of buckwheat
100 g pumpkin seeds
3 tsp honey
450ml + 440ml + 400ml water
50 g amaranth
3 tsp sea salt
some olive oil
You should start preparing your basic buckwheat bread the day before:

Soak the buckwheat and pumpkin seeds in a glass of water in the morning. Use about 440 milliliters, twice as much water as seeds. Then let them dry overnight. The best way to do this is to spread the seeds out on a baking sheet lined with baking paper and place them on the heater.
Soak the chia seeds in a glass filled with water overnight. The chia seeds should be completely covered with water. Use about 400 milliliters of water for this.
Preparation:

Puree the buckwheat grains and pumpkin seeds in a blender and then set them aside for a moment.
Blend the soaked chia seeds and water again in the blender.
Now put the chia seeds, buckwheat, pumpkin seeds, honey, water, sea salt and amaranth in a bowl and stir vigorously with the buckwheat flour.
Spread the batter on a greased baking sheet.
Let the basic bread dry in the oven at around 40 degrees for eight hours.
Turn the bread and let it dry for another eight hours, then it will have the right consistency.
Tip: If you like, you can sprinkle your bread dough with sunflower seeds or sesame seeds before you put it in the oven.

Baking basic bread: A sweet variant

You can bake sweet basic bread with the help of fruit, sweet spices and nuts. How about a sunflower seed bread with banana and cinnamon?

You need these ingredients:

500 g wholemeal flour
100 g sunflower seeds
150 grams of flaxseed
1 liter of water
1 banana
3 tsp honey
3 tsp vanilla
3 tsp cinnamon
some sunflower oil
How to prepare this basic bread:

Fill a jar with 1 liter of water and let the sunflower seeds and flax seeds soak in it overnight.
Then let the seeds dry for a few hours without the water.
Puree the dried sunflower seeds and flaxseeds.
Peel the banana and cut it into small pieces.
Put the banana, honey, vanilla and cinnamon in the blender and blend until smooth.
Mix the seeds, the mixture from the mixer and the whole wheat flour.
Spread the batter on a greased baking sheet.
Let the basic bread dry in the oven at around 40 degrees for eight hours.
Turn the bread and let it dry for another eight hours, then it will have the right consistency.

Tips for removing rust from the baking sheet or from the rusty pan. With natural home remedies, you can remove the rust without any chemicals and save cleverly. There are also tricks to avoid rust.

After a while, it can happen that rust spreads in the baking tray or in your favorite pan. But throwing it away is not an option. Instead, you can easily remove the rust with simple home remedies and help your baking tray and pan to shine again.

How is rust formed?

Rust is formed by the reaction of iron and oxygen in combination with water. Thus, rust is corrosion caused by the chemical process of oxidation. Steel or iron objects, in particular, can be affected by this slow destruction. Therefore, the question often arises as to how these objects can be rust-free. In the following, we will show you how to remove the rust from your baking sheet and pans.

1) Remove the grate from the baking sheet

The baking tray is often affected by rust and dirt. Cleaning the baking sheet is usually an unpleasant task. But simple home remedies for cleaning the baking sheet will help you to eliminate the problem. In the following, we will show you how you can remove the rust from your baking sheet quickly and effectively.

Tomato juice against rust

A little-known home remedy for rust is tomato juice. Similar to the vinegar, you need to spread the tomato juice on the baking sheet. Or put some of the juice on an old sponge and use it to rub away the rust stains. Here, too, it may be necessary to let the tomato juice take effect. So you can easily remove the stubborn rust.

Clean the baking sheet with salt and oil

Using salt as a home remedy is popular. And not just when cooking! You can also use it to remove the rust from your baking sheet. To do this, rub the tin with salt. Then rub in an oil-soaked cloth or old bacon and leave to take effect. Then clean and polish again with a new, damp cloth. If you have a lot of rust spots or patches of rust, you should repeat the process several times.

Remove vinegar and oil to rust

To remove rust, the use of all-rounder vinegar has also proven itself. This makes removing the grate from the baking tray child’s play. To do this, mix vinegar and oil in a ratio of 1 to 1. Then rub the baking sheet with it and let it work in briefly if necessary. Finally, grate the mixture, removing the rust as you go.

Cola as a home remedy for rust

Just as often one reads on the internet about removing baking tray rust with cola as a home remedy. And indeed it works because the cola contains phosphoric acid. Consequently, you can dampen a sponge with coke and then rub the affected areas with it. Or put the cola on your baking sheet and let it soak in. Finally, you can easily remove the rust. Also, read how to clean clogged pipes with coke.

2) Remove rust from the pan

You can remove rust with simple means. Whether from the cast iron pans, frying pans, or other kitchen accessories. It’s a tedious task, but there’s no way around it. And with the right tricks for cleaning the pans, it’s a lot easier.

Use baking powder and baking soda

For thorough rust removal in frying pans, use the home remedy baking soda or the miracle cure baking powder. To do this, mix 2-3 packets of baking powder or baking soda with two tablespoons of vinegar to a paste. Then spread this on the pan surface and let it work for a few minutes or overnight. Finally, rinse the grate with hot water. Or use a brush to scrub. The brush should not be a steel or metal brush. In the case of very stubborn rust, you can also use dishwashing detergent. Can also be used on the baking tray.

Soak in vinegar

Not only can you use vinegar to clean coated pans, but you can also remove rust. If you have a rusty steel pan, you can soak it in vinegar and then gently brush it with a steel sponge. You can see how well this method works in the video below. You should then sear the pan. Also, note our tips for removing rust from cutlery and crockery.

Potato and salt method

If you want to remove the rust from your pan, put a good amount of salt in the pan. Then cut a large potato in half. Now you can rub the salt in the pan with the cut potato side. You can rub vigorously in circular movements. As a result, you should be able to remove the rust from the pan. Several repetitions may be necessary. Also, note our other tips for using potatoes.

Remove citric acid to rust

You can also treat your rusty pan with effective lemon juice and lukewarm water. In the case of heavy rust, you should let the pan soak in this mixture. After the exposure time, you can rinse the pan with hot water and, if necessary, rub it down properly with a sponge. If your pan has only a few rust spots, it is sufficient to apply the mixture with a sponge and rub off the rust spots. Citric acid is also suitable for removing rust stains from clothing.

Vegans don’t always have it easy when it comes to baked goods. Because even if some bakeries now offer vegan alternatives, many cakes, biscuits and even breads still contain animal products such as butter and eggs. So how about just baking it yourself? This article will show you exactly how vegan baking works and what to look out for.

Why bake vegan at all? Being vegan means consistently avoiding products of animal origin. According to statista.de, more than 1.13 million people in Germany now live vegan – and the trend is still rising.

While a large number of meat substitutes and milk substitutes have long since found their way onto supermarket shelves, vegan baked goods are still the exception rather than the rule. Vegan baking is actually quite easy, is neither more complicated nor more expensive than traditional baking and the results are just as delicious. So why not just do it yourself?

Baking Vegan: Tips & Tricks

It doesn’t matter whether you’ve been vegan for a long time, want to please vegans in your circle of acquaintances or simply want to try out vegan baking recipes – with our tips you can make your favorite baked goods without animal products.

Rely on vegetable fats: Butter is a dairy product – and therefore taboo in vegan baking. Instead, use purely vegetable, preferably palm oil-free (organic) margarine. Of course you can also use oils. The following applies: 100 grams of margarine are replaced with 75 to 80 milliliters of oil (e.g. rapeseed or sunflower oil). Nut butter, such as almond butter, is also an interesting alternative to conventional butter – make sure you use organic and fair trade quality. If you want to improve your ecological balance and save calories at the same time, simply replace 100 grams of butter with a mixture of 120 grams of oat yoghurt and a tablespoon of semolina. Another option is to make your own vegan butter.

Egg substitute instead of eggs: In traditional baked goods, eggs are used to bind the dough better. As you will quickly find out when baking vegan, this is often not absolutely necessary. If you still want to use an egg substitute, you can buy one in most organic stores and some supermarkets – or you can simply make your own egg substitute using simple ingredients that you probably have at home anyway: banana , applesauce or flaxseed can effectively replace eggs in baking. Read more: Make your own egg substitute: 6 ideas for vegan eggs
Plant-based drinks instead of cow’s milk: plant-based milk alternatives have long been found in every supermarket and most drugstores, often even in organic quality. Depending on what you’re baking, cow’s milk can usually be easily substituted one-to-one with milk alternatives such as oat milk, soy milk, or almond milk.
Plant-based cream: Plant-based cream substitutes can also be found in most supermarkets, for example based on oats, soy or rice. Alternatively, you can easily make vegan cream yourself. More on this: Vegan Cream: Recommended Alternatives
Aquafaba instead of egg whites: There are some baking recipes that use egg whites. This is the case, for example, with biscuit doughs. But there is also a vegan variant here: aquafaba. Aquafaba is the soaking liquid from chickpeas and beans. Aquafaba is whipped into the perfect vegan egg whites and is even suitable for mousse au chocolat.

Baking with vegan chocolate: What would chocolate chip cookies be without delicious pieces of chocolate in the batter? In general, many dark chocolates are vegan by nature, although you should pay close attention to the list of ingredients. Those who value sustainability and fair production conditions should choose organic and fair trade chocolate. In the (organic) supermarket you will also find vegan white chocolate and purely plant-based “milk” chocolate with different cocoa contents.
Agar-agar instead of gelatine: Anyone who bakes fruit cakes sometimes seals the fruit layer with a gelatine-based icing. However, since gelatine consists of animal bone and cartilage residues, among other things, this is not an option for vegan baking. Instead, you simply replace the gelatine with agar-agar, a purely vegetable powder made from red and blue-green algae. Here too, pay attention to organic quality in order to get a residue-free product. More on this: Gelatin substitute: vegan plant-based alternatives

What else should you keep in mind when baking vegan?

To ensure that the cruelty-free baked goods are 100 percent successful, you should not overdo it when mixing the ingredients, otherwise a vegan dough can quickly lose consistency and become tough. So sometimes it can be worth using the whisk, spatula or fork instead of the food processor to mix the ingredients.

Depending on the type of oven, your vegan pastries may also cook faster than traditional recipes state. It is best to set the timer 15 minutes before the regular end of the baking time to make sure that cakes, biscuits, rolls and the like do not become too crispy.

Incidentally, when baking bread and rolls, most recipes are already vegan – or can be veganized quickly. Instead of the honey used in some bread recipes, you can use some organic sugar beet syrup, for example, and replace the quark in quark rolls with vegan organic soy quark. Buttermilk is easily replaced with a plant-based milk alternative with a dash of vinegar.

Is Vegan Baking Healthier?

You can decide for yourself how healthy your vegan baked goods will be. For example, if you use whole grain instead of white flour and at least partially replace the sugar content in sweets with low-calorie sugar alternatives such as organic erythritol, you can definitely produce healthier baked goods.

In general, the major health benefit of vegan baking is that purely plant-based ingredients are virtually cholesterol-free, while animal products such as eggs, milk and butter contain a lot of saturated fatty acids and trans fats. With high and regular consumption, these can promote heart and vascular diseases.

Vegan is not always sustainable

While vegan ingredients are always free of animal components, they are not always sustainable, since some of the products have extremely long transport routes to the local shops (e.g. coconut oil, cocoa, chia seeds, Agr-agar) or come from conventional cultivation and are therefore are not free from environmentally harmful pesticides.

If you also want to implement the topic of sustainability in baking, you should therefore rely on fairly traded organic products and prefer regional and seasonal ingredients.

Veganized Recipes vs. Vegan Recipes

Veganized recipes are conventional recipes that are made with purely plant-based ingredients instead of the traditional ingredients. This is particularly recommended for vegan baking beginners and for everyone who would like to recreate the taste of baked goods they love. For example, have you ever baked vegan cheesecake, apple pie, vegan biscuits or purely plant-based stollen yourself? It’s easier than you might think – and the taste is in no way inferior to the original recipes.

Of course, vegan baking is also possible with a variety of more experimental, vegan recipes in which sugar is replaced with dates, for example, and unusual types of flour such as lupine, almond or coconut flour are used. These recipes are not replicas of well-known originals, but developed vegan from the outset and represent their own category. They therefore offer a less comparable, but precisely because of this, interesting taste experience. They are often all about “Clean Baking”. Due to the often exotic ingredients, you should pay close attention to the origin and, if possible, prefer regional products.

There are different types of margarine from full-fat to half-fat margarine. Not all varieties are suitable for cooking or baking. Therefore we have an overview of varieties and uses for you

What types of margarine are there?

Margarine is often used as a good alternative to butter. But margarine is not just margarine, because there are different types. These usually differ in their fat content and the spectrum ranges from full fat – to half-fat margarine and more. Accordingly, different types of margarine are suitable for different purposes.

Use half-fat margarine as spread fat

Half-fat margarine has about half the fat. For this purpose, the margarine is produced chemically modified and water is added for the missing fat. Therefore, low-fat margarine is only suitable as a spread, e.g. for people who want to lose weight in a healthy way, but do not want to do without their beloved butter. However, half-fat margarine is not an alternative to baking or cooking.

Use margarine for cooking and baking

If you want to cook or bake, be sure to use margarine instead of low-fat margarine. Because half-fat margarine does not dissolve like butter when heated, but flakes and separates into its chemical components. In addition, the high water content ensures that it splashes when frying. Consequently, those with half the fat content are completely unsuitable, especially for greasing when baking or as a substitute for butter in the frying pan. Consequently, use butter or full-fat margarine when baking cakes or cookies. The same applies to cooking.

Baking cookies with children is always a good activity. And especially in the run-up to Christmas, this is a popular activity before the festival. So that baking cookie is stress-free, we have simple recipe ideas and tips that you should consider when baking together.

Baking together at Christmas time

Trying out different recipes, creating creative decorations and surprising friends and relatives with the delicacies is the epitome of a contemplative and loving time. Children also like to help their parents with baking and designing. From simple butter biscuits with sugar icing to Linzer eyes and hussar donuts with jam to marzipan potatoes and vanilla crescents, there is a recipe to suit every taste.

What cookies to bake with children?

However, some cookies are too big a challenge for children’s hands. A good example is Linzer Augen, where the individual layers of pastry have to be rolled out so thinly that cutting them out and handling them after baking requires great care. If the cookies keep breaking, frustration is inevitable. So think carefully about which cookies you can bake together. As a result, you prevent mishaps like cracking cookies or cake batter collapsing. The following recipes are also suitable for baking cookies with children and ensure fun in the kitchen:

  • shortbread,
  • wintry cookies,
  • butter cookies, and also vanilla crescents.

What tasks do children take on when baking cookies?

In some families, the mother and father take care of baking the cookies and only ask their children to help decorate them. What can definitely save time, however, takes away the opportunity for children to try things out for themselves and make new experiences. It is therefore best to plan enough time for baking when planning the weekend and to involve your children in the baking process from start to finish.

Depending on their age, children can then take on tasks as if they were under the supervision of their parents. Incidentally, children learn here that they can achieve great things themselves, which in turn strengthens their self-confidence. Because if your children not only decorate the cookies but also knead, shape, and bake them, they will be “proud as Bolle” at kindergarten age. Consequently, let them take over these tasks when baking cookies:

  • weighing ingredients,
  • kneading dough,
  • forming balls, croissants, or cookies
  • as well as cutting out and decorating the biscuits.

Observe hygiene when baking cookies

Good hygiene in the household should be a matter of course when preparing food. It is therefore important to teach children to maintain a certain level of cleanliness when baking cookies. You should make sure that you wash your hands properly before you start. This will get rid of bacteria and dirt. In addition, you should plan short hand washing cycles in between. Children in particular touch other things at work or put their fingers in their mouths.

that dough should only be touched with clean fingers. For this reason, washing your hands before baking is an absolute must. Here, any bacteria and dirt are rinsed off the fingers and do not come into contact with the cookies and dough. In addition, the following hygiene rules should be observed when baking cookies with children:

  • Children with a cold should not help or you will postpone baking the cookies. Then the risk of pathogens coming into contact with dough and cookies when you sneeze or cough is lower.
  • Raw eggs are a source of danger. Salmonella or other pathogens can adhere to the shell, which is why children should not eat raw dough. Or you can use a dough without eggs and a vegan egg substitute.

Bake delicious Christmas cookies

When the cold season begins, the anticipation of the Christmas season is great. Then gifts are bought, apartments and streets are decorated for Christmas and the Christmas tree is decorated. And special dishes are also prepared for the traditional festival. At Christmas, delicious and sweet foods such as gingerbread, chocolate cake, delicious biscuits, and cookies are very popular. These are not only served with a delicious Christmas meal but can also be enjoyed in the pre-Christmas period. Baking cookies together is a great winter activity for kids. The following recipe is good for baking cookies with children.

Make cookie dough instructions

To bake cookies you need the ingredients listed below. Then you can start making the cookie dough. To do this, first mix the dry ingredients such as flour, sugar, salt, and vanilla sugar in a large bowl. Then add eggs and margarine and cut into small pieces. Then quickly knead a coherent dough from the ingredients. After kneading you will get a golden-yellow dough, which you should divide into two equal halves. Form one half into a roll that should have a diameter of about 6 cm. The bright yellow rolling pin is now chilled in the fridge for about an hour or two.

Mix the other half of the dough with the cocoa powder and knead everything again. Then this role of dough also goes into the fridge. After the dough has been in the fridge for some time, the light and dark rolls of dough are cut in half lengthways so that you get two light halves and two dark halves of the dough. Then light and dark half of the dough is always put together, which gives you two-colored biscuit rolls that have a light and a dark side. Then cut the rolls into slices, which should be about one centimeter thick. Also, note our tips on how to bake grandma’s cookies easily and vegan.

  • 500g flour,
  • 2 eggs,
  • 250g margarine,
  • 130 grams of sugar,
  • Salt,
  • 1 packet of vanilla sugar,
  • 50 grams of cocoa.

Baking malt is a leavening agent that improves the texture and flavor of homemade bread. If you have a little time, you can easily make baking malt yourself – we’ll explain how it works.

Baked malt is made from sprouted grains that you dry in the oven, roast, and then finely grind. Baking malt fulfills two main tasks when baking bread: On the one hand, it refines the taste of the bread and also gives it a stronger colour. On the other hand, it can ensure that the dough rises better. This works especially well with wheat dough.

This is because the enzymes in the sprouted grains remain active when you dry them at low temperatures. Together with the yeast, they ensure that the bread rises particularly well. However, baking malt is not the only leavening agent – it only supports the function of the yeast. Recipes with baking malt therefore usually also contain yeast. You don’t have to change the amount of yeast if you also use baking malt.

Baking malt can be bought ready-made, but you can also easily make it yourself. All you need is grains, water and a few days of patience – because depending on the type of grain, it takes a while for the grains to germinate.

Important: Always use untreated organic grain if you make baking malt yourself. On the one hand, you support sustainable agriculture that works without synthetic pesticides. On the other hand, conventionally processed cereal grains are often not germinable because they are usually dried at high temperatures. Your enzymes can then no longer be activated.

Make baking malt yourself: This is how it works

Ingredients:

200 gorganic cereal grains (e.g. wheat or spelt)
water

Directions:

Place the grains in a sieve. Place the sieve in a bowl and fill it with enough water to cover the grains by about an inch or two. Leave them like that for twelve hours.
Remove the strainer from the bowl and drain the water. Dry the bowl. Rinse the grains in the sieve well under fresh cold water and then put the sieve back into the dry bowl. Important: The bowl should get light during this step, but if possible not stand directly in a sunny place.
Let the grains sit, this time for about two to three days. Rinse again under cold water every 12 hours.
After some time, the grains will begin to germinate. You can tell by the fact that thin white shoots sprout at the ends, which gradually intertwine. Wait for them to grow long enough to branch and form a braid. Then you can move on to drying the kernels. How long the grains need to germinate varies depending on the type of grain. With spelled, for example, it usually takes longer than with wheat. Important: If the shoots turn green, the grains are no longer edible. It is therefore important to wait for the right moment.
Line a baking tray with baking paper (or an ecological baking paper substitute). Spread the grains out on the baking tray and let them dry in the oven at 70 degrees top/bottom heat for about an hour. It is best to clamp a wooden spoon in the oven door so that it remains open a crack and the moisture can escape better.
After the drying process, you can roast the grains. Increase the temperature to 170 degrees top/bottom heat and leave the grains in the oven for another 40 minutes. You can then do a taste test: if the grain already tastes slightly malty, it’s ready. Otherwise, roast the grains again for 10 minutes.
When the kernels are done, remove the tray from the oven and let them cool completely. Then check if the grains are really completely dried. They must no longer contain any moisture.
Once they have cooled, you can grind the grains. It is best to use a grain mill or coffee grinder for this. Alternatively, you can also put them in the blender.
Fill the ground baking malt into a clean screw-top jar and close it tightly.

Baking malt: tips for use

The baking malt will keep for several months in a screw-top jar. It is important that the glass is sterile. You can find tips for this here: Sterilizing glasses: The best methods with step-by-step instructions.

When baking bread, it is sufficient to use about 30 grams of baking malt per kilogram of flour, unless the recipe specifies otherwise. Simply mix the baking malt into the remaining ingredients before kneading them into a dough and follow the further instructions.

Tip: If you don’t have baking malt at hand, you can replace it with malt coffee if necessary. It is then sufficient to use about a fifth of the recommended amount of baking malt – for example six grams instead of 30 grams.

Have you ever wondered if baking soda is vegan? This is a tricky question to answer as it depends on the baking soda: some are vegan, some are not.

If you want to bake vegan, you have to use vegan baking powder. Baking powder is not inherently vegan. Depending on what kind of baking powder it is, it may contain animal ingredients.

Baking powder usually consists of one or more of these ingredients:

sodium bicarbonate (E 500ii),
potassium hydrogen carbonate (E 501ii),
potassium carbonate (“potash”),
disodium dihydrogen diphosphate (E 450a),
cream of tartar (E 336),
monocalcium orthophosphate (E 341a),
Strength.

When baking soda is vegan

Of the above ingredients, baking powder contains either phosphate (disodium dihydrogen diphospha) or cream of tartar as an acidifier. In a separate article, we already explained why cream of tartar is better. However, you have to keep in mind: While conventional baking powder is always vegan, there are sometimes animal ingredients in cream of tartar.

Why isn’t baking powder always vegan? The cream of tartar in baking soda is wine based. In some cases, this is clarified with gelatin or other animal substances. Although the gelatine is removed again, traces can always remain. For this reason, you have to make sure that Weinstein baking powder is explicitly marked with the addition “vegan”. Then the wine has been clarified with vegan substances.

Overview: Vegan Baking Powder

The conventional baking powder with phosphate is vegan, but not recommended. We recommend cream of tartar, which the companies also say is vegan in most cases. Here is an overview of major brand vegan cream of tartar:

dm organic baking powder with pure cream of tartar
RUF organic cream of tartar baking powder
REWE organic pure tartar baking powder (certified with vegan flower)
Alnatura organic pure tartar baking powder (certified with vegan flower)
Biovegan Master Baking Powder
Natura Organic Cream of Tartar Baking Powder
Organic Central Baking Soda Tartar
Tip: If you still have old baking powder with phosphate at home, you can use it to clean the baking tray or other household items, such as the ceramic hob.