Tag

Beans

Browsing

Introduction to Angolan Rice and Beans

Angolan Rice and Beans is a traditional and popular dish in Angola, a country located in southwestern Africa. It is a simple yet delicious dish that is perfect for any occasion, from everyday meals to special events. The dish consists of rice and beans cooked together and flavored with various spices and herbs.

Ingredients and Preparation of Angolan Rice and Beans

The ingredients for Angolan Rice and Beans are simple and affordable, making it a favorite among many households. They include rice, beans, onions, garlic, tomatoes, olive oil, salt, and other spices and herbs. To prepare the dish, the beans are first cooked until they are soft and tender. Then, the onions, garlic, and tomatoes are sautéed in olive oil and added to the beans. The rice is also added to the pot along with water and the spices and herbs. The mixture is then cooked until the rice is tender and the flavors are well blended.

Nutritional Value and Health Benefits of Angolan Rice and Beans

Angolan Rice and Beans is not only delicious but also packed with nutrients and health benefits. Rice is an excellent source of carbohydrates, which provide energy to the body. The beans, on the other hand, are a good source of protein and fiber, which help to keep the body healthy and strong. The dish also contains various essential vitamins and minerals such as vitamin B, iron, and potassium.

Moreover, the combination of rice and beans makes a complete protein, which means that it contains all the essential amino acids that the body needs. This makes it an excellent choice for vegetarians and vegans. Additionally, the dish is low in fat and cholesterol, making it a heart-healthy meal.

In conclusion, Angolan Rice and Beans is a tasty and nutritious dish that is easy to prepare and perfect for any occasion. It is a great example of how a simple dish can be both delicious and healthy. If you haven’t tried it yet, give it a try and you’ll be pleasantly surprised!

Introduction: What is Cazumbu Stew?

Cazumbu is a traditional Angolan dish that features a combination of leafy greens and beans stewed together in a flavorful broth. The dish is particularly popular in the northern region of Angola, where it is often served with maize porridge or rice. Cazumbu is a hearty and nourishing dish that is enjoyed by people of all ages and backgrounds in Angola and beyond.

Ingredients and Preparation of Cazumbu Stew

The basic ingredients for Cazumbu stew include collard greens or kale, black-eyed peas or kidney beans, onions, tomatoes, garlic, and chili peppers. The vegetables and beans are typically chopped and sautéed in oil until they are tender and fragrant, then stewed in a broth made from water or vegetable stock, along with seasonings such as bay leaves, paprika, and salt. Some variations of Cazumbu may also include meat, such as beef or goat, or dried fish.

To prepare Cazumbu, start by washing and chopping the vegetables and soaking the beans overnight if you are using dried beans. In a large pot or Dutch oven, sauté the onions, garlic, and chili peppers in oil until fragrant. Add the chopped tomatoes and cook until they start to break down. Next, add the chopped greens and beans and pour in enough water or vegetable stock to cover the vegetables. Add the bay leaves, paprika, and salt, and bring the pot to a boil. Reduce the heat and let the stew simmer for at least an hour or until the beans are soft and the greens are tender.

Nutritional Benefits and Culinary Significance of Cazumbu Stew

Cazumbu is not only a delicious and comforting dish, but it also packs a nutritional punch. The combination of leafy greens and beans provides a good source of protein, fiber, iron, and vitamins A and C. The dish is also low in fat and calories, making it a healthy choice for those watching their weight or looking to improve their overall health. Additionally, Cazumbu has cultural significance as a beloved traditional dish that has been passed down through generations in Angola and beyond. Eating Cazumbu can be a way to connect with the culture and history of the region, as well as to enjoy a tasty and nourishing meal.

To preserve beans, you need to freeze them. However, important steps must be taken beforehand in order to achieve an optimal result. In this article, you will find out what you need to consider when preparing for freezing.

Beans can be stored in the freezer for up to ten months. You can freeze them cooked or freeze them raw. To ensure that nothing goes wrong when freezing the beans, it is advisable to observe the following points:

Freeze green beans

With our step-by-step instructions, nothing can go wrong when freezing. So you can enjoy bean dishes such as meat sausage and bean pot all year round. In addition, you can freeze not only the green beans but also other garden beans, such as wax beans or green beans in this way. You can then use the frozen supplies to prepare delicious bean dishes at any time.

Wash and prepare beans

Follow this step-by-step guide to preparing the beans.

  • You should wash the beans before you freeze them to remove dirt.
  • Now cut off the ends of the beans with kitchen scissors – about half a centimeter.
  • To be able to blanch the beans right away, you need a pot with boiling water and salt.
  • Set a bowl of cold water with ice cubes next to the saucepan to chill the beans.

Blanch and cool the beans

Blanching means that you first cook the beans very briefly in boiling water and then chill them in ice-cold water. Beans, kohlrabi, or carrots are blanched for 3-5 minutes, and cabbage is blanched a little longer. Place the beans in the pot of boiling water so that all of the beans are completely covered with water. Then let the beans cook for only about 3 to 5 minutes and then drain them. Then, by immediately adding the beans to the bowl of ice-cold water, you’ll preserve their vitamins and colors. Also, note our tips for freezing asparagus.

Drying the beans is very important. It is best to dry the beans as much as possible. This is because if there is still too much liquid, they will freeze together, making it more difficult to remove them individually from the freezer bag later. Tea towels are best for drying the beans. Dab the beans and wrap them in the tea towel. If you have a lot of time, it is best to let the beans dry and spread them out on the tea towel.

Freeze raw beans

To freeze the beans, it is best to place them in a reusable zip lock bag or in a plastic container. Now put them in the freezer. The beans can then be stored in the freezer for eight to ten months.

Freeze cooked beans

If you haven’t just blanched your beans, but already cooked them, you can also freeze them. Place the finished bean dish in a freezer container and follow our food freezing tips and guide. Then you can conjure up your bean dish on the table again later if necessary.

More on freezing

Freezing allows you to make food last longer. Freezing leftover fresh bread or rolls is a great way to keep food from going to waste. If you want to preserve foods such as meat, mushrooms, zucchini, and kitchen herbs such as wild garlic, you can simply freeze them raw. However, other vegetables, such as cauliflower, peas, spinach, beans, carrots, and chanterelles, must be blanched beforehand. Check out our tips on freezing mushrooms for more details. You can also find instructions on how to freeze meat in our articles.

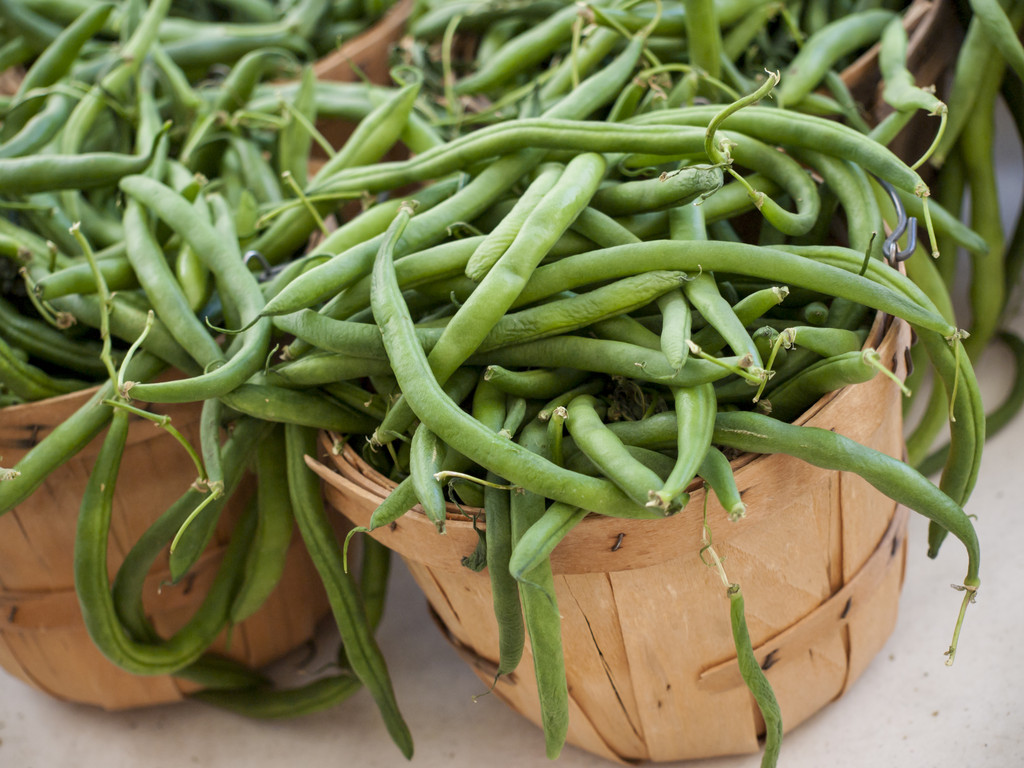
Green beans have a reputation for being a very healthy protein bomb. But under certain circumstances, the delicious garden vegetables are poisonous. Even the Bavarian consumer advice center warns.

Why green beans are poisonous

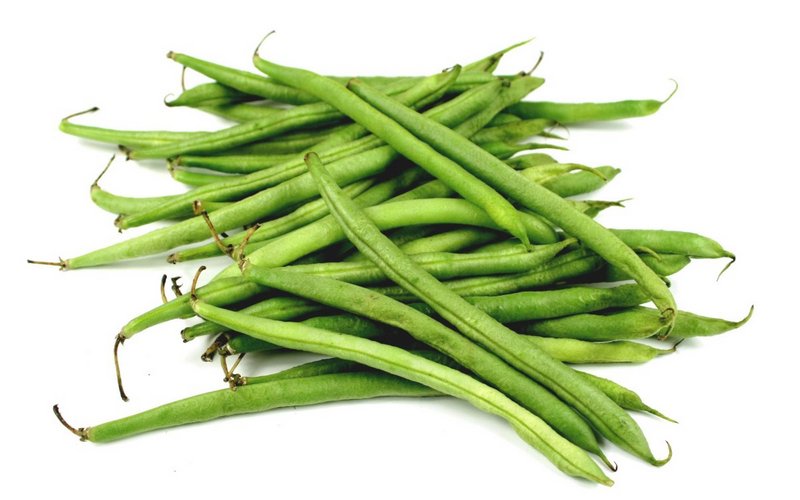
Unlike most vegetables, green beans cannot be eaten raw. They owe this fact to a specific component of the bean: phasin. The toxic molecule is a protein compound that, according to the Bavarian consumer advice center, is found in many types of fruit and vegetables. In comparison, however, raw beans contain a particularly large amount of phasin.

Phasin is actually a substance that is supposed to protect the beans. Plants have a variety of natural defense mechanisms against predators. Some rely on spikes, for example, while others prefer toxic substances. Even though green beans have been cultivated for centuries, they still contain their natural defenses.

The different defense mechanisms of plants do not all work in the same way. Beans and their phasin cause red blood cells to stick together and thus impede the transport of oxygen in the blood. In addition, phasin damages the epithelial cells in the intestine and thus disrupts the absorption of nutrients.

What does eating raw beans do?

The phasin thus hits sensitive areas in the body and can cause significant reactions. However, the reaction to the poison depends on the amount consumed. Eating some raw beans can cause mild stomach upset, intestinal inflammation, headaches, nausea, vomiting, and diarrhea

Consuming large amounts of raw beans can also lead to death. According to the Bavarian Consumer Center, the first symptoms appear after about two to three hours. However, signs of bean poisoning can vary in severity.

Because of their low body weight, children are particularly at risk. For them, a very small amount of 5 to 6 raw beans is enough to be deadly. Children should therefore be made aware of the danger if, for example, they play with beans in a garden. Should a case of poisoning nevertheless occur, medical advice must be obtained as quickly as possible, if necessary via the poison control center.

Phasin poisoning is easy to prevent

For all bean lovers, however, the all-clear is clear: fortunately, phasin is not very persistent
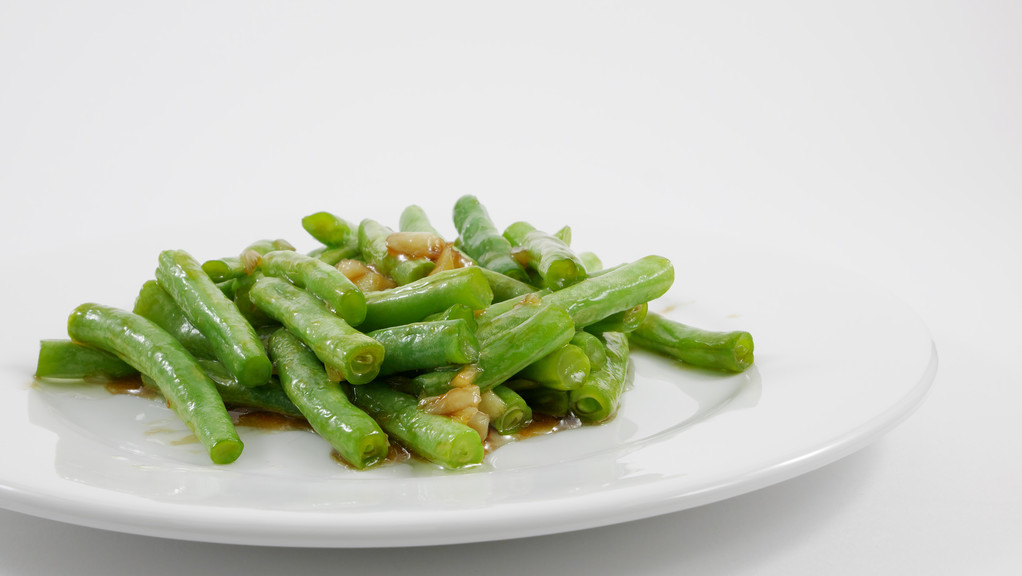
Incidentally, the steam cooker often used for vegetables is not suitable for beans. The gentle cooking process does not reach the required temperature to completely destroy the phasin. Green bean blanching water must also be discarded as it contains a significant amount of phasin.

Legumes are a great source of protein, especially for vegetarians and vegans. But meat eaters also benefit from the “superfood”. And of course there are also tricks against the intestinal complaints.

There are 730 genera of legumes worldwide. The most important are:

Lentils: Yellow Lentils, Green Lentils, Red Lentils
Peas: Chickpeas, Green Peas
Beans: Soybeans, Runner Beans, Green Beans, Kidney Beans, Lima Beans, Mung Beans, Black Beans, Soybeans
peanuts
lupins
Legumes are an important part of human nutrition because of the possible large yields on small areas and are therefore indispensable.

The most important ingredients at a glance

Vitamin bombs: vitamins B1, B2, B6, B9, C, E, K. Legumes contain B vitamins, among other things, which are among the most important nutrients of all. However, beans and co. usually have to be cooked for a long time, which is why they hardly contain any heat-sensitive vitamins such as the B vitamins.
Protein: No other plant-based food contains as much protein as legumes. This is often of high biological value, i.e. the body can absorb them well (e.g. soybeans). However, they do not contain all the protein building blocks necessary for life. However, a combination with grain, for example, can easily compensate for this deficit.
Fiber: Legumes contain a lot of fiber. However, the values ​​vary greatly depending on whether the seeds are peeled or unpeeled.
Secondary plant substances: Beans, peas and the like contain secondary plant substances such as alkaloids, saponins and isoflavones.
Iron: In addition to the high protein content, the plant-based superfood also has a lot of iron. However, they also contain phytate: a substance that in turn slightly inhibits iron absorption in the body.
Legumes also collect plus points for people with certain intolerances, as they are vegan, gluten-free and lactose-free. Leguminosae, as they are called botanically, are particularly interesting for vegetarians and vegans. Mainly because legumes have a high protein content, the body can easily absorb these proteins and because the fruits provide many other important nutrients.

This is how they affect the body

Legumes lower blood pressure and cholesterol levels thanks to vegetable proteins and fiber. This automatically reduces the risk of heart disease and diabetes. Legumes are also appropriate for meat eaters, who often struggle with these diseases through their diet.
The amino acid lysine helps the body produce antibodies, which boosts your immune system.
Proteins and roughage prevent cravings and make legumes long-lasting satiating foods. In addition, digestion is boosted, which has a positive effect on your organism.
The saponins (secondary plant compounds) are soap-like substances that may inhibit cancer, have an antibacterial effect and lower cholesterol. But be careful: Other studies show that in high doses they have a haemolytic effect, i.e. they can dissolve red blood cells.

The downside can be summed up very simply: flatulence. But that need not be. If you prepare legumes properly, you can digest them better.

Flatulence will decrease if beans and co. end up on the dinner plate more often
Start with legumes that cause less gas, such as cowpeas, baby peas, shelled lentils, and tofu and tempeh
If you have fresh legumes, soak them beforehand – for up to 24 hours, depending on the fruit
Insider tip: add some baking soda to the soaking water. This helps reduce the hard-to-digest substances
Boil them long enough – and don’t use the soaking water
Herbs and spices help them digest more easily. Rosemary, thyme, marjoram, savory and coriander are particularly good.
Specialists recommend 60 g/serving (after cooking that’s around 200 to 250 g) two to three times a week.

Planting runner beans is easy. The plants are undemanding and bring good yields. We explain to you what you have to pay attention to when growing.

Planting pole beans – you should know that

If you want to provide yourself with vegetables, runner beans should not be missing in your garden. They are easy to grow and produce good yields over a long period of time. The plants keep forming new pods and you can harvest regularly over a long period of time. Because they mainly grow tall, you can harvest a lot of vegetables from a relatively small area in your garden.

Planting runner beans – These points are important

If you want to grow runner beans, you have to consider several points:
Beans are weak eaters – meaning they only need a small amount of nutrients. Pole beans, however, have slightly higher requirements than other types of beans. Therefore, it makes sense if you prepare the bed with some compost.
Runner beans live up to their name: they need a pole to help them climb. Depending on the variety, they grow 1.5 to 4 meters in height.
A good climbing aid are long bamboo sticks. Plant four equally spaced in the ground and tie the top ends together. If you want to grow more beans, you can set up the poles in two rows using the same principle. Then tie two together at the top and connect them to each other with a crossbar at the top.
Pole beans only germinate above 12 degrees Celsius. Therefore, only plant them when the soil has warmed up and no more frosts are to be expected. From the “Ice Saints” in mid-May you are on the safe side.
The beans need a sunny, warm location if possible.

Prepare the bed for runner beans

Even if runner beans are quite undemanding, you should prepare the bed properly. In this case, this means that you have to loosen the soil well. Now you should set up the climbing aids. Make sure the trellises are long enough for your type of bean. Set up the poles at a distance of 50 to 70 centimeters from each other.

Then place five beans three centimeters deep in the soil at equal intervals around each pole. The warmer it is, the faster they germinate.

Maintain runner beans

Pole beans begin to germinate just a few days after sowing. Once they are about 6 inches tall, cover them with soil. This makes them more stable and forms additional roots. As a rule, the young shoots quickly find their way to the climbing aid. If that doesn’t work, you can easily tie them up with a piece of string.

Runner beans grow incredibly fast. You will be amazed. Once the beans have sprouted and found support on the trellis, your task is limited to regular, thorough watering. Pole beans need a lot of water.

Harvest runner beans

It won’t be long before your runner beans start producing flowers, which eventually become pods. Harvest time is from the end of July. The young beans are particularly tender. When ripening, the individual beans form a hard skin in the pod.

You should always use two hands to harvest beans. With one hand you hold the tendril just above the pod, with the other you pluck off the pod.

IMPORTANT: Raw beans are poisonous! They contain the protein phasin. The substance is only broken down by cooking.

Regular harvesting and thorough watering ensure you high and consistent yields. As the gardening season draws to a close, allow some pods to fully mature. When the husk is brown and dried up in late fall, you can harvest it and have your own seed for next year.

Canning beans is a great way to make healthy vegetables last longer. Here we show you how it works and what variants there are.

Whether green, yellow or white – by preserving beans you can preserve them for a long time and also enjoy them outside of the bean season. Depending on your taste, you can boil them salty or sour.

Boil beans with salt

For about three jars of the salty beans you need the following ingredients:
1 kg of beans
20 grams of salt
water
You can easily cook beans in just a few steps:
Clean and wash the beans. Remove the ends and cut the beans to the desired size.
Preheat the oven to 100°C. Meanwhile, bring water and salt to a boil in a saucepan and blanch the beans for 5 minutes.
Then take the beans out of the pot and rinse them with cold water. Boil the bean water again.
Place the quenched beans in previously cleaned mason jars and pour the boiling bean water over them. Close the jars tightly.
Place the glasses in a roasting pan, large pan or casserole dish and fill the respective container with water. It is important: The glasses must not touch the edge of the container!
Now let the beans cook in the oven for two hours and then cool them down under a tea towel.

Boil the beans sour

If salty beans aren’t quite to your liking, you can easily boil them sour with just a few more ingredients. You will need for about three glasses:
1 kg of beans
2 onions
125 ml vinegar
500ml of water
30 grams of sugar
pickled spice
Salt
dill
savory
Preparing sour beans works a little differently than the first recipe:
Wash and trim the beans. remove the ends.
Boil them in salted water until al dente. This takes about 10 to 15 minutes.
Take the beans out of the water, shock them with cold water and fill them into the previously cleaned mason jars.
Add dill and savory and 2 teaspoons of pickling spice.
Peel the onions and cut them into rings.
Bring the water, salt, vinegar, sugar and onions to a boil in a saucepan and let it simmer for a few minutes. Then fill the brew into the mason jars and seal them tightly.
Now place the glasses in a water-filled, oven-safe container as described in the first recipe. The glasses should not touch the edge of the container.
Cook the beans at 100°C for two hours, then take the jars out of the oven and let them cool, covered.

From July to the end of September you can buy fresh beans at the market or harvest them in the garden. We explain how you can blanch the vitamin-rich vegetables.

Beans are delicious, versatile and very healthy. In addition to protein, they also contain important vitamins and minerals such as vitamin C, vitamin A, iron and magnesium.

You can harvest beans from July to the end of September or buy them locally at the market. Fresh beans are crisp, firm and intensely green. But what can you do if you have more beans in the garden than you can handle? Fresh beans only keep for three days, even in the fridge. One option is to freeze the beans. This makes them durable and you can also use them out of season. But before you freeze them, you need to blanch the beans.

Blanching beans: the preparations

Wash the beans thoroughly with hot water.
Remove the end and the base of the stem with a knife. If the beans are very long, you can cut them in half. But that is optional. This will make it easier for you to process them afterwards.

Blanching beans: this is how it works

Bring enough water to a boil in a saucepan. The amount of water should not exceed 2/3 of the pot, otherwise there will not be enough space for the beans.
Meanwhile, have a bowl of ice water ready. Add some ice cubes to the water.
Once the water is boiling, add the beans to the pot.
Leave the beans in the boiling water for 3 to 4 minutes. If you prefer something softer, wait about 7 to 10 minutes.
Then scoop the beans out of the water with a slotted spoon.
Now put the beans directly into the ice water. This interrupts the cooking process and the beans stay crisp.
Leave the beans in the ice water until cool. After about three minutes, you can take them out of the water with a sieve and let them drain. If you want, you can also gently pat them dry with a cloth.

Process blanched beans

After you blanch the beans, you can freeze them. They will keep like this for up to a year. The beans taste great as an accompaniment to potatoes, in salads or casseroles. But the beans also make a delicious and healthy meal in a vegetable pan or simply tossed in a little fat.

Filter, espresso, cold brew: coffee is cult – but is it also healthy? When are beans fair trade? What can you do while drinking coffee to protect the environment? Here are the most important facts about sustainable coffee enjoyment.

Is drinking coffee healthy?

100 ml of coffee contains an average of 50 mg of caffeine – a natural stimulant that stimulates our circulation and metabolism: the heart beats faster, blood pressure rises and we become more alert and receptive again. Because of this effect, coffee is one of the so-called “legal drugs” – and is very popular among students, office workers and even athletes.

But like any drug, coffee has all sorts of side effects and can even become addictive: as soon as the body gets used to the regular intake of caffeine, drinking coffee becomes less and less effective – and if you stop drinking coffee, withdrawal symptoms can occur. Those who consume too much often suffer from insomnia, headaches or are generally irritable and nervous. The European Food Safety Authority recommends a maximum of 400 mg of caffeine per day – i.e. no more than 800 ml.

Caution: Pregnant or breastfeeding women should be particularly careful about how much coffee they drink – babies are also supplied with caffeine, but are much less able to break down the substance than an adult.

5 tips: How to drink your coffee more sustainably

In addition to the Fairtrade seal, there are numerous other ways to make drinking coffee in the morning a little more environmentally friendly:

Coffee to go: Many drink their coffee on the way to the office – and buy it in paper cups with a plastic lid at the nearest bakery.
Anyone who brings their own coffee from home saves money and can decide for themselves what kind of coffee ends up in the cup. However, if you don’t want to do without the brewed coffee from your regular baker, you can ask where he gets his beans from.
On the go without a thermos mug? Then keep an eye out for Recup: The reusable coffee mugs are already widespread in many big cities – you can take them with you for a deposit of 1 euro and return them to the nearest branch with Recup mugs. There they are washed and sent to the next customer.
Small regional roasting houses with hand-distilled varieties have sprung up in large numbers in recent years – you can also find them in your big city. The advantage: Here you can drink high-quality coffee, in which the roasters have invested a lot of time and love – and you can taste it too. Most of the varieties are even organic and fair trade. Get your beans from a local roastery and support quality over bulk.
Drinking less coffee is doing the environment a big favor. Coffee cultivation is anything but resource-friendly: 140 liters of water are used for one cup. So only drink coffee occasionally – this way you can appreciate the aromatic drink more and feel the effect more intensively again. Coffee withdrawal will also do your body good.

To soften white beans, you don’t necessarily have to soak them beforehand, unlike other legumes. We explain how to properly prepare white beans.

White beans belong to the legumes and are rich in protein and fiber. They ensure a long-lasting feeling of satiety and are among the best vegetable protein sources. Nevertheless, beans rarely end up on the plate in this country. You can prepare white beans easily and quite quickly.

Boil white beans: Soaking is worth it

Contrary to popular belief, you don’t necessarily have to soak beans before cooking. However, by soaking them overnight first, you can reduce the oligosaccharide content, making the beans easier to digest. However, this has not been definitively proven: while some people get severe flatulence even from soaked beans, others never have problems with the delicious legumes.

But what definitely speaks in favor of the soaking method is a shorter cooking time:
dry beans: cook for 1.5 to 2 hours
Beans soaked for more than 12 hours: cook for 45 to 60 minutes
So, soaking white beans overnight not only saves you time in the kitchen, but also energy when cooking.

The ideal preparation of the white beans:
The day before: Rinse the beans with water, then pour plenty of fresh water over them and let them soak overnight.
After at least 12 hours: Drain the soaking water, rinse the beans again with fresh water, and place them in a saucepan.
Pour water into the pot until the beans are about an inch or two covered with water.
Optional: add spices or fresh herbs of your choice to the cooking water, for example some marjoram or bay leaves.
Let the beans simmer over low heat until nicely tender, about 45 to 60 minutes.
If you don’t want to continue using the beans hot right away, you should let them cool down in the warm broth. Otherwise the fine skin of the beans would burst open. This is particularly important with giant white beans.

Cook white beans without soaking

If you forgot to soak the kidney beans first, you can still cook them. You only have to plan about twice as long cooking time so that the white beans become soft. Otherwise the preparation remains the same:
Rinse the beans with water, then place them in a saucepan.
Add enough water to cover the beans by about an inch or two.
Optionally, you can add fresh herbs or spices of your choice.
Let the beans simmer over low heat for about 1.5 to 2 hours until tender.
Here, too, you should let the beans cool down in the warm broth if you don’t want to use them hot.

Tip: Quick soak method for beans

If you didn’t think about soaking the night before, but are thinking about the bean dish at least a few hours before cooking, you can also use the following method:
Rinse the beans with water and place them in a saucepan with an inch or two of water.
Bring the water to a boil, let the beans simmer for about 2 minutes, and then remove them from the heat.
Allow the beans to sit for about 1 to 1.5 hours to cook.
The quick soak method also delays the cooking time a bit, which can save you energy. However, with this preparation, the white beans are most likely to disintegrate and sometimes lose the skin. Therefore, this method is more suitable if you want to puree the beans anyway – for example to make a delicious spread.