Tag

beginners

Browsing

Now learn to sew yourself as a great leisure activity. We all love shopping for clothes. But the dresses and blouses available in stores are usually not unique. Therefore it is worth starting. Because with lots of ideas for sewing, sewing can also be fun for beginners.

Although there is a wide range of clothing choices, it can still happen at parties where two people wear the same outfit. Such a situation is uncomfortable for many. You ensure more individuality if you sew your outfit yourself. As a result, we have collected tips for you on how to learn to sew.

Does every household have a sewing machine?

It’s hard to believe that not even a hundred years ago, a sewing machine was part of the basic equipment in many households and that sewing was as common as working with a computer today. And yet, especially in the younger generations, there are not many who have mastered the craft. But that too is slowly changing. The value of craftsmanship is gradually being rediscovered.

Sewing made easy

Sewing is a great hobby for all ages. You can get inspiration for your dress patterns on the internet or let your creativity run free. Then start with test cuts and trimmings. Whether classic, short, long, modern, or rather playful and tricky, in the end, the first copies can be looked at well. Once you get the hang of the sewing machine, you’re good to go.

And with a little patience and practice, many beautiful and light dresses can be made. Because a lot of things can also be easily implemented by sewing beginners. First of all, get instructions and various patterns. And YouTube tutorials can also help you to design and sew your very own dream garment. In addition, a tailor’s dummy can be helpful for sewing yourself.

1) Different suppliers for patterns

Sewing patterns in particular are a great help for beginners. Once you’ve used them a few times, sewing yourself will be much easier. Patterns are paper templates that you can use to sew the individual parts of the clothing properly. You can purchase patterns or download them free of charge from the following providers. As a result, you can also use it to make great Christmas or Easter gifts yourself.

  • Diverse patterns at Stoffen.de.
  • Affordable sewing tutorials from Makerist.
  • Patterns of all kinds at Pattydoo.
  • Free sewing patterns on Buttinette’s blog.
  • Great ideas and patterns at Sewing Pattern Database.
  • Free sewing patterns and tutorials at CrazyPatterns.
  • Simple cuts and creative ideas of fabric and style.

2) Know fabrics and learn to sew

Since knowing about fabrics and their properties is also an advantage when learning to sew, you should be well informed beforehand. To help you make the right choice for your garment, we have put together an overview of the most important fabrics.

3) Take a sewing class for beginners

If there is no one in your immediate area who can teach you how to sew, there are beginner sewing courses available in many cities. These are usually affordable and you get to know like-minded people. Then you know the most important tricks for sewing. And patching small holes in clothes is no longer a problem. This can also be a good start for you if you don’t like learning with videos from the Internet.

4) Techniques for sewing

There are a variety of techniques you can use to sew. Be it types of stitches, methods of cleaning up fabric edges, or simply a correct method of threading a thread. For all this, there are different basics that you should look at. Certain basic knowledge is essential for sewing yourself. So here are the two most important techniques. Because with clothes you sew yourself, you can also emphasize you’re natural beauty and strengthen your self-confidence.

Sewing by hand

You can sew many things by hand. For this, you need a basic knowledge of techniques. A very common type of stitch is the mattress stitch or ladder stitch. Check out the video below for a comprehensive guide on how to use this method.

Most people associate barbecue with a warm summer breeze, with green tree branches hanging over the grill and sunlight that accompanies the party almost until its end. But the Big Green Egg grill shouldn’t get dusty in the garage in winter, because this is not seasonal sports equipment, it is suitable for use at any time of the year.

In winter, cooking is even more pleasant: insects do not get bored, gathering at the lamps; the drinks are not heated, and the guests are even more delighted to welcome your little culinary masterpieces.

  • Place the grill in the least windy corner of the yard, as it is the icy wind that penetrates the blower and cools the heat;
  • The day before your planned BBQ party, bring the charcoal into your home to warm it up and dry, making it easier to fire.
  • It is only necessary to store coal in paper bags, as condensation can form on the walls of the plastic packaging due to temperature differences. The resulting water droplets will be absorbed by the coal, from which its quality will only suffer.
  • Close the charcoal bag tightly. Many people store grill charcoal in their garage, which has a ton of chemical odors such as gasoline, paint, or furniture varnish. If this smelling air gets to the coal, then you risk getting a steak for lunch with the smell of gasoline, engine oil, etc.
  • Equip yourself with tools: buy Big Green Egg tongs for meat and vegetables, and a metal spatula for fish. Under no circumstances pierce the grilled food with a fork, as you will only damage them and lose juice, turn juicy tidbits into dry and sinewy. The fork is only useful for slicing the finished dish.
  • Don’t tackle complicated recipes in winter. Bad weather can quickly ruin plans, be prepared for this. Cook simply and with passion.
  • If you want something like that, then it’s time to get a set of spices from the cabinet and make a fragrant sauce. With the Big Green Egg Pickle Syringe, you can make your steak or poultry even more juicy and tender.

In fact, sushi is very simple: rice, fish, and various additives like cucumber or avocado. However, in order for your sushi to turn out really cool and not worse than in a restaurant, we advise you to adhere to a few rules.

  1. The knife is the main participant in the preparation of sushi after you. Therefore, he must be at his best. That is, it must be very sharp. Therefore, do not be too lazy to sharpen it before starting your culinary experiments. Choose knives with wooden handles: when wet, they won’t slip in your hands. Such knives in Japan are called “bento” and are used to make sushi.
  2. All ingredients must be exceptionally fresh or, as they say in the markets, the freshest. Otherwise, you risk not only tasteless rolls, but also your own health: we think we don’t need to say that stale fish is dangerous. In addition, whatever fish you choose – fresh, smoked or dried – it is important to cut it correctly. Do not cut tender fish fillets as they will lose their presentation. Here we go back to rule number one: the sharp knife.
  3. Fig. It is very important to prepare it properly. Sushi is made from warm round-grain rice prepared using a special technology. 460 g of rice requires 750 g of water. Rice must be washed and dried for an hour, then placed in a saucepan with a tight lid, pour in water and cook over minimum heat for 5 minutes after boiling. Then it needs to be steamed for 12-15 minutes on low heat, remove the pan from heat, remove the lid and cover with a towel for 15 minutes. Then gradually add vinegar dressing to the rice and let it dry.
  4. Mat. That is, the rug with which the rolls are rolled. It should be made of bamboo so you can press the sushi rice properly. Many beginners use a plastic bag for these purposes, but it does a poor job: rice will quickly fall apart.
  5. Acetic water. When forming sushi by hand, use vinegar water. It is convenient to wet your hands in this solution during cooking and rinse them after working with rice. To make vinegar water, mix two tablespoons of apple cider vinegar with a glass of water.
  6. Proportions. Do not coarsely chop the sushi ingredients; this can impair the appearance and taste of the dish.
  7. Nori. Supermarkets sell sliced nori sheets, which are convenient only for making traditional sushi. If you bought these algae by mistake, don’t throw them away. Lay the sheets tightly together and crush a few boiled rice at the joints. This technique will help you easily glue nori and use them to prepare any kind of sushi.
  8. Wasabi. Do not get carried away by it. An excessive amount of this sauce will not let you enjoy the taste of the dish, because its sharpness dulls the taste buds.
  9. Eat immediately. Sushi should be eaten immediately, because this dish, prepared from fresh products, deteriorates very quickly. The maximum shelf life of sushi is six hours, provided that special boxes are used.

Have you always dreamed of making the perfect cake by decorating it beautifully? But are you not a professional pastry chef? Then these tips are for you.

  1. Baking the cakes in advance and freezing them will make it easier to decorate the cake. Frozen cakes do not crumble so much, this greatly facilitates the application of the cream. These cakes will stay fresh in the freezer for up to a week. You can also prepare the cream in advance and store it in the refrigerator, in an airtight container, for up to a week.
  2. It is no coincidence that the stands are used by professional pastry chefs. This allows the cream or glaze to be applied easily and evenly on all sides. And also make any decor without mistakes, apply drawings, decorative elements, and so on.
  3. Leveling the cake layers is important as they must be completely flat. Otherwise, they may tilt when you stack them on top of each other, making the cake uneven. A serrated knife is ideal for this purpose. Just make sure the blade of your knife is longer than the diameter of your cake. The goal is to cut off any domed top. To make it perfectly flat.
  4. The next step is assembling the cake. Lubricate the first crust with a spatula. Place the second cake on it with the bottom side up and apply the cream again. Do this with all the cakes. Now apply a layer of cream all over the cake and refrigerate for 15-30 minutes. This allows the layers of cream to cure completely before applying the last layer of cream.
  5. Place the collected cake layers on the turntable and apply a layer of cream using a spatula. A pastry spatula is a flat piece of metal with one flat edge and one serrated edge. To use the tool, drag an edge along the sides of the cake, rotating it in the opposite direction.
  6. Making decorative flowers and other decorations using a piping bag and various pastry attachments takes practice. This also applies to decorating with royal glaze. A great way is to practice on a piece of wax paper instead of the cake itself. Small single flowers can be transferred from wax paper to cake. Practice is key. And over time, everything will turn out perfect for you!

Get it out of your head that frying steaks are a special art that only men are born with. In fact, this is a clear scheme, completely obeying the female logic, which you just need to adhere to. And avoid mistakes that beginners often make. There are not so many fatal ones to count, the fingers of one hand are enough. So, bend your fingers.

  • The biggest nonsense is to beat a steak. This meat is meant to be fried as it is. By hammering it with a hammer, you lose all the juiciness and flavor, turning the steak into something incomprehensibly flabby.
  • Let the steak warm – after taking it out of the refrigerator, do not put it directly in the pan. Fibers of meat that are too cold will shrink during frying, condemning even the best piece of meat to stiffness. It is enough to hold the steak at room temperature for at least 20 minutes so that the meat does not experience shock when it comes into contact with the pan.
  • Remove excess moisture from the surface of the steak – otherwise, the meat will not be fried, but stewed in its own juice. To avoid this, simply wipe the steak dry with a paper towel.
  • Place the steak in a well-preheated skillet. Grease it with oil, put it on fire and wait 3-4 minutes, that’s enough. Inexperienced cooks shouldn’t heat the pan “to smoke”, as the pros often advise, why do we need a burnt crust of meat?
  • Finally, a bad idea is to start turning the meat with a fork. By piercing a piece, you release the juice from it, even though frying from all sides aims to seal all the juices inside the crust. So either get yourself some culinary tongs or get the hang of using a spatula masterly. But turning the meat with tongs, of course, is more convenient.

We reveal the best tips for beginners.

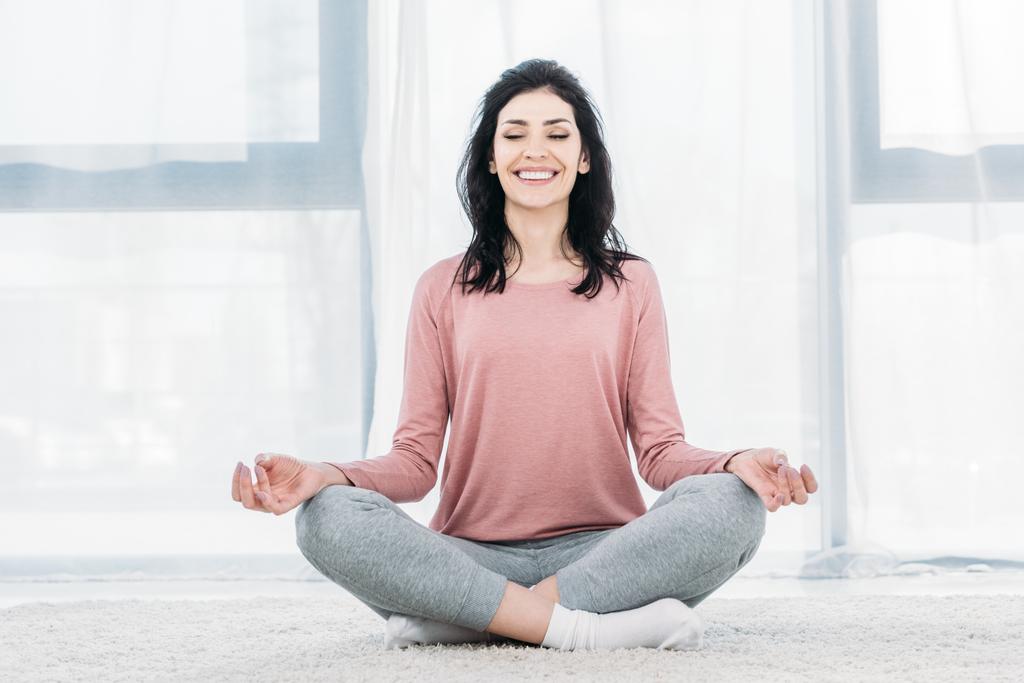
Yoga: what does sport bring?

According to the Deutsches Ärzteblatt, yoga has a positive effect on both the body and the psyche thanks to the diverse exercises with an even change between tension and relaxation. For example, gentle stretching mobilizes the spine and relieves tension. Targeted exercises with your own body weight, on the other hand, strengthen a wide variety of muscle groups. In this way, the fitness trend is intended to invigorate the whole body. In addition, blood circulation and concentration are also boosted.

In addition, yoga can consciously prevent health problems, and in some cases even improve them. On the one hand, the mobilizing exercises work against incorrect posture patterns, such as a crooked back when sitting at a desk for a long time. Painful back or neck pain as well as incorrect strain and joint problems can be effectively prevented. On the other hand, relaxed, calm yoga elements help with annoying headaches, for example.

Relax and relieve asthma with the right breathing technique

In order to be able to perform a yoga session effectively and correctly, breathing is particularly important. This should be complete, deep and slow and is considered a central part of every exercise

If you practice this regularly and consciously, you can change your own breathing behavior in the long term. An important quality to declare war on tension or migraines. In addition, asthma patients in particular can benefit from conscious yoga breathing. In a study, international researchers from the Cochrane Collaboration were even able to identify a slight improvement in asthma symptoms. However, these are not all advantages! In addition, endurance is strengthened, shortness of breath is avoided and the vegetative nervous system is calmed. This, in turn, has a positive effect on the cardiovascular system and even high blood pressure.

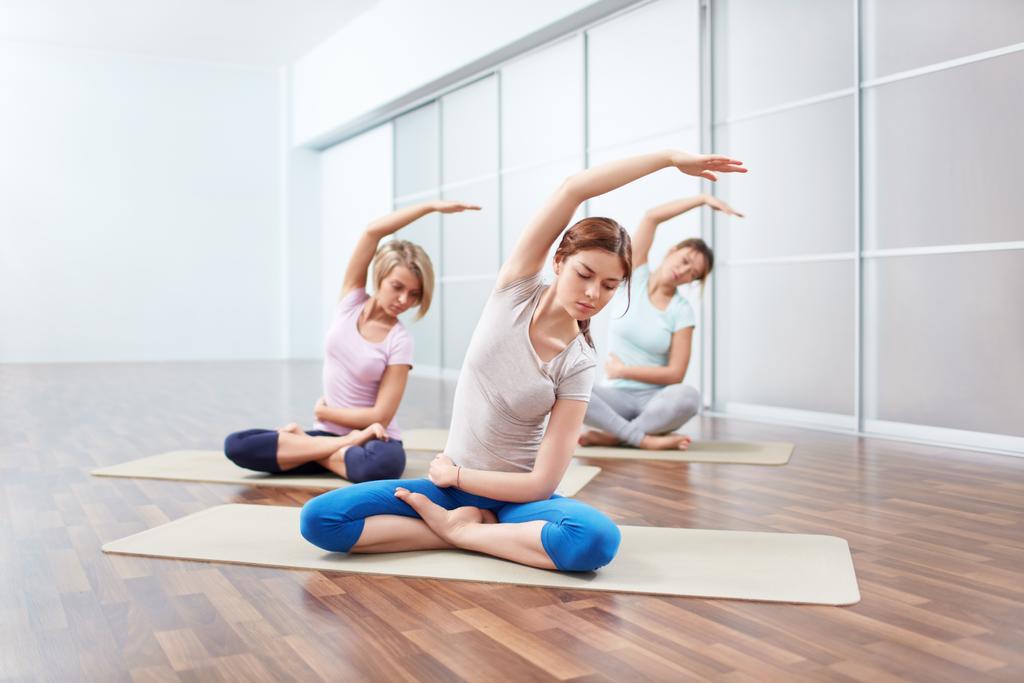
This is how the yoga start is guaranteed to succeed

Basically, yoga is suitable for everyone – regardless of age, stature or health condition. Because among the countless styles, everyone is sure to find what they are looking for. Special forms, such as back yoga, are particularly suitable for counteracting certain physical ailments. However, if yoga newcomers want to do something good for their entire body, you should take a closer look at the following styles.

Hatha Yoga

Hatha yoga is currently the best known and most widespread technique. The focus is always on your own strength, energy and endurance. These three components should be individually strengthened through an even mix of physical and relaxation exercises. The aim is also to create a healthy balance between body and mind and to find your own centre.

Kundalini Yoga

In Kundalini Yoga, in addition to the movement of the body, the focus is primarily on spirituality. Dynamic exercises and meditations are designed to strengthen and relax the body. The focus is also on finding inner peace and freeing yourself from negative thoughts. This also has clear advantages for everyday life. Anyone who practices Kundalini Yoga regularly practices how to react more flexibly and less stressedly in a wide variety of situations.

Ashtanga Yoga

If all this sounds a bit boring to you, you should try Ashtanga yoga. Because there are fixed series of exercises with different levels of difficulty. The special thing about it: There are usually no breaks between the physical exercises. Discipline and ambition are particularly important here!

Effective exercises for yoga newcomers

The trend sport yoga can not only be learned in fitness studios or special yoga courses. For starters, simple exercises can also be easily tried out in your own four walls and thus gain initial experience with the well-known hype from India. The following positions are particularly effective and beginner-friendly.

Sun salutation to warm up

In the well-known yoga classic, various physical exercises are combined with one another in order to achieve a flowing movement. It starts standing up. Bring your arms together over your head as you inhale. As you exhale, bend your torso forward until your hands touch the floor or your feet. For more flexibility, beginners can also bend their knees slightly. With the next breath, the upper body is tensed, but the hands remain on the floor. Then one leg is stretched out backwards and the upper body is straightened. From here you can now switch to the “downward-facing dog” yoga exercise and a push-up-like posture. In order to maintain the flow of movement, it is advisable to straighten the upper body again and repeat the steps mentioned. The sun salutation is particularly suitable for warming up and can be performed as often as you like.

Downward facing dog as a yoga classic

The starting point for downward facing dog is on all fours or a plank. From this position, the hips are pushed upwards. However, the palms remain on the ground. In order to stretch the back particularly long, the stomach can be pulled inwards and tensed. Finally, try to raise your legs so that your heels touch the floor.

Cobra for a flexible spine

For the yoga cobra, it is best to start in the prone position. The hands touch the floor at shoulder height, the arms are close to the ribs. The backs of the feet are on the ground. With tense abdominal muscles, the shoulder blades are then pulled together in the back and the chest is slightly straightened. The hands, which press the body slightly upwards, have a supporting effect. It is important that the gaze is directed upwards.

Cat-cow for back pain

This exercise starts on all fours. Here you pull the navel in the direction of the spine and push it up in a kind of cat’s hump. To increase the effect, the chin should be pulled towards the chest. On the next breath, the abdomen is again pushed down, the shoulder blades back and the head up. The back is now in a hollow back position. In the cat-cow exercise, these two positions are varied several times.

The most important gadgets: You actually need this for the fitness trend

For a successful yoga start, in addition to comfortable clothing, you first need a suitable yoga mat. Important: Yoga and gymnastics mats are not the same! Because the perfect base for the Indian philosophy of life is a lot thinner, usually only about four to six millimeters thick. This results in a better grip on the hands and feet during the different exercises. Beginners in particular can stay in balance more easily and train effectively. Another important factor is the material. This must be non-slip in order to remain in the correct position despite sweaty hands. Yoga mats made of natural rubber are therefore recommended for beginners.

For yoga beginners, a so-called yoga block can provide effective assistance. The stable block made of cork or hard foam is used when some exercises cannot be performed correctly. It is used, for example, to avoid incorrect posture, to bridge distances or to enable a secure hold. This is exactly what often leads to difficulties for yoga beginners with little flexibility and balance. However, to avoid injuries, the yoga block must not have hard corners or edges.

The hiit workout is becoming increasingly popular. Especially as a beginner you should pay attention to a few things during the training.

The hiit workout for beginners: definition and process

The abbreviation “Hiit” stands for High Intensity Interval Training. Translated, this means something like high-intensity interval training and thus already fundamentally defines what it is actually about. You can choose between two forms: One possibility is to switch between exercises that are highly intensive and exercises that are more relaxed. Alternatively, intensive training intervals can be interrupted with short breaks.

Before training begins, it makes sense to do a quick warm-up. This does not have to be a long process: it is enough if the muscles are warmed up for about five to ten minutes with easy exercises. This way you can avoid injuries and start the exercises optimally.

Basically, the Hiit workout is suitable for everyone. The training goal can be set individually and the training success can be achieved through the right motivation. Especially at the beginning, the workout is particularly strenuous for the body; However, if you stay on the ball, the body will adjust to it after a certain time.

Inspiration: This is what a hiit workout could look like

The hiit workout can be designed as you wish. Ideally, you can choose the sports that you also enjoy: In this way, the highly intensive training also has a fun factor. Suitable sports include cycling, running, jumping rope, weightlifting or classic circuit training with exercises such as squats or burpees.

As a beginner, the duration of a training session should be around 20 minutes. Depending on the training progress and resilience, the duration can be slightly increased on a weekly basis so that you can achieve maximum effects. The number of repetitions per interval can also be varied according to the level of training.

For example, an idea for a beginner hiit workout at home would be 20 seconds of hard work followed by 30 seconds of rest. For example, you can choose jumping jacks, push-ups, crunches, squats, burpees and planks as exercises. You can then repeat this in four intervals to fill the 20-minute training time.

Equipment needed for a hiit workout

When it comes to efficient training, many people initially think of classic training with fitness equipment. However, hiit training follows a different concept, making it highly attractive to a large audience.

Most of the exercises amount to training with your own body weight. Equipment is therefore not necessarily required: You can carry out the workout whenever and wherever you want. Duration, time and location can be determined by yourself: Training outdoors is also possible. The training also collects a plus point because it is so inexpensive.

If you still want to train with training equipment, this is also compatible with the Hiit workout. Depending on which exercises you want to do, a sports mat*, resistance bands, kettlebells* can be used as equipment.

What does the hiit workout bring?

Compared to typical cardio endurance training, hiit training should be able to boost fat burning even more effectively. This is achieved by stimulating the metabolism: a plus point for anyone who wants to achieve rapid training success.

The metabolism should be boosted so much by the strong stress phases that a so-called “afterburn effect” occurs. This means that fat and calorie burning continues the day after your workout

Muscle building can also be achieved through exercises that require heavy muscle strain. Hiit training can therefore increase endurance and stimulate the build-up of muscle mass.

Possible mistakes in the hiit workout: You should pay attention to this

In order for the Hiit workout to be able to produce maximum success, it is important to give the body time to regenerate. Ideally, the regeneration phase should last at least one day so that the body can be fully loaded again during the next training session. It is recommended to do the training about twice a week at the beginning. Advanced users can also increase the training to three or even four units.

The training itself should not be underestimated: the body is repeatedly subjected to maximum stress. Especially as a beginner, you should be careful not to overdo it right away, but to start with fewer repetitions and gradually challenge yourself more. To avoid injuries, you should make sure you do the exercises correctly. It is also important to always repeat the exercises on both sides of the body: This way you avoid one-sided training.

If you want to achieve your goals, you should not only pay attention to the training itself, but also to your diet. Even if the metabolism is stimulated by physical activity, the basis for success is a balanced and healthy diet.

Photography is a great hobby and you can capture great moments. So that it’s not just snapshots, but great pictures of people or travel, we’ve collected tips for learning to take photos. Accordingly, photography is also a success for beginners.

A few simple tricks will help you to avoid having to have blurry, underexposed, or shaky photos developed. Then your pictures will become breathtaking snapshots. Whether as a hobby or as a professional activity, everyone starts small.

Learn to take photos successfully

If you want to learn photography successfully, you don’t need much at first. Because the passion for photography is completely sufficient to start with the hobby of photography. Many think it’s an expensive hobby. And indeed, professional equipment is not cheap. But cell phones already offer you good cameras to try out. It is highly recommended to try it out first and find out whether photography will become a permanent hobby.

When taking photos, you learn to consciously perceive your surroundings and get an eye for the beautiful details in your surroundings. And your environment offers you diverse and beautiful motifs so that you never get bored while learning to photograph. You can also use the photos to create great photo gifts as a souvenir.

Simple photography tips for beginners

Once you’ve decided to learn how to take photos, simple tricks will help you get impressive shots. This makes photography a success even for beginners and provides a lot of fun. In addition, note our tips for learning to sew yourself.

1) What equipment do I need to take photos?

You don’t need much to learn to photograph. And above all, it is not necessary to buy the best professional equipment right at the beginning. It makes much more sense if you, as a beginner, buy simple or used equipment. You can use your cell phone or get a camera for beginners. For this purpose, think about which motifs you mainly want to shoot and which cameras are available on the market. Also, note tips for bargain hunting on the Internet.

2) Get to know attitudes

You don’t have to be tech-savvy, but you should know the most important camera settings and know how to use them. The categories aperture, ISO, and exposure time should be mentioned here. In the following, look at their meaning and then try out the settings. Because practice makes perfect. You will quickly see how well you can learn to take photos.

3) When taking photos, learn to pay attention to the lighting conditions

The light plays an important role. Studio lighting is not always available, especially when you are out and about. Therefore, you should know how to use natural daylight properly. In strong sunlight, a soft light should be generated. This works if you go to a shady place or if you don’t take the picture against the sun. If you own a professional camera, you can create the right light using the aperture and exposure time settings. This is not only practical when the brightness is low, but can also lead to great effects! Also, note tips for effective learning with self-organization.

4) When to use flash?

You can also use the flash to take photos outdoors. This is especially important when the sun is shining. Because it can create dark shadows on the subject’s face. Therefore, depending on the strength of the sunlight, choose between fill flash and full flash. If the subject is about 5 feet from the camera, use fills flash; full flash at a further distance. There may also be suitable professional training for you to learn photography.

5) Focus on the subject

The subject should be staged. This means that you as the person taking the photo determine what happens. Accordingly, take over the management and direction. When taking pictures of people, you can get up close and zoom in. This can reveal quite nice and interesting details. Make sure that the images are not blurred, depending on the type of camera and lens, the limits are different. You can use great motifs to create great homemade gifts.

6) Camera at eye level for portraits

The most important thing first: the subject should be the center of the picture. Therefore, it is important to properly arrange people. Especially with group photos, you should keep an overview. The following applies to the small ones to the front, and the big ones to the back. And note that no one will be cut off. It can also be useful for portraits to hold the camera at eye level. This is how beautiful and impressive photos are created. The person does not necessarily have to look into the camera. Photos are taken in this way to create a particularly welcoming atmosphere. You can also create great photo calendars with your own pictures and give them away.

7) Social Media

If you don’t want to stick your finished photos in a now old-fashioned photo album, you can also easily share them on social media channels. So you can not only capture and enjoy the great moments yourself but also share them with friends. Learning to photograph is also a great idea for leisure time.

Becoming a vegetarian has never been easier than it is now: there is a wide range of vegetarian products, recipes and restaurants to choose from. Our tips will make the transition easier for you.

Why become a vegetarian?

There are many reasons to reduce meat consumption – above all the sometimes cruel processes in industrial factory farming and animal husbandry. A vegetarian diet is also better for the environment.

Four-fifths of the world’s agricultural land is required for the production of animal products. In addition, animal husbandry produces high greenhouse gas emissions and a lot of water is consumed. After all, animals on fattening farms are rarely kept in a manner appropriate to their species and are often treated with antibiotics.

The good news: it has probably never been easier to become a vegetarian than it is today: there is a large variety of vegetarian cookbooks and blogs. More and more vegetarian restaurants are opening in the cities and “normal” restaurants often have many delicious vegetarian dishes on the menu. Nevertheless, it is not easy to change your diet overnight. The following tips should help you get started.

Change gradually and replace habits

Start slowly but set specific goals: for example, build in one or two vegetarian days a week and try to increase this number over time. Such precise guidelines are far more effective than saying to yourself, “I’m trying to eat less meat.”

It is particularly difficult to replace habits such as sausage sandwiches in the evening. The best way to do this is to replace them with new habits. How about a vegetarian spread instead of the sausage?

Become a vegetarian and cook for yourself

The best way to get to know the diversity of vegetarian cuisine is to cook it yourself. You can get inspiration from vegetarian friends, cookbooks or blogs. You will quickly realize that vegetarian dishes are really tasty and filling.

There are some national cuisines that offer many vegetarian dishes, including Indian and Italian cuisine. But there are also traditional meatless dishes from many other regions.

You can also replace the meat in many recipes: for example, you can prepare a delicious Bolognese sauce based on soy, lentils or mushrooms. This quickly becomes a vegetarian lasagna.

Schnitzel and sausage without meat?

There are now many vegetarian schnitzels, sausages and cold cuts on the market that are very similar to their meaty originals. However, before you buy them, we recommend checking the ingredients list, as many of these substitutes contain many additives.

If you have an appetite for the spicy flavor of meat, opt for foods that are naturally similarly spicy. This applies to mushrooms or cheese, for example.