Tag

Biscuits

Browsing

What are Anzac Biscuits?

Anzac biscuits are a traditional Australian biscuit that has its roots in the First World War. The biscuits were originally baked by the wives and mothers of the Australian and New Zealand soldiers who were fighting in Gallipoli. The biscuits are made from a combination of oats, flour, coconut, and golden syrup, and are known for their hard texture and long shelf life.

Ingredients and Recipe for Anzac Biscuits

To make Anzac biscuits, you will need the following ingredients:

  • 1 cup of rolled oats
  • 1 cup of plain flour
  • 1 cup of desiccated coconut
  • ¾ cup of brown sugar
  • 125g of butter
  • 2 tablespoons of golden syrup
  • 1 teaspoon of bicarbonate of soda
  • 2 tablespoons of boiling water

To make the biscuits, preheat your oven to 160°C and line a baking tray with baking paper. In a bowl, combine the rolled oats, flour, coconut, and brown sugar. In a saucepan, melt the butter and golden syrup together over a low heat. In a small bowl, mix the bicarbonate of soda with the boiling water, and then add it to the melted butter and golden syrup mixture. Pour the wet ingredients into the dry ingredients and mix well. Roll the mixture into balls and place them on the baking tray, flattening them slightly. Bake for 12-15 minutes or until golden brown.

History and Significance of Anzac Biscuits

Anzac biscuits are named after the Australian and New Zealand Army Corps (ANZAC) who fought in the Gallipoli campaign of the First World War. The biscuits were originally known as “Soldier’s Biscuits” as they were made by the women back home and sent to the soldiers as a form of care package. The biscuits were designed to have a long shelf life and survive the journey to Gallipoli. Today, Anzac biscuits are a symbol of remembrance for those who have served in the armed forces and are commonly eaten on Anzac Day, which is a national day of remembrance in Australia and New Zealand.

What is the Tim Tam Slam?

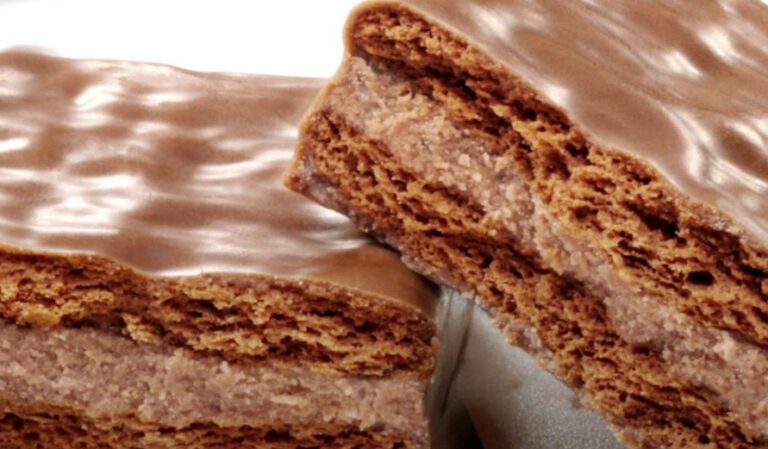
The Tim Tam Slam is a popular way to enjoy Tim Tam biscuits by using them as a straw to drink coffee or hot chocolate. Tim Tam biscuits are a popular Australian biscuit made of two layers of chocolate malted biscuit, separated by a light chocolate cream filling, and coated in a thin layer of chocolate. The Tim Tam Slam adds a fun twist to enjoying this iconic Australian snack.

The Tim Tam Slam has become a cultural icon in Australia and is enjoyed by people of all ages. It is a fun way to enjoy a hot beverage and a biscuit at the same time. The Tim Tam Slam is a unique experience that has made its way around the world, with many people from different countries now enjoying this Australian tradition.

How to do the Tim Tam Slam

To do the Tim Tam Slam, you will need a Tim Tam biscuit and a hot beverage such as coffee or hot chocolate. First, bite off a small piece from opposite corners of the Tim Tam biscuit, making sure not to bite off too much. Then, place one corner of the biscuit into the hot beverage and use the other corner as a straw. Suck the hot beverage through the Tim Tam like a straw until you can feel the biscuit starting to melt. Once the biscuit starts to melt, quickly place the whole Tim Tam into your mouth and enjoy the delicious combination of hot beverage and melted chocolate biscuit.

Tips and Variations for the Tim Tam Slam

To get the most out of your Tim Tam Slam, it’s important to use a hot beverage that is not too hot, as this may cause the biscuit to disintegrate too quickly. It’s also important to choose the right type of Tim Tam biscuit, as some varieties may not work as well for the Tim Tam Slam. The original Tim Tam biscuit is the best choice for the Tim Tam Slam, as it has the perfect texture and taste for the experience.

If you want to mix things up, you can try variations of the Tim Tam Slam. For example, you can try using different types of hot beverages, such as tea or hot chocolate with marshmallows. You can also try using different types of Tim Tam biscuits, such as the white chocolate or dark chocolate varieties. The Tim Tam Slam is a fun and delicious way to enjoy a hot beverage and a biscuit, so get creative and give it a try!

If you go to a pet store to buy dog ​​biscuits and take a look at the ingredients list, you will be amazed at what you can find there. Carbohydrates and sugar can be found on almost all packages, there is often no trace of meat, or it was only measured in teaspoons and added to the biscuits.

These ready-made biscuits are rarely healthy! Homemade dog biscuits are not expensive, much healthier than those that you can buy in stores, individually adaptable in terms of the ingredients and they are durable on top of that.

What ingredients are allowed in the biscuit?

You can mix everything into the dog biscuits that you would offer your dog for healthy nutrition, e.g. include vegetables, meat, fish, and egg. Since many dogs have grain allergies, it is a good idea to use gluten-free grains such as rice flour, amaranth, millet, corn flour, buckwheat, or chickpea flour. Anything that your dog loves and naturally tolerates is suitable as a vegetable.

Our dog biscuit recipe

  • 220g potato flour
  • 1 tsp barley grass powder
  • 150g granulated cottage cheese
  • 3 eggs
  • 1 tablespoon coconut oil

First, we need 220g of pure potato flour. Add a heaping teaspoon of barley grass powder and a pack of 150g granular cottage cheese. The empty pack of cottage cheese can be given to the dog to slurp on. Three eggs and a tablespoon of liquid coconut oil follow. It is recommended to get organic ingredients. The ingredients are placed in a bowl and mixed with a spoon or a hand mixer to form a smooth dough.

Baking in molds

Since the dough is liquid, you can either put it on a baking sheet lined with baking paper and cut it after baking, or you can put the dog biscuit dough in molds. Silicone molds, such as those used to make chocolates or ice cubes, are particularly suitable for this. Now put some dough in the middle of the mold and smooth it outwards until all the dough is distributed. When the preparations are complete, the biscuits are baked.

To do this, preheat the oven to 160°C and then bake the biscuits for 30 minutes. Depending on the size of the dog biscuits, if they are larger, they can be baked longer, if they are smaller, shorter.

What is the best way to store the biscuits?

With the right storage of food, it can be preserved for longer. Accordingly, release the biscuits from the mold after baking. But please be careful! If your dog is nearby, be sure to keep him away from the hot cookies or he could get badly burned. To dry, we recommend leaving the biscuits in a safe place out of reach of the dog for at least half a day. When the biscuits are completely dry, they can be fed or stored in cans for a while, as this will keep the biscuits crispy for longer. However, it is advisable to bake fewer biscuits and always prepare fresh ones and feed them.

Adjustment of the recipe

Of course, there are no limits to your imagination and you can add vegetables such as carrots or zucchini to the biscuits according to your dog’s preferences. You can also add meat. Stay creative and dare to try new things. Your dog will thank you!

Vegans don’t always have it easy when it comes to baked goods. Because even if some bakeries now offer vegan alternatives, many cakes, biscuits and even breads still contain animal products such as butter and eggs. So how about just baking it yourself? This article will show you exactly how vegan baking works and what to look out for.

Why bake vegan at all? Being vegan means consistently avoiding products of animal origin. According to statista.de, more than 1.13 million people in Germany now live vegan – and the trend is still rising.

While a large number of meat substitutes and milk substitutes have long since found their way onto supermarket shelves, vegan baked goods are still the exception rather than the rule. Vegan baking is actually quite easy, is neither more complicated nor more expensive than traditional baking and the results are just as delicious. So why not just do it yourself?

Baking Vegan: Tips & Tricks

It doesn’t matter whether you’ve been vegan for a long time, want to please vegans in your circle of acquaintances or simply want to try out vegan baking recipes – with our tips you can make your favorite baked goods without animal products.

Rely on vegetable fats: Butter is a dairy product – and therefore taboo in vegan baking. Instead, use purely vegetable, preferably palm oil-free (organic) margarine. Of course you can also use oils. The following applies: 100 grams of margarine are replaced with 75 to 80 milliliters of oil (e.g. rapeseed or sunflower oil). Nut butter, such as almond butter, is also an interesting alternative to conventional butter – make sure you use organic and fair trade quality. If you want to improve your ecological balance and save calories at the same time, simply replace 100 grams of butter with a mixture of 120 grams of oat yoghurt and a tablespoon of semolina. Another option is to make your own vegan butter.

Egg substitute instead of eggs: In traditional baked goods, eggs are used to bind the dough better. As you will quickly find out when baking vegan, this is often not absolutely necessary. If you still want to use an egg substitute, you can buy one in most organic stores and some supermarkets – or you can simply make your own egg substitute using simple ingredients that you probably have at home anyway: banana , applesauce or flaxseed can effectively replace eggs in baking. Read more: Make your own egg substitute: 6 ideas for vegan eggs
Plant-based drinks instead of cow’s milk: plant-based milk alternatives have long been found in every supermarket and most drugstores, often even in organic quality. Depending on what you’re baking, cow’s milk can usually be easily substituted one-to-one with milk alternatives such as oat milk, soy milk, or almond milk.
Plant-based cream: Plant-based cream substitutes can also be found in most supermarkets, for example based on oats, soy or rice. Alternatively, you can easily make vegan cream yourself. More on this: Vegan Cream: Recommended Alternatives
Aquafaba instead of egg whites: There are some baking recipes that use egg whites. This is the case, for example, with biscuit doughs. But there is also a vegan variant here: aquafaba. Aquafaba is the soaking liquid from chickpeas and beans. Aquafaba is whipped into the perfect vegan egg whites and is even suitable for mousse au chocolat.

Baking with vegan chocolate: What would chocolate chip cookies be without delicious pieces of chocolate in the batter? In general, many dark chocolates are vegan by nature, although you should pay close attention to the list of ingredients. Those who value sustainability and fair production conditions should choose organic and fair trade chocolate. In the (organic) supermarket you will also find vegan white chocolate and purely plant-based “milk” chocolate with different cocoa contents.
Agar-agar instead of gelatine: Anyone who bakes fruit cakes sometimes seals the fruit layer with a gelatine-based icing. However, since gelatine consists of animal bone and cartilage residues, among other things, this is not an option for vegan baking. Instead, you simply replace the gelatine with agar-agar, a purely vegetable powder made from red and blue-green algae. Here too, pay attention to organic quality in order to get a residue-free product. More on this: Gelatin substitute: vegan plant-based alternatives

What else should you keep in mind when baking vegan?

To ensure that the cruelty-free baked goods are 100 percent successful, you should not overdo it when mixing the ingredients, otherwise a vegan dough can quickly lose consistency and become tough. So sometimes it can be worth using the whisk, spatula or fork instead of the food processor to mix the ingredients.

Depending on the type of oven, your vegan pastries may also cook faster than traditional recipes state. It is best to set the timer 15 minutes before the regular end of the baking time to make sure that cakes, biscuits, rolls and the like do not become too crispy.

Incidentally, when baking bread and rolls, most recipes are already vegan – or can be veganized quickly. Instead of the honey used in some bread recipes, you can use some organic sugar beet syrup, for example, and replace the quark in quark rolls with vegan organic soy quark. Buttermilk is easily replaced with a plant-based milk alternative with a dash of vinegar.

Is Vegan Baking Healthier?

You can decide for yourself how healthy your vegan baked goods will be. For example, if you use whole grain instead of white flour and at least partially replace the sugar content in sweets with low-calorie sugar alternatives such as organic erythritol, you can definitely produce healthier baked goods.

In general, the major health benefit of vegan baking is that purely plant-based ingredients are virtually cholesterol-free, while animal products such as eggs, milk and butter contain a lot of saturated fatty acids and trans fats. With high and regular consumption, these can promote heart and vascular diseases.

Vegan is not always sustainable

While vegan ingredients are always free of animal components, they are not always sustainable, since some of the products have extremely long transport routes to the local shops (e.g. coconut oil, cocoa, chia seeds, Agr-agar) or come from conventional cultivation and are therefore are not free from environmentally harmful pesticides.

If you also want to implement the topic of sustainability in baking, you should therefore rely on fairly traded organic products and prefer regional and seasonal ingredients.

Veganized Recipes vs. Vegan Recipes

Veganized recipes are conventional recipes that are made with purely plant-based ingredients instead of the traditional ingredients. This is particularly recommended for vegan baking beginners and for everyone who would like to recreate the taste of baked goods they love. For example, have you ever baked vegan cheesecake, apple pie, vegan biscuits or purely plant-based stollen yourself? It’s easier than you might think – and the taste is in no way inferior to the original recipes.

Of course, vegan baking is also possible with a variety of more experimental, vegan recipes in which sugar is replaced with dates, for example, and unusual types of flour such as lupine, almond or coconut flour are used. These recipes are not replicas of well-known originals, but developed vegan from the outset and represent their own category. They therefore offer a less comparable, but precisely because of this, interesting taste experience. They are often all about “Clean Baking”. Due to the often exotic ingredients, you should pay close attention to the origin and, if possible, prefer regional products.

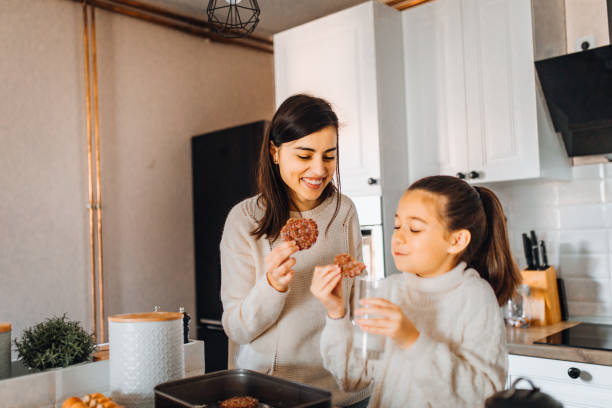
Baking cookies with children is always a good activity. And especially in the run-up to Christmas, this is a popular activity before the festival. So that baking cookie is stress-free, we have simple recipe ideas and tips that you should consider when baking together.

Baking together at Christmas time

Trying out different recipes, creating creative decorations and surprising friends and relatives with the delicacies is the epitome of a contemplative and loving time. Children also like to help their parents with baking and designing. From simple butter biscuits with sugar icing to Linzer eyes and hussar donuts with jam to marzipan potatoes and vanilla crescents, there is a recipe to suit every taste.

What cookies to bake with children?

However, some cookies are too big a challenge for children’s hands. A good example is Linzer Augen, where the individual layers of pastry have to be rolled out so thinly that cutting them out and handling them after baking requires great care. If the cookies keep breaking, frustration is inevitable. So think carefully about which cookies you can bake together. As a result, you prevent mishaps like cracking cookies or cake batter collapsing. The following recipes are also suitable for baking cookies with children and ensure fun in the kitchen:

  • shortbread,
  • wintry cookies,
  • butter cookies, and also vanilla crescents.

What tasks do children take on when baking cookies?

In some families, the mother and father take care of baking the cookies and only ask their children to help decorate them. What can definitely save time, however, takes away the opportunity for children to try things out for themselves and make new experiences. It is therefore best to plan enough time for baking when planning the weekend and to involve your children in the baking process from start to finish.

Depending on their age, children can then take on tasks as if they were under the supervision of their parents. Incidentally, children learn here that they can achieve great things themselves, which in turn strengthens their self-confidence. Because if your children not only decorate the cookies but also knead, shape, and bake them, they will be “proud as Bolle” at kindergarten age. Consequently, let them take over these tasks when baking cookies:

  • weighing ingredients,
  • kneading dough,
  • forming balls, croissants, or cookies
  • as well as cutting out and decorating the biscuits.

Observe hygiene when baking cookies

Good hygiene in the household should be a matter of course when preparing food. It is therefore important to teach children to maintain a certain level of cleanliness when baking cookies. You should make sure that you wash your hands properly before you start. This will get rid of bacteria and dirt. In addition, you should plan short hand washing cycles in between. Children in particular touch other things at work or put their fingers in their mouths.

that dough should only be touched with clean fingers. For this reason, washing your hands before baking is an absolute must. Here, any bacteria and dirt are rinsed off the fingers and do not come into contact with the cookies and dough. In addition, the following hygiene rules should be observed when baking cookies with children:

  • Children with a cold should not help or you will postpone baking the cookies. Then the risk of pathogens coming into contact with dough and cookies when you sneeze or cough is lower.
  • Raw eggs are a source of danger. Salmonella or other pathogens can adhere to the shell, which is why children should not eat raw dough. Or you can use a dough without eggs and a vegan egg substitute.

Bake delicious Christmas cookies

When the cold season begins, the anticipation of the Christmas season is great. Then gifts are bought, apartments and streets are decorated for Christmas and the Christmas tree is decorated. And special dishes are also prepared for the traditional festival. At Christmas, delicious and sweet foods such as gingerbread, chocolate cake, delicious biscuits, and cookies are very popular. These are not only served with a delicious Christmas meal but can also be enjoyed in the pre-Christmas period. Baking cookies together is a great winter activity for kids. The following recipe is good for baking cookies with children.

Make cookie dough instructions

To bake cookies you need the ingredients listed below. Then you can start making the cookie dough. To do this, first mix the dry ingredients such as flour, sugar, salt, and vanilla sugar in a large bowl. Then add eggs and margarine and cut into small pieces. Then quickly knead a coherent dough from the ingredients. After kneading you will get a golden-yellow dough, which you should divide into two equal halves. Form one half into a roll that should have a diameter of about 6 cm. The bright yellow rolling pin is now chilled in the fridge for about an hour or two.

Mix the other half of the dough with the cocoa powder and knead everything again. Then this role of dough also goes into the fridge. After the dough has been in the fridge for some time, the light and dark rolls of dough are cut in half lengthways so that you get two light halves and two dark halves of the dough. Then light and dark half of the dough is always put together, which gives you two-colored biscuit rolls that have a light and a dark side. Then cut the rolls into slices, which should be about one centimeter thick. Also, note our tips on how to bake grandma’s cookies easily and vegan.

  • 500g flour,
  • 2 eggs,
  • 250g margarine,
  • 130 grams of sugar,
  • Salt,
  • 1 packet of vanilla sugar,
  • 50 grams of cocoa.

These vital biscuits are suitable for giving you energy all year round – not just for the baking time at Christmas. We’ll show you how to prepare them here.

Anyone who likes to eat nuts or trail mix will probably like these biscuits too. You can vary the dry ingredients as you like, as long as they have a similar consistency – for example, pumpkin seeds instead of oatmeal.

You don’t need flour, butter or sugar for vital biscuits, so it’s not a conventional biscuit dough. They contain honey, which can liquefy again after the biscuits have been stored for a long time. To counteract this, you can simply bake the cookies again at around 170 degrees so that the honey caramelizes further.

Vital biscuits: Quick recipe for the high-energy pastry

Ingredients:

75 g sesame
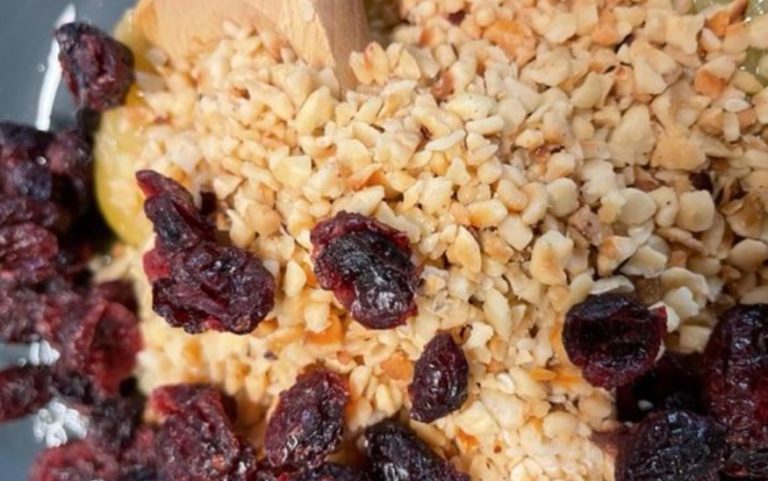
75 g hazelnuts, chopped
75 g almonds (chopped)
50 g seeded oat flakes
30 gcranberries 1organic egg
2.5 tbsp honey
1 drop of vanilla flavoring
1 pinch(s) of salt

Directions:

Preheat the oven to 180° top/bottom heat. This is necessary to caramelize the honey – this only works if heated quickly.
Place all the nuts, sesame seeds, rolled oats, and cranberries in a bowl and mix together.
In another bowl, mix the egg with the honey and vanilla essence and add the salt. Add the liquid mass to the grain-nut mix and fold it in with a tablespoon until everything sticks together.
Use two tablespoons to scoop small amounts of the mixture onto a baking tray lined with parchment paper alternative or parchment paper.
Place the tray in the middle of the oven for 10 minutes.
Let the biscuits cool down.

Tips and tricks for vital biscuits

Try to look for an organic seal for as many ingredients as possible. This shows you that the goods have been organically grown in a controlled manner. The Naturland, Demeter and Bioland seals are particularly recommended. Here you can find out why you should prefer them to the EU organic seal: EU organic seal: These things are prohibited with organic

Also, pay attention to the Fairtrade seal, especially for imported nuts and grains. It guarantees fair trading conditions for farmers and also rewards organic farming.

You can also prepare the vital biscuits without eggs, but you should then use half a tablespoon more honey. However, with this variant there is a risk that the cookies will get lost. Then, after baking, while the cookies are still lukewarm, shape them back into cookies to let them cool completely.

If you use egg, you can buy organic eggs without chick shredding, i.e. ones that guarantee the rearing of male chicks.

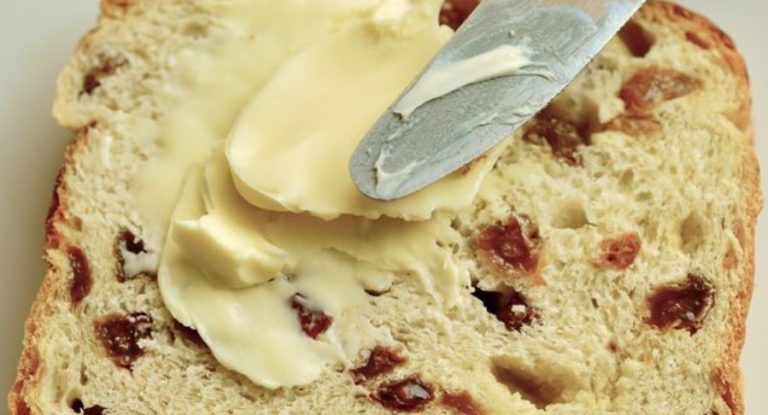
A raisin mare is a delicious Easter pastry made from yeast dough. We present a recipe that you can use to easily bake a raisin mare yourself.

Raisin mares are also known by other names depending on the region. In any case, it is a large, bread-like pastry made from a medium-heavy yeast dough. It contains a relatively large amount of fat and sugar. If you like it less sweet, you can also reduce the amount of sugar.

Make sure the ingredients are organic. This is particularly important with ingredients of animal origin, because you can support more species-appropriate animal husbandry.

In general, by buying organic products, you support agriculture that does not use chemical-synthetic pesticides and thus protects the environment and health.

A recipe for raisin mares

Ingredients:

500 g flour (+ something for dusting the mold)
0.5 tsp salt
50 gsugar
50 g butter (+ something to grease the mold)
250 ml milk (+ something for brushing)
1 pack(s) fresh yeast (42g)
1 egg
150 g raisins

Directions:

In a bowl, mix the flour with the salt and sugar. Make a well in the middle.
In a small saucepan, melt the butter. Add the milk and warm it to lukewarm. Add the yeast in small pieces and stir the mixture until the yeast has dissolved.
Pour the yeast milk into the flour well. Gently stir in a little flour with a fork. Let the mixture sit for five minutes.
Add the egg. Using your hands or the dough hooks of a hand mixer or food processor, knead everything together for about 5 minutes until you have a smooth dough. Add some flour or milk if needed. The dough should pull away from the bowl easily and be neither very firm nor very sticky.
Cover the bowl with a clean kitchen towel, put it in a warm place and let the dough rise for about 40 minutes. It should roughly double.
Grease a loaf tin (about 30 centimeters long) with some butter and dust it with flour.
Add the raisins to the dough and knead it again for five minutes.
Shape the dough to fit your baking pan and place it in the pan. Cover and let rise in a warm place for another 45 minutes.
Brush the dough with a little milk for a nice browning and shine. Bake the raisin mares at 170 degrees Celsius for about 40 minutes.

This is how you can vary the raisin mares

If you don’t like raisins, you can replace them with other dried fruits. Dried cranberries or dried cherries are suitable, for example. Fresh fruit is not suitable because it loses too much liquid and the dough then becomes mushy.

You can use plant milk of your choice instead of milk. You can easily replace the butter with margarine.

With 500 grams of flour, the recipe results in a fairly large mare of raisins. It stays fresh in a bread bin for two to three days. You can use leftovers to make French toasts.

Alternatively, you can slice the raisin mares and freeze them. Then you can defrost individual slices. They are particularly tasty if you toast them briefly.