Tag

Blanching

Browsing

From July to the end of September you can buy fresh beans at the market or harvest them in the garden. We explain how you can blanch the vitamin-rich vegetables.

Beans are delicious, versatile and very healthy. In addition to protein, they also contain important vitamins and minerals such as vitamin C, vitamin A, iron and magnesium.

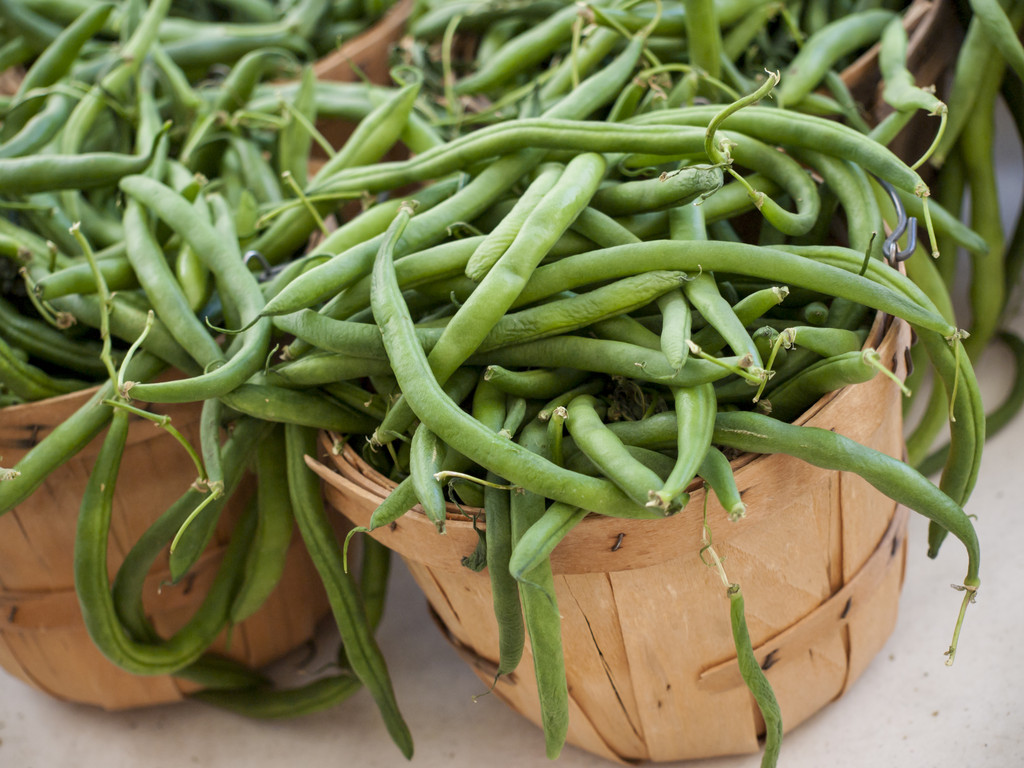
You can harvest beans from July to the end of September or buy them locally at the market. Fresh beans are crisp, firm and intensely green. But what can you do if you have more beans in the garden than you can handle? Fresh beans only keep for three days, even in the fridge. One option is to freeze the beans. This makes them durable and you can also use them out of season. But before you freeze them, you need to blanch the beans.

Blanching beans: the preparations

Wash the beans thoroughly with hot water.
Remove the end and the base of the stem with a knife. If the beans are very long, you can cut them in half. But that is optional. This will make it easier for you to process them afterwards.

Blanching beans: this is how it works

Bring enough water to a boil in a saucepan. The amount of water should not exceed 2/3 of the pot, otherwise there will not be enough space for the beans.
Meanwhile, have a bowl of ice water ready. Add some ice cubes to the water.
Once the water is boiling, add the beans to the pot.
Leave the beans in the boiling water for 3 to 4 minutes. If you prefer something softer, wait about 7 to 10 minutes.
Then scoop the beans out of the water with a slotted spoon.
Now put the beans directly into the ice water. This interrupts the cooking process and the beans stay crisp.
Leave the beans in the ice water until cool. After about three minutes, you can take them out of the water with a sieve and let them drain. If you want, you can also gently pat them dry with a cloth.

Process blanched beans

After you blanch the beans, you can freeze them. They will keep like this for up to a year. The beans taste great as an accompaniment to potatoes, in salads or casseroles. But the beans also make a delicious and healthy meal in a vegetable pan or simply tossed in a little fat.

Blanching is a handy trick for processing many types of vegetables and fruits. We’ll show you how your vegetables stay fresh and crunchy for longer.

Benefits of Blanching

Blanching is a simple and very effective technique for processing vegetables and fruit. Typically, you blanch by adding your fresh veggies or fruit to a large pot of boiling, salted water, and shocking them in cold ice water at the end of the cooking time. In the case of numerous fresh vegetables, a process is set in motion which, depending on the variety, inhibits toxins, releases important nutrients or makes the vegetables last longer.

Due to the short time in boiling water, your fresh vegetables do not lose their taste and remain crisp and fresh. It is often advisable to blanch vegetables before freezing them. In this way, it withstands the cold temperatures better and cooks more quickly when processed later.

Blanching vegetables sets important processes in motion:
It deactivates certain enzymes and thus stops unwanted changes in the fresh product. (such as progressive maturation and the associated changes in taste)
It preserves valuable ingredients such as vitamins and minerals.
It allows vegetables to retain their fresh color.
It makes many types of vegetables last longer and prepares them for freezing.
It draws out toxins and harmful germs.
It softens inedible flavors and substances that are difficult to digest (e.g. some types of cabbage).
It cooks sensitive vegetables ready to eat (e.g. leaf spinach or chard).
Blanching is also suitable for some types of fruit and nuts: Almonds, peaches or tomatoes, for example, can be skinned more easily after a short time in the bubbling cooking water and processed into mush or sauce, for example.

Blanching – that’s how it works

You can blanch in no time at all. It is only important that you take into account the individual cooking time depending on the variety.

For blanching you need:
a large pot full of water
Salt
Skimmer or sieve for chilling
That’s how it’s done:
Bring the water in your pot to a boil. Carefully add some salt, making sure the water doesn’t overflow.
Add your vegetables or fruit to the boiling water and let it simmer according to the cooking time.
Lift it out with the slotted spoon or drain into a large colander.
Pour cold water over your vegetables or fruit to stop the cooking process immediately. It’s even easier to have a second pot of ice water ready to dump your blanched veggies into after cooking time.
Wait for the vegetables to cool.

Blanch – note individual cooking times

Depending on the variety, you have to wait a certain amount of time for blanching. Our overview will help you. The times are for one 500 gram serving in a large saucepan.

Artichokes: 6 minutes
Beans: 3-4 minutes
Cauliflower: 3 minutes
Carrots: 2 minutes
Peppers: 2 minutes
Brussels sprouts: 3 minutes
Peas: 2 minutes
Corn on the cob: 5 minutes
Spinach: 1/2 – 1 minute
Apples: 2 minutes
Pears: 2 minutes
Blanching cabbage simplifies the preparation. The leaves, which are often brittle, become softer with a short boil and are then easier to roll.

Chinese cabbage (leaves): 2 minutes
Chard: 1-2 minutes
Leek: 3 minutes
Pointed cabbage leaves: 2 minutes
White cabbage leaves: 2 minutes
Savoy cabbage leaves: 2 minutes
To make raw vegetables more digestible – for example in a salad – you can also blanch them. Just add the following types of vegetables to the boiling water for a short time before you eat them al dente or freeze them for later.

Broccoli: 3 minutes
Kohlrabi: 3 minutes
Celery: 5 minutes
Zucchini: 3 minutes
Sugar snap peas: 2 minutes

Freezing rhubarb is a great way to preserve it and enjoy it out of season. We’ll show you how to do it and whether you have to cook it beforehand.

Rhubarb is in season from early April through June. The rhubarb harvest time is always over far too quickly. Maybe you have a surplus harvest and are looking for a way to preserve the vegetables. Freezing is a good option – we’ll show you how it works.

It’s best to avoid plastic containers and freezer bags when freezing the rhubarb. Screw-on jars are a good alternative. It also makes sense to portion the rhubarb before freezing; so you can thaw and process the right amount later.

Freezing rhubarb: this is how it works

First remove the rhubarb leaves. The leaves are not edible, but you can make plant fertilizer out of them, for example: put the leaves in cold water and let them steep for 24 hours. With the resulting extract you can water your plants and give them valuable nutrients.
Rinse the rhubarb stalks under running water and then drain them.
Cut off the ends with a knife. This is only necessary if the ends are hard. You can usually process fresh rhubarb without this step.
Now you can peel the rhubarb.
Cut the pickled vegetables into chunks. These should be between two and five centimeters long.
At this point you can blanch the rhubarb. However, the investment of time and energy is not absolutely necessary. Blanching preserves the color better, but does not change the taste. The shelf life does not change if you freeze the rhubarb raw.
Layer the rhubarb pieces in screw-top jars. Fill it up to just under the brim and seal it. Label the glasses with the respective date. Then you can store them in the freezer and freeze the rhubarb.
Frozen rhubarb will keep for 10 to 12 months. After defrosting, you can make rhubarb compote or rhubarb crumble, for example.

Tip: If you want to avoid the rhubarb pieces sticking together after freezing, you can prefreeze them: spread the pieces out on plates – they shouldn’t touch each other. Freeze the rhubarb for about an hour and then pour the pieces into glasses. If you have a freezer instead of a small freezer compartment, you can also prefreeze the pieces on a baking sheet or tray.