Tag

Cake

Browsing

Lamington cake: An Australian classic

Lamington cake is a beloved Australian dessert that has been around since the early 1900s. It consists of a sponge cake that is coated in a layer of chocolate and then rolled in desiccated coconut. The cake is usually cut into small squares or rectangles, making it perfect for layering with other ingredients.

The origins of the lamington are somewhat disputed, but it is believed to have been named after Lord Lamington, who served as the Governor of Queensland from 1896 to 1901. It is said that his cook accidentally dropped a sponge cake into a bowl of chocolate and then coated it in coconut to hide the mistake. The resulting creation was a hit with Lord Lamington and his guests, and the rest is history.

Today, lamington cake is a staple in Australian bakeries and is enjoyed by people all over the world. Its unique combination of chocolate and coconut makes it a delicious and memorable dessert.

Vanilla ice cream: Cool and creamy layers

Vanilla ice cream is a classic dessert that pairs perfectly with lamington cake. Its cool and creamy texture provides a refreshing contrast to the rich chocolate and coconut flavors of the cake. When layering the cake with ice cream, it is important to let the ice cream soften slightly before spreading it over the cake. This will help to ensure that the layers are smooth and even.

To make the ice cream layer even more special, you can mix in some shredded coconut or chopped nuts. This will add some texture and flavor to the ice cream and make it even more delicious. Once the ice cream layer is in place, the cake can be placed in the freezer to set.

Raspberry sauce: The perfect complement

Raspberry sauce is a tart and tangy topping that perfectly complements the sweetness of the lamington cake and vanilla ice cream. To make the sauce, simply puree some fresh or frozen raspberries and add a bit of sugar to taste. The sauce can be drizzled over the top of the cake, or served on the side for individual portions.

In addition to its delicious flavor, raspberry sauce also adds a beautiful pop of color to the dessert. The vibrant red hue of the sauce makes the cake look even more tempting and appetizing. With its combination of rich chocolate, creamy vanilla ice cream, and tangy raspberry sauce, the lamington ice cream cake is a dessert that is sure to impress.

Introduction: What are Lamingtons?

Lamingtons are a popular dessert that originated in Australia, made with sponge cake squares coated in chocolate icing and shredded coconut. They are typically served at afternoon tea and other gatherings and are beloved for their light and fluffy texture and rich, sweet flavor. While the exact origins of the Lamington are unclear, it is believed to have been invented in the early 1900s and named after Lord Lamington, who was Governor of Queensland at the time. Lamingtons have since become a staple of Australian cuisine and are enjoyed around the world.

Ingredients and Preparation: How to Make Lamingtons

To make Lamingtons, you will need a sponge cake, chocolate icing, and shredded coconut. Start by making the sponge cake, which can be done from scratch or using a store-bought mix. Once the cake has cooled, cut it into square pieces. To make the icing, mix together cocoa powder, powdered sugar, and milk until smooth. Dip each cake square into the icing, making sure to coat all sides, and then roll it in shredded coconut. Allow the Lamingtons to set for at least 30 minutes before serving.

Serving and Storage: Tips for Enjoying Lamingtons at Their Best

Lamingtons are best enjoyed fresh, but they can be stored for up to 2-3 days in an airtight container at room temperature. To serve, simply place the Lamingtons on a platter and enjoy with a cup of tea or coffee. For a twist on the traditional recipe, try adding a layer of jam or cream between the cake layers before coating in icing and coconut. Lamingtons can also be made with different flavors of sponge cake, such as chocolate or lemon, for a unique twist on this classic treat.

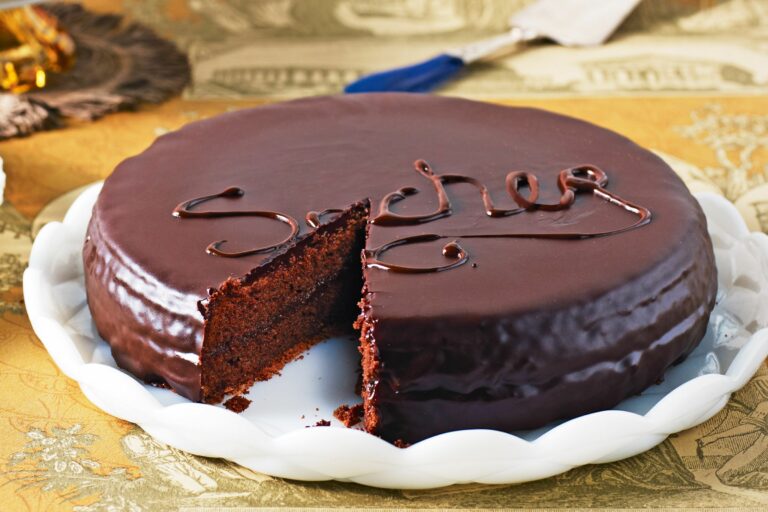
What is Sachertorte?

Sachertorte is a famous Viennese dessert that is renowned all over the world for its rich and indulgent taste. It is a chocolate cake that is layered with apricot jam and then covered in a dark chocolate glaze. The dessert has a distinct taste and texture that makes it one of the most beloved chocolate cakes in the world. Sachertorte was first created in 1832 by Franz Sacher, a 16-year-old apprentice chef, who made it for a high-ranking diplomat. Since then, the dessert has become a symbol of Viennese culture and cuisine.

How is Sachertorte made?

The making of Sachertorte is a delicate and precise process that requires a lot of care and attention to detail. The cake is made from a combination of high-quality dark chocolate, eggs, sugar, flour, and butter. The cake batter is then baked in a round tin until it is perfectly cooked. Once the cake has cooled, it is then sliced in half, and a layer of apricot jam is spread over the bottom half. The top half of the cake is then placed back on top, and the entire cake is covered in a rich and decadent dark chocolate glaze. The glaze is made from a mixture of melted dark chocolate and butter, which is then poured over the cake, giving it a smooth and glossy finish.

Where can you find Sachertorte?

Sachertorte is a popular dessert that is available in many cafes and pastry shops around the world. However, the best place to try Sachertorte is in Vienna, Austria, where it originated. The original Sachertorte recipe is still used by the Hotel Sacher in Vienna, which was founded by Franz Sacher’s son in 1876. The hotel’s restaurant serves Sachertorte to this day, and it is considered to be one of the best places to try this iconic dessert. Additionally, many other pastry shops in Vienna also serve Sachertorte, and it is a must-try dessert for anyone visiting the city.

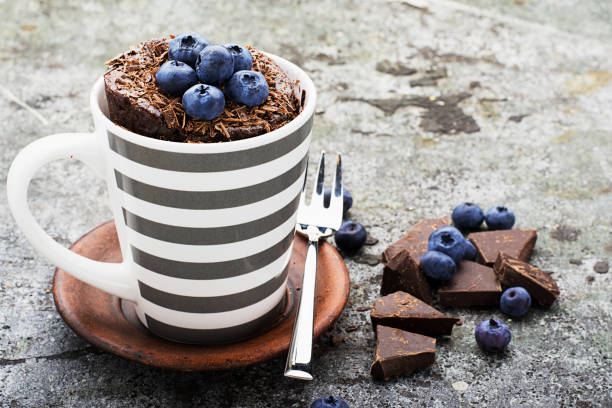
They are THE absolute trend among cake fans who don’t have much time but still want to enjoy a delicious pastry: mug cakes. The mini cakes from the cup have their origin – how could it be otherwise – in the USA and are now becoming increasingly popular in Germany, so well-known food companies have already included the cupcake in their range and offer various baking mixes in the supermarkets. But of course, you can also make the delicious creations yourself. We’ll tell you how to make mug cakes yourself.

They succeed in no time at all and taste simply delicious: mug cakes are the latest craze and are extremely popular with baking fans worldwide! The mini cakes, which are cooked in the microwave, are considered a real treat and can be spooned straight out of the cup. You don’t need a scale or a mixer to prepare it. All you need is a little imagination! Would you like to make a mug cake yourself? Then get started right away.

It does not require many ingredients – you can design and develop the cakes according to your preferences. And best of all: A mug cake is only one portion, which is extremely figure-friendly. Because unlike with an ordinary cake or a tart, you can’t just order a second helping…

Make mug cake yourself – the basic recipe

For 1 portion or 1 mug of cake

  • 30 grams of butter
  • 1 egg (M)
  • 2 tbsp sugar
  • 1 vanilla bean
  • 1 tbsp cream
  • 5 tbsp flour
  • 1/2 tsp baking powder

For the topping

  • powdered sugar
  • optional chocolate glaze.

Preparation

1. Melt butter in the microwave. Split the vanilla pod lengthways and scrape out the pulp. In a large mug, beat the egg vigorously with the sugar and the vanilla pulp; Gradually add all the other ingredients, including the melted butter, while stirring constantly.

2. Place the cup, including the liquid content, in the microwave at 800 watts for around 2 minutes so that the dough rises.

3. Take the mug out of the microwave (caution: the handle is hot) and sprinkle chocolate icing or some icing sugar over it.

The nice thing about this basic recipe is that you can adapt it to your own preferences – for example, add cocoa powder (3 tablespoons), work a few drops of chocolate into the dough, use colorful sprinkles or brittle as a topping, and and and… If you want, you can use the cake also put on a little cream or garnish it with a fruity sauce. There are no limits to your ideas! Another tip: If the mug cake appears a bit dry, this is usually due to the individual microwave setting. Here it helps to approach the ideal result or to add a little milk (2 teaspoons) when preparing the dough. Work out your favorite mug cake creation and tell us your favorite recipe! We are excited…

You will enchant your guests with this dessert: lukewarm chocolate cake with a liquid core… The interplay between a crunchy coating and delicately melting chocolate is very simple; it just needs some time to let the dough rest. We show you how it works.

The chocolate cake is aptly called “Lava Chocolate Cake” in English: The lukewarm chocolate erupts like a delicious volcanic eruption as soon as you prick the soft cake with a fork. Add a scoop of vanilla ice cream, whipped cream, or fresh berries and you have a dessert that just makes you happy.

A small challenge arises when baking the chocolate cake with a liquid core: finding the balance between too short (then the cake looks more like a mushy chocolate accident) and too long a baking time, which allows the chocolate volcano to dry up. In our recipe, the dough is chilled for a few hours so the core stays nice and liquid.

Make your own chocolate cake with a liquid core: the ingredients

For 10 cakes you need:

  • 150 grams of dark chocolate with 70 percent cocoa content
  • 6 eggs
  • 150 grams of butter
  • 150 grams of sugar
  • 100 grams of flour
  • also 1 muffin pan and parchment paper

Make a chocolate cake with a liquid core yourself: this is how it works

Chop the chocolate into small pieces. It is best to use a large, heavy kitchen knife and a wooden cutting board. Place the chopped chocolate in a bowl and melt the pieces over a bain-marie. When the chocolate mass is completely smooth, add the butter in small cubes. Leave over the water bath until the chocolate and butter form a smooth, homogeneous mixture.

In another bowl, beat the eggs and whisk them with the sugar using a hand mixer. Now the flour is sifted over the mass and stirred in. Add the slightly cooled chocolate-butter mixture and whisk until smooth. Now the chocolate dough has to rest in the fridge for at least five hours, preferably overnight.

After taking the batter out of the fridge, prepare the muffin tins by greasing them and placing a narrow strip of parchment paper in each, extending over the rim. You can use the ends of this strip to simply lift the cakes out of the molds after baking. Preheat the oven to 180 degrees.

Since the dough hardly rises during baking, you can fill the molds almost to the brim. Bake the cakes in the preheated oven for ten minutes. They’re done when the surface is no longer runny but still soft. After baking, leave the cakes in the tin for about a minute and then carefully lift them out using the parchment paper strip. Arrange on plates immediately, dust with a little icing sugar, garnish with ice cream, cream, or fruit and serve – bon appetit!

Make a chocolate cake with a liquid core yourself: variants

Peanut butter or Nutella junkie? Add a small teaspoon of your favorite sin to the muffin tin before baking. Smaller truffles also work well.

The perfect accompaniment to sauces: the tart-sweet aroma of the mango goes perfectly with the chocolate cake with a liquid core. For a quick mango sauce, puree the flesh of two ripe mangoes with 3 tablespoons of orange juice and arrange the cakes on a sauce dish. Passion fruit tastes great too!

Can it be a little sharper? Then add half a finely chopped chili pepper to the batter. The finely grated zest of an organic orange is also suitable for flavoring the cakes.

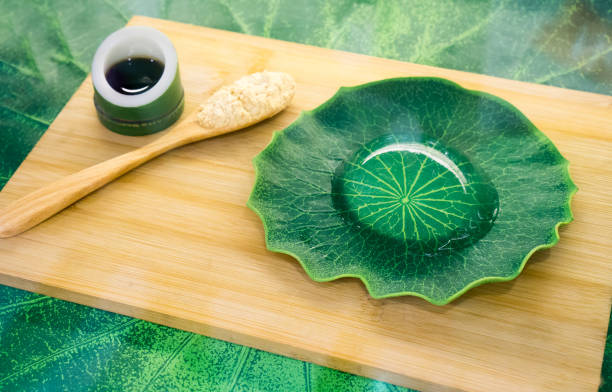
You can eat this oversized raindrop! Raindrop cake is the name of the latest food trend from Japan and is said to be THE alternative to cake. It’s vegan and has 0 calories – no wonder, after all, it consists only of mineral water and agar-agar. EAT SMARTER introduces the Raindrop Cake.

Raindrop Cake: vegan & low in calories

The Raindrop Cake is currently triggering a real hype on Instagram, Facebook & Co. While it reminds some of a breast implant, others think the cake looks like a sip of water in space.

In fact, the Raindrop Cake consists of mineral water and agar-agar. This makes it vegan, low in calories, and a lighter and more colorless version of the currently trendy freakshakes or macaroons. But can the transparent drop taste good?

Raindrops to eat

Foodies who are currently vacationing in Japan or New York and visiting the street food markets there naturally don’t want to miss out on this food trend: They report that the raindrop cake melts on the tongue as soon as it is eaten with a spoon. So the consistency is great – but the taste is not particularly innovative, because mineral water and the vegetable gelling agent agar appear neutral.

To add a little more sweetness to the mix – which is what you usually expect from a cake – the Raindrop Cake is served with coconut blossom syrup and toasted soy flour. Chef Darren Wong invented the raindrop to eat and took it back to New York after a trip to Japan as inspiration. The light Raindrop Cake is now available there for about 8 dollars.

The recipe for the Raindrop Cake

The ingredients for 2 servings:

  • 300 ml still mineral water
  • 1 tsp agar agar
  • 3 teaspoons coconut blossom syrup (or agave syrup)
  • 3 tsp soy flour (toasted)

The preparation:

  1. Boil still mineral water in a saucepan and dissolve agar in it according to package instructions.
  2. Boil the liquid on low heat for about three minutes. Then pour into two bowls and place in the fridge for about two hours to set.
  3. Pour the finished Raindrop Cake onto a plate and serve with the coconut blossom syrup and the roasted soy flour.

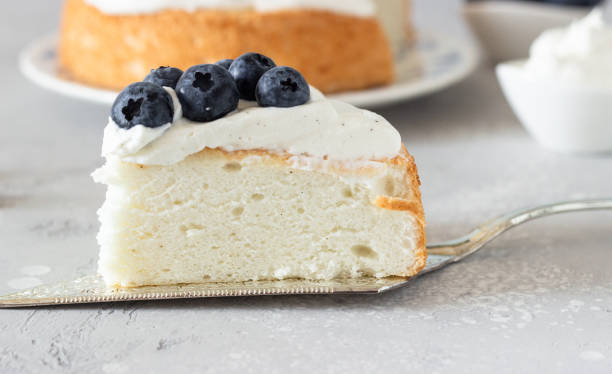
What is fluffy, not too sweet, and fits perfectly on every cake board? The Angel Food Cake! With a handful of ingredients, a little patience, and loving preparation, this cake sensation can be conjured up in a short time. And best of all: This pleasure is not a calorie sin! EAT SMARTER shows you how to make the Angel Food Cake yourself.

Fluffy cake love

The special thing about Angel Food Cake is its unique consistency: it is tender and soft, like a pillow you want to sink into. A piece of cake can be easily squeezed together without breaking into a thousand crumbs – it springs back to its original shape just as undamaged and is by no means rubbery but absolutely fluffy!

The angel cake is so healthy

If you would like to treat yourself to a piece of cake, you can cut yourself a slice at the Angel Food Cake! A piece of angel cake contains around 200 kilocalories and little fat – a treat that you can enjoy with a clear conscience! The topping made of cream and low-fat quark makes the Angel Food Cake extra creamy. The berries bring a subtle sweetness and the taste of summer to the plate.

Make Angel Food Cake yourself

The ingredients:

For the dough:

  • 80 g wheat flour type 405
  • 70 g cornstarch
  • 270g powdered sugar
  • 10 egg whites (use the yolk for something else)

For the topping:

  • 200 ml whipped cream
  • 100 g low-fat quark
  • 1 tsp powdered sugar
  • 250 g berry mix
  • Powdered sugar for dusting, if desired

The preparation:

  1. In a bowl, sift the wheat flour, cornstarch, and 70 grams of the icing sugar finely four times. Then preheat the oven to 180 degrees top and bottom heat.
  2. In a large bowl, lightly beat the egg whites until stiff, and then sprinkle in the remaining 200 grams of the powdered sugar. Continue beating until stiff and glossy.
  3. Sift half of the flour mixture over the egg white mixture and carefully fold in. Do the same with the other half of the mixture.
  4. Pour the batter into an Angel Food Cake mold (not greased), smooth it out, and tap it twice on the work surface to close the last air gaps. Bake in the oven for about 25 minutes.
  5. Take the Angel Food Cake out of the oven and turn it upside down on its metal feet – leave it to cool completely (at least four hours). If the cake has not slipped out of the mold by itself after this time, you can carefully help with a knife.
  6. Whip the cream until stiff, stir the low-fat quark until creamy and mix together carefully. Stir in the powdered sugar. Spread the cream and quark mixture on the cake and garnish with berries and powdered sugar, if you like.

Low carb marble cake? That’s fine! Because this cake is actually low in carbohydrates and therefore has a few calories less than its classic colleague. Instead of flour, ground almonds are used here. And the result is really impressive: A light, fluffy cake that is reminiscent of childhood days. EAT SMARTER shows how to make the low-carb cake yourself.

Bake low carb

In a low-carb diet, carbohydrates are avoided completely or for the most part. Especially when it comes to low-carb baking, you are often faced with the question: Which low-carb alternatives are there?

Cakes based on quark or cream cheese are very suitable. But it shouldn’t always be a creamy cake. So if you want a classic low-carb cake, you can replace the flour with coconut or almond flour, for example, which is sometimes quite expensive. We simply used ground almonds for this recipe.

Of course, the normal sugar must also be left out for low-carb cakes. Examples include stevia and xylitol.

Xylitol as a sugar substitute

Although xylitol is a pure carbohydrate, Zucker is suitable for a low-carb diet. Fatty acids are mainly formed from xylitol, which is not metabolized as quickly as glucose (simple sugar). Therefore, it can be used well by diabetics.

Unlike sugar, the blood sugar level rises very little after consuming xylitol, which relieves the pancreas. Nevertheless, xylitol has no negative impact on lipid metabolism and blood lipid levels. Due to the constant blood sugar level, there are no food cravings, as these are usually caused by a drop in blood sugar levels. Therefore, xylitol is very suitable as a sugar substitute for low-carb cakes.

The recipe for the low carb marble cake

For 15 pieces

  • 100 g xylitol
  • 50 grams of butter
  • 6 eggs
  • 250 g cottage cheese
  • 1 lemon
  • 2 vanilla beans
  • 220 g ground almonds
  • 1 pinch of baking soda
  • 1 pinch of salt
  • 2 tbsp baking cocoa

Preparation steps

  1. Preheat the oven to 160 degrees. Grease the loaf tin (or Gugelhupf tin) with a little butter or oil.
  2. Set the eggs and egg whites aside. Wash the lemon in hot water and grate the zest, then scrape out the vanilla beans.
  3. In a large bowl, mix together the butter and xylitol until creamy. Gradually add the egg yolks.
  4. Now stir in the quark, lemon zest, and vanilla pulp.
  5. Add the ground almonds and baking soda to the batter and mix well to form a batter. Beat the egg whites with salt until stiff and carefully fold into the batter.
  6. Divide the dough in half and mix one half with the cocoa powder.
  7. Put the light dough in the mold and the chocolate part on top. Mix the batter with a wooden skewer or knife to create the typical marble cake pattern.
  8. Bake the cake for about 45 minutes and let it cool down a bit. Serve warm or cold.

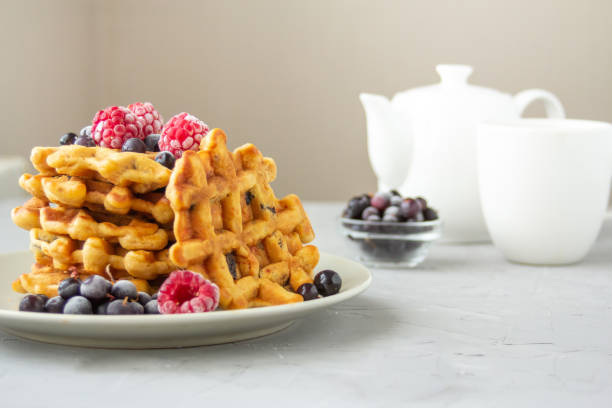
Do you have carrots? Sure, we have – in the form of golden brown carrot cake waffles! Instead of cakes, cupcakes, and the like, we don’t serve the spring classic out of the oven, but out of a waffle iron. Together with the creamy frosting, this combination has an unbeatable taste and is ready in 30 minutes. EAT SMARTER has the simple recipe for making carrot cake waffles yourself!

Sweet carrot cake from the waffle iron

Carrot cake, carrot cake, or carrot cake: The sweet specialty is world-famous under many names and is served in just as many different forms. In addition to cakes, cupcakes, and muffins, the classic can also be prepared as a waffle – practical to take away and quick to make. With a large blob of frosting on top, the carrot cake waffles taste simply heavenly!

Thanks to the wholemeal spelled flour used and the complex carbohydrates and fiber it contains, the waffles fill you up for a long time and keep your blood sugar level constant. This carrot cake variant is a great alternative for breakfast, instead of cake in the afternoon or for Easter brunch.

Make carrot cake waffles yourself

The ingredients:

  • 200 g butter (room temperature)
  • 100 grams of sugar
  • 6 eggs (size M)
  • 300 g almonds (ground)
  • 80 g wholemeal spelled flour
  • 1 tbsp baking powder
  • 1 tsp cinnamon
  • 1 pinch of salt
  • 300 g carrots (grated)
  • 500 g low-fat quark
  • 150 g natural yogurt
  • 50 g powdered sugar

The preparation:

  1. Cut the butter into small pieces and, using a food processor (or hand mixer), cream together with the sugar in a large mixing bowl.
  2. Now mix all six eggs with the butter mixture one after the other.
  3. In another bowl, mix the ground almonds, wholemeal spelled flour, baking powder, cinnamon, and salt and mix thoroughly with the egg mixture.
  4. Now stir the grated carrots into the batter and let it swell for about ten minutes. Meanwhile, heat up the waffle iron.
  5. Now put the batter in portions in the waffle iron and bake for about five minutes until golden brown – allow to cool.
  6. In the meantime, prepare the frosting: mix the quark, yogurt, and icing sugar together in a bowl until you get a creamy mass, and serve with the carrot cake waffles.

Airy layers of dough and delicate cream are made from mascarpone, amaretto, and strong coffee.

Ingredients for 12 pieces

Dough:

-2 eggs (size M)
-125 grams of sugar
-180 g wheat flour (Type 405)
-2 teaspoons of baking soda
-100ml milk
-100 grams of melted butter

Filling:

-4 egg yolks (egg size M)
-170 grams of sugar
-500 grams of mascarpone
-300 grams of whipped cream
-3 sheets of white gelatin
-100ml of water
-4 tablespoons of instant coffee
-3 tbsp amaretto

Besides that:

-1 tbsp cocoa powder
-1 tbsp powdered sugar

Preparation

  1. Preheat the oven to 175°C. Then grease a springform pan (24cm diameter) and sprinkle the pan with some breadcrumbs.
  2. For the batter, use a whisk or hand mixer to mix the eggs and sugar into a creamy batter. Then mix the flour with the baking powder and fold them into the smooth dough. Next, pour in the milk and butter. Mix the mass gently and fill it into the indicated baking pan.
  3. Bake the dough on the lower rack for about 35 minutes (gas 2, fan oven 150°C). After the finished dough base is removed from the oven, let the base cool in the tin. The cooled soil is then slowly overturned and cut through twice horizontally.
  4. For the filling, beat the egg yolks and sugar with a whisk or hand mixer until you get a soft foaming mass. Then stir in the mascarpone and the cream until stiff and fold in as well.
  5. The gelatine is placed in water for a few minutes so that it softens a bit. Then the gelatine is put into a pot together with water and the coffee powder. The ingredients are heated. Wait until the ingredients have dissolved in the water and then remove the pot from the stove. Stir in the liqueur.
  6. The lower cake base is now placed in the springform pan. Use a spoon to dribble some of the coffee mixtures onto the base and then spread a little mascarpone cream on top of the cake. Do the same for the other two cake bases.
  7. Finally, sift the cocoa and powdered sugar onto the layers of dough. Place the cake in the fridge for about 1 hour before serving.

Ingredient tips

  • Mascarpone is an Italian cream cheese that you can now get from us in almost all supermarkets. If necessary, you can also mix 250 g each of crème fraîche and double cream cheese until creamy. Nothing changes in the preparation.
  • Leftover egg whites freeze great – don’t forget to write the number on the tin.