Make chocolates yourself? Simple, tasty, with heart and soul. That’s how you spoil your loved ones. That’s how you spoil yourself. Clever chocolate recipes to imitate and try out.
In the following, you will learn everything that is important and useful for making chocolates. Why do they taste so good? How to make them yourself easily and simply. Which tips and tricks make the result even more satisfying and numerous tasty praline recipes.
Chocolates to indulge in
Making chocolates is already one of the supreme disciplines of hobby bakers and kitchen heroes. But it is also your pleasure. But it is not that difficult to want to make chocolates yourself. The nice thing about it is that pralines, in contrast to cookies, biscuits, cakes, and tarts, have a much longer shelf life and are edible. So you can let off steam in the kitchen for a whole weekend and always have small and romantic gifts for your loved ones and friends for the next few weeks. Have the courage to try. The tasty, delicious results come all by themselves. It is also a great idea for homemade gifts for Christmas.
Tools, materials, and basic equipment
If you want to make your pralines clean and tidy, you can’t avoid a praline grid and a praline fork. For the first attempts, a wire rack and fork will certainly suffice… but honestly? They are just stopgap measures that unnecessarily complicate work and make it less clean. With a praline fork and praline lattice, on the other hand, you can easily “ignite” any homemade praline. A pot for heating the couverture is also essential.
What’s inside?
If you talk about wanting to produce pralines, you are primarily talking about different fillings that are filled into hollow praline balls. At least these are the classic chocolates. This filling is called can ache and usually consists of lots of cream and couverture as the basic ingredients.
Then it depends on the respective taste. Because the ganache can be upgraded with any alcohol such as rum, whiskey, or Marc de Champagne, refined with special flavors such as pistachios, coconut flakes, coffee, chili, vanilla, or spiced up with fruit components made from raspberries or apricots. Depending on the flavor additive, the required amount of butter also varies. Because this determines the respective fat content of the praline.
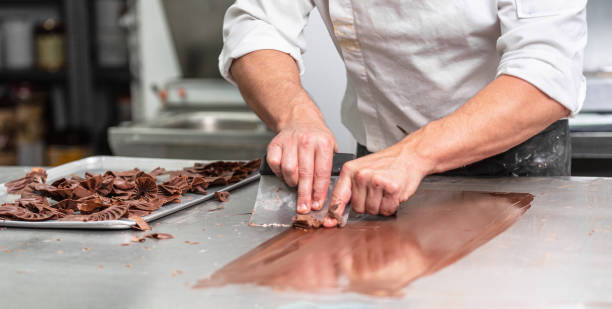
Making chocolates – the mass makes the difference
In order for the praline production to be successful, you need a good base: the can ache. To ensure that this is correct, we have put together some important tips and tricks.
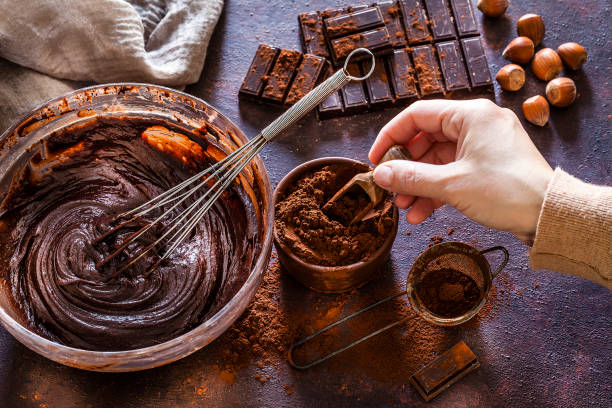
- The mass hardens very quickly. We, therefore, recommend using an electric mixer to mix the individual ingredients. If you want to try it analogously with your own physical strength, you will quickly reach your limits. In addition, the result is not as creamy and smooth.
- The color of the chocolate mass determines the intensity of the taste. The best indication of this is the dried chocolate on the edge. If it is very dark, the cocoa content is very high. The lighter the chocolate, the higher the milk content.
- Sometimes the mass just doesn’t have the desired consistency. If you want to let your praline mass harden a bit, you can put the mass in the fridge. We recommend a minimum of 3 hours, but you can also stay overnight. Then whip the mass up again. This provides additional suppleness.
Shelf life of homemade chocolates
We often ask ourselves how long a praline can keep for so long. You can’t really say that with any certainty. First and foremost, the respective ingredients decide how long the praline can be enjoyed.
Keep in mind that most ganache contains cream. This limits the shelf life of the praline to a good two weeks. In order to guarantee this period, however, the praline must be stored at 15 to 18 degrees … preferably in the dark. In terms of taste, a reduction in the aromas can definitely be determined after two weeks.
Of course, it is also crucial that flawless ingredients are used and that work is carried out as hygienically as possible. The shelf life can also be extended in this way. Sterilization of the ingredients also increases shelf life. It is advisable to heat the cream just before its boiling point, instead of just heating it to 70°C, as many praline recipes recommend. But be careful: If you heat your cream to over 70°C, you lose taste … at least the flavor is changed. In return, you have less to worry about mold growth.
The alcohol content also determines the shelf life. The more alcohol the chocolates contain, the longer they will keep. Classic liqueur pralines can have a shelf life of up to 6 weeks. But here again: the taste diminishes over time. The best thing to do is to produce less and always ensure fresh supplies, then you don’t have to worry about shelf life … and you can try out many more new praline recipes.