Cleaning stainless steel and brushing stains off stainless steel. Stainless steel can now be found in every kitchen and every household. Sometimes, however, every touch leaves annoying marks and stains. With a few home remedies for cleaning stainless steel surfaces, this problem can be solved within minutes.
In the following, we will show you how you can use simple means to make stainless steel in your household shine without having to spend hours scrubbing. Pots, pans, cutlery, sinks, and fittings will shine again in no time and the jewelry will be hygienically clean.
1) Fingerprints don’t have to be
The easiest way to remove fingerprints on stainless steel is with a damp microfiber cloth. If there are greasy traces, you can use some washing-up liquid. After cleaning the stainless steel, you should use an absorbent cloth to dry the surface. This prevents water stains after cleaning.
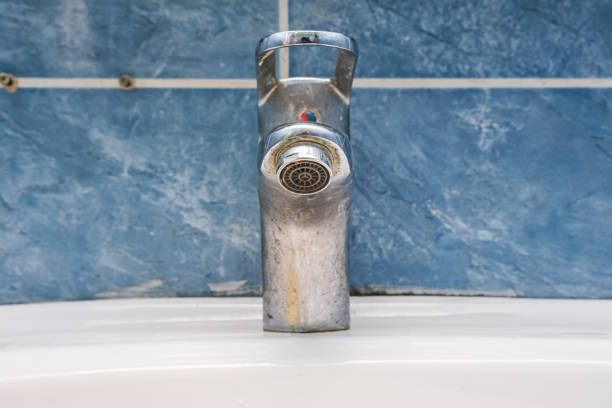
2) Eliminate limescale
If traces of limescale have formed on your stainless steel sink or faucet, use vinegar, a universal household remedy. It works wonders and makes the limescale disappear quickly. It is enough if you put a few splashes of vinegar on a cloth and then use it to clean the sink or the stainless steel faucet.
3) Clean stainless steel pots
Heavy soiling on pots can be removed with baking powder or baking soda. To do this, put baking powder or baking soda in a saucepan, pour in some water, and use a sponge to remove the dirt. You should be careful not to use sponges that are too coarse, as they can leave scratches and damage the surface of the stainless steel. In this case, the baking soda acts as a polishing paste.
You can also read on our website which material in pots has exactly the properties you need and how you can remove burnt food from pots. Here you will find the right solution for every household problem with tips and tricks for correct handling.
4) The power of the lemon
You can rub a lemon on a stained sink, pots, or faucets made of stainless steel to remove the annoying stains. If you don’t have a lemon handy, lemon juice concentrate from the bottle will do. After treatment with the top home remedy lemon, you should rinse the pots with clear water and dry them, otherwise, limescale will quickly form again.
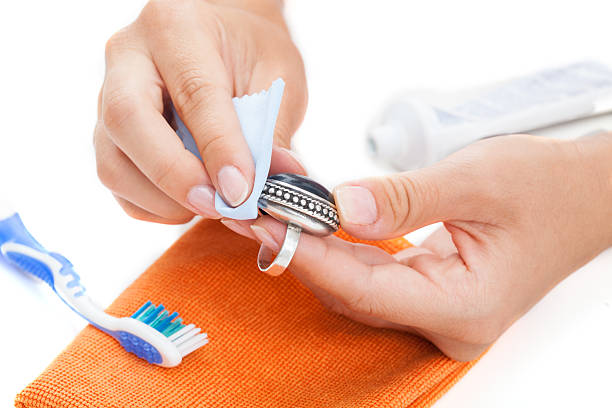
5) Clean stainless steel jewelry
Stainless steel jewelry, which is not only trendy but also ideal for allergy sufferers, should be cleaned from time to time. Through skin contact, dead skin and sebum can accumulate in and on the jewelry, which promotes bacterial growth.
Simple jewelry can be cleaned well with a soft cloth and a little soapy water or washing-up liquid from the kitchen. If the cloth is not enough, you can take some polishing cotton and use it to remove small scratches from the jewelry. However, the polishing cotton should not be used on jewelry with brushed surfaces, as you could lose the brushed effect.
Oops, there’s some dirty silver jewelry in the box too? If, in addition to cleaning stainless steel jewelry, you also find jewelry made of other materials in your casket that you would like to clean, you will also find the right home remedies, tips, and tricks for this with us.
6) Clean stainless steel with cleaning milk
If you don’t want to rely on home remedies, you can also buy special cleaning products for stainless steel, which can also magically remove stubborn dirt. They reliably dissolve all dirt and clean stains from stainless steel surfaces. Here, too, it is necessary to dry the surfaces with a cloth afterward.
7) Special care for non-stainless steel
Although non-stainless steel is rare, it is always found in cutlery and knives. This can be cleaned with the agents described above but requires special care. After cleaning, you should rub the steel surfaces with some oil, for example, sunflower oil, to protect them from rust.
8) Stain removal on matte stainless steel
It can hardly be avoided that some surfaces of kitchen fronts, for example, the extractor hood, are touched when operating or closing. It can be problematic if there are surfaces made of brushed stainless steel in your kitchen. Simply wiping with common fat-dissolving agents is not enough, fingerprints or other stains remain. You should avoid aggressive cleaning agents – the character of the brushed stainless steel suffers as a result, as does the environment.