Tag

Cleaning

Browsing

Cleaning windows with window cleaning agent – anyone can do that. We reveal the trick how detergent ensures streak-free windows and white window frames.

Clean with detergent – this is how it works

Yes, you heard me right. Detergent not only makes the laundry shine clean again. Fabric softener is a real miracle cure for streak-free windows. To do this, simply fill the cap of the packaging with fabric softener and mix the amount with three liters of water. The windows are then cleaned with this liquid in the usual routine. This not only makes the windows shine. The ingredients in the fabric softener also ensure that rainwater rolls off the window glass. Who knows, maybe you won’t have to clean as often afterwards.

Fabric softener for streak-free windows – that’s not all. Because with detergent you can also get the window frames clean. This time we’ll use the washing powder that everyone probably has at home. This also saves you the trip to the shop if the actual window cleaning agent is empty. Detergent powder is particularly suitable for white window frames that can no longer be cleaned properly with normal cleaning.

The procedure is simple: moisten a cloth slightly and put a small amount of the white washing powder on it. The window frame can then be cleaned with it. Isn’t that enough? Then simply repeat the process again. The bleaching content of the powder not only ensures white laundry: after use, the frame will shine in wonderful white again, which makes you want spring.

Clean the shower with a potato? What does the strange household tip bring?

Why would you clean your shower with a potato?

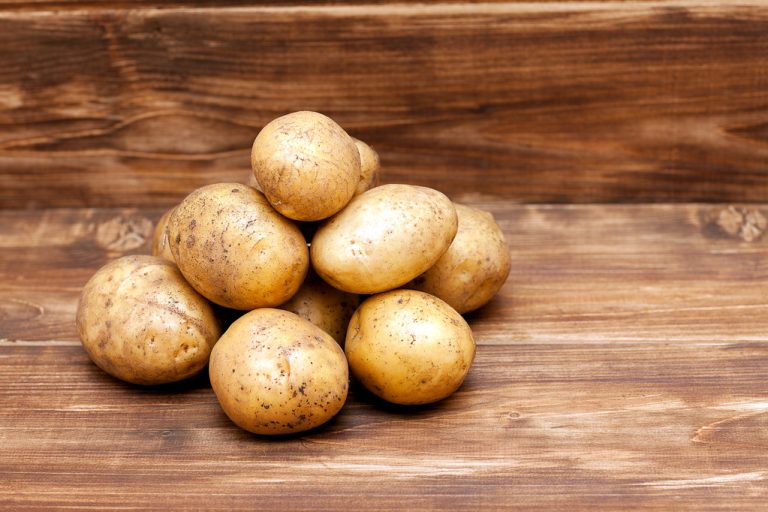
If the potato is already a useful helper here, it can do even more in the shower. If you have a shower with walls or doors made of glass, treat them with a potato to give them a natural impregnation. This ensures that water and dirt roll off the surface and do not stick to it.

Of course, this impregnation doesn’t last forever, but you save yourself having to grab a wiper and towel every time you shower. Another advantage: The potato is an absolutely environmentally friendly and inexpensive household item that you can use at any time without hesitation.

You don’t even need very fresh potatoes for this, but you can also use specimens that are already germinating a bit. This is irrelevant for the cleaning process itself. This way you can also use sprouted potatoes for yourself at the same time and don’t have to throw them in the trash.

Clean the shower with the potato: That’s how it’s done!

So that you can clean your shower in an environmentally friendly and quick way with a potato in the future, you only have to do a few simple steps:
First, clean your shower of all previous limescale stains and water residue. Make sure the shower is completely clean.
Use a raw potato for the subsequent impregnation. It’s best to peel them so you don’t get dirt on your hands or the walls of the glass.
Now cut your potato in half and rub all the glass walls and the doors of the shower stall with the cut inside. Rinse again with water. This will remove any remaining streaks from the remains of the potato and the shower cubicle will not smell of the tuber afterwards.
The next time you take a shower you will notice how the natural lotus effect kicks in and the water rolls off. The sap of the tuber acts as a kind of impregnation agent and makes it difficult for the dirt to stick. Repeat the process after a few showers so that the impregnation is renewed.
This simple method can save you a lot of time and nerves in the future. You are also doing something for the environment at the same time and you can leave expensive bathroom cleaners on the shelf without hesitation. Tip: You can also soak heavily soiled clothes with unsalted potato water. This makes it even easier for dirt to be removed during the subsequent wash cycle.

The yellow, tasty chanterelles or chanterelles usually have to be cleaned beforehand before they can be prepared. cleaning or washing? How to properly clean chanterelles? We have put together helpful, proven tips for you on how this work can be made easier for you.

Properly cleaning chanterelles is easy when you consider the nature and texture of the delicious mushrooms. Because they are delicate, care must be taken. In addition, you can make sure to cut off the stems when collecting them in the forest so that as little dirt as possible gets into the basket.

Pre-cleaning of chanterelles in the forest

Chef and cook can save themselves a lot of work if the mushroom picker leaves the soil, needles, and leaves in the forest and not in the basket. It is even better to sparingly cut off the earthy stalk of the chanterelle when collecting it and scrape off the earth a little. In this way, the final cleaning of the mushroom harvest is just a snap for the housewife (and the househusband) and the further processing of the mushrooms, such as freezing the mushrooms or preparing delicious mushroom dishes, can begin.

Dry mushrooms are better than wet ones

It is very important and helpful to let the mushrooms dry a little. If they were picked after a rain in the forest, they are much dirtier than during a dry period and unfortunately, the dirt cannot be removed as well. If you lay them out on absorbent kitchen paper at home, the chanterelles can dry well. Don’t worry, they won’t lose any of their taste or their firmness!

The cleaning of chanterelles

In order to be able to enjoy your mushrooms later, you need to remove dirt and dirt from them. It is best to use a mushroom brush or a kitchen brush. You clean each mushroom individually by hand. This work can also be done carefully with a kitchen towel if you don’t have a brush at hand. Very sparingly cut off the dry or muddy areas, as well as the stalk, with a kitchen knife. Now the chanterelles are ready for further processing.

Clean or wash chanterelles?

You should definitely clean the chanterelles, and do it by hand. When washing, the delicious mushrooms would unfortunately quickly soak up water and become mushy. Furthermore, the chanterelles also lose their delicious aroma easily. Accordingly, you need to clean chanterelles properly, which means that you should take a little time to do it. However, there is a trick if you want or need to do it faster. It’s the flour trick.

The flour trick for washing mushrooms

If you’re in a hurry, you can use the flour trick. All you need is a small amount of regular flour, a plastic bag, and a sieve. Place the mushrooms in a colander and sprinkle flour over them. Then rub the mushrooms with your hands so that the flour can bind the dirt as a household remedy. Now wash the floury chanterelles briefly under the tap. Dry the chanterelles carefully with paper towels.

Freeze chanterelles properly

The chanterelle keeps fresh for a few days when cleaned and properly stored in the refrigerator at below 7°C. The mushroom can also be frozen well, provided it is very fresh and you proceed as follows: Cut the cleaned mushrooms in half lengthwise and check whether they have been eaten by maggots or worms. Now cut the mushrooms into bite-sized pieces. Then blanch them by putting them in boiling salted water for a minute. Then shock them with ice water and pat them dry. Now freeze them immediately.

The atmosphere of mushroom pickers

Many mushroom pickers swear by cleaning the chanterelles together in a relaxed atmosphere. Placed around a table, preferably outside on the terrace, with a beer or a glass of wine and a nice chat, work becomes a pleasure and seems to be done twice as quickly.
We wish all mushroom pickers and chanterelle cooks a successful season! Incidentally, the real chanterelle is called Eierschwammerl in Austria.

From time to time the car windows have to be cleaned of dirt and streaks. We will show you how you can use simple home remedies to clean and properly clean your car windows. For a clear view and a good and safe journey.

Cleaning car windows can be very annoying. But there is no way around it. Because just activating the wipers is not enough in the long run. For this purpose, we have collected simple methods on how you can easily remove dirt from your car windows.

Home remedies are suitable for cleaning car windows

Instead of going to the expensive car wash, use simple home remedies. Because with these you can effectively clean your car windows. We will also tell you how to clean your car windows without leaving streaks. There are many good cleaning agents in the 2020 windscreen cleaner comparison, but for most methods, you only need a bucket of warm water and one of our home remedies.

1) Clean car windows with washing-up liquid

One of the most popular ways to clean car windows is with warm water and dish soap. To do this, fill a bucket with warm water and add a few drops of washing-up liquid. Then you can use a soft sponge to remove the dirt from your car window. You can then wipe the pane dry with a microfiber cloth. Alternatively, you can also use a newspaper. You should also remove dirt from the wipers. Also, read our tips on removing car stickers.

2) Clean the car window with vinegar water

You can also clean your car windows properly with the effective home remedy vinegar. To do this, mix vinegar essence with water in a ratio of 1:10 and fill it in a spray bottle. You can then lightly spray your car window with it. Then rub it with a bit of crumpled newspaper and dry it properly. Vinegar is also a good home remedy for de-icing car windows in winter.

3) Remove moisture with the blackboard eraser

Easily remove the moisture with a simple chalkboard eraser. Because these absorb the moisture and do not leave a wet film on the panes, such as a cloth or handkerchief. You can also get blackboard erasers in office supply stores or online for a few euros. You can also easily store the good piece in your glove compartment. So you always have it quickly at hand. Also note our article on reducing humidity and dehumidification in rooms, as well as tips against a smelly air conditioning system.

4) Cleaning sponge for cleaning car windows

Or use a special cleaning sponge to clean your car window from the inside. This makes cleaning car windows child’s play. If you don’t have any glass cleaner at hand when you’re out and about, this special cleaning sponge is particularly suitable. Because it has two different cleaning sides. With one, you can absorb the moisture. And with the other side, you can remove the stubborn dirt. In addition, note our tips on replacing bleached plastic in the car.

5) Clean car windows from the inside with glass cleaner

Cleaning the car windows from the inside is also an annoying topic. It often takes a little self-motivation and you have to overcome your weaker self. It doesn’t take much to clean the car window from the inside as well. To do this, you should first wipe the inside with a slightly damp cloth and let the whole thing dry with the windows open. Then you can put some glass cleaner on a kitchen towel and use it to clean the inside of the car window. Then rub everything dry with a bit of newspaper.

6) Wooden spoon for hard-to-reach places

A wooden spoon can also help you to clean the car windows. Especially in hard-to-reach places like corners of car windows. All you have to do is place a cloth over the wooden spoon and then moisten it with the cleaning agent of your choice. Then you can easily clean the corners of your car windows with it. Also, note our tips for cleaning car seats and caring for car upholstery.

7) Clean tinted car windows

You should be careful when cleaning tinted car windows. Because some cleaners could severely damage the tinted windows. These include, in particular, abrasive, enzyme-based, and salmiak or ammonia-based cleaning agents. Accordingly, only use water and a soft cloth to clean tinted car windows. You should avoid the edges of the tint so that it does not peel off. If you are in the process of selling your car, read our car selling tips and tricks.

8) Eliminate bugs from car windows

Newspaper and old tights can help you clean your car windows properly and get rid of annoying insect dirt. Accordingly, you can wipe the affected areas with damp newspaper. This will soak the insect debris. As a result, they are easier to remove afterward. Finally, you can wipe away the soaked bug residue with an old pantyhose. If you decide to drive to the car wash anyway, follow our car wash tips.

Defrosting the fridge is not that difficult. We offer you many useful tips and a guide that will get the job done quickly.

The fridge needs to be defrosted regularly to keep it working properly. Electricity costs also increase if cleaning is not carried out. We would therefore like to show you a few tips on how to defrost the refrigerator, clean it quickly and keep it clean.

Always defrost the refrigerator quickly

It is important to defrost the refrigerator quickly. Because the food has to be cooled again quickly. Most of the time, the refrigerator is also connected to the freezer, so that the frozen food could thaw there when it is switched off. Therefore, action must be taken quickly. Incidentally, the most important reason for defrosting the refrigerator is that energy costs increase when there is a lot of ice.

Regular defrosting is important in order not to have any energy guzzlers in the house. The food from the fridge can easily be on the table for an hour, after all, when you go shopping, you don’t have the opportunity to put the food in the fridge immediately. If you also want to defrost your freezer, you have to think better. Neighbors with space in the freezer could help here. Otherwise, in winter, you can put things outside to keep them cold and frozen.

Quickly clean the fridge

The refrigerator can be cleaned with warm water and washing-up liquid. Simply wash, dry, and put away. All glass panes, fruit trays, and more can basically be put in the dishwasher. If the fridge smells bad, you no longer have to clean it, but instead, use a solution of lemon washing-up liquid. That means you prepare water with washing-up liquid and add citric acid. The bad smell is masked and the refrigerator shines like new after cleaning.

But even after cleaning, the citric acid can be placed in the refrigerator. The liquid is in a cup of slices of lemon is on a plate. So the fridge smells like pure summer.

Defrost hot water in the refrigerator when there is a lot of ice

If the fridge is very iced up, simply place a pot of hot water in the unit. The same goes for the freezer too. Some people also like to use the hairdryer to make ice removal easier. If you do this, you save long waiting times and can put the food in the fridge faster.

The condensation water must of course be collected, this can be done with towels that you simply put in the bottom of the fridge or with dishcloths. The fat pan from the oven is also a great help.

Vinegar disinfects the refrigerator

If you feel like you have to disinfect the refrigerator, you should use vinegar. Simply mix warm water with vinegar and not only unpleasant smells are gone. Vinegar essence is not recommended here, it smells far too strong and of course, the smell also spreads to the food in the refrigerator.

Tips for cleaning dirty baby clothes. When a baby’s clothes are affected by breast milk feces and other stains, then they need special cleaning. We clarify the most important questions about getting baby clothes clean again.

Anyone who breastfeeds their child has certainly experienced that when the baby has a bowel movement, something often gets into the baby’s clothes. Then the laundry is difficult to clean again. So these tips will help you.

How do get baby clothes clean again?

All sorts of stains collect on baby clothes and basic equipment. It can sometimes happen that the burp lands on the clothing and the porridge are spat out again. And then there are the little accidents when the bowel movement literally “goes in the pants”. But how do you get this dirt out of baby clothes and which detergent is suitable for baby clothes?

1) Clean baby clothes properly

If the baby’s clothes have become dirty from feces or other stubborn stains, then you should soak the clothes in warm water to pre-treat them. Then add a little Vanish Oxi for whites and let it sit for a while. You may need to give it a quick scrub with a brush. Then wash it with the normal laundry. Then the stubborn stains are gone. The same goes for removing carrot stains or getting rid of spinach stains.

2) Pre-treat baby clothes with gall soap

You can also use classic gall soap to clean baby clothes. To do this, wash them out in warm water and rub the affected areas with gall soap. Then leave it on for 30 minutes and rinse it off. Then wash with the normal laundry.

3) Remove breast milk stains

Breast milk contains protein. Therefore, you should remove stains from breast milk or other milk by soaking the clothes in cold water. On the other hand, hot water causes the milk to coagulate, making stain removal more difficult. You can also do preparatory work here with gall soap.

4) Which detergent to use for baby clothes?

All detergents are suitable for cleaning baby clothes. Parents have to find out for themselves which ones are suitable for their baby and which ones are not. Therefore, many parents prefer organic detergents for baby clothes. Many detergent alternatives are also popular.

5) At what temperature do you clean baby clothes?

Depending on the fabric, you can use different temperatures to clean baby clothes. In general, 30 to 40 degrees are sufficient. So you can wash them with the rest of the family’s laundry. However, if the laundry is affected by dirt from gastrointestinal disease, it is better to wash it separately.

Parsnips can be prepared in a variety of ways. With a little know-how, you will discover your very own favorite recipe with the tasty tuber.

Parsnips are a native root vegetable that is in season during fall and winter. Therefore, the best time to buy and prepare parsnips is between September and March.

Not only do parsnips resemble parsley root in terms of their appearance, the two are also difficult to tell apart in terms of taste. They taste tart, but also slightly sweet. If you accidentally got them mixed up, don’t worry – parsley roots can be prepared in a similar way to parsnips.

Parsnips have a number of valuable nutrients: They are rich in vitamin C, vitamin E, folic acid, calcium and potassium. We’ll show you how to prepare these healthy tubers.

Clean and prepare the parsnips

How to prepare the parsnips:
Peel parsnips – yes or no?: It is not absolutely necessary to peel the parsnips. On the contrary: Since many of the vitamins and flavors are located directly under the skin, it is worth leaving the skin on. However, if you don’t like bitter tastes, you can remove the peel. In contrast to potatoes, however, the skin is not quite as different from the taste of the inside of the vegetable. Important: In order to avoid harmful substances, it is best to buy organic parsnips.
Cleaning parsnips: Parsnips can be easily cleaned with a vegetable brush. Just get rid of the rough bits of dirt. You only need to wash the parsnips if you eat them raw or if they are very earthy.
Just make sure to chop off the coarse head and rooty end before preparing.

Preparing Parsnips: Boiling, Baking or Roasting?

Parsnips can be prepared in a variety of ways: they can be boiled, baked, roasted, fried and pureed. Depending on your preference, they are suitable for a variety of dishes.

If you boil or bake them, they will get a rather soft texture, just like potatoes. If you cut them into thin slices, you can fry them crispy or use them to make chips. Either way, parsnips pair really well with other root vegetables like parsley root, beets, carrots, potatoes, and sweet potatoes. Parsnips go just as well with hearty vegetarian or vegan roasts or seitan goulash.

Bathroom and toilet cleaners and all other household cleaning materials should be kept safe in a household with small children and should never be left lying around. Because children can easily get serious poisoning or chemical burns if they play with the cleaning products or drink them.

It is best to deposit all cleaning and cleaning materials in a lockable box and place them high up on a shelf out of the reach of children or, even better, in a lockable room, such as the storage room or the basement. Then simply lock the door and place the key on top of the door frame, for example, or hang it on a nail where children cannot reach it.

Cleaning the showerhead was made easy. Dirt and lime build up on the showerhead over time. These deposits are not only unsightly but also impede the flow of water. With the help of vinegar, you can clean your shower head very easily and in an environmentally friendly way.

Clean the showerhead with vinegar

To clean the showerhead, detach the shower head from the hose and place it in a saucepan. Fill the pot with white vinegar or diluted vinegar essence until the showerhead is covered. Heat the liquid briefly and let it work for a few minutes. Then rinse the showerhead with clear water and screw it back on.

Clean plastic showerheads

Be careful with plastic showerheads. For cleaning, it is best to simply place them in a pot or bowl with vinegar or diluted vinegar essence without heating the solution. You can also let the shower head soak overnight.

With our housewife tips, you can easily and cleverly clean the gold jewelry. Let your jewelry shine again in its former glory. Cleaning gold jewelry can be easy, and cleaning gold jewelry sometimes makes it harder if you want the gold jewelry to look neat. With the following steps, you can get the gold jewelery clean and shiny again quickly and easily.

Easy cleaning of gold jewelry

Foam a splash of dishwashing liquid in 2 liters of lukewarm water. Put the jewelry in and leave it in for at least 4 hours (possibly even a day). Shake it from time to time to get rid of the dirt. In addition, you can clean the jewelry with a soft toothbrush, especially where the hard-to-reach areas are, e.g. B. Closures.

Clean gold jewelry safely

To clean gold jewelery easily and safely, I place it in the palm of my hand, hold it briefly under running water and gently brush it with a little toothpaste on an old, soft toothbrush. Then I rinse off the gold jewelry or the silver jewelry and the shine is done! The beauty of the method is that it’s free, fast, and scratch-free. This method also works when cleaning silver jewelry.

Clean gold jewelry with precious stones or pearls

Jewelery with stones or pearls can be cleaned in the same way. After “bathing” you should rinse the jewelry in distilled water and dry and polish it with a soft cloth. Gilded pieces should NOT be cleaned with a brush, as this can damage the gold layer. Dark spots on gold and gilded jewelry can be removed with the help of onion juice. Squeeze a little juice from an onion and apply it to the dark areas. Leave on for 1.5 -2 hours. Rinse with water and let dry. Please also note our useful tips on storing and caring for opal jewelry.

Clean gold rings with stones

To clean rings with stones, you can also use a cotton swab (a toothpick and cotton wool are recommended for very fine and thin pieces). The cotton should be moistened with clear alcohol and used to clean the setting of the stone and the stone itself. Then dry and polish with a flannel cloth. Sharp objects should be avoided when cleaning jewelry, they damage the surface of the jewelry.

So that the stones in the jewelry always shine, you should completely remove the jewelry when washing your hands, showering, or bathing. The soap leaves a greasy layer on the stones. The rings can also be brought into top condition on the go. Apply a line to the ring with lipstick and distribute evenly. Then polish with a handkerchief or cotton balls. Overall, you should note that different types of jewelry require different care.