The bishop’s cap is a type of pumpkin that is best known for its unusual shape. You can find out more about the characteristics of the special vegetable variety in this article.
Bishop’s cap: ornamental pumpkin with taste

The pumpkin owes its name “bishop’s hat” to its special shape: it is round and flat at the bottom. At the top is a smaller part that sits on top of the rest of the pumpkin like a cap. Most of the bishop’s hat is colored orange and crossed by a yellow-green pattern. That is why this variety has made a name for itself primarily as an ornamental pumpkin.
While most ornamental gourds are inedible, bishop’s caps can also be used in the kitchen. It has a sweetish-nutty taste and a relatively floury consistency. Only the shell and the upper part of the “cap” cannot be eaten. You can therefore simply peel the pumpkin and then bake, boil, steam or fry it in a pan.
Alternatively, you can hollow out the bishop’s cap pumpkin beforehand and cook it whole in the oven. You can use the pulp for a pumpkin soup recipe, for example, and then serve the soup decoratively in the baked pumpkin.
In addition to soups and stews, the bishop’s cap is also suitable as an ingredient for salads and casseroles or as a side dish, for example in the form of baked pumpkin wedges or pumpkin puree. Spices and herbs that go particularly well with the flavor of the pumpkin variety include garlic, thyme or curry powder.
Plant your own pumpkin
If you want to plant the bishop’s cap in your own garden, it’s best to get a young plant from a specialist retailer. You should then note the following:
Grow your own bishop’s cap pumpkin:
The pumpkin needs a warm and preferably sunny location.
The soil should be humic, nutrient-rich, permeable and well loosened.
You can plant young plants outdoors from mid-May. Alternatively, you can also grow the bishop’s hat from seeds. You sow these directly outdoors from May or prefer them indoors from mid-April.
How to plant bishop’s hats:
Before you plant the pumpkin plant, you should loosen the soil well and add some compost as a starter fertilizer.
Then first place the young plant in a container with water so that the root ball can soak up moisture.
Then put the bishop’s cap in a sufficiently large planting hole, press the soil firmly again and water the area generously.
If you want to grow several pumpkin plants, you should make sure that there is a distance of about one meter between the plants.
Care of the bishop’s cap:
The bishop’s cap is an easy-care pumpkin: it is sufficient to water it regularly and to provide it with some organic fertilizer about every two weeks. Here you can find out how you can easily produce biodegradable fertilizer yourself: Fertilizer for plants: make it yourself naturally.
To prevent pests (especially slugs), you can sprinkle some coffee grounds around the plant or build a barrier around the squash using natural materials (like wood shavings).
You can already harvest the first ripe pumpkins in late summer or early autumn of the first year of cultivation.
Recipe: Stuffed Bishop’s Hat
A bishop’s cap filled with rice and vegetables from the oven is a warming and filling dish, especially in autumn and winter. When buying the ingredients, make sure they are organic if possible to avoid synthetic pesticides. You can get the bishop’s cap pumpkin from German cultivation from September to January. You can also buy mushrooms, carrots and onions regionally almost continuously during this period.
Ingredients:
1bishop’s hat
5 tablespoons rapeseed oil
Salt pepper
2 teaspoons Ras el Hanout
100 g wholegrain rice
1 onion
2 clove(s) garlic
2 medium carrots
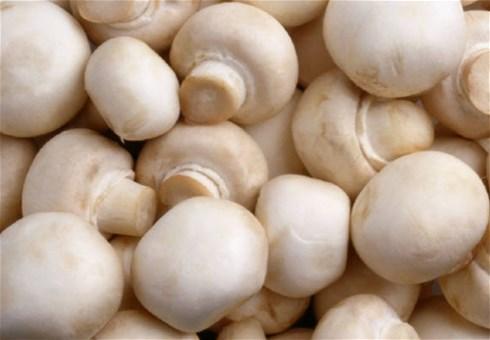
150 gmushrooms
2 tbsp tomato paste
150 ml vegetable broth
Directions:

Cut off the cap of the bishop’s hat.
Use a spoon to scoop out most of the flesh, leaving the edge of the squash only about an inch wide. Set aside the pulp of the bishop’s hat for later use.
Brush the inside of the pumpkin with about two tablespoons of rapeseed oil and sprinkle with some salt and ras el hanout.
Now put the hollowed-out bishop’s cap pumpkin in the oven at 200 degrees Celsius top and bottom heat for about 30 minutes.
Cook the rice according to package directions in a little salted water. Depending on the type of rice, this takes about 20 to 30 minutes.
Cut the onion and garlic into small cubes and sauté them in the remaining rapeseed oil in a pan.
Cut the carrots into small cubes and add them to the other ingredients in the pan. Allow the mixture to cook over medium-high heat for about five minutes.
Chop the mushrooms into slices and also cut the pumpkin pulp into small pieces. Add both ingredients to the pan and let the vegetables sauté for another five minutes.
Now add the tomato paste and the rice and fry everything for another three to four minutes.
Season with salt, pepper and ras el hanout.
Pour the mixture of rice, vegetables and bishop’s cap into the squash and pour over the vegetable broth. Then put the bishop’s cap back on.
The filled pumpkin is now put in the oven for another 20 minutes at 200 degrees Celsius. After half the time you can remove the lid again.