Tag

cook

Browsing

Easy preparation of applesauce and lots of tips for cooking the apples. We give you recipes and ideas with which you can easily make applesauce yourself with or without sugar.

Cook applesauce yourself

In autumn the trees bear many apples and the kilo of apples is also sold cheaply at the weekly markets. But what do you do with all the apples? Is there a better idea than making applesauce out of it and refining it according to your own taste? What would grandma’s potato pancakes be without the delicious mousse on cold days? Whether the classic recipe or a variant without sugar. Autumn just tastes better with the golden, warm happiness. We’ll show you how.

Quick instructions for applesauce

Separate the apples from the so-called core and cut them into small pieces. If desired with peeled apples. The smaller the pieces, the faster they will cook. Boil all the apple pieces in hot water until the apples are cooked through. Then puree the apple pieces with a food processor or a blender and then season with cinnamon and sugar. Try it as rice pudding with cinnamon, sugar, and apple sauce.

The basic applesauce recipe

Peel all apples and cut them into small pieces. Cut the apples into eighths and remove the core from each apple. Then put the apple pieces in a saucepan and heat up vigorously. Pour about 0.2 liters of apple juice per kilo of apples. Then cover and simmer until all the apples are completely soft. Puree all the apples with a masher or with a hand blender. Thin with a little apple juice as you like and season with sugar, cinnamon, and lemon juice. The applesauce tastes particularly good with pancakes with applesauce.

Useful information and special tips

Apples can also be cooked whole. After cooking, you can simply pass these whole apples through a sieve using a food mill. Depending on the apple variety, the applesauce can turn yellow to rust-red. This is due to the different fruit acids of the apple varieties and the color of the skin. The Boskoop apple is often used because it decays evenly and has a natural yellow color. The Berlepsch is suitable for apple allergy sufferers. Applesauce also tastes good as an accompaniment to sauerbraten and Christmas goose as well as in muesli and fresh grain porridge. A classic is also Kaiserschmarrn with cinnamon and sugar.

Refine applesauce deliciously

Instead of sugar, you can also use honey to taste. Some recipes add raisins or vanilla. You can also cook cloves with it. We recommend two cloves per kilogram of apples. This can be added very nicely with a tea egg in the saucepan. With pears, the apple sauce becomes an apple and pear sauce. Other fruits such as apricots or quinces are also good for refining. Apple foam is a dessert variation with applesauce. Here cream is mixed with the mush. Or you can mix it with beaten egg white to create even more foam. Apple foam is lighter and fluffier than normal mousse. Another great idea is Christmas applesauce.

Sugar-free variants save calories
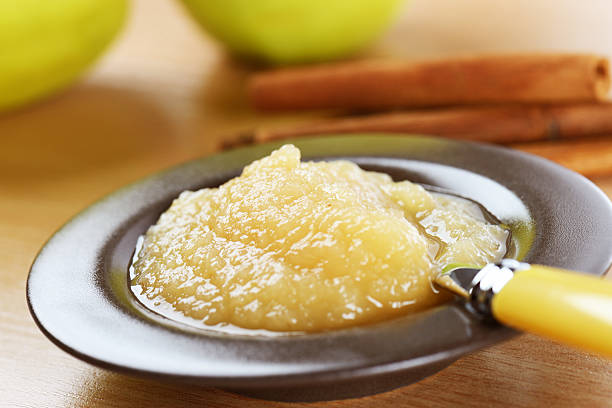
You can also cook applesauce without sugar. You only use apples, water, vanilla, cinnamon, and lemon. Particularly gentle and with far fewer calories and is also suitable for diabetics. If you want a little more sweetness, but still want to save calories and remain tooth-friendly and suitable for diabetics, you can use sugar alternatives such as birch sugar xylitol or erythritol. Coconut blossom sugar also has slightly fewer calories than table sugar and gives the applesauce a slight hint of caramel in taste. Maybe you are also interested in a jam without sugar.

Preserve in screw-top jars

To preserve it, you can either freeze it or fill it in screw-top jars. For the variant with glasses, fill the still hot mush into jam jars. Then turn the glasses upside down. Once the jars have cooled, return them to their normal position, as you would with jam. The shelf life is at least one year if you work cleanly according to the rules of kitchen hygiene. Did you like our tips on applesauce? You might also be interested in cooking plum jam and making plum jam yourself.

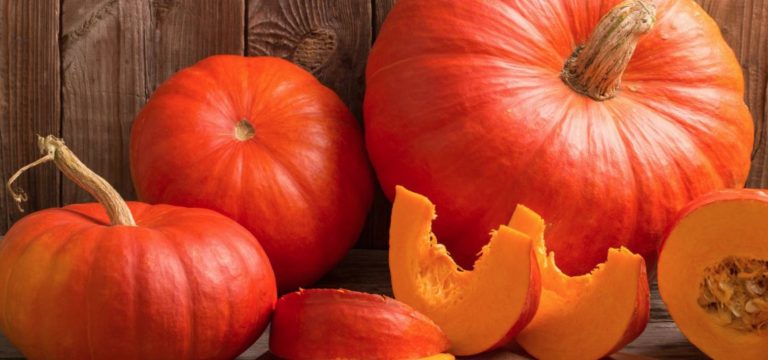
The bishop’s cap is a type of pumpkin that is best known for its unusual shape. You can find out more about the characteristics of the special vegetable variety in this article.

Bishop’s cap: ornamental pumpkin with taste

The pumpkin owes its name “bishop’s hat” to its special shape: it is round and flat at the bottom. At the top is a smaller part that sits on top of the rest of the pumpkin like a cap. Most of the bishop’s hat is colored orange and crossed by a yellow-green pattern. That is why this variety has made a name for itself primarily as an ornamental pumpkin.

While most ornamental gourds are inedible, bishop’s caps can also be used in the kitchen. It has a sweetish-nutty taste and a relatively floury consistency. Only the shell and the upper part of the “cap” cannot be eaten. You can therefore simply peel the pumpkin and then bake, boil, steam or fry it in a pan.

Alternatively, you can hollow out the bishop’s cap pumpkin beforehand and cook it whole in the oven. You can use the pulp for a pumpkin soup recipe, for example, and then serve the soup decoratively in the baked pumpkin.

In addition to soups and stews, the bishop’s cap is also suitable as an ingredient for salads and casseroles or as a side dish, for example in the form of baked pumpkin wedges or pumpkin puree. Spices and herbs that go particularly well with the flavor of the pumpkin variety include garlic, thyme or curry powder.

Plant your own pumpkin

If you want to plant the bishop’s cap in your own garden, it’s best to get a young plant from a specialist retailer. You should then note the following:

Grow your own bishop’s cap pumpkin:

The pumpkin needs a warm and preferably sunny location.
The soil should be humic, nutrient-rich, permeable and well loosened.
You can plant young plants outdoors from mid-May. Alternatively, you can also grow the bishop’s hat from seeds. You sow these directly outdoors from May or prefer them indoors from mid-April.
How to plant bishop’s hats:

Before you plant the pumpkin plant, you should loosen the soil well and add some compost as a starter fertilizer.
Then first place the young plant in a container with water so that the root ball can soak up moisture.
Then put the bishop’s cap in a sufficiently large planting hole, press the soil firmly again and water the area generously.
If you want to grow several pumpkin plants, you should make sure that there is a distance of about one meter between the plants.
Care of the bishop’s cap:

The bishop’s cap is an easy-care pumpkin: it is sufficient to water it regularly and to provide it with some organic fertilizer about every two weeks. Here you can find out how you can easily produce biodegradable fertilizer yourself: Fertilizer for plants: make it yourself naturally.
To prevent pests (especially slugs), you can sprinkle some coffee grounds around the plant or build a barrier around the squash using natural materials (like wood shavings).
You can already harvest the first ripe pumpkins in late summer or early autumn of the first year of cultivation.

Recipe: Stuffed Bishop’s Hat

A bishop’s cap filled with rice and vegetables from the oven is a warming and filling dish, especially in autumn and winter. When buying the ingredients, make sure they are organic if possible to avoid synthetic pesticides. You can get the bishop’s cap pumpkin from German cultivation from September to January. You can also buy mushrooms, carrots and onions regionally almost continuously during this period.

Ingredients:

1bishop’s hat
5 tablespoons rapeseed oil
Salt pepper
2 teaspoons Ras el Hanout
100 g wholegrain rice
1 onion
2 clove(s) garlic
2 medium carrots
150 gmushrooms
2 tbsp tomato paste
150 ml vegetable broth

Directions:

Cut off the cap of the bishop’s hat.
Use a spoon to scoop out most of the flesh, leaving the edge of the squash only about an inch wide. Set aside the pulp of the bishop’s hat for later use.
Brush the inside of the pumpkin with about two tablespoons of rapeseed oil and sprinkle with some salt and ras el hanout.
Now put the hollowed-out bishop’s cap pumpkin in the oven at 200 degrees Celsius top and bottom heat for about 30 minutes.
Cook the rice according to package directions in a little salted water. Depending on the type of rice, this takes about 20 to 30 minutes.
Cut the onion and garlic into small cubes and sauté them in the remaining rapeseed oil in a pan.
Cut the carrots into small cubes and add them to the other ingredients in the pan. Allow the mixture to cook over medium-high heat for about five minutes.
Chop the mushrooms into slices and also cut the pumpkin pulp into small pieces. Add both ingredients to the pan and let the vegetables sauté for another five minutes.
Now add the tomato paste and the rice and fry everything for another three to four minutes.
Season with salt, pepper and ras el hanout.
Pour the mixture of rice, vegetables and bishop’s cap into the squash and pour over the vegetable broth. Then put the bishop’s cap back on.
The filled pumpkin is now put in the oven for another 20 minutes at 200 degrees Celsius. After half the time you can remove the lid again.

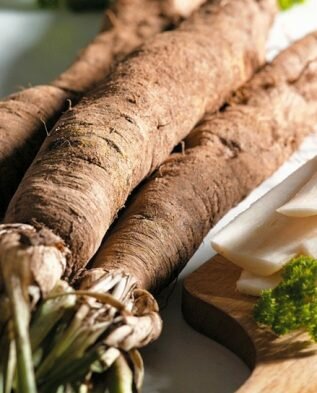
There are a few things to keep in mind when preparing salsify. Read our step-by-step instructions to find out how to properly prepare the winter vegetables.

Used in the Middle Ages as a remedy for snake bites, black salsify is now a popular winter vegetable. Due to its similarity to asparagus, it is colloquially called winter asparagus.

For example, you can serve salsify as a side dish, baked or as a soup. But no matter how you end up preparing them – in most cases you have to cook them first. There are a few things to keep in mind. Below you will find out how best to proceed.

By the way: Black salsify is in season from October to April, making it the perfect winter vegetable.

Cook salsify: tips

Preparing salsify takes a bit of work. But you shouldn’t let that put you off, because they provide a lot of fiber and important vitamins that strengthen your immune system.

Preparation: Peel the salsify

Wash the salsify under running water and thoroughly remove dirt and dirt.
Peel the stalks until the brown skin is completely removed. Important: Black salsify contains a sticky, staining liquid. Therefore, wear old clothes or an apron and peel them in a bowl of water.
Attention: As soon as the black salsify is peeled, it will turn brown relatively quickly. Therefore, after peeling them, leave them in clean water and add a little lemon juice or a dash of vinegar.
Boil salsify

Cut the peeled stalks into bite-sized pieces.
Fill a saucepan with water and lightly salt it.
Add the salsify pieces and let them cook for about 15 to 20 minutes. When they are soft, you can take them out of the pot and serve or process them.

Tip: Black salsify will keep in the fridge for about two weeks. It is best to wrap them in a damp kitchen towel. If you have a basement, you can also store them just like carrots. Place the salsify in a box or bucket and cover them generously with sand. They will keep like this for several weeks.

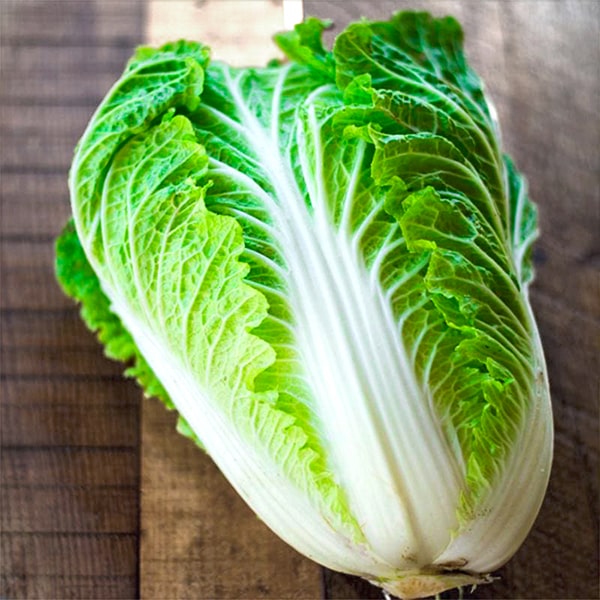
Chinese cabbage can be prepared in many ways – but how? Asian cabbage varieties are popular, but the preparation of Chinese cabbage is unknown to many. A little product information.

Preparing Chinese cabbage is also something for cabbage skeptics

Chinese cabbage is different from its native relatives – it is more subtle and easier to digest. If you are put off by digestive problems, the smell and taste of cabbage from the local varieties, then prepare Chinese cabbage instead.

Because it also has the vital substances typical of cabbage: Above all, it provides a lot of vitamin C, vitamins from the B group, folic acid, mustard oil glycosides and minerals such as potassium and iron. With around twelve calories per 100 grams and a water content of 94 percent, it is the ideal vegetable for losing weight.

Caution: Chinese cabbage has a high nitrate content. Adults can take it without hesitation. Babies and toddlers, on the other hand, should only consume small amounts occasionally – or they should avoid it altogether.

Before preparing: Buy good Chinese cabbage

When shopping, test to see if the cabbage is tightly closed and feels firm. The leaves should be crisp with no dark spots. Chinese cabbage from the supermarket often has small black spots. They are not harmful to health, but occur when storage is too warm. Damage to the outer layer of leaves isn’t a big deal, since you remove this layer anyway when you prepare the Chinese cabbage. The cabbage should not have mushy spots.

Now it’s time to prepare: Cut the Chinese cabbage

In contrast to the local types of headed cabbage, Chinese cabbage does not have a hard stalk and the leaf veins are so tender that you can use them. How to cut Chinese cabbage before cooking:

Remove the outer leaves. Also withered or damaged areas.
Then, at the bottom of the cabbage, cut a slice about an inch thick with a straight cut.
Now the leaves can be easily separated and you can cut them into the desired shape.
Wash the Chinese cabbage pieces in cold salted water.

Cooking Chinese cabbage is quick and easy

If you want to prepare a larger portion of Chinese cabbage, choose a wide pan or pot, because raw Chinese cabbage takes up a lot of space at first. Cooking time depends on how crispy you want it. Basically, the crunchier, the tastier. If you haven’t prepared Chinese cabbage often, try the al dente every now and then. These are the cooking times:

Roast and Cook: Five to seven minutes
Steam and simmer: Five to ten minutes
How to prepare Chinese cabbage:

as a raw food snack or salad
fried in a pan with oil
cooked in salted boiling water
as steamed vegetables in their own juice: first add the thick ribs and later the fine leaves to the pot.
steamed in a saucepan with a steamer insert or a suitable kitchen sieve with the lid closed. The cooking water should not come into contact with the Chinese cabbage.
fermented

Store Chinese cabbage properly

Chinese cabbage is tender, so you should get it as fresh as possible and use it immediately. Stored in the fridge, it keeps its crunchiness for up to four days. If you wrap it, you can still cook Chinese cabbage after a week.

Be sure to wrap the Chinese cabbage loosely, otherwise it will get bruises that can rot. It is better not to use cling film for this: a beeswax cloth is the plastic-free solution. Once added, you can use it over and over again.

The productive head of cabbage can be kept in the freezer for up to four months: Clean the Chinese cabbage, cut into small pieces and blanch briefly in boiling, lightly salted water. The professional would then quench the Chinese cabbage in ice water.

Our tip: If you freeze the Chinese cabbage in portions, it will be easier to prepare the amount intended for your recipe.

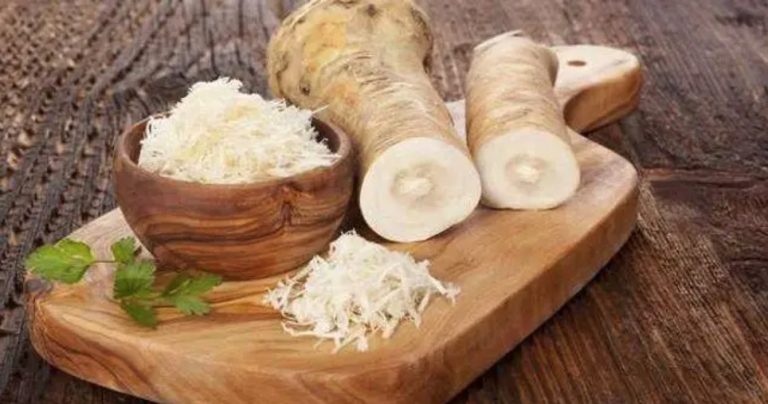
You can prepare horseradish in the form of dips, sauces and soups, for example. If you bought too much or had a particularly rich harvest, horseradish can also be easily preserved.

Horseradish is a particularly hot type of radish that is in season in Germany between October and January. The horseradish root is considered healthy because it is rich in vitamin C and is said to have an antibacterial effect due to its mustard oils. At the same time, the mustard oils ensure the characteristic spiciness of horseradish, which gives various dishes their special flavor.

In this article, we will show you how you can prepare horseradish and how best to store it.

Cook horseradish: This is how you use the root

Due to its sharpness, horseradish is hardly edible on its own. In the kitchen, it is therefore used in small amounts to flavor sauces and similar dishes – often in combination with cream or other ingredients that reduce the heat somewhat.

The classic horseradish sauce is traditionally often served with meat or fish, but it also goes well with potatoes, dumplings, vegetables or vegetarian patties. You can also prepare salad dressings, dips or soups with horseradish.

If you are particularly fond of horseradish, you can plant it in your own garden and harvest the roots yourself. You can find detailed instructions on how to do this in our guides on harvesting and planting horseradish. If you buy the horseradish at the weekly market or in the shop, you should do so in season if possible and pay attention to organic quality. In this way you avoid unnecessarily long transport routes and residues of harmful pesticides.

When cooking, you often only need small amounts of horseradish root. Because of this, it’s easy to end up buying or harvesting more horseradish than you can cook. So that you don’t have to throw away the excess horseradish, you can make it last longer. We’ll show you a simple method to do this.

Preserve horseradish: Simple method with salt and vinegar

Ingredients:

200 g fresh horseradish
1 tsp salt
1 squirt vinegar (plus more for topping if needed)

Directions:

Wash the horseradish, peel it and grate it finely.
Mix the grated horseradish with a teaspoon of salt and a dash of vinegar. Important: Make sure that the vinegar is evenly distributed so that the entire horseradish mixture can be preserved. Otherwise it will quickly turn gray later.
Pour the mixture into a sterilized jar, covering the surface with a little extra vinegar if necessary. Then close the jar tightly.
It is best to keep the pickled horseradish in the fridge. Unopened, it will keep for at least four weeks. Just like with fresh horseradish, you can use it to prepare various horseradish dishes. Once opened, you should use the jar within a few days if possible.

By the way: As an alternative to this method, you can also preserve horseradish by freezing it. This is possible with both the unpeeled whole root and with grated horseradish, which you should mix with a little vinegar or lemon juice before freezing. The horseradish will keep in the freezer for about half a year. However, it may lose some of its flavor when frozen.

You can actually eat banana peels. Raw they taste rather bitter, but they are easy to process. We’ll show you how.

Eating banana peels sounds strange at first. But not only the inside of the banana contains many nutrients, but also the banana skin – it is particularly rich in potassium. Since banana peels are quite firm and fibrous when raw and also taste bitter, you should eat them cooked. The banana peels taste a little sweet and slightly nutty.

Eat banana peel – You should pay attention to this

If you want to eat banana peels, you should buy organic bananas. According to a sample from Öko-Test, unripe bananas are very susceptible to caterpillars and fungal diseases, which is why they are protected from infestation in conventional agriculture with synthetic chemical pesticides.

Also make sure that you wash the bananas well before further processing, even if you use organic bananas. Sometimes pesticide residues are also found on bananas from organic farming.

Eat banana peel: That’s why it’s a good idea

When you eat banana peels, you’re not only helping to reduce food waste – banana peels contain many vitamins, such as vitamin C, vitamin B6, vitamin K and folic acid.

In addition to the vitamins, there are also some minerals such as potassium, magnesium and phosphorus in the banana peel.

Four quick banana peel preparation ideas

There are several ways to eat banana peels. These recipes are quick to make and taste good:

Baked Banana Peel:

Separate the top and bottom of the banana peel and cut into strips.
Sprinkle the banana peel with sugar or drizzle with simple syrup or honey.
Let the banana peels cook in the oven at 180 degrees for half an hour.
Pulled banana peels:

Cut off the ends of the banana peel again.
Using a fork, tear the banana peel lengthwise into strips. Season with oil, paprika powder and cumin.
Sauté chopped onions and garlic in oil. Then add the banana peels with some water and wait five minutes.
Now add barbecue sauce and let the pulled banana peels simmer for ten minutes.
Season everything with salt and pepper.
Banana Peel Smoothie:

Cut two peeled bananas into small pieces.
Add 1 tablespoon cocoa, 3 teaspoons chia seeds, and 3 teaspoons grated chocolate, and 8 ounces apple juice.
Blend everything in a blender for about 30 seconds.

Banana Peel Cake:

Preheat your oven to 180 degrees.
Cut three banana peels into chunks and place in a blender with 1/4 cup of water.
Separate the yolks from two eggs and save the whites for later. Then beat the egg yolk with a cup of cane sugar and 30g of butter until a light yellow mass forms.
Mix in the banana peels, then add 1.5 cups of flour and 3 teaspoons of baking powder.
Then beat the egg whites until stiff and carefully fold them into the cake mixture. Pour the mixture into a baking pan and let it bake for about 30 to 40 minutes (depending on the thickness of the cake).

Freezing chickpeas is a great way to always have the healthy legumes ready to cook. We’ll show you what to look out for when freezing chickpeas and how to use them.

Freezing chickpeas preserves the legumes even when cooked. Recipes that use chickpeas usually call for cooked chickpeas. However, the cooking time of legumes is very long, so they are not suitable for a quick meal uncooked.

Chickpeas are healthy because they have valuable vegetable protein, proteins and other healthy ingredients. Legumes are used in a variety of ways in the kitchen. If you freeze cooked chickpeas, you’ll always have them ready to cook.

When buying chickpeas, pay attention to organic quality. This protects the environment, since organically certified seals such as Demeter or Bioland do not use synthetic chemical pesticides.

By the way: in your own garden is very easy. You can grow your own chickpeas in the garden to avoid having to buy them at the store. This is how to plant and care for chickpeas.

Freeze chickpeas: this is how it works

Freezing chickpeas is quick and easy. Only the cooked chickpeas are suitable for freezing. Because in the dried state, properly packaged, the legumes can be kept for many months.

If you want to freeze chickpeas, then proceed as follows:

Cook the chickpeas according to package instructions. In another article, you’ll learn everything you need to know about cooking or soaking chickpeas.
Catch the chickpea water, because you can use it in many ways. In another post we have tips on this: Don’t throw away chickpea water! 5 ideas how to use it
Let the cooked chickpeas cool.
Place the cooked chickpeas in a freezeproof, sealable container. Make sure the containers are reusable. This is how you avoid rubbish. Also read: Freezing food without plastic
Place the container of chickpeas in your freezer. Important: If you are freezing in glass, do not fill the glass to the top, but leave some space so that the chickpeas can expand during freezing. Also, only close the lid after a few hours in the freezer, otherwise the jar may burst if the contents expand too much.
Tip: Freeze the chickpeas in several small containers. So you always have the right amount at hand for a meal.

Recipe ideas for chickpeas

Freezing cooked chickpeas will keep the legumes for a few months. Get them out of the freezer when you need them and use them in delicious dishes. You have two options for this:

Thaw the chickpeas before cooking:

Place them in a bowl in the fridge overnight to use the next day, or
let them thaw at room temperature for a few hours.
If you want it a little faster, put the frozen chickpeas in a small bowl and thaw them in a water bath over medium heat.
With the thawed chickpeas, you can cook particularly well recipes in which the chickpeas are pureed or should be used fresh, i.e. not further cooked and baked. For example, try the recipe for a classic hummus or a fresh chickpea salad.

Use frozen chickpeas:

Add the frozen chickpeas to a soup or warm dish and cook with the remaining ingredients until soft again.

Recipes that use cooked chickpeas also work well to use your frozen chickpeas. For example, they taste great in chickpea curry or chickpea soup.

Tip: Fry the frozen chickpeas in a little oil in a pan. Once they have softened, season them with herbs and spices of your choice.

Cook chestnuts however you like: Roast them in the oven, cook them in a pot or eat them raw. Depending on the method of preparation, you have to prepare the chestnuts differently. We show you how to prepare chestnuts.

Cook chestnuts correctly: Roast them in the oven

Chestnuts from the oven taste particularly delicious. Because here the edible chestnuts keep their typical taste. Roasted chestnuts from the oven are particularly good for snacking. How to prepare chestnuts in the oven:

First cut off the pointed brush of the chestnuts with scissors.
Use a sharp knife to slit a cross into the skin of the chestnuts. This is important so that the chestnuts do not burst open from the heat. Depending on the size of the sweet chestnut, the cross cut should be about one and a half centimeters long.
Now you can put the chestnuts in the oven at 175 degrees and circulating air.
Place a bowl of tap water next to the chestnuts so that the chestnuts don’t dry out while roasting.
Cut the chestnuts correctly: It doesn’t matter whether you make the cross on the flat side or on the lower end. It is only important that the shell is really severed and the cut is big enough. It doesn’t matter at all if you cut the flesh in the process.

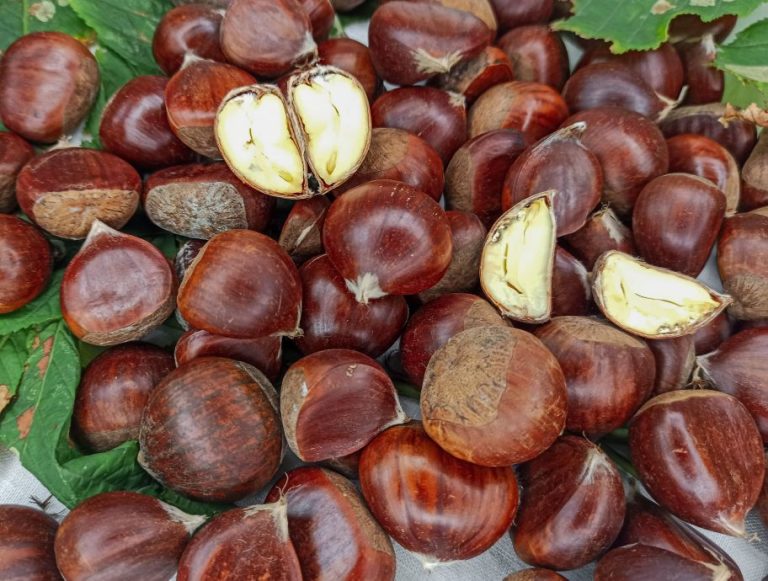
Tip: You don’t have to preheat the oven to prepare the chestnuts. After about 20 minutes, check if the chestnuts are ready. You can tell by the fact that the indentations have clearly opened up and the shell is a bit darker (see picture). Then you can take them out of the oven and remove the shells. If your oven only heats up slowly to 175 degrees, the chestnuts can take up to 30 minutes in the oven.

Cook the chestnuts in the pot

You can also prepare chestnuts as a side dish. Because chestnuts contain a lot of starch and thus replace potatoes. The dish is particularly useful if you have your own tree in the garden – because bought chestnuts are quite expensive. How to prepare chestnuts in a pot:

First, slit the chestnuts crosswise. The incision should be about one and a half centimeters long and reach down to the flesh of the fruit.
Then boil the chestnuts in lightly salted water for about 20 minutes.
The chestnuts are done when the skin has split open at the indentations.
Then you can let them cool down a bit and remove the shell.

Alternatively: prepare chestnuts raw or fry them in a pan

You can also eat chestnuts raw. The taste is very reminiscent of walnuts. You have to remove the peel with a sharp knife beforehand, then the light-colored flesh is already in front of you.

Alternatively, you can roast chestnuts in a cast-iron pan with a lid. To do this, you have to slit open the chestnuts, otherwise they will burst. Keep the following in mind when preparing the chestnuts like this:

Don’t use oil, instead put the chestnuts directly into the hot pan.
Roast the chestnuts at low temperature until the shell opens.
To prevent the chestnuts from burning, you should keep tossing them in the pan.

How healthy are chestnuts really?

Chestnuts are available from the end of September/beginning of October. They are a real power food: chestnuts contain a lot of high-quality protein and much less fat than nuts. In addition, they are rich in potassium, calcium, iron, magnesium, as well as vitamin E, vitamin C and almost all B vitamins as well as beta carotene.

If you buy chestnuts at the market in autumn or at the Christmas market in winter, they are usually very expensive. But chestnuts also grow in many parks and deciduous forests. Although they are much rarer than the normal chestnuts (which are poisonous, by the way), once you have found a few trees, you can harvest many chestnuts there every year. Because there are up to three chestnuts in each shell. Walking carefully through parks and forests can therefore be worthwhile.

Tramezzini consist of slices of white bread topped with various ingredients. We’ll show you how to make Italian sandwiches at home.

The term “Tramezzini” comes from tramezzo, which means something like “in between” in Italian. The special thing about the Italian sandwiches is the tremezzini bread. It is very similar to toast bread, but with a softer texture and no crust. In addition, it is more fine-pored. If you don’t have tramezzini bread, you can also simply use normal slices of toast for the preparation.

It is best to buy the covering for your tramezzini at the weekly market. There you can usually get regional and seasonal groceries and thus save unnecessarily long transport routes. Also use organic products to support organic farming. She refrains from using synthetic chemical pesticides that are bad for the soil quality. If you eat eggs, take extra care to buy eggs without chick shredding; This means that the male chicks are also raised. Unfortunately, this is not necessarily the case with organic quality either.

Tramezzini: The recipe

Ingredients:

3 pieces of red peppers
3 tbsp olive oil
1 bunch of parsley
400 gmushrooms
2 tbsp lemon juice
4 pieces eggs (optional)
4 slices of tramezzini bread or 8 large slices of toast
40g hummus

Directions:

Halve, deseed and wash the peppers. Rub them with a tablespoon of oil.
Place the peppers, skin side up, on a baking sheet lined with parchment paper and roast them under the grill for about ten minutes until the skin of the peppers is dark brown.
Cover the peppers with a damp cloth, let them cool slightly, and then peel off the skin.
Remove the parsley stems and finely chop the leaves. Clean the mushrooms and chop them as well.
Heat a tablespoon of olive oil in a pan. Add the chopped mushrooms and fry until golden brown.
Add the parsley to the mushrooms and season with salt and pepper.
Fry the eggs one at a time in the remaining oil. (Skip this step for the vegan version.)
Spread the tramezzini or toast with hummus. Top one half of the bread with mushrooms and fried eggs, the other half with peppers. Fold the halves together.

Topping ideas for tramezzini

In addition to hummus, you can also combine your tramezzini with various spreads. You can find various spread ideas here, for example: Seasonal spreads: 3 recipes with regional winter vegetables.

The topping of the tramezzini can also be varied in many ways. Well suited are:

Various vegetables, for example cucumbers, radishes, radishes or Chinese cabbage
fried vegetables, for example eggplant, zucchini or peppers
various (vegan) cheeses

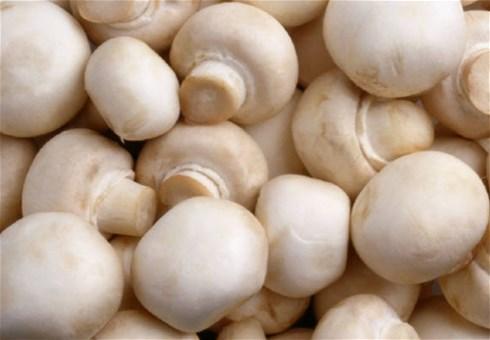
Mushrooms are healthy and tasty all-rounders that can be prepared in a variety of ways. We will show you which method has which advantages.

Mushrooms are a very popular type of mushroom used in many cultures in different dishes and prepared in different ways. As they are easy to grow in the dark, mushrooms are available from us all year round. In nature, however, they are only in season in late summer.

Mushrooms are healthy: They consist of about 91 percent water and are therefore extremely low in calories. They’re high in the healthy electrolyte potassium — about the same as bananas, which are famous for it. Among other things, potassium is responsible for keeping your nerve cells and their conductivity healthy.

Mushrooms also contain minerals such as:

iron
magnesium
zinc
Vitamins such as B1, B2 and folic acid

There are white and brown mushrooms that hardly differ from each other in terms of their ingredients. The white ones just taste a little nuttier and the brown ones a little stronger.

Cook mushrooms

If you want to prepare mushrooms, you should consider a few points beforehand. This includes buying quality produce and cleaning the mushrooms.

What you should consider when buying:

Make sure the mushrooms are fresh. Canned or jarred mushrooms don’t have nearly as many nutrients as fresh mushrooms, and they taste completely different.
Mushrooms can be bought all year round, but these “cultured” mushrooms are often treated with pesticides. So make sure to buy them organic.
The wild mushrooms are in season here in late summer. However, you should only collect them yourself if you are an experienced mushroom picker, as they can easily be confused with the dangerous death cap mushroom.
To clean mushrooms, you can use a brush or clean kitchen towel to gently rub them. Bought mushrooms usually have little soiling. More about this here:

Cook mushrooms raw

Like other vegetables, mushrooms can also be eaten raw. Not only does this have the benefit of making them quick to prepare, they also retain all of their nutrients.

If you have never eaten raw mushrooms, you should not overdo it: some people do not tolerate raw mushrooms very well, which can lead to flatulence. They are best eaten raw in a salad.

What you need to prepare a vegan mushroom salad:

250 g mushrooms of your choice
5 tbsp olive oil
4 tablespoons lemon juice (from a fresh lemon)
1 tbsp grated lemon zest
2 garlic cloves (chopped or pressed)
Salt and pepper to taste
1 half bunch parsley (chopped)
(optional, not vegan: 3 tablespoons grated parmesan)
Recipe:

Clean the mushrooms and cut them vertically into very thin slices.
For the dressing, combine the olive oil, lemon juice, lemon zest, and garlic in a bowl.
Season to taste with salt and pepper.
Now add the dressing and the roughly chopped parsley to the mushrooms.
Gently fold them in to avoid breaking the mushrooms.
A simple salad for a summer barbecue is ready!

Fry mushrooms

If you fry mushrooms, they lose some of their nutrients due to the high heat. On the other hand, they unfold their full, strong and nutty aroma.

To fry the mushrooms, you need a large pan so that they are well heated on all sides.

What you need for fried mushrooms:

250 g mushrooms of your choice
2 tbsp butter
3 garlic cloves (chopped or pressed)
2 shallots (chopped small)
Salt and pepper to taste
a handful of freshly chopped parsley
Recipe:

Clean the mushrooms and quarter them.
Heat the butter in a pan until it starts to sizzle.
Now add the mushrooms and spread them out in the pan so that they don’t pile up.
After about four minutes, add the onions and garlic.
Fry the whole thing for about three more minutes.
Season the fried mushrooms with salt and pepper to taste and fold in the parsley.

Steam mushrooms

Mushrooms are often prepared and served steamed: due to the relatively low heat, they retain more nutrients than when fried. Here they also develop their aromatic taste strongly and absorb spices and herbal aromas well. If you leave out the oil and fat, the mushrooms are also far lower in calories. Steamed mushrooms can be served both with meat and vegetarian, for example, with pasta.

Ingredients for stewed mushrooms:

250 g mushrooms of your choice
1/2 cup your choice of chicken, beef, or vegetable broth
3 garlic cloves (chopped or pressed)
2 spring onions
fresh or dried oregano
Salt and pepper to taste
Recipe:

Clean the mushrooms and roughly cut them into thin slices (Different slices will steam different degrees and make your dish taste more rustic.)
Cut the spring onions into small rings and set the green part aside for the time being.
Peel the garlic and briefly fry it and the white end of the spring onions over medium heat.
Add the broth to the pan and heat until it begins to simmer.
Now add the mushrooms and turn the heat to low.
Season with salt, pepper and oregano.
Toss the mushrooms well in the pan until they have completely absorbed the liquid.
Finally, mix in the green of the spring onion. Now you can serve them with your favorite dish!

Grill mushrooms

Whether with meat or completely vegetarian, the grilled mushrooms with herb butter are the star on the grill. They are particularly easy to make and spice up every barbecue party. Another advantage of this preparation is that you can always put a new portion on the grill. So you can always serve hot and fresh mushrooms to guests.

What you need to prepare the grilled mushrooms:

particularly large mushrooms
homemade herb butter
garlic (pressed)
How to prepare grilled mushrooms:

Clean the mushrooms and remove the stems.
Use a spoon to spoon the herb butter and crushed garlic into the well.
Put the mushrooms in e.g. a grill board, grill paper or a grill grid so that they don’t fall over and the butter runs out. Avoid aluminum foil or an aluminum tray. Aluminum is not only harmful to the environment, it also ends up in your food when heated. We will show you various grill alternatives to aluminum foil:

After about ten minutes, the mushrooms should be ready.