Tag

cooking

Browsing

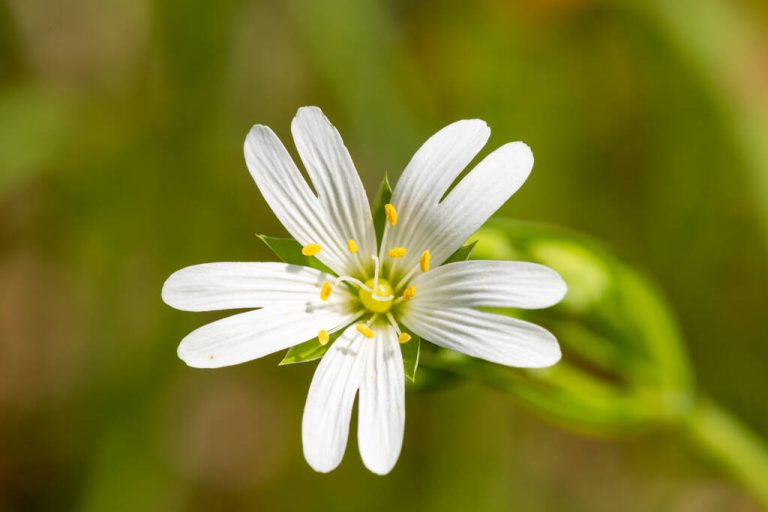
Chickweed is often found in fields and gardens. Externally rather inconspicuous, the wild herb can be used in many ways in the kitchen – and is full of important nutrients.

Chickweed is also known as chicken gut in some regions of Germany. Both names are probably derived from the fact that it is popular with wild birds, but also with domestic chickens as a forage plant.

In humans, on the other hand, it is often considered a troublesome weed because it can spread like a carpet on farmland and overgrow large areas. However, chickweed does not do justice to this bad reputation, because it can be very useful: In the kitchen, it refines many dishes and also provides the body with plenty of vitamins and minerals.

Chickweed in the kitchen: salads, spreads and dips

Chickweed is hardy and grows all year round. You can harvest the fresh leaves at any time and use them in the kitchen. There are many ways to do this:
Salads: Chickweed leaves are a delicious addition to wild herb salads. The small, young leaves are particularly suitable for this, as they are particularly tender and juicy. The taste is reminiscent of young corn.
Herb butter: You can also cut the leaves of the chickweed into small pieces and use them for herb butter. You can also add other herbs if you like.
Herb quark: For a simple dip, you can mix the finely chopped chickweed with a little salt and pepper to make a herb quark. It is also suitable as a savory spread.
Pesto: For a delicious chickweed pesto, crush the leaves together with oil, salt and pepper, a little lemon juice and, depending on your taste, pine nuts or hazelnuts, for example. You can read exactly how to do this in our step-by-step recipe for homemade pesto.
Soup: You can use chickweed to enhance soups such as potato soup. But it also works well as a main ingredient.

Chickweed Soup: A simple recipe

For a simple soup made from chickweed leaves you need the following ingredients:
150 g Chickweed
1/2 onion
3 potatoes
some butter
300 ml vegetable broth
Salt
pepper
And this is how you prepare the soup:
Wash and chop the chickweed leaves.
Peel the onion and dice it finely. Peel the potatoes and cut them into slightly larger cubes.
Melt the butter in the saucepan. Add the chopped onion and sauté the diced onion for about 5 minutes until translucent. Then add the diced potatoes.
Deglaze the onion and potatoes with the vegetable broth. Then let the soup simmer on a low flame for about 15 to 20 minutes.
Now add the chickweed. Once the leaves have collapsed, remove the pot from the flame.
Puree the soup with the hand blender and then season with salt and pepper.

Chickweed and its ingredients: That makes them healthy

Chickweed leaves not only taste good, they are also rich in healthy nutrients such as vitamins and minerals. These include above all:
Vitamin A – important for skin and eyes
Vitamin B1 – necessary for the nervous system and metabolism
Vitamin B2 – promotes growth and development
Vitamin B3 – responsible for the utilization of fat, carbohydrates and protein
Vitamin C – strengthens the immune system
Iron – the body needs it to make blood
Phosphorus – the most important component of bones
Magnesium – supports muscle function and metabolism
Copper – important for cellular respiration
Potassium – ensures that the stimulus transmission of the muscles works
Silicic acid (silicon) – good for joints, connective tissue and hair
Chickweed also contains saponins. The foam-forming plant substances are also contained in horse chestnuts, for example. So far, there has been little research on how saponins affect the human body. According to studies, they should help to fight obesity.

Caution: If you prepare chickweed warm, you should be careful not to overcook it. Some of the valuable ingredients can be lost in the process. It is best to add them at the end of a soup or other warm dish.

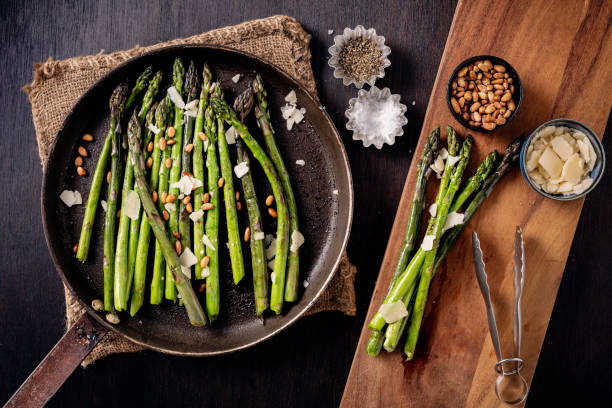
Instructions and useful tips for cooking asparagus properly. The asparagus season has begun and with it the preparation of the most delicious dishes. But who does not know that the popular delicacy is too woody after preparation or simply not tender enough? Even if the preparation of asparagus seems very easy at first glance, you should pay attention to a few things. With the right knowledge, the preparation of the delicious vegetables is very easy.

Peel asparagus like the pros

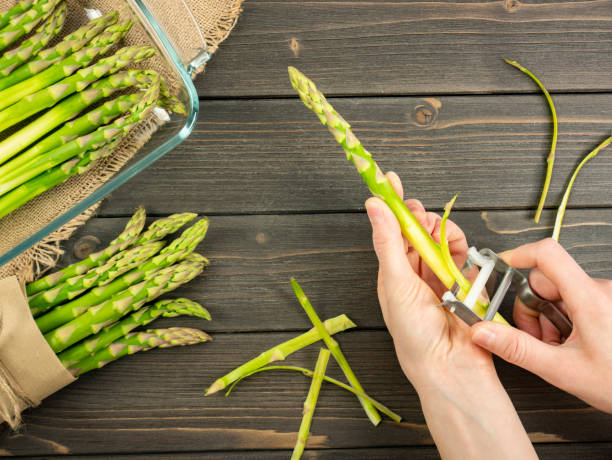
Of course, asparagus should be peeled before cooking, unless you opt for the slightly more expensive option, namely the tender asparagus tips. First of all, the asparagus is washed and placed on a dry cloth. This makes it easier to peel during further processing.

Now the asparagus is carefully peeled with a paring knife. You should make sure that the shell has been removed all around. If the asparagus is not peeled cleanly, it can taste woody very quickly.

When buying, you should make sure that the interface at the lower end of the asparagus has not dried out. Nevertheless, the lower piece is cut off about one centimeter during processing, because this is usually a bit woody.

  1. Wash the asparagus spears.
  2. peel carefully with a paring knife.
  3. Cut off the ends of the asparagus about a centimeter.

Cooking and preparation of asparagus

If you don’t have a special asparagus pot, a simple saucepan that is closed with a lid when cooking will do. To get the asparagus out of the saucepan later without any problems, you can hold the spears together with a piece of string before cooking, which can be easily removed later. This in no way affects the cooking process. Only a little water is needed for cooking so that the asparagus is just covered with it. Now add a pinch of salt. Add a little knob of butter if you like. This once again underlines the delicate taste of the asparagus.

With white asparagus, it is advisable to add some lemon juice to the vegetables. In this way, the light color of the asparagus is preserved. To bring out the flavor, even more, you can add a pinch of sugar during cooking.

  1. Bundle asparagus
  2. Cook in salted water
  3. Season with butter and a pinch of sugar

Ideal cooking time for asparagus

After about fifteen minutes, the vegetables are done. If you are not sure about this, take an asparagus spear out of the top and check if the asparagus bends. In this case, it is done or you simply taste a piece of it. Hollandaise sauce is particularly popular with asparagus dishes. Green asparagus can also be refined with a little garlic. The asparagus water can still be used, for example in aromatic vegetable soups.

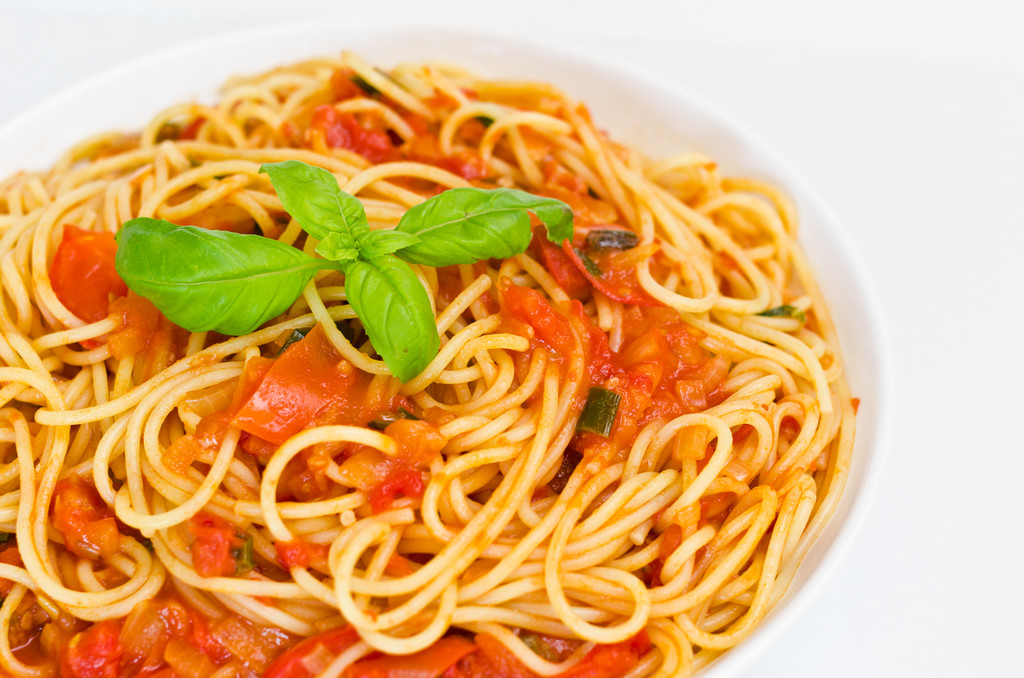
Cooking spaghetti is easy with our tips. The Italian classic among pasta is quick to prepare and always tastes different with the different sauces.

Cooking spaghetti isn’t an art, but it’s not enough to simply boil a pot of water and pour in a pack of pasta.

With our tips, the spaghetti succeeds like in Italy and you have a delicious meal on the table in just a few minutes.

In addition, in this article you will learn what you should consider when eating spaghetti.

Cooking spaghetti: the ingredients

The most important ingredient to cooking perfect spaghetti is a large pot. It must be large enough for the noodles to swim freely.

You need these ingredients for each portion of spaghetti as a main course:
1 liter of water
1 tsp salt
100-125g spaghetti #5
Tip:
You can buy what is known as a spaghetti measure in stores. The different hole sizes correspond to the different portion sizes. In order to portion the spaghetti correctly, however, the spaghetti measurer is not required. Use your kitchen scale so you always have the right amount.

When cooking spaghetti, use pasta made from 100% organic durum wheat semolina and from regional production. Regional products have shorter transport routes behind them and are therefore better for the climate. Traditional spaghetti does not contain eggs and is vegan.

How do you cook spaghetti?

Always cook the spaghetti fresh so they don’t stick together. You should therefore prepare the sauce first – it will be ready when the spaghetti is cooked. It is best not to put the pasta pot with the water on until the sauce is almost ready.

Fill a large pot with water and bring it to a boil.
Add the salt to the boiling water.
Now add the spaghetti and immediately turn the heat down to the lowest setting.
The spaghetti usually does not have enough space in the pot. Therefore, wait a moment until the part of the spaghetti that is in the boiling water can be bent.
Stir well so all of the spaghetti is surrounded by the water.
Now you can close the lid of the saucepan and cook the noodles on the lowest setting.
Keep stirring the spaghetti. This distributes the starch in the cooking water and prevents them from sticking. Tip: Regular stirring also prevents the pasta water from boiling over.
Let the spaghetti cook for the length of time listed on the pasta package.
Test to see if the noodles are the consistency you want. If necessary, let them cook for a little longer. You can already switch off the stove.
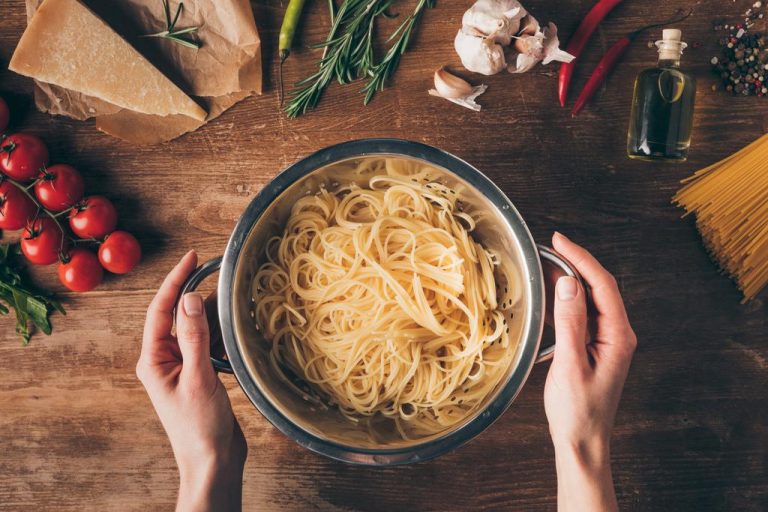
Pour the spaghetti into a large colander and serve immediately.

Cooking spaghetti: You should pay attention to this

These tips make the spaghetti even better:
The best guarantee for the perfect spaghetti is a large pot with plenty of water so that the pasta can cook while it is floating. When in doubt, it is better to use a pot that is too big than a pot that is too small.
Spaghetti releases starch into the cooking water as it cooks. If you don’t use enough water, the noodles will stick together while cooking in the pot.
To cook spaghetti, you need a relatively large amount of salt in the cooking water. Always salt the water after it is already boiling. Salting the cold water will leave stains on the bottom of the pot that won’t be easily removed by washing up.
You don’t need to quench the spaghetti in cold water. If you serve them right away, the noodles won’t stick together.
Surely you have already read that you should add oil to the cooking water so that the noodles do not stick together. The oil in the water serves this purpose, but the sauce won’t stick to the noodles as well later on. If you cook the spaghetti just before serving, you can skip oil in the water for better flavor.
The Italians usually mix the spaghetti with the sauce in the saucepan. This will infuse the noodles with the sauce, improving the flavor.
Use spaghetti tongs to make portioning the pasta easier.

This is how you simply cook potatoes. We give you tips for cooking potatoes and for cooking tests. Also for boiled potatoes with rules of thumb for the duration. Here’s our quick guide!

The cooking time of potatoes varies depending on the variety and size of the potatoes. For this reason, every time you cook, you have to carry out a cooking test to find out whether the potatoes are done or not. The cooking time also changes depending on the potato dish. Unfortunately, some people don’t know this and so the result is floury or too hard potatoes for many. We will help you and give you some rules of thumb so that the potatoes turn out well.

1) Boil potatoes

To boil potatoes you need boiling water and a saucepan for cooking. The ideal is to cover potatoes with cold water and gradually warm it up. The reason is that at around 70 degrees, the starch particles in the potatoes burst open. So if you immediately put them in hot water, the starch on the edge of the potato will gelatinize and the result will be potatoes that are cooked on the outside and hard on the inside. When the water starts to boil, you should season them with a pinch of salt. As soon as the potatoes are boiling, reduce the temperature until it is just simmering. Also, note our tips and home remedies for potatoes.

2) Potato cooking test

If you think the potatoes are good now, you should do the cooking test. To test the cooking, you take a fork or a needle and stick it in the potato floating in the water. It is best to use the largest potato for this. If the fork penetrates the potato without resistance, then it is done. However, if there is still greater resistance or piercing is difficult, the potatoes must continue to cook. Here you will find an overview of different types of cooking and cooking methods with water.

3) Potatoes and their duration

Depending on the size and saucepan, there are different cooking times for the potatoes. Waxy potatoes will take a few minutes longer. Mealy a few minutes less. Potatoes turn out very quickly in the microwave and can be ready in just 5 minutes. There are special containers or potato bags in which even boiled potatoes can be cooked in the microwave. Baked potatoes, on the other hand, take about 45 to 74 minutes at 200°C. The same time applies to potatoes on the grill. Here you will find more tips for grilling vegetables properly.

4) Rules of thumb when cooking potatoes

The smaller the potatoes are, the quicker they will be cooked and ready. Cutting the potatoes will reduce the cooking time. Small cubes don’t even take half the time. Always try to choose similarly-sized potatoes for a portion, because the more uniform the potato size, the better the cooking point of all potatoes will be reached. Salt in the water does not affect the cooking time. Peeled potatoes cook faster than unpeeled jacket potatoes. By the way, the average cooking time of potatoes is about 25 minutes. Did you like our tips? You might also be interested in our tips and instructions for cooking eggs.

5) Potato Varieties and Recipes

Potatoes have different properties. We will show you which dishes they are suitable for. The following applies here: The smaller and thinner the potato pieces are in a dish, the faster they are ready. Incidentally, a rösti in the pan only takes 15 minutes.

The water temperature is crucial for the cooking method. You have the choice of boiling, poaching, blanching, steaming, steaming, or vacuum cooking.

When preparing food, it is important that it tastes good, is digestible, looks appetizing, and contains as many vitamins and nutrients as possible. With the right cooking method, you can positively influence the result.

The water temperature has an impact on taste and cooking time

The most common methods of cooking with water are:

  • boiling/simmering
  • Poaching/simmering
  • blanch
  • steaming
  • steaming
  • vacuum cooking

These methods differ in the water temperature and the amount of water required. The hotter the water, the shorter the cooking time. Use the right cooking method so that the vegetables are neither too hard nor too mushy. The meat should not be too dry either.

1) Boiling or simmering

We usually associate two different things with the term cooking. First, we think of the activity of cooking, the whole process of preparing a meal. In the second case, and this is what is meant here, it is about a cooking process in which the water is heated to over 100°C, i.e. it reaches the boiling point. You need to use enough water to completely cover the contents of the pot. Potatoes, pasta, or soups are usually prepared in this way.

2) Poaching, also called simmering

The water temperature when poaching should be around 70-90°C. It is important that the water does not boil. There shouldn’t be any steam either. Leave the food to soak in the hot water until the desired consistency is reached. This gentle method is particularly recommended for foods that break down easily. Examples of this are fish, tender vegetables, or the so-called poached eggs.

3) Blanching

In this process, you first bring the water to a boil and then put the food into the water. After a short time, about 1-3 minutes, take it out and shock it in very cold water. With this method, many nutrients are retained and germs are killed. The vegetables stay crisp and get a strong, bright color. Blanched foods are usually further processed afterward. You can ideally freeze these to cook or fry later.

4) steaming

Here the ingredient is not cooked directly by the boiling water, but by the steam. There are special steam cookers or pressure cookers for this. But you can also use a conventional saucepan for steaming. To do this, hang either a sieve or a special insert in the saucepan. It is important not to touch the water surface. Place the ingredient in the insert and cover the pot with a lid. The ingredient is cooked by the steam generated by the boiling water. This method is considered a particularly gentle process since the nutrients cannot be lost in the water.

5) steaming

Only a little liquid is needed for steaming. You put the vegetables, fish, or meat in the pot and close it with a lid so that the steam does not escape. The temperature should be above 70°C and below 100°C. During heating, additional liquid is extracted from the food. This food’s own juice mixes with the added water. With this method, too, only a few nutrients are released into the cooking water. The remaining liquid at the end of cooking is great for making a sauce.

6) Vacuum Cooking

A vacuum sealer is required for vacuum cooking. You can use it to enclose the food in an airtight plastic bag provided for this purpose. You should season the food beforehand. Place the plastic bag in a pot filled with water and cook the food at a water temperature of around 65-80°C. This method doesn’t work as well for poultry. At the relatively low temperature in the water bath, not all pathogens may die.
During this preparation, the food retains its nutrients and natural taste.

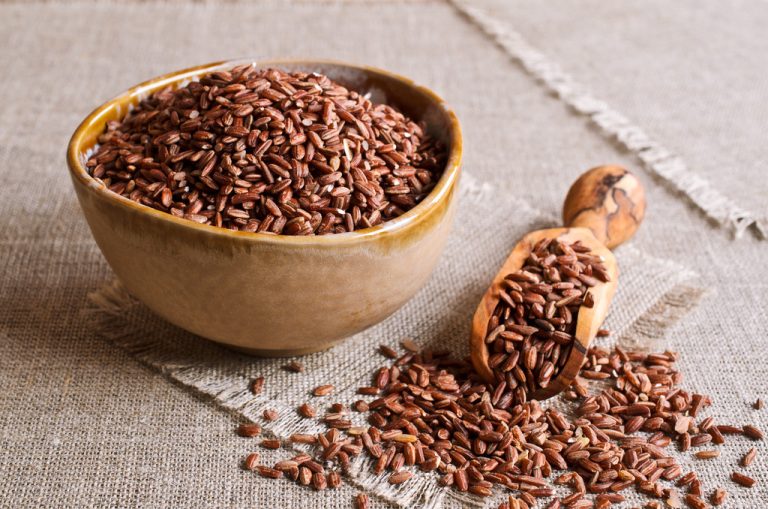
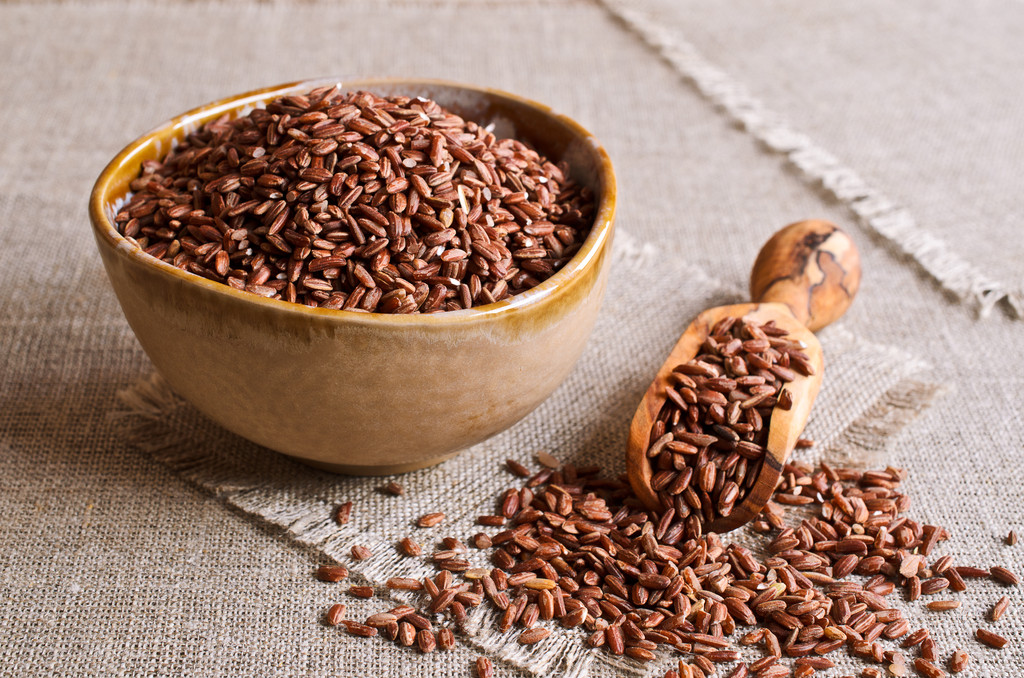
If you want to cook brown rice, you have several options. We will introduce you to two variants – a particularly quick and a particularly healthy way of cooking brown rice.

Brown rice is so healthy

Basmati rice, long grain rice, parboiled rice, black rice, wild rice: there are many different varieties and types of rice. Brown rice is popular because it is largely untreated and still has the outer layers of the rice grain. Brown rice therefore contains more minerals and trace elements than white rice – but it also takes longer to cook. We explain how to cook brown rice properly.

Cook brown rice – soak, wash, cook

If you want to cook rice, you basically have two options: the swelling method and the water method. The soaking method is particularly energy- and water-saving, but has one major disadvantage: In addition to the valuable micronutrients, pollutants also remain in the rice. This is a problem with brown rice because it is usually particularly heavily contaminated with arsenic, as reported by the Federal Office for Risk Assessment (BfR). Arsenic is a metalloid that is carcinogenic to humans. You can find more information about arsenic, its occurrence and its effects in our article on the subject.

We therefore recommend that you soak the brown rice beforehand, wash it and cook it with a higher water-to-rice ratio. In this way you can reduce the arsenic content by up to 80 percent.

Cooking brown rice – this is how the preparation works:
Soak the brown rice in water overnight. The rice should be covered with water about two centimeters high.
The next day, rinse the rice until the wastewater runs clear.
Then put the brown rice in a saucepan with five times the amount of water. In other words, there are five cups of water for every cup of rice.
Bring the water to a boil on the highest setting. Once the water is boiling, turn the heat down to low and let the brown rice simmer, with the lid on, for about 20 minutes.
Remove the pot from the stove and let the rice sit in the covered pot for another ten minutes.
The brown rice is ready. At this point you can loosen the rice grains with a fork and add a pinch of salt. But be careful: very hot steam escapes when you open the pot.

Cooking brown rice using the quick swelling method

With the swelling method, you only add enough water to the rice so that it completely absorbs the water when cooking. Therefore, the source method is particularly water and energy-saving. However, the arsenic contained in the rice is not flushed out with this method of preparation. If you have enough time, you should still soak the brown rice first to reduce the arsenic content.

Cooking brown rice using the swelling method:
Optional: Soak the brown rice in plenty of water overnight.
Rinse the rice with clear water until the waste water is no longer cloudy.
Put twice the amount of brown rice in a saucepan: for every cup of rice, add two cups of water.
Bring the water to a boil on the highest setting. Once the water is boiling, switch to a low setting. With the lid on, let the rice gently simmer for about 20 minutes.
Remove the covered pot from the heat and let the rice sit for another 10 minutes.
At the end you can fluff up the brown rice with a fork and add a pinch of salt.
By the way: If you have cooked too much rice, you can heat up the rest of the rice the next day. Alternatively, you can freeze the cooked rice and preserve it for a long time.

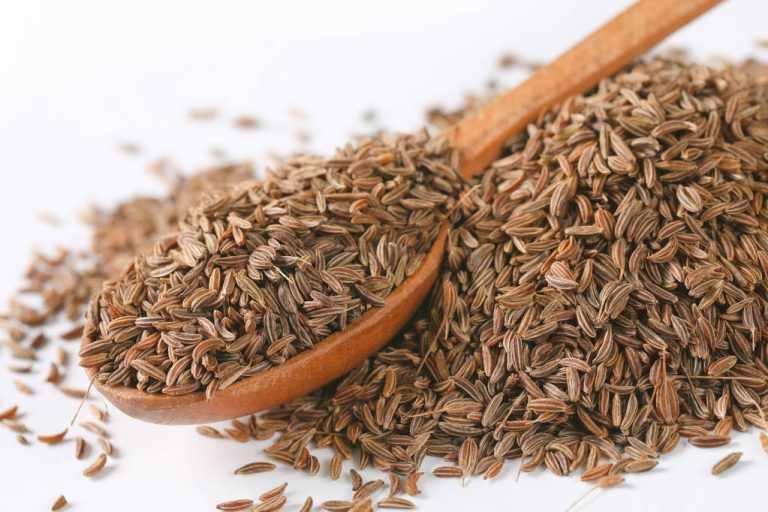
Cumin seeds are a native spice and natural remedy. Here we tell you how to use the spice in your kitchen and as medicine.

Are caraway seeds and cumin the same?

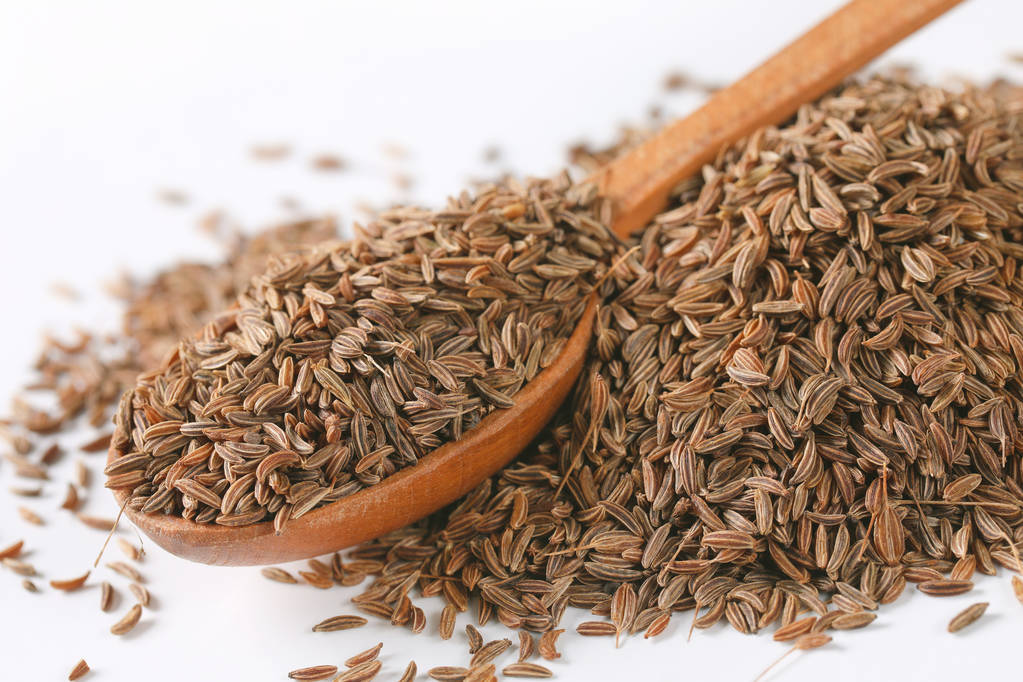
Caraway seeds are popular in German cuisine and are also used as a home remedy for flatulence due to their digestive effect. Caraway seeds, which are native to us, are often confused with cumin. Cumin is particularly popular in Mediterranean, Mexican and Indian cuisine. Although both spices belong to the umbelliferae family, they differ greatly in taste.

You should also not confuse caraway seeds with black cumin. This belongs to the buttercup family and is not related to caraway seeds or cumin. The taste of black cumin is similar to that of black pepper. Cumin seeds, on the other hand, taste mild and slightly sweet.

How to use cumin seeds in the kitchen

Traditionally, caraway seeds belong in bread spices. Not only do they improve the taste of the bread, they also help make it easier to digest. Because of its digestive effect, caraway seeds are also a popular spice for hearty dishes such as sauerkraut, boiled potatoes, goulash and roast goose.

Ground cumin seeds also go very well with salads. Caraway gives yoghurt dressings in particular a more intense aroma. In haute cuisine, the spice is an important ingredient in the brew of lobster and crabs.

Caraway seeds can be combined with many spices, for example with aniseed, fennel, coriander, ginger, pepper, paprika and chili.

Cumin seeds as medicine

Cumin has been known as a natural remedy for a long time. Cumin tea is particularly popular. You can now buy this almost everywhere. However, it is also very easy to make it yourself. All you have to do is pour boiling water over one to two teaspoons of lightly crushed cumin seeds. After ten minutes you can strain the finished tea.

Cumin seeds are known to aid digestion and relieve gas. It also helps with headaches, high blood pressure, toothache and coughs.

Which health effects of caraway seeds have been scientifically proven?

The essential oils it contains are responsible for the positive health effects of caraway seeds. Cumin seeds are scientifically recognized as an important medicinal plant. Studies have shown that they:
have an antimicrobial effect
have an antioxidant effect
can prevent diabetes
have an anti-inflammatory effect
lower blood pressure
improve fertility in women.
Cumin seeds are a local spice that, in addition to having a great taste, is also a recognized medicinal plant. Cumin is therefore a great alternative to the exotic types of spices from East Asia.

Cooking broad beans isn’t difficult, but it does take time and patience. With the right preparation, you too can use the delicious beans as the basis for many vegetarian and vegan dishes.

Broad beans, also known as broad beans, horse beans or fava beans, are a particularly healthy and tasty source of protein – not only for vegans. You can use them for various dishes, for example for salads or stir-fried vegetables, but you can also process them into puree. Although they require some prep time, cooking fava beans isn’t difficult.

There are two different ways to cook broad beans: you can use either dried broad beans or fresh broad beans. In both cases, you need a little patience when preparing. In contrast to the dried version, you can prepare fresh beans on the same day: they do not have to be soaked overnight.

Before you buy fresh broad beans, you should pay special attention to the quality of the beans. Look for those that don’t have empty shells. The smaller ones are sweeter and contain less starch. Avoid dried out beans that are yellowed or even mushy. Buying during the season is also crucial for the quality: broad beans are in season from June to August.

Cooking fresh fava beans: this is how it works

Cooking fresh fava beans is quick and easy. Just the preparation takes some time. Before preparing, prepare and set aside the following:
1 tsp salt
an extra plate for the beans and the shells
a bowl of cold water and ice cubes
How to cook fresh fava beans:
Break open the pods with your hands.
Use your fingers to peel the broad beans out of their shells.
Take your saucepan and fill it with water (about enough to cover the beans). Add a teaspoon of salt.
Boil the water.
Blanch the broad beans for a minute or two.
Take them out of the pot with a sieve and let them drain briefly.
Afterward, shock them with cold water in your ice tray to stop the cooking process. Drain them again.
Now you can remove the leathery skin by slightly slitting it with your nails and pressing it away with your fingers.
Boil the broad beans in salted water until done. This takes about ten to 20 minutes.
Now they are ready for further processing for bean salads, stir-fries or puree.

Cooking dried fava beans: you need to know that

Cooking dried broad beans is a bit more tedious: you can’t cook them right away, you have to soak them overnight before cooking. The amount of water depends on how many broad beans you want to cook:
1 liter of (cold) water per 200 grams of beans
1. How to prepare the dried broad beans for cooking:
Rinse the dried beans under cold water using a sieve.
Get a large bowl or saucepan and place the dried beans in it.
Pour in the measured amount of cold water.
Let the beans soak overnight.
2. Cooking dried fava beans:
Even when cooking, pour about 1 liter of water for every 200 grams of beans in a large saucepan and bring to the boil.
Add a teaspoon of salt.
Now put the beans in the pot and cook them for about ten minutes on high heat.
Now set the stove to low heat and let the broad beans cook. Their cooking time is about 45 minutes.
At the end of the cooking time, use a fork to check if the beans are cooked through. If they tear apart easily, they’re nice and soft. Caution: It’s important that you cook beans properly, as they contain toxic lectins. These can only be rendered harmless by fully cooking them.
Be careful when draining: drain the broad beans gently to avoid crushing them and turning them mushy.
You can now process the cooked beans for a broad bean recipe of your choice.

In order for green and yellow beans to be compatible, you have to cook them beforehand. Read here how much time you need to have the fresh kidney beans on your plate.

Green and Yellow Beans: What’s the Difference?

Yellow beans, also known as wax beans, are just another variant of green beans. Basically, you can use the green and yellow beans at the same time. You can buy the legumes fresh from the region in summer. Harvest time for beans is from June to around October.

Fresh beans should not have brown spots when you buy them. If you break through the bean and the inside is nice and juicy, that’s also a sign of freshness.

Cooking time and preparation of the beans

Beans contain the hard-to-digest and toxic protein phasin. According to the Bavarian consumer advice center, bush beans should be cooked, blanched or boiled for at least ten minutes so that the protein compound is rendered harmless. Unfortunately, even the bean water is toxic and you should stop using it.

The preparation of the beans is very simple:
Wash the beans and trim the ends of the beanstalk.
Cut them into small pieces depending on their future use.
Cook the beans in boiling salted water for about 10 to 15 minutes.
If you can bite through the beans without squeaking, they are done.
Tip: In addition to proteins and many other good nutrients, beans also contain some fiber, which can sometimes lead to flatulence. To prevent this, you can incorporate caraway or fennel (seeds) into your dish or chew a few grains of them after the meal. Fennel, caraway and anise also have a stomach-soothing effect as a tea.

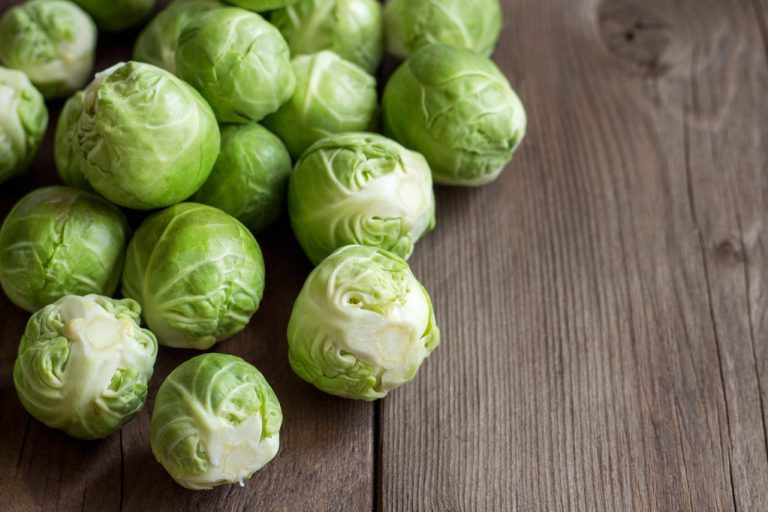
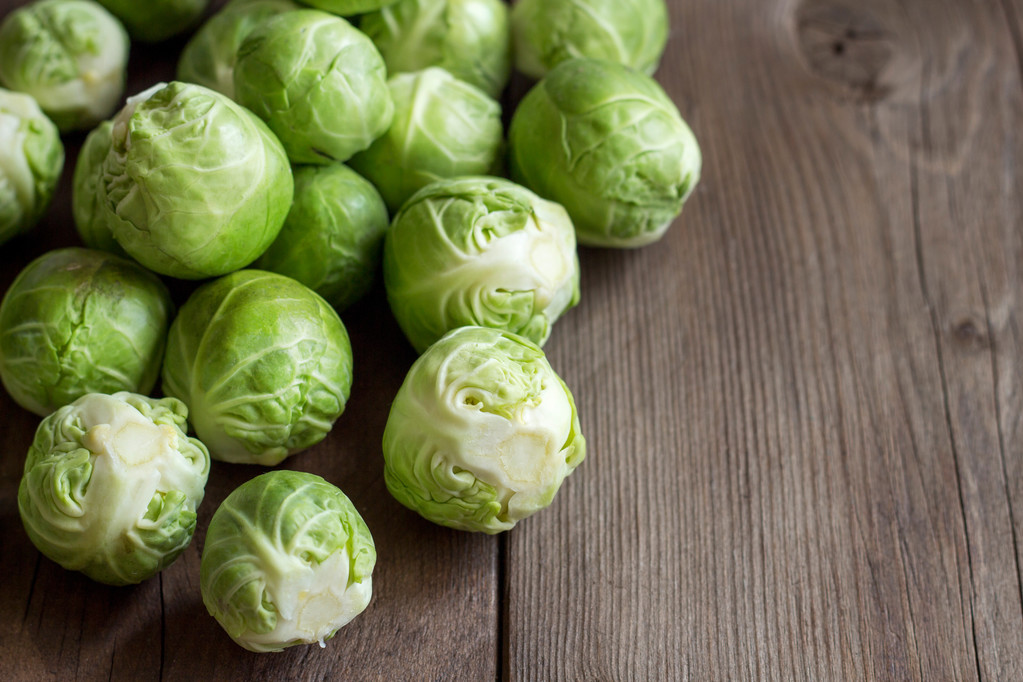
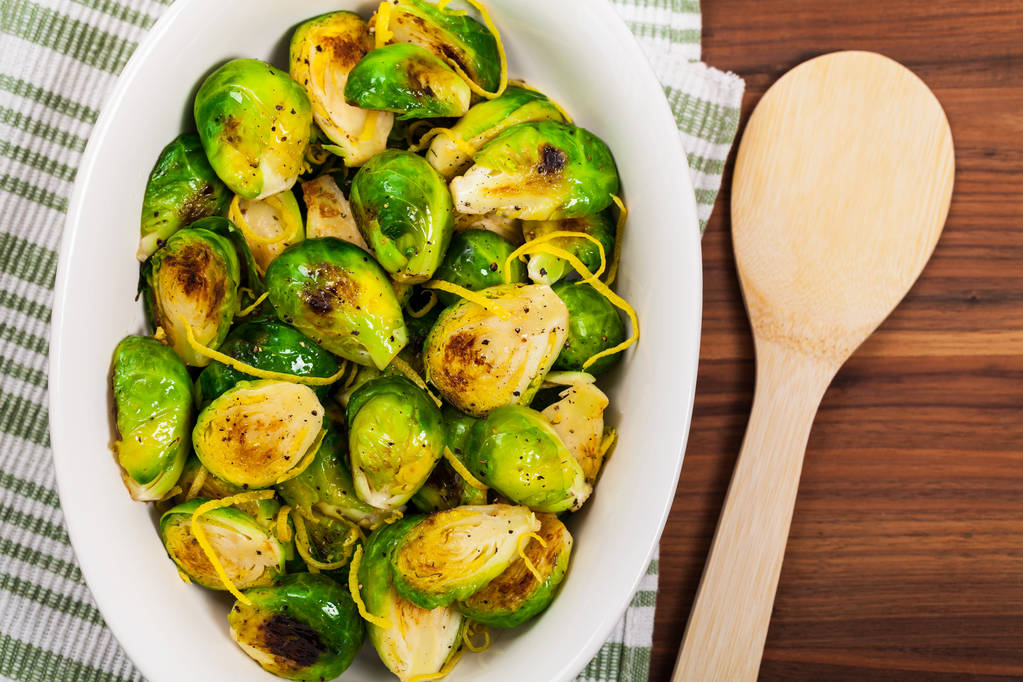
Brussels sprouts are a very healthy winter vegetable. Here you can find out what you should consider when preparing Brussels sprouts and find suitable recipe ideas.

Brussels sprouts are a classic winter vegetable: they are in season from October to February and provide us with valuable nutrients during the cold season. Brussels sprouts are rich in vitamin A, vitamin C, iron, potassium, calcium and magnesium.

To ensure that the vitamins and minerals are retained during preparation and that the Brussels sprouts remain crisp, you should observe the following instructions.

Cook Brussels sprouts: This is the ideal cooking time

How long Brussels sprouts should cook depends on its size. If the florets are rather large, the cooking time is about fifteen minutes. If they are small, you shouldn’t cook the sprouts for more than 10 minutes.

To keep the Brussels sprouts from overcooking and becoming crunchy, you should follow these steps:

Before cooking, remove any eaten leaves and wash the Brussels sprouts florets thoroughly in cold water. In another article you will find tips for cleaning Brussels sprouts.
Then bring plenty of salted water to the boil in a saucepan and then add the Brussels sprouts. Turn the heat down to medium-low and let the florets simmer in the salted water for 10-15 minutes. Periodically check with a fork to see if the cabbage is done. As soon as the tines sink relatively easily into the rosette without falling apart, it’s done.
Then pour the Brussels sprouts into a sieve and briefly rinse them under cold water. So its green color is preserved.

Steam Brussels sprouts

Another preparation method that is gentle on the Brussels sprouts is steaming. How to do it:

Before cooking, remove any eaten leaves and wash the Brussels sprouts florets thoroughly in cold water.
Put water in as wide a pot as possible. The water should only be deep enough for you to put a steamer basket in without it leaking through the holes. Alternatively, you can also hang a large sieve in the pot.
Place the Brussels sprouts in the steamer basket or colander and let the water boil. Then immediately turn the heat down to medium-low and let the Brussels sprouts steam for 10 minutes.
Finally, quench it with cold water to give it its light green color.