Tag

correctly

Browsing

Lots of useful wallpapering tips at a glance. We have put together the most important rules and wallpapering instructions for you so that you can successfully apply wallpaper yourself. With it, you can wallpaper like the pros.

Simply wallpaper yourself and properly

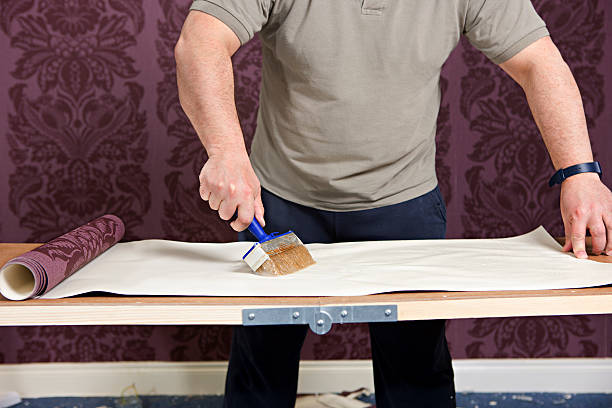
Anyone who has ever installed wallpaper knows that proper wallpapering must be well prepared. Because putting the wallpaper on the wall yourself is not as easy as it looks. But with the right instructions, wallpapering will also work. Then you can do everything on your own. Or even better, ask a few friends who will actively support you. As a result, wallpapering is sure to be a lot of fun. To ensure that everything works, we have collected the most important rules and tips for wallpapering for you. In addition, note tips for removing dust stains from wallpaper.

Ceiling wallpaper tips

Installing the wallpaper on the ceiling is more difficult than on the vertical wall. So use a ladder. It is best to attach the wallpaper lengthwise and away from the window to have an ideal incidence of light. When measuring, make sure there is an overhang of 2-3 cm for the longitudinal wall. The strip of wallpaper that will cover the lamp connection must first be cut out at this point. To do this, take the ceiling sheet and hold it against the ceiling so that you can see the cable connection. Then cut a radial hole in the wallpaper there. Also, note useful tricks for storing paint rollers and brushes after painting

Wallpaper on door frames and windows

Other wallpapering tips relate to door frames and windows. Accordingly, simply press the wallpaper strip to the door frame. It is best to use a wallpaper spatula for this. Then the excess is cut off as usual. Finally, you have to cut the wallpaper that is to be glued over the door frame to size. But with windows, there is also the fact that they have inside and outside corners. Work here in the same way as with the other corners of the room. Finally, you can start painting. Please also note our article on making your own paint and how to remove wallpaper stains from painted wallpaper

Wallpaper behind radiator

If you want to wallpaper behind radiators, it is best to remove them beforehand. Then let the pipes cool down, otherwise, the paste will dry too quickly. Otherwise, attaching works as in the previous steps. You can carefully smooth out freshly formed bubbles towards the edge. However, if these cannot be brushed out, you can use a syringe to inject some glue into the blister. In contrast, very large blisters can be cut with a craft knife and smeared with paste. After the soaking time, simply press the wallpaper to the wall. For more inspiration, watch various step-by-step video instructions and also note the different wallpaper symbols.

Repair cracks when wallpapering

Woodchip is forgiving. Therefore, you can easily repair cracks in the wallpaper when wallpapering. Because they can be glued back together very easily. After the walls have been painted over, the crack can no longer be seen. And even after that, you can hide cracks and other damage in woodchip, e.g. with Tipp-Ex or leftover wallpaper.

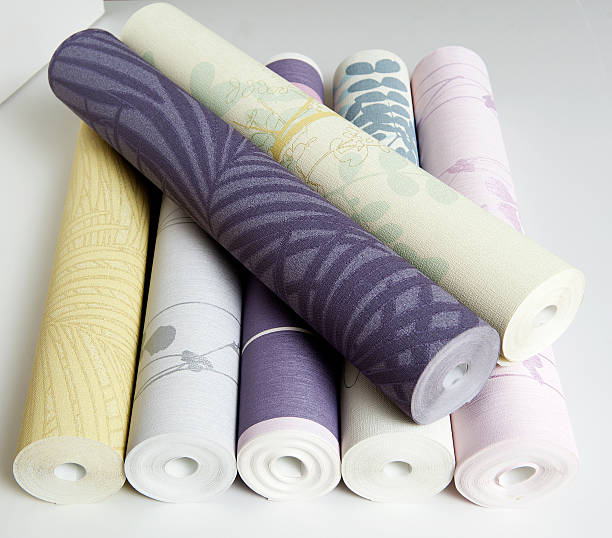
Easier to wallpaper with non-woven wallpaper

You can save a lot of time with non-woven wallpaper, as there is no need to soak paper wallpaper. A special fleece paste is applied directly to the wall. In this way, the wallpaper can be pressed directly from the wallpaper roll onto the wall. After sticking on a strip, you can simply cut off the excess with a spatula.

Strawberries are very delicate and perishable. Therefore, it is important to store strawberries properly. You can find out here how they stay fresh the longest.

Freshly picked strawberries are very aromatic and rich in vitamin C, folic acid and other important nutrients. Unfortunately, they are also easily perishable and quickly lose their aroma. That’s why you should always buy them fresh from the region or pick them yourself. In addition, it is important that the strawberries are not crushed during transport and get fresh air.

It is best if you store the strawberries at room temperature and eat them the same day. Since water strips the flavor of the fruit, wash it and remove the stems and leaves just before eating. You should always cut out bad spots immediately, as mold in strawberries spreads quickly due to the high water content.

Store strawberries in the fridge

Strawberries will keep in the crisper drawer of the refrigerator for up to two days if you store them properly. For this it is important that you keep the strawberries unwashed in the fridge. Additional moisture would cause the fruit to spoil faster.

So that the strawberries get enough air, it is best to put them in a large sieve. But be careful not to stack them too high. It also makes sense to line the bottom of the crisper with kitchen paper, as it will absorb excess moisture. If you don’t have a large colander, you can store the strawberries on a large plate or tray lined with paper towels.

Freeze strawberries

If you want to store the fruit longer, you can also freeze the strawberries. Unfortunately, they get a bit mushy when defrosting, but you can still make a delicious strawberry sauce or a smoothie out of them, for example.

Tip: In order to be able to portion the fruit better later, you can freeze them individually before you freeze them properly. To do this, place them on a tray or large plate and freeze them for a few hours. Then fill them together in a freezer.

canning strawberries

Instead of freezing them, you can also cannish the strawberries. It works like this:
Wash the strawberries thoroughly and remove the pulp.
Place them in clean, boiled mason jars.
Boil water with sugar in a ratio of 3:1 in a saucepan.
Allow the resulting sugar water to cool.
Pour the sugar water over the strawberries up to the rim of the jar and seal tightly.
Now you boil the jars. If you don’t have a pressure cooker, you can also do this in the oven:
Place the mason jars on the rack in the oven.
Fill a baking sheet two inches high with water and slide it onto the rail under the rack.
Heat the oven to 130 degrees until the water on the tray starts to boil.
Turn off the oven and let the jars cool in the oven for about 30 minutes.
When the jars have cooled, you can remove them from the oven, label them, and store them in a cool, dark, and dry place.

If you harvest and dry sage properly, it can be stored for a long time. So you can use it at any time of the year to refine and season dishes. Even harvested and dried sage is also suitable as a tea for a sore throat.

6 tips for the right sage harvest

The real sage is a popular herb for refining dishes. But sage can also provide relief as a variety of home remedies, for example for sore throats or gastrointestinal complaints.

It is important to harvest the sage correctly in order to have sufficient supplies for the cold season, when the sage no longer sprout.

You should pay attention to these tips for a productive harvest:
Harvest time is from May to August. Normally, the sage begins to bloom at the beginning of summer. In its heyday, however, its aroma content is very weak, which would make it uninteresting as a herb.
If you grind consistently and evenly, you’ll reduce woodiness and blooming. The young shoot tips in particular are rich in essential oils and aromatic ingredients.
Never cut into the woody part of the shoots, otherwise the shoot will not sprout again.
Do not wash the harvested sage, just wipe it off to avoid unnecessarily slowing down the drying process and losing valuable ingredients.
To avoid loss of aroma, you should dry or freeze the sage immediately after harvesting.
You should harvest the last time around the end of August so that the shoots can fully mature before the first frost and are therefore protected. To protect the hardy shrub from frost, you can put leaves, fir green or straw around the root area. Attention: Not all sage species are hardy.

drying sage

Dry or Freeze Sage – Which is Better? The answer: both are possible! The essential oils are preserved both dried and frozen.

Sage really dry
In the air:
Dry the sage at 70 to 80 degrees Fahrenheit (21 to 27 degrees Celsius) in a well-ventilated area. That takes about ten days.
You can simply spread individual sheets on newspaper.
If you have harvested stalks, tie them together with string and hang them upside down.
In the oven:
It is also possible to dry the sage in the oven at 40 degrees Celsius within about six hours.
Turn the leaves regularly and leave the oven door ajar (say, with a wooden spoon between them). However, this method is not very energy-efficient and therefore not recommended.

Freeze sage properly

To freeze sage, you can put the sage leaves uncrushed in a screw-top jar or freezer container.

Dry laundry quickly, but how? Washing is the order of the day for most families. Especially with children, there is always a lot of laundry, which of course not only has to be washed but also dried. We have the best tips for drying clothes.

The washing process itself is no longer a problem with modern washing machines. But where can you dry your laundry quickly and easily? We’ll show you what to look out for when drying your clothes indoors and outdoors.

Different ways to dry clothes

There are different ways to dry clothes. Mistakes already happen when doing laundry. This includes, for example, not having spun the laundry well in the washing machine. But other clever tips and tricks can also help you to dry your laundry properly and quickly. We will show you the things you should pay attention to below.

1) Don’t forget the spin cycle

Of course, you should not spin very delicate items of laundry. But normally all pants, sweaters, towels, and the like are suitable for the spin cycle. The spin cycle helps to ensure that the laundry no longer comes out of the machine dripping wet, but only damp. This dries it faster. Also, note our tips for washing and caring for laundry.

2) Air dry laundry

If you have a garden or balcony, you can dry your laundry in the fresh air. You can use a good old clothesline. If you don’t have a rotary clothes dryer in your yard, use a plastic tie. Then stretch it open on two sides and hang the laundry on it. Because the pieces dry fastest in the sun and in the fresh air. This method works particularly well for bedding. Also, note our contribution to washing and caring for bed linen.

3) Dry clothes with a proper drying rack

Traditionally, the pieces are hung over a drying rack after washing. Some are wider, others are taller. But no matter which drying rack you use, you should definitely leave space between the individual items of clothing. This allows the air to circulate better. You can also hang everything from a stand that is placed on the edge of the bathtub. Individual pieces can also be hung in front of the heater to dry.

4) Dry laundry in winter

Washing clothes is difficult, especially in winter. Washing and drying pillows and duvets are also a reluctance to do in winter. Because clothes often take longer to dry in winter. But even in winter, you can dry your laundry outside. Because even cool temperatures dry your clothes. But you should make sure that the humidity is not too high. Otherwise, the clothes will take longer to dry outside. If the clothes are frozen during the process, let them hang a little longer. Because after some time the moisture pulls out and the problem is solved.

5) Dry laundry in the apartment

If you don’t have a garden, laundry room, or balcony, you have to dry your laundry indoors. But there are many things that can go wrong. In the worst case, mold forms due to the high humidity. And then only home remedies help to remove mold. So that it doesn’t get that far in the first place, we have put together the most important tips for drying laundry in the apartment:

The right choice of room

If you hang up your laundry in the apartment, then you should choose the right room. The room should have a temperature of 20 degrees. Because in unheated rooms, the humidity can increase due to the wet laundry. And it is possible that the humidity in the air is drawn into the walls. This can lead to the formation of dangerous mold and you then need effective mold remediation. Likewise, the right room is not too small and has windows for ventilation.

Regular airing in the apartment

Regular ventilation ensures that the air is exchanged. As a result, you can reduce the high humidity in the room. And that is very important to prevent mold from forming. Also, read our other tips on reducing humidity.

Hang up clothes and cleverly place drying racks

You should also be careful not to hang the clothes too close together. Instead, leave a little more space. You should also place the drying rack in such a way that the air can flow through the laundry when it is aired. This makes drying laundry even faster.

If you want to cut a pumpkin, it is often difficult because of the hard skin. We’ll show you a simple trick that will make cutting the pumpkin much easier.

Pumpkin is a versatile vegetable that you can buy locally grown between August and December, when pumpkins are in season. You can eat the skin of many types of squash and don’t have to throw it away. However, it is a bit hard, making the squash difficult to cut. The skin only softens when it is cooked. For most recipes, however, you will need to cut the squash into small pieces or slices before cooking. For example:

Cut pumpkin into pieces for: pumpkin soup, pumpkin spread and pumpkin pasta
Slice the pumpkin for: Tarte flambée with pumpkin
We’ll show you a trick on how to cut the peel more easily.

Cutting the pumpkin: The cooking pot trick

If the pumpkin skin is very robust or the knife is no longer very sharp, it will be difficult to cut a pumpkin. But a simple trick helps to make it easier:

First wash the pumpkin thoroughly.
Then place the squash in a pot filled with water. The water should come up a little to halfway up the squash.
Let the water simmer for about five minutes.
After that, the squash will be much softer and easier to cut.

Dice the pumpkin

You can then cut the pumpkin into cubes or slices. Both are possible with this guide:

1. Halve the pumpkin. To do this, place the knife on the stalk of the pumpkin and divide the pumpkin once.
2. Now the pumpkin with the pulp is open. For most recipes you will now have to hollow out the pumpkin. This is easy to do with a spoon. In addition, you should usually remove the cores. You don’t have to throw them away, you can roast the pumpkin seeds. They’re a tasty snack.
3. To cut the pumpkin into cubes or slices, place the pumpkin half with the open side on a wooden board. Then cut the pumpkin into slices one to two centimeters thick. If you are right-handed, start at the end of the pumpkin that is to the right of the stalk.

Note: If you want to use the pumpkin in slices (for example, to cover a tarte flambée or a pizza), cut the slices only a few millimeters thick.

4. Now place several pumpkin slices on top of each other and cut off individual cubes.

Note: Be sure to separate the stalk from the pumpkin piece as well.

5. Now you can carry out steps 3 and 4 for the other half of the pumpkin and then process the pumpkin further.

When dosing coffee, you always have to look very closely. Measuring spoons can easily distort the taste. We will show you what you have to be aware of.

The dosage affects the taste

The taste and wholesomeness of a freshly prepared coffee depends on many factors – including the dosage. How much brewing time do I give the coffee and of course what is the quality of the beans used? However, what many coffee lovers like to overlook: The dosage of the coffee powder also has a significant influence on the coffee quality: If there is too little powder, the coffee quickly tastes bland and not aromatic, but too much powder can make it taste bitter and sour. We have therefore put together some tips on how to dose your coffee correctly.

Measuring spoons are too imprecise

If you buy fresh beans for your coffee in a roastery, if you are lucky you will also get a measuring spoon with it. That’s well intentioned, but it doesn’t necessarily have to be an advantage – at least for the taste of our coffee beans. Because here the mistake is in the details: Depending on the type of coffee, the size, structure and density of the beans vary. This means that a scoop of one type of coffee can contain many more grams of coffee powder than the same scoop of another type. So if you want to be on the safe side, you should weigh the coffee powder instead of measuring it with a spoon. Because: When it comes to coffee powder, the volume is unfortunately no help. It can therefore be weighed neither by spoon nor by cup.

Dose coffee correctly: Always pay attention to the weight

So we see that good coffee quality depends, among other things, on weight. The best and most accurate way to determine the coffee powder is with a conventional kitchen scale.

Now, of course, it depends on which type of coffee you have chosen and which method of preparation you prefer – whether filter coffee, stamp jug, coffee from the fully automatic machine or from the coffee machine. Mild coffee also likes to tolerate a stronger dosage in order to develop the full taste with all aromas. Stronger varieties should be dosed rather cautiously at the beginning. However, the rule here is: the proof of the pudding is in the eating. You can find your preferred starch and bean relatively quickly. So nothing stands in the way of perfect coffee enjoyment.

No more fear of gelatin! Gelatine is often required to make cakes, slices, and roulades firm. Processing these is not as tricky as some might think. With our tips & tricks, nothing can go wrong.

Correct dosage of gelatine

The amount of gelatin needed depends on the amount and desired consistency of the mass you want to gel. As a guideline: For 500 ml of liquid, either 1 pack of ground gelatine or 6 sheets of gelatine are used.

Soaking is part of it

Leaf gelatin needs to be soaked in cold water in a wide bowl for about 5 minutes. So that the leaves do not stick together and can swell sufficiently, they should be placed individually in the water. Mix the powdered gelatine with a few tablespoons of the cold mass, juice, cold water, or liqueur (depending on the recipe) in a small saucepan and leave to swell for about 5 minutes.

Cold masses gel

Remove the swollen gelatine leaves from the water, squeeze them out well and dissolve them in a small saucepan over low heat. Here you can also add a few tablespoons of the mass to be gelled or some juice. You can also slowly dissolve swollen powdered gelatine over low heat.

Before you add the gelatine to the rest of the mass, it should be leveled. To do this, stir a few tablespoons of the cold mass into the dissolved gelatine and then mix the gelatine mass with the cold mass.

Hot masses gel

If you want to gel hot masses, you can immediately add the gelatine undissolved to the hot, no longer boiling liquid and stir until it has completely dissolved.

The liquid should not be boiled after the gelatin has been added, otherwise, the gelatin will lose its gelling power.

Tips and tricks

Gelatine is not suitable for creams or jellies with fresh kiwi, pineapple, papaya, and figs, as these contain an enzyme that reduces the gelling power.

A plant-based alternative to gelatin is agar-agar. The difference is that agar-agar has to be boiled for 2 minutes in order to develop its gelling power. It is therefore very suitable for fruit jellies.

Simply chop finely diced onions

The best way to cut onions is with a sharp paring knife. A smaller knife is better for peeling and a larger vegetable knife for cutting. First, remove the thin peel of the onion, then cut the onion in half lengthwise, the root of the onion should not be removed.

Lay the onion cut-side down on a board and hold the narrow side – the base of the root – with your slightly bent fingertips. Cut the onion lengthwise into fine strips so that the root end remains whole and thus holds the onion layers together.

Cut the onion horizontally one to three times (depending on the size of the onion) until just before the root. The more often you cut here, the finer the cubes will be. Then cut thin slices vertically so that the onion falls into fine cubes by itself.

A slicer is best for slicing wafer-thin, whole onion rings, as you can never slice the rings so thinly and evenly with a knife.

Important: Onions should never be cut twice, which is why the chopping devices are not ideal for chopping onions. Cutting the onion several times can turn it gray and bitter.

Tip: If you have to cut a large number of onions, you can put a pot of water next to the work surface. The steam neutralizes the spiciness of the onion. A wet chopping board can also provide some relief from the pungent onion fumes.

Bitter almond flavor, rum flavor, and vanilla flavor are mostly artificially produced substances that are mixed with sugar or oil. Even the smallest amounts are enough to flavor cakes (cake recipes), biscuits (bake biscuits yourself), and creams (mousse recipes).

Donuts (vegan carnival donuts) can also be refined with a rum aroma. The vanilla raspberry cupcakes go well with Valentine’s Day (Valentine’s Day Recipes) and are sure to please the loved one.

Baking flavors can also be used for homemade ice cream (make ice cream yourself), pudding (pudding recipes), or drinks (mix your own cocktails).

Baking flavors are usually available in small bottles and can be stored for a long time.

Perfect dosing of baking aromas

A little trick is needed to get a drop out of the small bottle of baking aroma. With vigorous shaking, almost the entire content of the baking aroma bottle comes out.

Simply hold the tine of a small fork against the slanted opening and catch a drop.

A bottle of aroma is sufficient for at least 500 g of flour or 500 ml of liquid. Usually, only a few drops get into a cake. Please follow the recipe and use it sparingly.