Tag

cultivation

Browsing

Bhut Jolokia has over a million Scoville and is considered one of the hottest chillies. But where does the chili plant come from and can you grow it in your own garden?

Bhut Jolokia: The hottest chili?

Bhut Jolokia is one of the hottest known chili varieties. With over a million Scoville units, use this chili with caution. Scoville measures the degree of spiciness of pepper plants, which include the Bhut Jolokia.

The Federal Institute for Risk Assessment classifies too much spiciness or foods with too high a capsaicin content as harmful to health. However, there is only a risk if you consume an excessive amount of it.

The chili plant Bhut Jolokia comes from north-east India. Hot chili varieties and spicy food are widespread there. Meanwhile, you can also find Bhut Jolokia outside of India. You can recognize them by their wavy exterior.

Cultivation and use of the Bhut Jolokia

The chili fruit, which belongs to the Capsicum chinense family, is said to grow up to four meters high in India. One to two meters is actually normal. The fruits are between five and eight centimeters long.

Traditionally, Bhut Jolokia is grown in intercropping, mainly between rice plants. It is harvested in August and September. The advantage of mixed cultures between rice plants is that the fine leaves of the chilli plant do not burn. If Bhut Jolokia is not grown in paddy fields, you will find it in shady places in gardens.

If you want to plant the chili in your own garden or on your balcony, you should pay attention to a few things:
The germination temperature of the seeds should be between 26 and 32 degrees Celsius.
The chilli plant also likes it moist, which is why it feels so at home in the rice fields.
Give her time to germinate. This can take up to 36 days.
If you prefer to start seedlings, they should be around two months old before planting them in the garden.
The time between sowing and harvesting can last up to 160 days.
Whether you get a successful harvest depends mainly on whether your soil reaches the desired germination temperature.

Preserve Bhut Jolokia

If your experiment is successful and your harvest is productive, you can use the fruits of the Bhut Jolokia fresh or preserve them. So you can enjoy spicy dishes all year round.

Since it is also monsoon season in India during the harvest phase, chillies are not dried there. In Germany, of course, things are different. Maybe you even have a dehydrator, which is a big energy guzzler.

Instead of drying the chillies, they are often smoked or preserved in oil. In the country of origin, mustard oil and lemon juice are often used for pickling.

Vanilla is particularly popular in desserts. But hardly anyone knows what the spice is all about. We’ll tell you everything you need to know.

Cultivation and origin of vanilla

We all know the black vanilla beans that you can buy in the supermarket in a small glass tube. Only very few people know how and where vanilla grows.

The Spice Vanilla is an orchid plant that climbs trees and poles. This has green to yellowish flowers and seed pods. Vanilla originally comes from Mexico. The Aztecs already appreciated the spice, the Spaniards made it known in Europe.

Meanwhile, Madagascar is the largest growing area because the weather conditions are ideal. There, however, the plant is artificially pollinated, since it can only be pollinated by Central American bee and hummingbird species. Vanilla is grown in huge plantations. This is so complex that vanilla is considered the king of spices.

Vanilla: Processing into a spice

The taste is in the seed pods of the pods, but it takes a while before they are edible. They are ripe in August, but it is only through moonlighting that vanilla becomes the spice we know:
First, the seed pods are treated with hot water or steam.
The fermentation then takes place in airtight containers. This process, which can take up to four weeks, creates the flavor-giving vanillin in the pods.
To keep the vanilla flavor for a long time, it is sold in glass tubes. Incidentally, the real vanillin tastes more aromatic than the artificially produced one.

Downsides of vanilla cultivation

Ideally, vanilla farmers in Madagascar receive the equivalent of ten euros per kilogram of vanilla. Dealers keep pushing prices down. The spice is then sold on the world market for up to 600 euros per kilogram. The main buyers of vanilla are large corporations such as Nestlé and Unilever.

Farmers complain that the cultivation is hardly worthwhile for them because of the low wages. Many of them have to live on less than a dollar a day. In addition, natural disasters such as cyclones make work difficult. If the harvest fails, vanilla becomes even more expensive. But the farmers do not benefit from it.

Therefore, when buying, you should make sure that you choose Fair Trade vanilla. This is the only way you can be sure that the farmers can sell their vanilla at a fair price.

This is where vanilla comes into play

Pudding, cake, ice cream: In addition to desserts, vanilla is also used in salad dressings and fish dishes. Depending on the recipe, you can either use the whole pod or just the pulp. You can carefully scrape this out with the tip of a knife.

You can then use the pod to make vanilla sugar yourself. Since vanilla has come a long way before it ends up in our kitchen, it is better if you use the entire vanilla bean. Vanilla should also be an exception in your diet.

The honeyberry is a pretty plant whose berries are safe to eat. Here you will find everything you need to know about the cultivation and use of wild fruit from Siberia.

The exotic honeyberry (Lonicera kamtschatica) comes from the Kamchatka region, the border area between Russia and China. It is also known as Mayberry or Kamchatka honeysuckle and belongs to the honeysuckle family. Unlike most other species in this family, the fruits of the honeyberry are edible. The taste of the pretty fruits is strongly reminiscent of our local blueberries. Honeyberries have a high proportion of vitamins and are suitable for direct consumption, but also for further processing into jams, mousse or juice.

It’s not just the elongated, deep blue fruits of the honeyberry that make a good impression. The shrub and its filigree flowers also make the plant a pretty ornamental shrub for your garden.

Honeyberry: location and soil for the plant

As a densely branched shrub, the honeyberry reaches a height of up to one meter and is similar in growth form to the blueberry. The deciduous twigs and leaves sprout in the first warm days of spring. You can expect the first flowers as early as March. The honeyberry already bears fruit between April and the end of May, making it one of the earliest wild fruit varieties. Their short development span is due to the homeland of the plant. In the cold Siberian regions, it has to adapt to a very short growing season, which has always resulted in early flowering and fruiting.

Thanks to the harsh weather conditions of its homeland, the honeyberry is a very hardy shrub that is easy to grow and care for:

Location: The ideal location for the Geissaceae is a damp, partially shaded to sunny location. Honeyberries combine well with hedge plants and other berry bushes.
Soil: The honeyberry grows on both peaty and loamy soils. In order to achieve rich fruit stands, you can support your plant with humus or compost.

Growing and caring for honeyberries

Cultivation: Add an extra portion of compost to the excavated planting hole before planting young honeyberry bushes. It is ideal if you plant your young shrubs in pairs to make it easier for them to be fertilized. Different types also harmonize with each other. Always keep a planting distance of at least one meter.

Care: The honeyberry is a very frugal shrub. Only long periods of drought can damage it. Therefore, especially during the growing season, make sure to always keep the root ball slightly moist without waterlogging. The honeyberry survives even cold winters without any problems. The wood can withstand temperatures as low as -45°C and even her delicate flowers can withstand sub-zero temperatures. Your berry plant does not need special winter protection. Fertilizing is also not absolutely necessary. However, if you want to do something good for your plant, you can treat your shrub in moderation with organic berry fertilizer or homemade fertilizer.

Pests and diseases are not known for the honeyberry. If you want to look forward to a rich harvest, you should cover your berries with a protective net, especially during the growing season. This way you make sure that the birds in your garden don’t get there before you. If you don’t want to eat the berries yourself, you can of course leave them to the birds as food.

Pruning: Honeyberries sprout new shoots from the base. A pruning should therefore only be carried out once a year on the oldest shoots. The best time is right after harvest. To do this, select the three to four oldest shoots and cut them back to the ground with sharp hedge trimmers. To keep your shrub strong and healthy, it should never have more than ten to twelve shoots.

Cook jam & Co. from honeyberries

Honeyberries are rich in vitamins C and B, making them a healthy snack to snack on in the garden. However, since its fruits are relatively small and not easy to harvest, the plant is hardly suitable for large-scale industrial cultivation. However, honeyberries are ideal for preparing your own delicious jams, mousse, compote or juice. For example, you can use the varieties “Maistar”, “Mailon”, “Morena” and “Failon”.

You can easily plant savory in your garden or on the balcony. The kitchen herb is very aromatic and impresses with its intense smell. Here you can find out what you have to consider when growing and using savory.

Savory and its effects

The genus of savory herbs includes about 40 different species. They all belong to the mint family. The best known are summer savory (Satureja hortensis) and winter savory

Savory is rich in valuable ingredients, including:
essential oils
tannins
flavonoids
The substances are said to have a positive effect on digestion, which is why savory is traditionally used to flavor foods that are difficult to digest. Although the herb is rarely used as a medicinal plant today, it has many positive effects on the body. As a 2018 study on summer savory shows, the plant’s properties include:
antibacterial
antioxidant
anti-cancerous
antiparasitic

savory in your garden

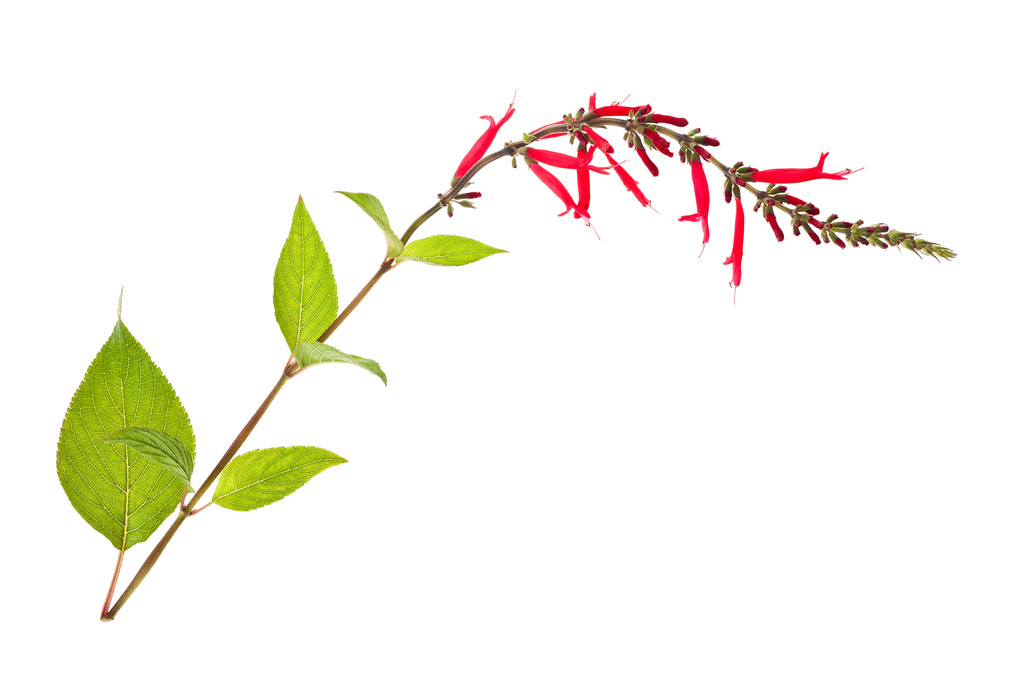
Summer savory is an annual plant that reaches a height of about 55 centimeters. The more robust mountain savory is hardy and can become biennial or perennial. It grows up to 70 centimeters. The plants bloom from July to October. The scent of the flowers attracts bees

If you want to enjoy the intense savory for longer, you should opt for the perennial winter savory. Otherwise, the cultivation of both varieties is very similar.

Location:
Savory needs a light and warm location.
The soil should be water-permeable and slightly calcareous. Savory is sensitive to waterlogging. If the soil is clay-like and firm, you should loosen it up with some sand first.
You can grow both summer and winter savory in the garden or in a pot. Make sure the pot is big enough for the herb.
Sowing:
Savory belongs to the light germs. The seed therefore needs a bright place to germinate. The windowsill is ideal.
From April you can start seedlings indoors. To do this, press the seeds lightly onto the potting soil so that they get enough light.
From the end of May you can also sow savory directly outside. Here, too, it is sufficient to press the seeds slightly into the soil. They should not be completely covered.
Make sure that the distance between the individual plants is at least 20 centimeters. Savory grows voluminously and needs enough space to thrive.
Alternatively, you can also buy cuttings.
Care:
Savory is used to nutrient-poor soils. That’s why you should only fertilize the soil with organic fertilizer once a year in the spring
It is advisable to occasionally enrich the soil with lime.
Summer savory requires little water and can withstand longer periods of drought. You should definitely not water the plants too much. It is best not to water savory until the soil is two centimeters dry.
Put perennial savory in pots indoors in a cool room in winter.
It is best to prune perennial savory in spring to encourage bushy growth.
Harvest:
In principle, you can harvest savory all year round. However, the intensity varies. Young shoots are significantly milder, while the older ones, especially perennial winter savory, are very tart.
The taste of the herb is most intense just before flowering. This starts between July and August, depending on the weather conditions.
Since the flowers are also edible, you can also harvest and use savory while it is in bloom.
Simply trim the branches with secateurs as needed.

Storing savory: this is how it works

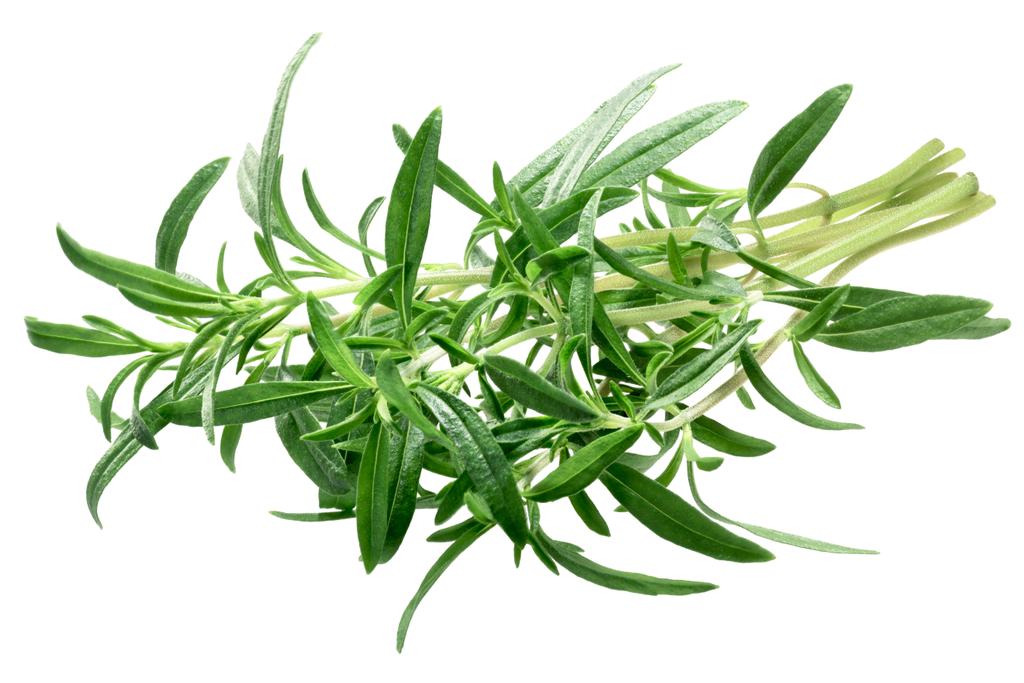
You can process savory fresh immediately after harvesting. If the harvest is particularly plentiful, it is advisable to preserve the herb.

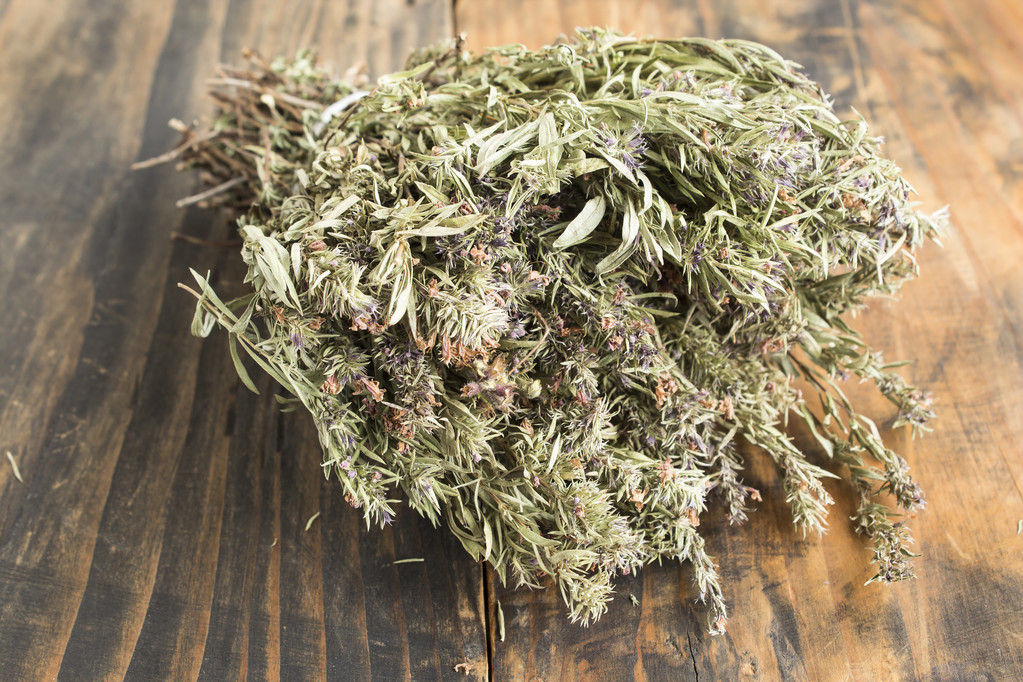
Unlike many other herbs, savory doesn’t lose its flavor when you dry the plant. On the contrary, properly dried, the taste can even be intensified.

You can pull the annual summer savory completely out of the ground and hang it with a thread in a shady place to dry

For winter savory, use only the young sprouts to dry while leaving the older, woody ones. Tie the shoots together with string and hang them in a shady, dry place. You should avoid direct sunlight during this phase

When the savory has finished drying, the leaves can be easily removed from the stem and you can fill them into a screw-top jar. You should store savory in a dark and dry place

Alternatively, you can freeze savory. Wash the herb thoroughly and then pat it dry. You can pack the whole sprouts in a jar or cotton bag to avoid plastic waste and freeze the herb that way.

How to use savory in the kitchen

Savory is particularly popular in French cuisine. No wonder: the herb is versatile and goes well with countless dishes.

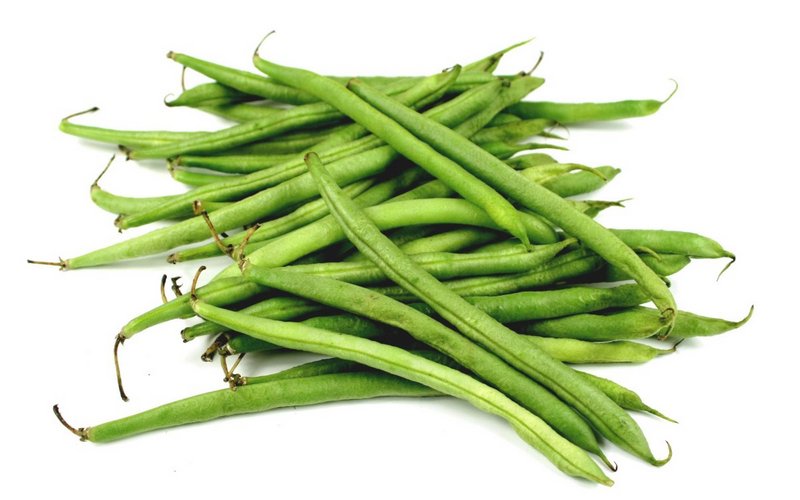
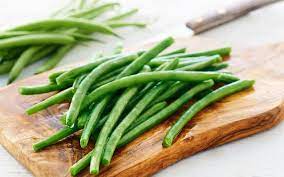
The name is program. Hardly any herb harmonizes so well with beans. Whether with bean salad or a fresh bean pan, savory is guaranteed to go well.
The herb is particularly suitable for various potato dishes, from wedges to potato gratin or a classic potato soup.
You can also refine cabbage dishes or legumes such as peas or lentils with savory. Its digestive action is an added benefit.
Savory is an excellent ingredient for homemade herb butter or herb quark
Traditionally, meat dishes such as lamb or fish dishes are also seasoned with savory.
Savory has a very intense taste. Therefore, you should use it sparingly and taste it. So that the taste is not lost, you should not cook the kitchen herb for too long. The taste of savory harmonises with various Mediterranean herbs such as thyme, sage or rosemary.

In the kitchen, summer savory is more often used. Although in principle both types are suitable for this. The winter savory tastes a little more intense and is therefore used more as a tea. Because of its anti-inflammatory properties, it is ideal as a home remedy for coughs.

Exotic pineapple sage is a fruity spice for summery dishes and drinks. Here you can find out everything about the use, cultivation and harvest of the South American herb.

Pineapple sage (Salvia elegans) is a plant from the mint family. The plant, which belongs to the sage family, owes its colloquial name to the scent of its leaves, which is reminiscent of pineapple. However, the herb is not related to the tropical fruit.

As with all types of sage, both the leaves and flowers of pineapple sage can be used for seasoning and cooking. With its bright red flowers, the exotic kitchen herb is also a pretty ornamental plant for the balcony and garden. As a late bloomer, it brings color to your garden well into autumn.

Use: pineapple sage in summer salads

Pineapple sage originally comes from the highlands of Mexico and Guatemala. Today it enjoys worldwide popularity as an exotic culinary herb.

Thanks to its sweet note, pineapple sage is ideal for refining desserts, such as fruit salads or cold dishes.
You can also add an exotic touch to fruity salads with the herb. The bright red flowers are also ideal as an edible decoration.
Pineapple sage goes well with other fresh herbs – mint or lemon balm, for example, are ideal partners: decorate and spice up fresh summer salads with a combination of pineapple sage and mint.
Refine homemade lemonades or iced tea with leaves and flowers of the sage plant.
On cooler days, you can also make tea from the leaves of pineapple sage: Put a few leaves in a tea strainer and let them steep in boiling water for about five minutes. Tea made from pineapple sage tastes a little tarter than the fresh herb.
The leaves can also be used dried for any use.

Grow pineapple sage

Pretty pineapple sage is an uncomplicated and hardy herb. You can cultivate it both in the garden and in a bucket on the balcony. It should be noted that the perennial plant is not winter-proof and has to go inside during the cold season. With good care, you can enjoy a richly branched shrub that can reach a height of up to half a meter.
Location
Pineapple sage prefers a sunny to half-shady and warm location. A wind-protected place along a house wall or in a sunny corner of your balcony is suitable for this.
The mild morning and evening sun is good for your sage. However, the herb should not be exposed to the midday sun.
floor

The exotic herb thrives best in soil rich in nutrients and humus, which may be enriched with a little sand.
The soil around the root ball should not dry out and should be watered regularly. However, the plant does not tolerate waterlogging either. To prevent this, you can provide natural drainage with a generous layer of sand or gravel at the bottom of the planting hole or the bottom of your tub.
If you plant your pineapple sage in a pot, make sure that the water can drain out of the pot through the drainage.
In the growing season from spring to late autumn, your sage plant will be happy about regular fertilizer application. Use homemade compost or organic fertilizer.
hibernate

Pineapple sage is not hardy.
If your pineapple sage is growing in a pot, put it in a cool, unheated spot in the house where the plant gets enough daylight before the first frost. A bright conservatory, a greenhouse or even a stairwell are perfect for this.
In winter you can reduce the watering and stop fertilizing completely. The plant now gathers strength until the next shoot.
Pineapple sage growing in the garden must be cut back completely in winter and its roots well protected from frost. Lay a thick layer of brushwood or leaves around the root ball. In colder regions or in very cold winters, the plant cannot always be overwintered successfully. If you are unsure, plant them in the bucket.

Harvest pineapple sage

Pineapple sage can be harvested all year round. The green leaves taste particularly aromatic before the first flowering period, but can also be harvested later. You should harvest the flowers just before they fade. Use sharp scissors or a knife to cut off both flowers and leaves at the end of the stem.

Galangal is related to ginger and also forms underground tubers. Galangal is a popular spice and medicinal plant, especially in Asia. Here you can find out how galangal works and how to use the root.

Galangal is an Asian spice plant that is closely related to ginger. Just like ginger, the plant forms underground tubers that are used in the kitchen.

Galangal refers to different plants:
Galangal (Alpinia officinarum)
Greater galangal (Alpinia galanga)
Lesser galangal (Kaempferia galanga)
The species mentioned form all tubers that are mainly used in Asian cuisine and are valued as medicinal plants. The ingredients are mostly identical. Galangal is also often referred to as Thai ginger.

In the following article you will learn how galangal works, how to use the tuber and how to grow it in your garden.

This is how galangal works

Galangal has a long tradition, especially in Asian medicine. Both the fresh tuber and dried galangal that is then ground into a fine powder are considered medicinal.

But also in Europe, galangal has long been used for health purposes. Hildegard von Bingen was already convinced of the root. She used galangal mainly for heart problems, but also recommended it for the stomach and bile and used it to treat fevers.

The effect of galangal has now been extensively scientifically researched. In 2015, for example, the Journal of Botanical Sciences dealt with the ingredients and effects of galangal in a study and was able to demonstrate the following properties:
Antimicrobial: In the laboratory, galangal has proven to be efficient against various strains of bacteria and fungi.
antioxidant: The ingredients of galangal have a strong antioxidant effect. They protect the body from oxidative stress, support cell renewal and fight free radicals.
Anti-cancer: Animal experiments on rats and mice have shown that galangal is effective both in preventing and treating tumors. Initial human studies have also shown that galangal reduces the spread of cancer cells.
Anti-inflammatory: Galangal helps with inflammation and is therefore used in inflammatory skin diseases such as rheumatism or arthritis.
cholesterol-lowering: In studies on rats, galangal was able to noticeably lower cholesterol levels after just four weeks.

Galangal in the kitchen

Galangal is reminiscent of ginger both visually and in terms of taste. However, the galangal root is a bit milder and has a slightly bitter taste and a fresh citrus note. The smell of galangal is reminiscent of pine forest.

To refine your dishes with galangal, you can either finely chop or grate the tuber. In addition to the fresh tuber, you can also use galangal dried in the form of powder. If you bought the tuber in organic quality, you can use the peel without hesitation. Otherwise, you’d better peel galangal.

If you use galangal raw or add the spice just before serving, the root tastes rather hot. The longer you cook them, the milder the flavor will be.

Basically, you can distinguish the different types of galangal by color:
white to yellow: The light version has a much milder taste and is suitable for a variety of dishes.
reddish: The red root has a sharper and tart taste. Here you should be careful and use less so that the taste does not dominate too much.
Just like ginger, you can use galangal in a variety of ways in the kitchen:

Soups: Galangal adds flavor to Asian soups, such as Tom Kha, a Thai coconut milk soup.
Wok pan: Whether it’s vegetables or rice dishes – galangal adds an exotic touch to wok dishes. Meat and fish can also benefit from the fine flavor of galangal.
Stews and curries: Especially in Thai cuisine, galangal is an integral part of curries.
Desserts: Many Asian desserts rely on the mild spiciness of galangal. For example, you can refine Asian rice pudding with galangal. But also European classics like rice pudding get a new depth with galangal, cardamom and cloves.

Galangal in the garden

Galangal comes from Asia and is mainly cultivated in Thailand and the Chinese island of Hainan. With us, the root is still quite unusual. You can only buy the tuber in well-stocked Asian shops.

How to grow:
Location:
Galangal needs a light and warm location. A south-facing window sill or a greenhouse is ideal.
Since temperatures should remain constant throughout the year, galangal is only suitable for growing in pots. The pot should be at least 20 centimeters in diameter.
Floor:
The soil should be nutrient rich and permeable. The plant is sensitive to waterlogging. A layer of expanded clay or gravel at the bottom of the pot can help the water drain better.
Planting:
To grow galangal, all you need is a fresh piece of galangal. Leave it in a bright place for a few days until the root starts to sprout.
Place it in loose soil and cover it with about an inch of soil.
Care:
Galangal needs a lot of liquid. During the growth phase you should water the plant daily. However, avoid waterlogging, otherwise the roots will quickly begin to rot.
In addition, spray the leaves regularly with a little water.
In order for the tubers to develop well, the plant needs sufficient nutrients. It is best to use organic fertilizer every two months.

Cassava is also known as the potato of the tropics. You can process the starchy tuber in many ways. You can read everything you need to know about growing cassava here.

Cassava originally comes from South America. Today, cassava is widespread in many tropical areas and counts as an important staple food. Because of their high starch content, cassava tubers are also known as the potatoes of the tropics. However, the roots are significantly larger than our potatoes. Its thin shell is brown, while the inside is white to reddish in color. Other names for the nutritious root include mandioca, cassava or yuca.

Here you can read what you need to know about cultivation and what options you have for processing cassava.

This is how cassava is grown

The cassava plant is one of the spurge plants. Like most members of this genus, cassava thrives in tropical or subtropical climates and does well in heat and drought. In addition to South America, cassava is now also cultivated in Africa and Asia.

Under the right conditions, the perennial shrub can reach a height of up to three meters, while the bulbs average between 30 and 60 centimeters long, with a diameter of ten centimeters.

Although you can admire the cassava plant in some botanical gardens, the tuber cannot be successfully cultivated in your own garden. This would require a heated greenhouse. Tropical cassava does not tolerate temperatures below 18 degrees.

In addition, cassava needs a permanently sunny location. In order for the tubers to thrive and not become woody, the soil must be kept moist. However, the plant is also sensitive to waterlogging. In addition, the plant needs regular fertilization with organic fertilizers in order to form tubers, but it must not be over-fertilized.

How to use cassava

Similar to raw potatoes, cassava is toxic when uncooked. After you’ve sufficiently heated cassava, the tuber is a healthy source of energy. Depending on the variety, the taste of the tuber varies between neutral and slightly sweet.

The root is widespread in many areas and is prepared in many different ways. Before you process the cassava bulb, you must first peel it. This works best with a vegetable peeler or with a little skill with a small knife.

Then you can process them in many ways:
Roughly dice the peeled cassava and cook until soft. This takes about 20 minutes. To be sure, test with a fork to see if the root is soft. You can use the cooked cassava to make cassava mash, similar to mashed potatoes, or use the pureed root as a base for sauces. Because of its high starch content, the root creates a creamy consistency.
Since the tuber does not keep for long, it is often processed into cassava flour. To do this, cassava is first grated, dried and roasted. Then the dried cassava is ground to get fine flour. You can use this similar to wheat flour.
In many areas, cassava is sliced ​​in a manner similar to french fries and then fried. Cassava chips are also a popular option.
The root is also suitable for stews or curries.
The starchy tapioca flour is also made from cassava. You can use the gluten-free flour to prepare desserts such as tapioca pudding or crepes.
Before you buy cassava, you should be aware that the root usually comes from Latin America or other tropical areas. In order to reduce your CO2 footprint, you should rather use regional alternatives such as potatoes or sweet potatoes.

Planting peppers works in the garden and even on the balcony. Here you can find out how you can plant peppers yourself and what you have to pay attention to.

The pepper originally comes from Central and South America. But you can also plant peppers with us. The vegetables just need a lot of heat and light. With the right care and a few tricks, you can also grow them in your own garden or on the balcony.

Plant peppers – the cultivation

You should not sow pepper seeds directly outdoors. You make it easier for the little plants if you prefer them in the greenhouse or on the windowsill from the end of February:
To do this, plant the pepper seeds evenly in potting soil and only lightly cover them with another layer of soil.
You can cover the seed pots with a transparent hood to germinate.
Prick out the young plants as soon as they develop the first leaves. Transplanting means transplanting dense seedlings to give them more space.
If no more frost is to be expected, the pepper plants can move outside from mid-May. To do this, you only put them outside during the day for a while – a little longer every day. This is how you make the temperature change as comfortable as possible for them.

The right location for the pepper plants

Location: The right location is essential for the growth of your peppers. Peppers are very sensitive to cold and need a warm, wind-protected place with plenty of light and direct sunlight. Whether in the garden or on the balcony – a wind-protected south wall is ideal. The warmer the location where you plant your peppers, the faster they will ripen.

Soil: Use sandy, loose and nutrient-rich soil. Feel free to add compost too. This saves you additional fertilizer in the first few weeks. When the first peppers appear on your plants, you should fertilize again. To do this, you use a potassium-rich homemade fertilizer for plants. You can also make nettle manure as an additional fertilizer.

Cultivation: Be careful not to place the young plants too close together. Adult pepper plants need a distance of at least 50 centimeters from each other so that the leaves and fruit can develop unhindered.

Tip: Plant peppers as a mixed culture with tomatoes or cucumbers. All three types of vegetables love warmth and need a lot of water. Plant different plants at a sufficient distance from each other or use separate containers. So you always have fresh ingredients in late summer – for example for a delicious salad.

Plant and care for peppers

With your mature plants, you should pay attention to a few things so that the peppers grow quickly:

Watering: Peppers need a lot of water. You should water the plants twice a day, especially in sunny locations. Make sure, however, that no waterlogging forms and that you do not water in direct sunlight. Morning and evening are good times. You will give your pepper plants a special treat if you water them with collected rainwater or other stagnant water.
Support: Stabilize tall peppers with sticks, such as those made of bamboo. Tie the stems loosely to the support. This will ensure that the twigs with the fruit cannot snap.

Harvest your own peppers

Depending on the variety, your pepper plants will reward you with colorful pods between July and October. During the ripening process, the fruit changes from green to yellow to red.

You can use the young, green fruits as paprika.
Red, fully ripe fruits taste the sweetest.
Tip: Don’t just pick your fruit, it’s better to use a sharp knife to harvest it.

Overwinter peppers

Most pepper varieties are perennial. In the second year after you planted the peppers, your harvest is often even better than the year before. You should cut back your plants for the winter. To do this, trim the twigs at each branch above the first knot. Also rid them of dead leaves.

Now the peppers can reduce their energy and sprout fresh in the spring. Place the plant in a bright room with an average temperature of 10 degrees Celsius during the cold winter months. Water the dormant plant twice a week and be sure not to let it dry out. You can then plant them out again in the spring.

Fire beans are both a visual and culinary enrichment. Read here what you have to consider so that runner beans also grow in your garden. You will also get inspiration on how to use the beans.

Runner beans owe their name to the bright red flowers that add visual interest to gardens. That is why the fire bean is often referred to as a runner bean. Like other beans, the fire bean belongs to the butterfly flowers.

The runner bean comes from South and Central America and came to Europe from there in the 17th century, where it is widespread today. The legume is an annual climbing plant and reaches a height of two to four meters. It is therefore also suitable as a privacy screen in the garden.

runner beans in your garden

Fire beans are robust and make few demands on their environment. Therefore, the beans are equally suitable for garden beginners and experts. Here are some things to keep in mind when planting them:
Location:
Fire beans make few demands on their location. A sunny to partially shaded spot is best.
The plant copes better with humid and mild climates than with heat and drought.
At your chosen location there should be enough space for a climbing aid.
Floor:
The bean is also frugal when it comes to soil. While many plants do not thrive well in loamy soil, the runner bean does very well with it. But the plant also thrives in other conditions.
The soil should be permeable and moist. However, avoid waterlogging as this causes the roots to rot.
To ensure that the plant produces numerous fruits, you enrich the soil with mature compost before planting.
mixed culture:
You should not plant runner beans next to onions, leeks or garlic.
On the other hand, savory, potatoes, tomatoes, radishes, lettuce or spinach are well suited.

Plant and care for fire beans

In cultivation, runner beans are no different from conventional pole beans. In order to preserve the diversity of varieties and to avoid genetic engineering, we recommend that you buy organic seeds.

How to plant fire beans:
After the danger of frost has passed, you can sow the beans directly outdoors.
Soak the beans in water overnight beforehand. This is how you support them in the germination process.
Make a 2-inch deep seed groove and place the runner beans about 2-4 inches apart in the groove. Then cover them with soil again. You should keep a distance of 40 to 50 centimeters between the rows.
The beans take about two weeks to germinate. During this time you should keep the soil moist and protect the young plants from cold snaps if necessary. You can cover them with fleece, straw or leaves to protect them from frost.

How to care for fire beans:
The fragile shoots of the beans need a climbing aid right from the start. Long, stable branches or ropes, which you can attach to the ground with pegs, are suitable for this. These should not be too slippery so that the beans don’t slip. It is best to attach the climbing aid when you sow the fire beans.
On hot days, you should provide the beans with enough water, as they are sensitive to severe drought.
Otherwise, the fire bean is quite easy to care for. You don’t have to fertilize them.

Process fire beans

The first runner beans are ready to harvest after just ten weeks. Then you should pick the pods regularly, as this stimulates the formation of new flowers and fruit. You can use both the runner bean pods and the speckled fruit inside the pods.

The pods of the runner bean reach a length of up to 25 centimeters. You can process them just like other pole or bush beans. It is important that you harvest the pods young, before the fruit develops too much and the pods become fibrous. You can simply boil the young pods in salted water for ten to fifteen minutes.

In Austria, fire beans are also called beetle beans because of their impressive size and colour. You can process them in many ways:

They are served as a runner bean salad with pumpkin seed oil and fresh onions.
Cooked and seasoned, you can puree the beans and process them into a tasty spread.
Runner beans are also suitable for soups and stews. Due to their high protein content, they give your dishes a particularly creamy texture.

Romaine lettuce is a popular staple ingredient for salads and side dishes. We’ll show you how to grow the popular romaine lettuce yourself and use it in the kitchen.

Romaine Lettuce: How To Grow It

Romaine lettuce is also known as romaine lettuce, lettuce or lattuga. It is also suitable for gardeners who are not that experienced yet, as it is a relatively undemanding and easy-care plant. You should consider the following things when growing:

Romaine lettuce grows best in a sunny location. The soil should be loose, rich in humus, nutritious and always moist.
From March you can put the Romana seeds in the cold frame. From April to the end of July you can sow them directly in the open air.
Don’t plant the seeds too deep in the soil. Otherwise they quickly start to rot.
Make sure there is a distance of 30 to 40 centimeters between the seeds. As the plants get bigger, you may need to remove some more so they don’t get in the way of each other.
You can harvest the lettuce after 10 to 14 days. If you want fresh romaine lettuce in your garden all summer long, it is best to sow new seeds every 14 days.
Alternatively, you can also buy Romana young plants and plant them directly in the bed. Again, make sure that there is a distance of at least 25 to 30 centimeters between the plants.
You don’t usually have to fertilize romaine lettuce. However, you should water it regularly so that the soil never dries out. From time to time you can also loosen the soil a bit so that excess water can drain off easily and no waterlogging forms.
After harvesting, the best place to store romaine lettuce is in the fridge. You can also wrap it in some damp paper.

Romaine Lettuce: Uses and Nutrients

The crisp outer leaves of romaine lettuce have a slightly tart flavor. The lettuce hearts, on the other hand, are a little milder. Romaine lettuce is particularly common in Mediterranean cuisine. Here it is used raw in salads or served warm as a side dish. You can serve it fried or blanched (similar to chard or spinach). You can also roast it briefly in the oven.

Romaine lettuce tastes particularly good in combination with aromatic and strong ingredients such as olives, garlic, cheese or roasted nuts. It is particularly well-known as the main ingredient in the famous Caesar salad, in which it is served with parmesan, croutons and the typical Caesar dressing.

Like other types of lettuce, romaine lettuce is mostly water. It is therefore low in calories, but also low in micronutrients compared to other vegetables. Nevertheless, it is a good supplier of vitamin C and also contains small amounts of B vitamins, provitamin A and potassium and calcium.

Note, however, that romaine lettuce, like all types of lettuce, contains nitrates. This can be converted into harmful nitrite in the body. Therefore, consume romaine lettuce in moderation and make sure you eat a balanced and varied diet.