Tag

Dough

Browsing

Tips to prevent dough from collapsing. We have collected a few tips for you so that your cake does not collapse while baking and keeps its beautiful shape.

Why cakes collapse:

Anyone who likes to bake knows the problem. The dough rises nicely in the oven and then collapses. But why is that? And how can you prevent the dough from collapsing? The reason why cakes collapse is usually the gluten they contain. Because this is released when kneading and stirring too intensively. Then it acts like glue and binds the dough. Consequently, the cake will collapse.

Tips to prevent dough from collapsing

If you like to bake and bake often, there are tricks to help you keep the dough from collapsing. You should always keep in mind that every type of flour contains gluten, which can be responsible for the breakdown. Therefore, use the following tips for healthy baking yourself:

1) Do not knead and stir dough for a long time

In order to prevent the dough from collapsing, the contained gluten should not be released. Since this happens when kneading and stirring the dough, only a little kneading and stirring is allowed. Consequently, 30 seconds or one minute will suffice. But avoid kneading the mass for several minutes. Also note tips for letting yeast dough rise properly.

2) Add flour at the end

Another good tip is to add the flour last to the dough. The same applies to the home remedy baking powder and starch. Because this means that it is not mixed for so long and the gluten is not released. In addition, the dough will not clump as quickly and your cake will keep its nice shape.

3) Preventing the dough from collapsing in the oven

If you want to prevent the batter from collapsing while baking in the oven, keep the oven door closed. Because with dough with baking powder, no change in cold air must disturb the baking process. In addition, every time the oven door is opened, heat escapes, which the oven then has to produce again. Consequently, every opening costs energy and money. So let the cake bake in peace and watch it through the glass pane to save electricity. So only open the door for a cooking test or to cover the cake with aluminum foil, for example, if the top is getting too brown. If you want to save energy, you can switch off the oven 10 minutes before the end of the baking time. Then the cake bakes in the still hot oven with the remaining heat.

More tips to prevent the cake from collapsing

In addition to the tricks already mentioned, you should observe the following rules when baking so that your cake does not collapse and baking cookies with the family is a success:

  • Bake with room temperature ingredients.
  • Don’t let the cake cool too quickly.
  • Temperature and oven function depend on the type of dough.

Simple cakes succeed with ingredients that everyone has and are quickly prepared. We will show you how you can bake three vegan cake variations from a basic recipe.

Many cake recipes contain ingredients that you have to buy first and don’t have in the kitchen cupboard. If it has to be done quickly, this is usually impractical. Here we present three vegan cakes with ingredients that everyone has at home. So you can start baking right away.

Tip: Even if you probably don’t have to go shopping for these recipes – look out for ingredients with a meaningful organic seal the next time you go shopping. For example, the Bioland or Naturland seals stand for high standards. With imported goods, you should also rely on fair trade products. In this way you support climate-friendly cultivation methods on the one hand and fair wages for smallholders in other countries on the other.

Simple cake with ingredients that everyone has

Ingredients:

300 grams of flour
100 grams of sugar
3 tsp baking powder
1 packet(s) of vanilla sugar
1 pinch(s) of salt
120 ml vegetable oil
200 ml liquid

Directions:

Put all the dry ingredients in a bowl and mix them together.
Then add the oil and liquid. In this step you mix in other ingredients in the individual variations if necessary. The type of liquid also varies in different cake recipes.
Mix all the ingredients to a smooth batter and pour it into a cake pan. Bake the cake at 160 degrees Celsius for about an hour. A loaf pan works best. For a Gugelhupf you would have to make 1.5 times the recipe so that the form is optimally filled.

Cake variation 1: cinnamon and cardamom

Kanelbullar is what cinnamon rolls are called in Sweden and are made from yeast dough. Cinnamon and cardamom are added to the dough and provide the typical taste. Preparing yeast dough usually takes a long time because of the resting time and can go wrong. The sponge cake alternative, on the other hand, is very simple and tastes similar.

In addition to the basic recipe, you will also need the following ingredients:

1 teaspoon ground cardamom
1 teaspoon of cinnamon
You can use plant-based milk as the liquid. It doesn’t matter whether you choose oat, almond or soy milk.

You can either put the finished batter in a cake pan or in muffin cases. Muffins don’t take that long in the oven, so you can take them out after 20-30 minutes.

Cake variation 2: coffee and cocoa

You always have coffee and cocoa at home. Not only drinks can be prepared from it, but also a vegan cake.

You have to change and supplement the basic recipe as follows:

You only need 250 grams of flour instead of 300 grams
Divide the 200 milliliters into: 100 milliliters of coffee and 100 milliliters of plant-based milk.
In the second step of the basic recipe, you add two tablespoons of cocoa and one tablespoon of sugar.
When buying coffee and cocoa, pay particular attention to fair trade and organically certified products. In conventional agriculture, the ecosystem suffers and smallholders often work under poor conditions.

Cake variation 3: banana with chocolate sprinkles

You can make the ingredients for the third variation of the basic recipe yourself if you don’t have them at home. You can make grated chocolate by chopping leftover chocolate or grating it with a Parmesan grater. You can also make the banana juice yourself.

In addition to the basic recipe, you will need the following ingredients:

50 grams of grated chocolate
200 milliliters of banana juice as a liquid

Tips: How to use up cake leftovers

A whole cake can sometimes be too much. But that’s not a problem: you have many options for using the leftovers instead of throwing them away.

You can use cake leftovers in the form of rum balls or desserts, for example.
Alternatively, you can freeze the cake. It’s quick and makes it durable. With pieces of cake in the freezer, you can also defrost a piece spontaneously and don’t always have to bake a whole cake right away.
Cake pops are cakes on a stick. You can also use leftover cake for this.

Stiftung Warentest tested apple juice – with mixed results. Not-from-concentrate juices perform best, most juices are mediocre. The test method misses a major problem.

After orange juice, apple juice is the second most popular juice in Germany: we drink around six and a half liters of it per capita a year – not including apple spritzer. The selection of products in the supermarket is correspondingly large.

Stiftung Warentest has now tasted 26 apple juices and examined them in the laboratory. The result: only six juices – all naturally cloudy not-from-concentrate juices – scored “good”. Most juices are satisfactory, three are fair, and one fails with poor.

Apple juice: Naturally cloudy direct juice convinces in the test

Of the 26 apple juices in the dough, 16 are not-from-concentrate juices. This is juice that is briefly heated and bottled immediately after the apples have been pressed. In the case of juices made from juice concentrate, on the other hand, the pressed juice is processed into a concentrate using heat, which is later diluted back into juice with water and flavorings.

“The test shows that the naturally cloudy not-from-concentrate juices are superior to the juices made from concentrate, especially in terms of taste,” says project manager Janine Schlenker. Apple juice is naturally cloudy, but it can be clarified by centrifuging and filtering. Sometimes gelatine is also used for filtering, which is why such juices are often considered non-vegan.

According to Stiftung Warentest, naturally cloudy juices are also healthier than clear ones because they contain more effective plant substances (polyphenols). These are mainly found in the cloudy matter. However, apple juice contains hardly any natural vitamin C.

Dough winners and losers

Among the six good juices are two organic juices:

Voelkel Demeter apple 100% direct juice
Van Nahmen organic apple juice from meadow orchards
The conventional naturally cloudy direct juices from Edeka and Lidl also do well.

Both the not-from-concentrate juices from Aldi Nord and popular branded juices – such as from Amecke and Pfanner – are only satisfactory in the test.

Among other things, the naturally cloudy juices from Dm Bio and Granini scored “sufficient”. The testers criticized both for a comparatively low aroma content, and for the granini juice also for unclear declarations on the sugar content and alleged CO2 neutrality.

Of the eight organic apple juices in the test, only the two above did well, four others (Aldi Nord, Edeka, Lidl, Rabenhorst) with satisfactory.

The naturally cloudy Alnatura apple juice was the only juice to score unsatisfactory in the test – the laboratory found a high content of ethanol, volatile acidity and acetoin. According to Stiftung Warentest, this indicates inferior quality apples or improper processing. However, the levels are not harmful to health.

Dough ignores pesticides

What you should know: In contrast to the Oko-Test, the “sensory judgement” (i.e. the taste) is rated the most at Stiftung Warentest. The “chemical quality”, on the other hand, only accounts for 15% of the overall assessment.

The laboratory apparently did not check whether there were any pesticide residues. The use of pesticides in apple cultivation is widespread. In 2020, Oko-Test found traces of pesticides in all conventional juices in the apple juice test – in some even several and some particularly problematic.

No pollutants, but not necessarily healthy

After all, the Stiftung Warentest laboratory did not find any other residues or pollutants that were harmful to health, such as mold toxins or germs, in any juice.

However, nutrition experts repeatedly point out that fruit juices are not suitable thirst quenchers. They contain a lot of fructose.

The German Society for Nutrition (DGE) does not even classify fruit juices as drinks, but as fruit and vegetables – because according to the experts, drinks should be “low-energy”. This applies to water and unsweetened teas, but not to juice. In order to be able to more easily implement the recommendation to eat five portions of fruit and vegetables a day, one portion of fruit can be replaced by 200 milliliters of fruit juice, but not every day.

Yeast dough is versatile and not difficult to make. We will show you a classic and a vegan recipe for sweet yeast dough and tell you what is important when it comes to the dough – and also how it is made into a braid.

Recipe for vegan yeast dough without egg, butter, and milk

You can easily make a vegan, sweet yeast dough yourself.

You need for this:

500 g flour (light organic wheat or spelled flour)
80 grams of sugar
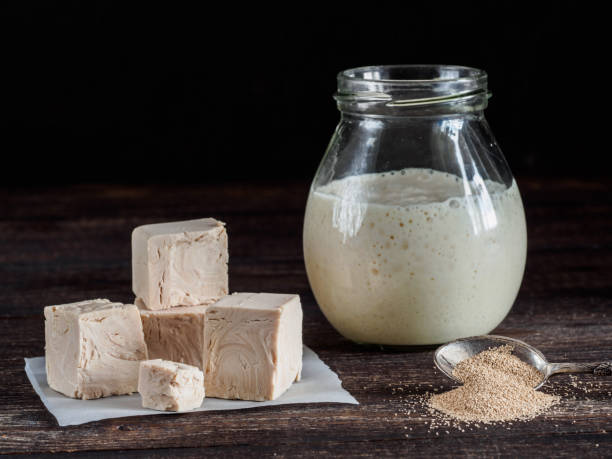
1 cube of yeast
250 ml plant milk (e.g. oat or soy milk)
70g vegan margarine
1 tsp apple cider vinegar
1 pinch of salt
Optional: some light-colored jam for spreading, quince or apricot jam without pieces is best.
You also need:

a bowl,
a whisk,
a kitchen scale,
a pastry brush,
a clean tea towel.

This is how the vegan yeast dough succeeds

Whether for Easter or for a nice Sunday breakfast – you can easily make a vegan yeast plait yourself with a little preparation time. There is no need to use eggs, milk or butter, because this vegan yeast dough is delicious and buttery soft.

How to make the dough:

Place all liquid ingredients and in a bowl. The plant-based milk and margarine should be lukewarm.
Add the yeast cube and stir until it has dissolved.
Then add the salt and sugar to the liquid.
Add the flour while stirring constantly until the dough has reached the typical consistency.
Knead the dough well on a floured work surface for several minutes.
Cover the bowl with a tea towel and let the dough rise in a warm place for at least an hour. The cloth is important to protect the dough from drafts.
The dough is ready when it has doubled in size.
Important: The decisive factor for a successful yeast dough is the temperature. With fresh yeast, the liquid should be warm but not hot. If it’s too hot, the yeast culture will die and your dough won’t rise. Cold, on the other hand, does not harm the yeast. It just takes longer for your dough to rise. If you’re not in a hurry, you can leave the dough in the fridge overnight and bake it the next day.

This is how you succeed in making the perfect yeast braid

Take the dough out of the bowl and knead it well again on a floured work surface.
Divide the dough into three equal parts and form long strands out of the dough balls.
Braid the strands of dough loosely and pinch the ends together.
Use a pastry brush to brush the braid with some light-colored jam or plant-based milk.
Place the braid on a baking sheet and let it rise for another 20 minutes.
Halfway through the resting time, preheat the oven. If you want to bake with top and bottom heat, set the stove to 200 degrees Celsius and 175 degrees Celsius for circulating air.
Bake the braid on the bottom shelf of the oven for about 25 minutes.
Take the braid out of the oven and let it cool down a bit.

Recipe for classic yeast dough

For a classic yeast dough you need:

500g flour
80 grams of sugar
1 cube of yeast
250 ml lukewarm milk
70 grams of butter
1 pinch of salt
1 organic egg
You also need:

a bowl,
a whisk,
a kitchen scale,
a pastry brush,
a tea towel.
The preparation and processing of the classic yeast dough hardly differs from that of a vegan one. The following variant is for a yeast dough with pre-dough:

Sift the flour into a bowl and mix it with a pinch of salt.
In another bowl, mix lukewarm milk with sugar and crumble in the yeast. Stir the liquid a little until the yeast has dissolved.
Make a well in the flour and pour in the liquid. Thicken the yeast milk with a little flour using a spoon and then leave the bowl covered for 15 minutes.
Then add the other ingredients and knead the dough for several minutes.
Cover the bowl with a tea towel and let the dough rise in a warm place for at least an hour.
The dough is ready when it has doubled in size.
You can use this dough as a base for cakes or a yeast plait. If you want to make a yeast plait, you can brush it with milk before baking to brown it nicely.

Tip: If you made too much dough, you can freeze the leftover yeast dough. It will last up to six months this way.

Bread on a stick is a hit with children – and not just during the barbecue season. Read recipes and inspiration for quick and easy stick bread dough with or without yeast here.

Bread on a stick is part of the campfire. This childhood memory can still make us happy as adults. And the best thing is: stick bread is so easy to make! Whether yeast dough or not, you can spice up stick bread with your favorite ingredients. Gluten-free and vegan variants are also possible. So there is something for everyone at the barbecue and around the campfire.

Bread dough: recipe without yeast

If it has to be quick and you don’t have time to “wait” for the yeast dough, you can also prepare stick bread dough without yeast. Here it is important to knead the dough really well so that it becomes airy.

For 10 to 15 stick breads you need:

400 grams of flour
1 tsp salt
2 teaspoons of baking soda
50 g fat (oil or vegan margarine)
220 ml plant drink or milk
If you’re using margarine, let it melt.
Meanwhile mix the dry ingredients together.
Add the plant drink and fat and knead well (about 10 minutes).
Done: Divide the dough and wrap it around the stick.
Hold the stick bread over the embers until it is golden brown on the outside, similar to the crust of regular bread.
Tip: You can incorporate herbs, olives or even vegetables of your choice into the stick bread dough. So you have a little variety around the campfire. You can also prepare sweet stick bread with cinnamon and sugar, for example. Simply add a pinch of salt to the batter and add sugar and cinnamon. Chocolate drops or garlic cloves are also good in stick bread dough.

Classic stick bread recipe

Classically, stick bread dough is a yeast dough. You should plan a little time for this so that it can go.

For the yeast dough you need:

400 grams of flour
1/2 cube of fresh yeast or 1 packet of dry yeast
1 pinch of sugar
2 tsp salt
250 ml lukewarm milk or plant drink
To stimulate the yeast, you must first mix the yeast, sugar, and lukewarm milk in a bowl.
Add 200 grams of flour and let it rise for half an hour.
Now mix the remaining flour with the salt and fold it into the yeast-milk mixture.
Knead everything well and let the stick bread dough rise in a warm place for about one to two hours.
Divide the dough into small portions and wrap it around sticks: your stick bread is ready.

Homemade pizza like from a pizzeria? Is quite real. To make the perfect pizza in the most ordinary oven, it is important to remember the following:

  1. The dough recipe is not so important, the sauce recipe and the type of filling are not so important as the baking temperature. Italian pizza is originally cooked in a wood-burning oven at a temperature of 450-550 C, no more than 1 minute, due to which it turns out to be crispy on the outside, with a thin elastic crust, it is not easy to simulate a wood-burning oven with such a high baking temperature at home, therefore such methods are used: preheat the oven to the maximum (250-300 C), instead of a baking sheet, use a special stone sheet, which is heated together with the oven. Pizza is baked on the stone for no longer than 10-15 minutes. Since I have no stone, I bake on a metal baking sheet, but at the highest temperature (250-300 C) in an oven very well preheated to this temperature. It takes 10-15 minutes to bake, depending on the size of the product. As soon as the sides of the dough are browned, and the cheese melts and begins to bubble, the pizza is ready. Take it out immediately! It is important not to overdry the pizza, this often happens if it is baked at medium temperatures (about 180 C) for a long time (20-30 minutes).
  2. The pizza dough is made according to the simplest recipe for lean yeast dough with the addition of olive oil, the ascended dough is not crushed a second time but immediately stretched with the palms of the cake to the desired size. It is believed that the rolling pin destroys air bubbles in the dough, so it is not used. I still roll out the dough with a rolling pin, but I let the base “breathe” for about 20 minutes so that air bubbles inside again form.
  3. To prevent the pizza base from becoming dry and greasy during baking, after rolling out the cake, place it on a baking sheet sprinkled with flour (you do not need to grease it with butter, only flour).
  4. To prevent the base from becoming wet from excess moisture in the filling and sauce, after placing the dough in a baking sheet, first of all, grease the side on which you will spread the filling with olive oil, only then distribute the sauce and filling.
  5. To make the pizza tasty and baked well in a short time, do not overload it with ingredients, distribute the cheese in slides at a short distance.
  6. When baking pizzas in new modern ovens, use the oven manufacturer’s recommendations. See instructions. Why is it so important? Old ovens are almost always a little leaky and natural ventilation (convection) is provided during baking. In the old oven, it is enough to set the maximum heating temperature, warm up the oven itself well and the pizza turns out to be perfect – with dry crispy sides and a juicy cheese center. Furnace effect. Modern ovens are hermetically sealed and therefore with standard heating (classic heating top + bottom) moisture does not evaporate and the pizza turns out to be moist. The result is not at all the same. Therefore, I recommend using the mode for baking pizza, which is offered in the instructions for your oven, usually, it includes powerful heating + fan mode. I have such a mode called “Heating from below + ventilation heating” while the baking sheet should be placed not in the middle, but closer to the bottom of the oven. I set the temperature to 220C. The pizza turns out to be perfect, not wet, very tasty!

Pizza! At the mere mention of this word, profuse salivation begins and in the subsequent time, you will not be abandoned by thoughts of a delicious aromatic pizza with the most tender dough and stretching cheese. There is hardly a person who would say that he does not like this divine delicacy, and if such an eccentric lives on this planet, then he, most likely, tried some kind of wrong pizza. The basis of a delicious pizza is, of course, the dough, which must be cooked correctly for the dish to be truly unforgettable. We have prepared for you the secrets of the perfect pizza dough.

  1. The easiest way is to roll out the dough on baking paper, after sprinkling it with flour. This will save you from unnecessary and completely unnecessary movements since you can send the pizza to the oven right on the parchment.
  2. Pizza tastes differ dramatically from person to person. If you love the fluffy dough, then take on board a simple life hack: let the rolled dough rest for 5-10 minutes. If you are worried that during this time it will have time to wind up, cover it with cling film.
  3. If, on the contrary, you like a thin dough that will crunch in your mouth, then you need to roll it out as much as possible, sparing no effort, and bake at elevated temperatures – 230-250 degrees.
  4. Another secret to the deliciously crispy dough is olive oil. They should grease a baking sheet. Put the dough on top and send it to the oven preheated to 220 degrees for 5 minutes. Only then add the filling.
  5. What if you didn’t roll out the dough on parchment? Do not worry ahead of time. You will need a rolling pin. Wrap it in half of the dough and transfer it while holding the handles.
  6. You can and should experiment with the ingredients for the dough. So, advanced gourmets prepare pizza dough from a mixture of flour and semolina. It turns out to be more crunchy and tender. You can use this mixture not only for making dough but also for dusting a baking sheet.
  7. The tedious part of making pizza is waiting for the dough to rise. Add more yeast to speed up this process. You only need 3/4 teaspoon more than the recipe says.
  8. Italians love aromatic herbs and actively use them in cooking. Take on board a cool life hack: To make the dough tastier and more aromatic, stir in oregano, basil, or other dried seasonings of your choice.

Pizza is an ideal meal for a company: family dinner, get-togethers with friends, big party. First, everyone loves her – well, almost everyone. Second, pizza is a lot of fun to make. It’s very simple and you can experiment along the way. And the result is guaranteed to be delicious. In this article, we will reveal the secrets of making real Italian pizza and share the tips of professional chefs.

  1. Homemade pizza starts with the dough. Of course, you can buy a ready-made semi-finished product in a store. But it’s much more interesting to make it yourself. By the way, it takes a few days for real pizza makers to make pizza, and it’s the dough that matters. They knead it and leave it to rise for a few days. You will say – but I want pizza here and now. Well, there is a special life hack for this. To make the dough rise faster, you can heat it up in the oven. Heat the stove to 70 degrees. Then cool for 10 minutes and place the dough in the oven. Make sure that the temperature is not higher than this mark, otherwise, the yeast will die. You can put a tray with warm water under the baking sheet – then the dough will be even more tender and fluffy.
  2. Is the dough ready? Remove the rolling pin! This is not a joke: Italian chefs do not roll out the dough with a rolling pin, but knead it with their fingers and then unwind it, thanks to which the cake takes on the look we are used to. By the way, perfectly round pizzas are the prerogative of fast food. It is difficult to achieve the shape of the correct circle by hand, so the pizza from the hands of a real pizza maker can be a little uneven – this is a sign of its authenticity. Well, if you don’t have a special round board, it doesn’t matter. Homemade pizza is good because it can be anything – even round, even rectangular, in the shape of a baking sheet.
  3. The thickness of the dough according to the classic recipe of Italian pizza is 3 mm in the center, up to 2 cm at the edges.
  4. As you know, all people are divided into two categories: those who eat the pizza crust, and those who leave it on the plate. Personally, we think crisp is the tastiest thing in dough! She is also needed to hold a piece and not get your hands dirty. Therefore, when you smear the dough with sauce and spread the filling, do not fill the whole cake – leave 1.5 – 2 cm around the edges. Here’s how to make the crust really crunchy. Turn the baking sheet upside down. Cover it with parchment and sprinkle it with cornflour. And put the pizza on top. Then we put it in the oven for 10 minutes, and voila: the crunch is no worse than in the best Italian pizzeria.
  5. By the way, it is also better to reheat yesterday’s pizza in the oven. In the microwave, it loses its crunchiness, becomes dry and hard. And if you put it on the same parchment and put it in the oven for 5 – 8 minutes, it will be just as tasty as yesterday.
  6. There are many recipes for pizza dough. We offer classic – easy and quick to prepare. You will need five ingredients: flour, yeast, olive oil, salt, and water. The main thing here is flour: we advise you not to skimp on it and take a good, Italian one.
  7. Dissolve a bag of yeast in 125 ml of warm water. Pour flour in a slide into a deep bowl, season with salt. Make a small indentation in the center of the slide and carefully pour the water and yeast into it. Stir the mixture with a fork. Then, when the dough begins to turn out, knead it with your hands. Add flour, if necessary, until it becomes one piece. Pour olive oil into a bowl and knead for another 10 minutes. After that, the dough will become elastic and smooth. Wait for it to rise and you can cook.

Making pizza is very simple, and you can bake it without even having great culinary skills. And our tips will help you make it even easier and faster.

  1. So, if you decide to make pizza, first you need to knead the yeast dough. Let it stand for 30-60 minutes before baking. The dough must be precipitated 2 times and only then can it be laid out in the mold. To prevent the dough from sticking to your hands, you need to grease your hands with oil.
  2. You can bake pizza in the oven in 2 ways – on a baking sheet or in a frying pan, and its thickness should be at least 2 mm. Grease the baking sheet with vegetable oil.
  3. You don’t have to roll out the pizza crust – the dough is laid out on a baking sheet and evenly stretched with your fingers over the entire surface so that its edges hang down a little. Before putting the dough in the oven, it must stand for at least 5-7 minutes.
  4. If the dough is very damp, place a sheet of parchment on top of it and roll it straight through the paper.
  5. If you prefer to bake pizza in a frying pan – the classic round shape, generously grease the bottom and edges with vegetable oil, as the dough will rise a lot, and then sprinkle a little with semolina or dust with flour – so that the finished pizza can be freely removed from the mold. Put the dough in a skillet and place for 10-15 minutes in a warm place, and then in the oven.
  6. Sometimes the dough is put in the oven without filling and baked until half cooked – when it is still raw inside, and a thin crust has formed on top. At this moment, they take it out of the oven, lay out the filling in layers, and bake it until tender.
  7. The average time for baking pizza is 30-40 minutes at a temperature of 250 ° C. Each pizza is special, so there are slight differences in the recipes.
  8. So, the dough can be thin or thick. Thin is baked for 20-30 minutes. A thicker layer can be left in the oven for almost 1 hour, but at the same time reduce the heat slightly by lowering the temperature to 220 degrees C.
  9. The baking time also depends on the filling. If its layer is thin or loose, it is necessary to reduce the time; denser and bulkier require longer baking times.
  10. If you use different types of filling, then put the raw one on top (for faster cooking). In this case, it is advisable to sprinkle it with cheese or a layer of some other product so that it is not open, but languishes, as if under a lid.
  11. By the way, it is better to spread a small layer of filling on a thin crust, but not too raw. It is best if it is meat, cheese, fish, pressed or dry vegetables, and dried fruits.
  12. A thick layer of dough is good for fluffy, layered, and moist filling. You can also layout the main filling of vegetables and meat on it.
  13. If the pizza turns brown too quickly when baking, then cover it with clean paper dipped in water.

A study has now determined why you should never eat raw dough and how dangerous it can be.

Raw dough causes nausea and stomach ache? – The flour may be the culprit

The risk of salmonella infection is well known, but this is not the case with E. coli from raw dough. According to an American study, flour can trigger a life-threatening intestinal infection. E. coli can cause severe diarrhea, vomiting and stomach cramps. These bacteria get into grain, for example, via fertilizer or animal excrement.
The so-called E. coli bacteria (Escherichia coli)
According to the Federal Institute for Risk Assessment (BfR), if floury dough and other dishes are baked at these high temperatures for at least two minutes, consumption is already safe.

With these tips, you can snack on dough without hesitation

Our tips:
If you bake with children, you cannot prevent one or two snacks. Therefore, it is best to bake a dough
If you use nut flour
Make sure your ingredients are organic
However, if you are pregnant or generally have a sensitive stomach, you should stick to the baked cookies.
If you want to snack on the dough without hesitation, then the “Cookie Dough” food trend is also suitable. This dough is without eggs and often also without flour. In addition, it does not contain any leavening agents. This cookie dough is deliberately intended for raw consumption and tastes just as good.