Tag

durable

Browsing

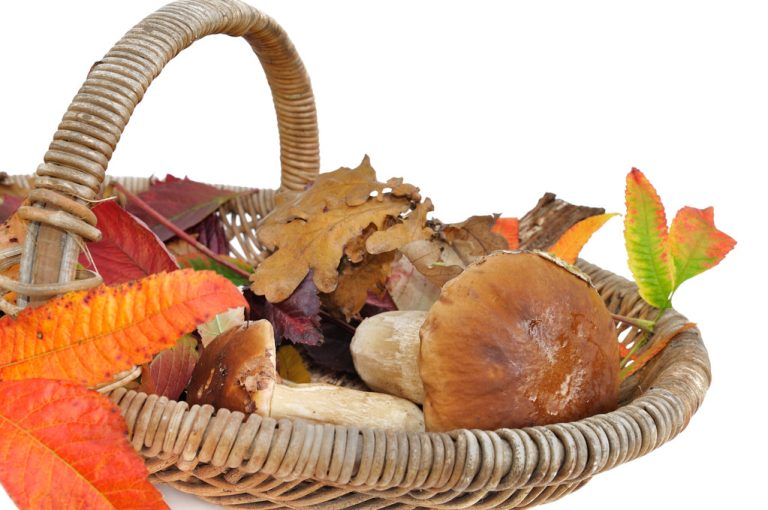
Porcini mushrooms cannot be grown commercially, so they are not available fresh all year round. However, if you dry porcini mushrooms, you can preserve them. We’ll show you how.

Drying porcini mushrooms: the right preparation

Before you dry the porcini mushrooms, you should take the following precautions:

Dry the mushrooms as soon as possible after picking. This is the best way to preserve their aromatic taste.
Wet porcini mushrooms are not suitable for drying, as they easily mold. Therefore, only clean the mushrooms with a slightly damp cloth before drying. You can also scrape off dirt with a sharp knife.
Cut out any eaten spots on the porcini mushrooms. The best way to dry porcini mushrooms is to cut them into slices three to five millimeters thick.
Now you can decide, because there are two ways to dry porcini mushrooms without a professional dehydrator: in the air or in the oven.

Air dry porcini mushrooms

Air-drying porcini mushrooms is the easiest and most environmentally friendly option. However, you need the right weather for it. The air drying process only works when the weather is dry and as hot as possible. How to do it:

Thread the porcini slices on a thin thread or spread them out on a baking sheet. The mushroom pieces should not touch each other.
Dry the porcini either in full sun or in the shade. The former speeds up the drying process, but the latter is gentler and better preserves the aroma of the mushrooms.
If the mushroom slices are on a baking sheet, you should turn them several times a day. If you dry the mushrooms outside, you also have to bring them inside in the evening, otherwise they could absorb moisture from the cool night and morning air.
The duration of the drying process varies depending on the weather. The dried porcini mushrooms are ready as soon as they are dry on the inside but can still be bent. They also rustle like dry leaves.

Drying porcini mushrooms in the oven

Drying in the oven requires more energy. Proceed as follows for the drying process in the oven:

Spread the porcini slices on a baking sheet and place in the oven.
Then let the mushrooms dry at a maximum of 50 degrees and circulating air. Important: Hold the oven door ajar with the handle of a wooden spoon so that the moisture in the mushrooms can escape into the oven.
With this drying variant, too, the duration of the drying process varies depending on the performance of the oven.
Tip: If you have a stove with a stone plate, you can also let the porcini mushrooms dry on this plate while the fire burns in the stove. This way you don’t use any additional energy.

Properly store dried porcini mushrooms

You should store dried porcini mushrooms in airtight jars in a dark, dry place.

Stored in this way, dried porcini mushrooms will keep for several years. If they get a slight gray tinge after a while, this is harmless: they are leaked minerals.

You can simply dry sourdough and store it for a long time. We will introduce you to three methods of preserving sourdough: by crumbling, drying and freezing.

You only have to prepare sourdough once and can then “feed” it again and again with flour and water and thus multiply it. This makes it last forever. The sourdough contains microorganisms (such as lactic acid bacteria and yeast) that form during the fermentation process and make the dough slightly acidic. However, if you don’t bake regularly or want to send the sourdough to friends or relatives, you can preserve the sourdough by drying it. The shelf life of the sourdough varies depending on the method, ranging from three months to several years.

For each of the three methods, you must first prepare a sourdough. You can find instructions here: Prepare the sourdough. We strongly recommend that you buy the ingredients in organic quality. Among other things, you avoid residues of chemical-synthetic pesticides and support ecological agriculture.

Method: Crumble sourdough

The first method is the “crumbling” and subsequent drying of leaven:

Pour your prepared sourdough into a bowl.
Gradually add the flour and mix everything together with a wooden spoon. Use enough flour so that the dough is only slightly moist and crumbs can form.
Gradually rub the dough between your palms. This creates crumbs. Do the same with the entire dough.
It is best to spread the crumbs on a baking sheet and let them dry for several hours. This way you prevent mold.
Fill the so-called Krümelsauer into a lockable screw-top jar. You should only close the jar loosely or drill a hole in it if the dough continues to ferment a little. Alternatively, use a cloth bag. The dried sourdough can be stored in the refrigerator for about three months.

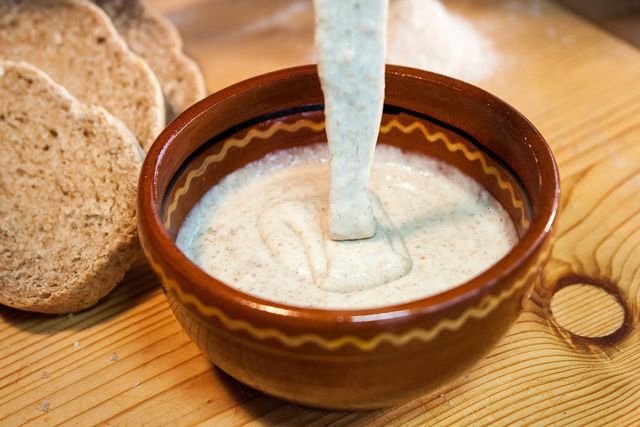
To use the dough again, add enough water to the crumbs until it becomes a paste. Store the dough at room temperature for about 2 to 8 hours. It is then activated again and can be processed further.

Method: Dry sourdough as flakes or powder

The second method involves making flakes or powder from the sourdough:

Spread the sourdough thinly on half of a sheet of baking paper and fold it over. If you have more dough, use a second sheet of baking paper.
Allow the sourdough to dry at room temperature. This takes about a day or two. The dough needs to be really dry, otherwise mold can form.
Dried, sourdough is lighter in color, cracks, and breaks easily when touched.
Note: You can usually reuse the parchment paper. To do this, carefully peel off the dry sourdough so that the baking paper does not tear. Or you can use a sustainable baking paper alternative.

Break off small pieces of the dried sourdough. Now you have two options:

For tiles: Place the small pieces in a sealable container, cloth bag, or paper bag.
For powder: grind the small dividers into powder with a mortar or grinder.
Dried sourdough lasts for several years. You can store it in the fridge or at room temperature in a dark place (for example, in the pantry).

To reactivate the leaven, you need to add water and flour. First add the same amount of water to the dried dough (ratio 1:1). If he starts blistering at room temperature, you can “feed” him with more water and flour. This can take several hours.

Note: Since most microorganisms die off during drying, the sourdough may not always start to ferment. This is always the case when there are no or no longer sufficient microorganisms in the dough.

Method: Sourdough Freezing

Pour your sourdough into a sealable container that is freezer-safe. Alternatively, you can fill the batter into an ice cube tray. Place the dough in your freezer or freezer compartment.

Freezing disrupts the fermenting properties of sourdough, as some of the microorganisms die off. So give the dough 1-3 days after defrosting to recover slowly. You can add some flour and water and activate it at room temperature. You can then feed him more flour and water.

You can freeze fresh asparagus and eat it out of season. This works just as well with white asparagus as with green asparagus. We show you what you have to consider.

You should always buy fresh asparagus during the asparagus season and from the region. Because imported asparagus causes high CO2 emissions, which are not necessary. If you also want to eat asparagus out of season, you can freeze the asparagus spears.

When buying, make sure to choose organic asparagus, as conventional asparagus is often contaminated with chemical-synthetic pesticides.

Tips for freezing asparagus

Before you freeze the asparagus, be sure to peel it. You can find out more about this here: Peeling green asparagus and peeling white asparagus. You don’t have to throw away the peel – how about an asparagus soup made from the peel as a starter?
You should also cut off the woody ends now.
Don’t blanch or cook asparagus before freezing it. Because otherwise it loses its taste.
It is best to freeze the asparagus in portions and airtight. So you can easily remove it without having to defrost all the sticks at once.

After freezing: Thaw and prepare asparagus

While many foods should be thawed gently, exactly the opposite makes sense with asparagus:

It is best to put the still frozen asparagus directly into the boiling salted water. If the asparagus thaws beforehand, it loses its taste with the melted water. The asparagus needs about eight to twelve minutes in the boiling water until it is cooked.
Frozen asparagus is also good for grilling: after freezing, asparagus cooks a little faster than fresh spears. After about five minutes on the grill, you can eat it.
If you want to fry the frozen asparagus, you should cut it into small pieces before freezing. After about five minutes they are done.


You can also use the frozen asparagus for salads or vegan chicken fricassee. This is a good alternative if the asparagus has lost too much flavor during freezing.
After freezing, the asparagus can be kept for at least six months.