Tag

easily

Browsing

You can’t go wrong with the offshoots of the ivy plant. Ivy is robust and very vigorous. It belongs to the Araliaceae family and there are six different species distributed around the world, hence ivy’s toughness and frugality.

Ivy is hardy and requires little soil nutrients. No particular location would be required and any climate and sun situation will do. Ivy grows in places where other plants die.

Make ivy cuttings

To make offshoots of the plant, cut off several smaller tendrils. Since it does not harm the plant, you can cut it in many places without a guilty conscience. Non-lignified tendrils that still have few adhesive roots, i.e. without fruits or flowers, are ideal. Since ivy varieties are poisonous, people with sensitive skin should wear gloves when working, as allergic reactions could occur.

Length of the offshoots

The ivy offshoots can be about 10-15 centimeters long. Simply remove all the leaves except for a few at the top. Then place the ivy cuttings in a glass of water and after 1-2 weeks the new roots will form. When the roots are about 3 centimeters long, simply plant the young fresh cuttings. Either somewhere in the garden or in nature or in a flower pot in the apartment or on the balcony.

Site selection for new ivy offshoots

When choosing a location, you should note that ivy should not be placed in children’s rooms because of its toxicity. In addition, please do not feed pets or livestock.

Ivy grows fast and vigorously. The more space the ivy has, the higher and further it climbs, up to 20 meters in height. This forms adhesive roots, which bother some homeowners because the ivy digs into the plaster and concrete. Tree owners don’t like ivy either, because the climbing plant forms woody trunks over the years. This allows the ivy tendrils to literally “strangle” a tree. So make sure you choose a suitable place when planting ivy.

Protection for the young plants

Ivy as a natural sunscreen works particularly well if you let it completely overgrow a scaffolding or ledge. It is also well suited as a privacy screen on fences between properties. Songbirds like the dense ivy groves as nesting sites.

Useful background knowledge on making ivy offshoots

In Germanic mythology, ivy protects against witches and black magic. Therefore, ivy is used by angels, healers, and herbalists to protect themselves from evil. Many old houses, therefore, have an almost complete ivy facade, because they also wanted to protect themselves against evil.

Peeling tomatoes is not that easy. Unless you try this method—then the tomato skin will almost come off by itself!

Simply peel tomatoes in 4 steps

Tomatoes are among the most popular vegetables. They are delicious raw, but also cooked in a delicious tomato sauce or soup. To make them particularly velvety, many recipes recommend peeling the tomatoes. It works like this:

1. Score the tomato

Take a sharp kitchen knife and score the bottom of the tomato with a cross. This will make it easier to peel later. Meanwhile, bring water to a boil in a saucepan. There should be enough water to completely submerge the tomato.
Tip: You can then use the water for the pasta.

2. Blanch the tomato

Add the tomato to the pot of boiling water and let it blanch for about 30 seconds. Then lift them out of the pot with a slotted spoon.

3. Deter the tomato

Immediately place the tomato in a bowl of cold water. You will notice that the skin of the tomato is already starting to peel off.

4. Peel the tomato

Now you can peel the tomato. To do this, take them out of the water, let them drain a little, and use a small knife to peel off the skin from where you cut them.

For example, you can use the peeled tomatoes to prepare a delicious tomato sauce. To do this, sauté a piece of onion and garlic in olive oil, add the tomatoes and herbs of your choice and let the sauce simmer. Season with salt and pepper and possibly a little sugar. If you fill the hot sauce into clean jars or bottles and seal them tightly, the tomato sauce will keep for several months.

Meditation works easier than you think

Meditative thinking is still. Not the stillness of a quiet evening. It is the stillness when the thoughts completely stop with all their images, their work, and their imaginations. Meditation means letting go, sitting still, breathing, letting go, relaxing, going, and letting it happen. Try it! Meditating is easier than autogenic training. Religion is not necessarily a requirement when meditating. Nevertheless, it is important to open up and keep both feet firmly on the ground.

A simple guide to meditating

  • When meditating, I sit down in a normal chair.
  • I put both feet firmly on the floor.
  • The back is straight, the head too as if a cord were pulling it up a little at the crown.
    At first, I fix my eyes on a point in space. It can also be candlelight, which I look at for a while to calm down.
  • Then I usually close my eyes and let my weight sink completely into the chair without buckling in the back.
  • From that moment on I only pay attention to my breathing. How the breath comes and my torso and stomach expand and how the breath goes again and I let the air flow out until the process repeats itself automatically.
  • With each breath, I breathe in calm and peace, and on the exhale I release what I want to get rid of.
  • When thoughts come, I allow them but don’t hold onto them.
  • I then slowly relax all parts of my body.

  • Start at the head and then slowly work your way down to your legs.
  • I also don’t forget small details like relaxing the tongue and jaw.
  • When I’m completely relaxed and not disturbed by external sources of noise, I enter a state of relaxation that is indescribably beautiful.
  • Inner images come to light, which appears in the form of colors and states and can no longer be grasped mentally.

For many recipes you have to skin peppers – but this is often harder than you think. We will show you various methods that are guaranteed to work.

Skinning the peppers: How to prepare the pods

You can use skinned peppers in a variety of ways in the kitchen: raw they go well in salads, cooked or roasted they can be pureed very well and made into a pesto or soup. And pickled peppers are also delicious.

It is best to use organic paprika. In summer you can get them from the region or you can grow them yourself. Regardless of which method you choose to use to skin the peppers, first prepare them as follows:
Wash or trim the peppers.
Remove the core casing.
Quarter or third the pods.
Depending on what you want to use the skinned peppers for, you can now use one of the following four skinning methods.

Method 1: Scald the peppers.

If you plan to use the pods in a sauce or soup, this is a good way to skin the peppers. Here’s how you do it:
Place the quartered peppers in a saucepan.
Pour boiling water over them and let them simmer briefly. It’s best to heat the water in a kettle, it’s quick and saves energy.
Rinse the peppers with cold water.
Now you can peel off the skin of the peppers with a knife.

Method 2: Roast the peppers in the oven

If you roast the peppers in the oven, you can not only skin them very easily afterwards – they also get a great roasted aroma that goes well with antipasti, for example. How it works:
Set the oven to a high temperature (at least 200 degrees).
Place the quartered peppers, skin side down, on a baking sheet. Line this with parchment paper beforehand. Now brush the pods with oil.
Slide the baking sheet onto the top shelf in the oven and turn on the grill function, if available.
After about 10 to 15 minutes, the skins of the peppers will be dark and blistered. Turn off the oven, cover the peppers with a damp cloth and let them cool.
Now you can easily remove the skin from the peppers.
Roasting the peppers in the oven is more energy intensive than the other skinning methods. You should only use them if you have enough peppers to fill a baking sheet. It is also important that you push the tray to the top level in the oven and switch on the top heat or preferably the grill function. You can also save energy by not preheating.

Method 3: Cook peppers in the microwave

You can also cook peppers in the microwave. Whether you save energy compared to the oven is questionable, but heating is faster:
Wrap the quartered pods in baking paper.
Place them in the microwave and heat on high for 5 to 7 minutes.
Let the peppers cool down a bit and then peel off the skin.

Method 4: Peel the peppers with a vegetable peeler

If you want raw skinned peppers, you can try peeling the skin off with a vegetable peeler or paring knife. This is not easy – it works best when the peppers are still fresh and firm. Depending on the shape of the peppers, it may be easier to peel the pod whole or quarter it first.

But keep in mind that most of the vitamins are hidden under the skin and only skin the peppers if it is absolutely necessary for the recipe and the taste.

Everyone knows the disorder that arises in the bedroom when the freshly washed fitted sheets are stowed away in the linen closet. It always looks very messy and also takes up a lot of space.

This can be avoided with a clever trick. Lay the fitted sheet spread out on the table so that the fitted side is facing up. Then turn two of the stretch corners over by hand, fold the sheeting once and tuck the bottom corners into the two top corners.

Then smooth it out and fold it two to three times, depending on the size of the fitted sheet. This saves space and the linen closet looks much tidier.

Freezing food preserves it and can thus reduce waste – and that works with a surprising number of foods. We show what you can freeze and what you should pay attention to.

Freezing is a good way to avoid wasting food, especially when you have leftover food that would otherwise go bad. Fruit or vegetables, for example, that you just can’t manage to use up or leftovers from dinner that nobody can eat anymore.

Of course, freezers or chest freezers need electricity – that’s why it’s important to make sure you choose efficient devices and the right location.

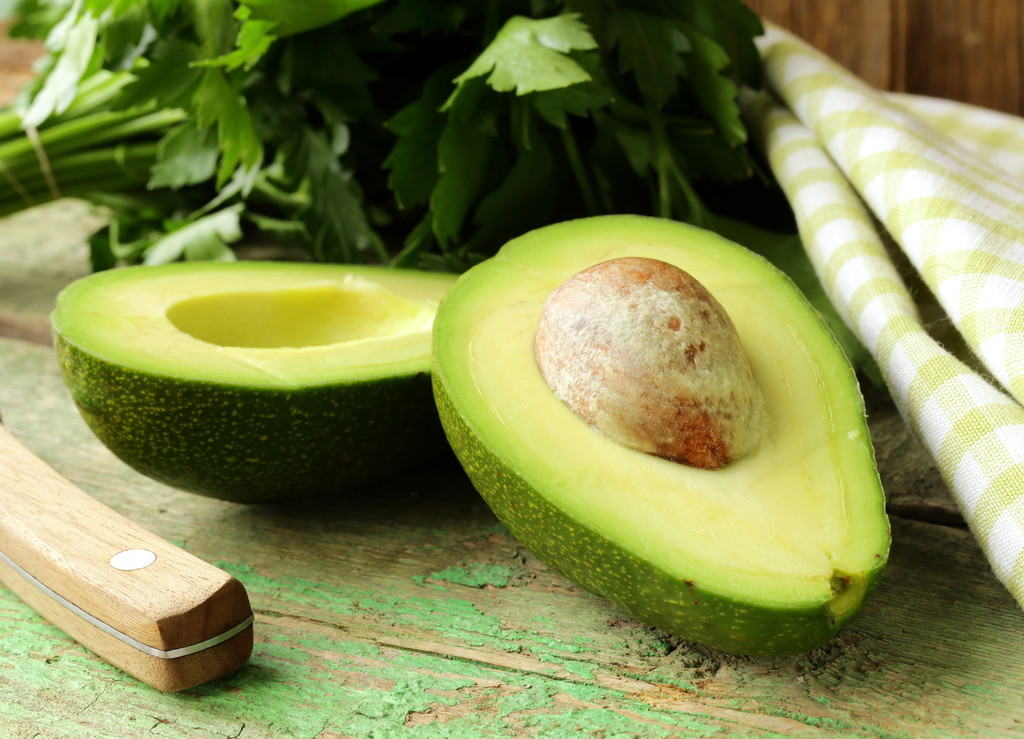
1. Fruits and vegetables

Mushrooms: Simply (dry!) ​​clean button mushrooms or oyster mushrooms, trim stems if necessary, then cut into quarters or slices and prefreeze flat on a chopping board or baking sheet to prevent them from sticking together, then transfer to cans. Blanch chanterelles briefly in salted water before freezing, otherwise they taste slightly bitter after thawing. Tip: simply use frozen mushrooms! If you let them thaw before processing, they will become slightly mushy.
Avocados: You should only freeze ripe fruits, either halved, without the stone and sprinkled with lemon juice, or pureed for dips like guacamole.
Better than buying strawberries in winter: Freeze seasonal strawberries. To do this, simply wash the whole fruit, remove the stems and pat dry, then pre-freeze flat on a board or baking sheet before dividing into freezer containers. Or you puree the strawberries and freeze the puree in small glasses or ice cube trays.
You can also freeze cherries: wash, remove the stalks – and the pits if you want – then prefreeze flat on a board or baking sheet before dividing them into freezer containers.
Although you can freeze apples, they are best suited for baking or cooking afterwards, as they lose their consistency when thawed. To preserve apples, you can also make applesauce from them – and you can freeze applesauce without any problems.
Freezing ripe bananas is a good idea, especially if you want to use them for smoothies, vegan egg substitutes, or nice cream. You can freeze bananas whole, sliced, or mashed, depending on how you want to use them.
Freezing tomatoes is not a problem, but they lose their flavor due to their high water content. They are then best suited for sauces. Tip: You can also freeze homemade tomato sauce in a jar and defrost as needed. Another method if you have more tomatoes than you can use: preserve them by canning them.

2. Ready meals

Here’s an idea for the summer: You can freeze cold coffee in an ice cube mold – and then spice it up with ice coffee or cold brew, for example.
Raw potatoes don’t work, but boiled potatoes or potato dishes do: You can freeze mashed potatoes or potato soup in particular without any problems.
If you have too much cooked pasta or rice left over, you can simply freeze both – the easiest way is to portion out the leftovers. To thaw frozen noodles, simply put them in boiling water, thaw the rice at room temperature and then warm it up in the steam.
Freezing soup is super easy – and you’ll have “ready to eat” ready to hand. Tip: Freeze soups in screw-top jars so you have ready-made portions straight away.

3. Animal Products

It will go rancid in the fridge after a few weeks, so freezing butter may be a good idea. It will then last up to six months. Simply put the butter pack in a tin and put it in the freezer. If necessary, thaw slowly in the refrigerator. Tip: You can also freeze pre-portioned butter for baking. You can freeze herb butter in ice cube molds.
Incidentally, you can also freeze margarine, but this only works with full-fat margarines.
Cheese: You should only freeze hard cheese or semi-hard cheese and only if you cannot use it otherwise. It keeps best whole and with the rind on, but sliced ​​raclette cheese can also be kept in the freezer for around two months without losing too much of its aroma. Re-thawed cheese is best for cooking and baking as it loses some of its flavor.
Whole eggs will keep raw or hard-boiled in the refrigerator for a few weeks and are not suitable for freezing. Raw egg yolks or egg whites or whisked eggs, on the other hand, go bad quickly – you can also freeze eggs in this form. Simply place in freezer-safe containers and thaw slowly in the refrigerator as needed. Be sure to heat it up properly before eating!

4. Dough & Yeast

Did you know that you can freeze fresh yeast dough? It is best to divide the dough into portions before letting it rise and freeze them in airtight wrappers. Tip: If you want to freeze pizza dough, you can freeze it rolled out to the right size, separating several layers with baking paper. It is best to let yeast dough thaw overnight or for several hours in the refrigerator.
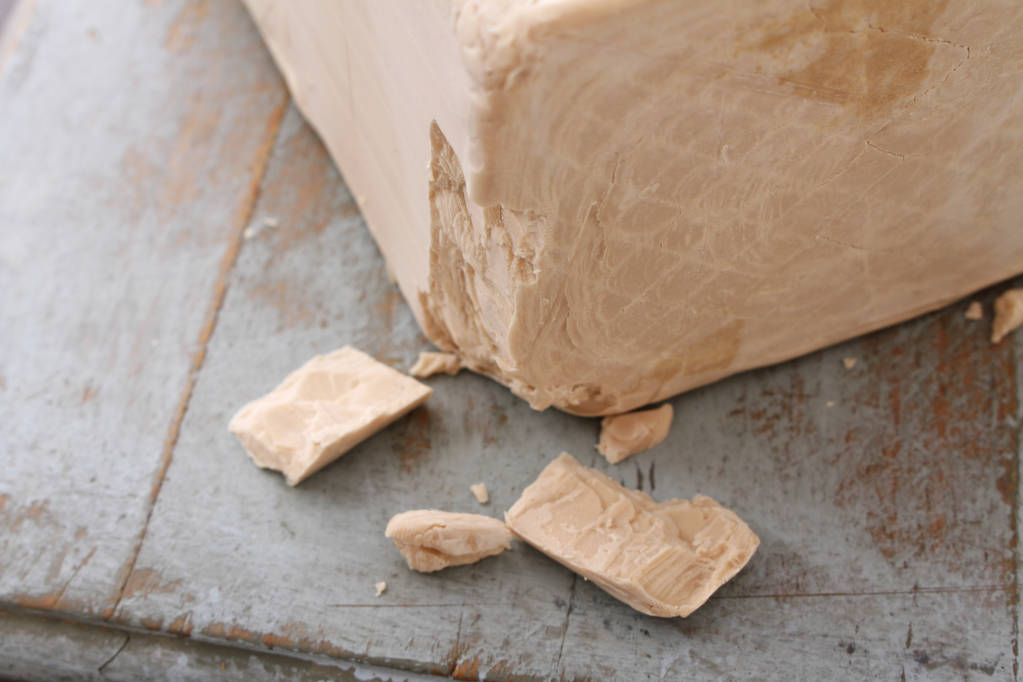
You can also freeze fresh yeast – this is a good idea, for example, if you have half a cube of yeast left over. Simply place in a small can or jar in the freezer. It is best to put it in the fridge to thaw the day before you use it.

Heartburn, stomach pain, flatulence? Then the stomach needs a breather. We will introduce you to easily digestible food and tips on how to prepare it in a way that is easy on the stomach.

There are certain foods that are considered easy to digest and are particularly well tolerated by people with a sensitive, irritated gastrointestinal tract. So if you notice that your stomach is in chaos, give it a rest and eat foods that are gentle on your stomach.

Alleviate indigestion with stomach-friendly food

Sometimes we put a lot on our stomachs: they have to deal with greasy fries, hot curries, sweet treats and a glass or two of alcohol. Most of the time he does it with no problem. But he often rebels and reacts after eating these foods with digestive problems such as heartburn, stomach pain, flatulence, diarrhea or constipation. The reason for this can be inflammation, infection or irritation of the gastrointestinal tract.

Then it’s time to relieve the stomach and focus on easily digestible food.

Easily digestible foods: You can access them here

Just as every person is unique, our stomachs and stomach problems are also very individual. That’s why everyone should find out for themselves what is actually good for their stomach. There are foods that are generally considered to be well tolerated and digestible, but exceptions cannot be ruled out. That’s why only one thing helps: try it yourself and listen to your own gut.

The Pinsa Romana is similar to an ordinary pizza, but is said to be more digestible. We will explain to you what is behind the trend from Italy and how you can prepare Pinsa yourself.

For several years, a trend dish has been spreading from Italy that not only resembles pizza in name: the pinsa. They are also called Pinsa Romana, because the Romans are said to have enjoyed eating the pastry. But the recipe was forgotten until it was rediscovered in the last decade.

What makes the pinsa romana so popular? Above all, it is their dough that is said to be more digestible than pizza dough. It consists of a mixture of wheat, rice and soy or chickpea flour and Italian sourdough (“lievito madre”). The rice flour is supposed to loosen up the dough, the soy flour ensures good binding and proteins and the sourdough is supposed to make the pinsa romana easier to digest.

The long rising time also contributes to this: the dough of the pinsa should rest for up to 72 hours or more. The ongoing fermentation processes not only make the dough very airy, but are also supposed to relieve the digestive tract of some of its work. However, there are still no systematic scientific comparative studies between the digestibility of pinsa and pizza. More about this here: This is why many people can no longer tolerate bread.

In the next sections you will find out how you can bake and topping Pinsa Romana yourself without Lievito Madre.

Pinsa Romana: The recipe for the special dough

For four pins you need:

350 g flour type 405 or 550
50 g wholemeal spelled flour
75 g rice flour
25 g chickpea flour or soy flour
0.5g of fresh yeast or 0.2g of fresh yeast and 50g of Lievito Madre
approx. 300 ml cold water
1 tsp salt
1 tsp olive oil

Directions:

Mix the flours together in a large bowl.
Dissolve the yeast and salt each in a portion of the water.
Add yeast water, salt water, olive oil and, if necessary, Lievito Madre to the flour mixture. Knead the ingredients for about ten minutes until you have a smooth dough. Add some more water if needed.
Cover and let the dough rest for 30 minutes, kneading it briefly every ten minutes.
Place the dough in a large sealable container and refrigerate for 48 to 72 hours.
On baking day, take the dough out of the fridge 2-3 hours before you use it to let it come to room temperature.
Knead the dough briefly and divide it into four pieces of dough. Cover them with a tea towel and let them rise again for an hour.
Preheat the oven to 240 degrees circulating air. Note: For most dishes you can do without preheating the oven and thus save energy. Preheating the pinsa romana (just like pizza or tarte flambée) makes sense, however, because it only needs to be baked for a short time, but it should be nice and crispy. The ovens of professional pizzerias reach much higher temperatures.
Pull the dough pieces apart in an oval or round shape. Be careful to break as few air bubbles as possible. The dough does not have to be as thin as pizza dough.
Place the pins on an oiled baking sheet and top them with ingredients of your choice.
Bake the pins for about 10 to 15 minutes.

Tasty toppings for pinsa romana

You can eat the Pinsa pure or top it like a pizza, for example with:

  • tomato sauce
  • fresh seasonal vegetables
  • cheese or vegan yeast melt
  • fresh herbs
  • aromatic olive oil

The only thing to keep in mind is that the Pinsa Romana is only briefly in the oven, just like a pizza. This means that you should pre-cook vegetables or cut them very thinly. It’s also a good idea not to cover the pinsa too thickly, as that could make them mushy (and harder to eat).