Tag

for

Browsing

Many people suffer from unpleasant foot odor and wonder what they can do about smelly stockings and socks. The older generations were used to fighting this problem with baking soda. A home remedy that has since been forgotten as a natural remedy for foot and sock odor.

Numerous foot care preparations have pushed this home remedy off the market, although baking soda is much more effective and cheaper. In the following, we reveal how effective and versatile baking soda can be against foot odor, smelly socks, and stockings.

Baking soda works against smelly socks and stockings

Baking soda has a double action to counteract bad foot and sock odor. In this way, baking soda neutralizes the organic acids from foot sweat and the skin’s pH value is given an alkaline environment. Bacteria like to multiply in an acidic environment. Thus, bacterial proliferation is inhibited by the basic environment. This in turn creates less foot odor and socks or stockings no longer smell of sweat. With regular baking soda care, the feet no longer develop foul-smelling sweat or are only much later than usual.

Tips for getting rid of smelly sock odor

  • A housewife tip is to add half a spoonful of fine-grain baking soda before you put your socks on. So that everything is evenly distributed, the socks should be shaken well before putting them on. Feet stay dry while wearing and sweaty feet don’t stand a chance.
  • Another method against sweaty feet is not to sprinkle baking soda on your socks but to powder your feet with baking soda. For this purpose, the feet are simply rubbed with fine baking soda powder. Shoes and socks can then be put on as usual.
  • Alternatively, it is also possible to spray the feet with a sodium bicarbonate solution consisting of 250 mm water and a tablespoon of sodium bicarbonate powder. This mixture is best filled into a spray atomizer. Before you put your socks on, you should definitely let your feet dry in the fresh air so that the baking soda can take full effect.
  • If you also suffer from shoe stench, you can put some baking soda in your shoes after wearing them and shake them out before wearing them. This keeps your feet dry and there is no bad stench in the shoe closet. In addition, when you try on and buy shoes, you should not choose models that are too tight. Because these can promote sweaty feet.

  • If you don’t like baking soda on your feet or in your socks, you can also put the baking soda in the fabric softener compartment when washing because that also helps against strong foot odor
  • If you want to prevent foot odor, you should take a soda bath regularly. To do this, add 1 tablespoon of baking soda to 250 mm of lukewarm water. The bath should last 10 to 15 minutes. Then dry your feet well to avoid the athlete’s foot.

Simply remove stubborn paint after painting and varnishing when renovating. We show you tools with which you can effectively remove the paint from various material surfaces such as wood, metal, plastic, and skin.

During renovation work, something can often go wrong. Then the paint finds itself in places where it shouldn’t be. Or it may be that you want to give your favorite item a new shine. We will show you different methods of removing paint. From butter to petrol to sanding.

The paint color

Lacquer is a coating medium mostly in liquid form, but it is also available in powder form. It consists of binders, fillers, and solvents. However, modern paints are increasingly water-based. This means that they are low in odor and pollutants. A wide variety of surfaces such as plastic, metal, or even wood can be painted with different paints. As a result, you can use it to spice up old furniture instead of throwing it away. But how can you remove the paint color if you no longer like it or something has gone wrong? In the following, we will show you different ways to easily remove paint.

1) Remove paint with benzine

Varnishes are very stubborn. But you can easily remove the paint with petrol. Because gasoline can dissolve the paint. This method is particularly suitable for removing paint that was produced on the basis of chemical solvents. Accordingly, you should first carefully clean the affected area with light cleaning agents. So you don’t damage the underlying surface. Then you can treat the remaining paint color with petroleum ether. As an alternative to petrol, you can use lighter petrol, nail polish remover, universal thinner, or turpentine substitute. All these funds are based on petrol. Also, note our clever tips for saving fuel.

2) Treat the paint with hot air

If you want to remove old paint from your furniture or the like, try using a heat gun. Because with this you can soften the paint. To do this, you have to aim the very hot airflow at the painted area until it starts to bubble. And then carefully remove it with a spatula. But you have to be careful not to create any toxic fumes. You should therefore wear protective clothing such as goggles, gloves, and a mask. You should also be careful with wood and plastic surfaces when removing paint with the heat gun. Since this method is not always suitable for these materials. Also, read tips for repairing scratches in the wood.

3) Remove paint colors on the skin with butter

Paint residue often remains on the hands after painting or varnishing. Removing this paint color is very simple with simple butter: just rub the colored areas with butter. After a short exposure time, you can easily remove the varnish from your skin with a cloth. This allows you to save on expensive chemical cleaning agents. In addition, the whole procedure is absolutely gentle on the skin and 100 percent environmentally friendly. Also, note our other tips for using butter in the home.

4) Remove the paint by sanding

You can also remove the paint color by sanding it off. But this method is a bit more complex. If you’re sanding off the paint by hand, you’ll need sandpaper. But it would be a little easier to remove the paint with an electric grinder. You should start by using coarse sandpaper. After that, you can continue with finer sandpaper. Using abrasive tools, you can use this method to remove paint from metal, wood, and plastic. You should also wear a protective mask here, as the dust produced can be hazardous to your health.

5) Remove paint residues by stripping

As an alternative or in addition to sanding, you can try the stripping method. This is because chemical strippers can soften the paintwork. You can then remove them with a spatula. You should also know that this method is mainly suitable for metal surfaces. It is also advisable to wear a protective mask here. You can see how chemical stripping works in the following video. In addition, note how you can touch up small paint damage.

6) Remove paint with a wire brush

If you want to remove paint from non-sensitive surfaces, you can use a wire brush. These are mainly materials such as metal and stone. There are also handheld wire brushes or wire brush attachments that you can use. In addition, this is a good method for removing rust.

Many natural home remedies for bad breath help to get rid of the bad odor coming from your mouth. Avoid and drive away bad breath with useful tips.

Simple home remedies for bad breath

Good oral hygiene is fundamental. Dentists recommend brushing your teeth thoroughly twice a day and also cleaning the spaces between your teeth. In addition to gargling with mouthwash, a tongue scraper is useful, since odors are often caused by the coating on the tongue.

If you are out and about and notice bad breath, you should always have dental care chewing gum or candies with eucalyptus, fennel, or anise on hand. In this way, one is equipped with a “first aid kit” against this unpleasant problem. But what home remedies are there for prevention?

1) Fight bad breath with apple cider vinegar

You can find naturally cloudy apple cider vinegar in any well-stocked supermarket. Now put a teaspoonful in a glass of lukewarm water, gargle with a sip, spit it out and drink the rest.

2) Mouthwashes with sage tea

The anti-inflammatory effects of sage tea are well known. To prevent bad breath, add a teaspoon of sage tea to a quarter-liter of water and let it steep for 8 – 10 minutes. Then rinse your mouth thoroughly with the lukewarm tea.

3) Combat bad breath with myrrh

Myrrh tincture has a beneficial effect on the oral mucosa, prevents inflammation, and is a traditional household remedy. If you put five drops in a glass of water and gargle with this solution several times a day, you are definitely doing yourself a favor.

4) Propolis cure to prevent bad breath

Propolis protects bees from diseases in the hive. This putty resin is antibacterial and inhibits inflammation. To prevent bad breath, several drops are added to a glass of water. Rinse and gargle your mouth with it.

5) Tea tree oil for gargling

Using the home remedy tea tree oil has a similar effect to the remedies mentioned above. Here, too, you put two to three drops in a glass of water and gargle with it.

6) Oil pulling for oral flora

Oil pulling is a traditional method to rid the mouth of bacteria and thus bad breath. You start by cleaning your tongue. Then you take about a tablespoonful of organic sunflower, sesame, or coconut oil into your mouth and move it back and forth for about 20 minutes. You shouldn’t be gargling. When the time is up, it is best to spit the oil into a paper towel and then throw it in the bin so that the toxins contained in it do not get into the water. Finally, brush your teeth thoroughly.

7) Healing earth binds toxins and helps against bad breath

You can also use the miracle cure healing earth to rinse your mouth. To do this, stir a teaspoon of healing earth thoroughly in a glass of water and rinse your mouth with it. To remove the remains of the healing clay, which can be unpleasant in the mouth, you should rinse with water several times.

8) Salt brine relieves many ailments, including bad breath

First, you have to prepare the brine. That takes a day. To do this, but one or more chunks of Himalayan salt in a glass jar with a lid and then fill it up with good spring water. This is left to stand for a day and you get a 26% brine solution, which is alkaline and thus counteracts the formation of acid in the mouth. Now put a teaspoon in a glass of water and gargle with it.

9) Fight bad breath with herbs

If you have a garden, growing a few herbs in it is a nice addition to the kitchen in general. Chewing the following fresh plants also helps against the problem of bad breath: thyme, parsley, dill, aniseed, marjoram, or fennel. If you have an apple tree, eating a grated apple will also help against this annoying problem.

10) Clean coated tongue

You should also regularly clean your coated tongue if you have bad breath. This is because a film builds up over time which can cause bad breath. For this, you need a tongue scraper from the drugstore or the Internet. Then you can use this to remove the coating from your tongue every evening.

You only need a small piece of fresh ginger for most dishes.

Tip 1 for correct storage: Don’t buy too much ginger

If you want to enjoy fresh ginger for as long as possible, you must not buy old tubers. Old ginger is very difficult to store. You can recognize fresh produce by the fact that the tuber feels firm and heavy. Ginger that is no longer as dewy is softer and has a wrinkled skin.

Also, don’t buy too much ginger at once. For most recipes you only need a few slices, the rest is often forgotten and eventually ends up in the bin. So you should consider beforehand how much ginger you need and how you want to use it.

Tip 2: Store ginger outside of the refrigerator

If your fresh ginger root is still unpeeled and uncut, you can store it in a dark and cool place outside the refrigerator. The pantry is best for this. You can store fresh ginger there for several weeks. Wrap it up completely in a paper towel beforehand and then put it in a sealable container or paper bag.

Sliced ​​ginger can also be stored outside the refrigerator for some time. Store it in a dark and cool place. While the interface may become a bit woody and hard over time, the ginger flesh stays fresh and you can keep using it.

Tip 3: Store cut ginger in the fridge

If you want to store cut ginger in the fridge, you should make sure that it is kept as airtight as possible. There is high humidity in the refrigerator, which promotes the formation of mold in food.
Option 1: To prevent the ginger cut from drying out too much, you can cover it with reusable beeswax towels instead of plastic or aluminum foil. Place the fully wrapped ginger in a sealable can or paper bag.
Option 2: Alternatively, you can slightly dampen a cloth kitchen towel and wrap the ginger in it before storing it in the crisper of the fridge.

You can use these methods to keep sliced ​​ginger fresh in the refrigerator for up to three weeks.

Tip 4: Freeze fresh ginger

If you always want to have a supply of ginger on hand, you can also freeze it. Proceed as follows:
Method 1: ginger pile
Peel the ginger and then grate it finely.
Use a spoon to form small mounds of the grated ginger.
Put these piles on a plate, which you then put in the freezer.
Once the ginger mounds are frozen, you can remove them from the plate and place them in a freezer bowl.
Method 2: ginger slices
Peel the ginger.
Cut it into strips or slices.
Place in a freezer-safe container and freeze.
You can pour hot water over the heaps or slices of ginger to make ginger tea or add them to dishes. Processed like this, the ginger will keep in the freezer for about 3 to 6 months.

Tip 5: Pot ginger and plant it yourself

Ginger is one of those foods that grows back on its own. This means that you can easily keep fresh ginger bulbs alive by planting them one at a time. In this way, you can also recycle ginger bulbs that have already sprouted. The ginger pieces sprout and form reed-like plants. After some time you can harvest fresh ginger bulbs for kitchen use.

Here you can find out how to plant ginger yourself.

Tip 6: Preserve ginger by pickling it

To prevent ginger from spoiling or becoming too woody and dry, you can preserve it by pickling it. Peeled, cut, grated and preserved in a vinegar broth, the ginger prepared in this way can be kept for up to six months. Pickled ginger is particularly popular with sushi.

Here are the instructions on how to pickle ginger.

Tips and home remedies for removing red wine stains from fabric, carpets, sofas, or jeans. This is how you get the dark red stains removed quickly and easily without having to resort to expensive special agents.

A red wine stain on clothing is, in some cases, a medium-sized disaster. The red wine stains can be easily and safely removed with simple means. In this article, we will explain how you can get rid of red wine stains, which home remedies will help you, and what you should consider.

The best home remedies for removing red wine stains

You sit comfortably with the family and drink a glass of red wine and – bang – it happened: A sometimes only very small red wine stain is probably still spreading on white trousers or a white top. You can use a variety of home remedies to remove red wine stains. We present the four most effective means here with brief instructions for quick and effective help.

1) Soak stained textiles in mineral water

To remove a fresh red wine stain on clothing or other fabric fibers, soaking the affected garment in mineral water can help. You can either use mineral water from the bottle or from the sparkling water maker. The carbon dioxide bubbles it contains can loosen the red wine pigments from the fabric.

Then all you have to do is rinse the garment again with clear water and then dab it with a piece of kitchen roll. You should proceed cautiously if there are still red wine residues in the fibers. If you take a more resolute approach, you can work the remaining residues even deeper into the fibers in the worst case. You can also use this method to remove stubborn fruit stains.

2) Remove fresh red wine stains with baby powder

You can also powder baby powder onto the fresh stain, let it soak in, and simply wipe it off. The red wine is thus pulled out of the textile. This also works, for example, on sofas or carpets that you cannot easily soak and wash.

It is important that you then immediately rinse the stain with water or dab it off. If residue from the stain is still visible, rub the stain with salt for a few hours. You should then wash the textiles as normal. In addition, read how you can remove spinach stains and which home remedies help against grass stains.

3) Get rid of old red wine stains with lemons and salt

You only noticed the stain later and it has already dried up? Then first drip a few drops of lemon juice onto the red wine stain and then sprinkle it with salt. The salt pulls the red wine out of the tissue. Once dry, brush or vacuum off the salt and wash the garment normally. You can also easily remove tea stains with lemon juice and get rid of chocolate stains with flour and salt.

4) Remove red wine stains with window cleaner

Another variation is to remove the red wine stain with colorless window cleaner. To do this, soak the garment or stain it. You can repeat this until the window cleaner pulls all of the red paint out of the affected garment. You should then rinse the textile thoroughly with clear water. Also, note tips for removing deodorant stains from clothing.

After the easy removal with these home remedies, you can hopefully enjoy the red wine again without having to worry about possible stains. And if something goes wrong again, you now know how you can help yourself. With these tips, you can make the red wine glasses really shine for the next good drop.

You can easily decorate the muffins with a locomotive made of smarties and waffles. The most important thing about a children’s birthday party is surprises! In this paragraph, you will find a recipe for both creative and delicious chocolate muffins.

Not only are treats for children’s birthday parties a great gift, but they also indicate the motto of your party at the children’s birthday party. These gifts make an impression on every birthday table! The children can also decorate muffins themselves at the children’s birthday party. They are also a nice give-away at the end of a party.

Ingredients chocolate muffins for children’s birthday party

You will already have most of the ingredients at home. If you don’t have a muffin tin, borrow one or buy one using the link below, for example. The reusable silicone muffin molds are also nice. You can also use paper cups, which you can buy in almost every supermarket. For the chocolate muffins as motto cakes we need the following ingredients for 12 pieces:

  • 125g softened butter
  • 150 grams of sugar
  • 1 packet of vanilla sugar
  • 2 eggs
  • 200 g dark chocolate
  • 200 grams of flour
  • 4 tablespoons baking cocoa
  • 1 pinch of salt
  • 2 teaspoons baking powder
  • 175 ml milk
  • 12 paper muffin cups
  • 1 12-hole muffin tin

Preparation of the muffins with the locomotive

Funny decorated muffins or cakes for children’s birthdays are always an eye-catcher. If the decoration also fits the motto of the birthday party, then the surprise is a success. What’s nicer than fancy, fun muffins with Smarties? Muffins to decorate yourself. With these step-by-step instructions, even children can make sweet cakes if they get a little help from mum and dad.

  1. First mix the butter with the vanilla sugar.
  2. Then stir in the eggs.
  3. Now roughly chop the chocolate.
  4. Then preheat the oven to 180 degrees (convection 160 degrees).
  5. Also mix flour with cocoa powder, salt, and baking powder and mix well.
  6. Then fold in a third of the chocolate.
  7. Line the wells of the muffin tin with paper cases.
  8. Divide the batter into the molds.
  9. Then distribute the remaining chocolate chips on the muffins.
  10. Finally, bake the cakes in the preheated oven for about 25 minutes.

Ingredients for decorating with smarties

You can build many different decorations on your cupcakes. How about making scary figures on the muffins for pranks and Halloween? Or bring something very special to a summer party or a barbecue party in summer? Small cakes for dessert with edible flowers as decoration. For the train fans, you need the following ingredients to build 12 locomotives on top of the muffins:

  • 12 chocolate rolls (you can find them on the cookie shelf).
  • 6 chocolate biscuit sticks (e.g. Mikado).
  • 48 chocolate lentils or Smarties.
  • 1 tube of edible food-grade glue.
  • 12 square waffle cookies or dominoes.
  • possibly colored fondant or chocolate icing as a base for the locomotive.

Make your own edible glue

You don’t necessarily have to go buy the edible glue. If you make it the night before, you can also use homemade glue to attach your decorations to the muffins the next day. You need 50 ml of boiled water and a quarter of a teaspoon of CMC (carboxymethyl cellulose), as well as an empty jar that can be closed well. If you don’t have a CMC at hand, you can also make the glue with 50 g sugar and 25 ml water. The following video explains how to cook the sugar glue.

Preparation of the creative surprise

Children aged five and over can decorate the muffins with the locomotive with a little help. Children from the age of eight can do it all on their own. Especially on children’s birthday parties, such a baking campaign is a nice activity that the children will remember for a long time. A photo captures the little bakers for eternity. In order for the locomotives to succeed, it is best to proceed as follows:

  1. First brush the cooled muffins with the chocolate icing.
  2. Cut out 12 circles from fondant and glue them to the muffins with a dab of edible glue.
  3. The locomotive can also be glued directly to the muffins.
  4. To do this, stick the biscuit roll on and let it dry.
  5. Then glue the square wafer biscuit to one end of the biscuit roll.
  6. Glue the four wheels made of chocolate beans to the sides.
  7. Glue the chimney from the biscuit sticks with chocolate.
  8. Finally, let everything dry well.

Young parents are often unsure whether babies are allowed to drink cow’s milk. We will show you whether cow’s milk is suitable for infants.

Can infants drink cow’s milk?

The first year of life for an infant consists of three feeding phases:
At first, your baby only feeds on breast milk or industrially produced infant formula.
In the course of this, the mashed food or complementary food also follows.
Finally, the toddler gradually participates in the family dinner.

Caution: Infant formula should not be made from cow’s milk or other types of milk.

Note: Make sure you only give your baby pasteurized or highly heated cow’s milk. As in pregnancy, you should bear in mind that raw or processed milk can contain dangerous germs for the child’s immune system.

Can baby food contain cow’s milk?

Children need numerous important nutrients for healthy development – including sufficient calcium, protein and iodine suppliers. Numerous plant-based foods, but also milk and dairy products can provide these nutrients. With supplementary food, you can use small amounts of cow’s milk or yoghurt, up to 200 milliliters per day, to prepare a milk-cereal porridge. Of course, you can also prepare the porridge with breast milk or formula milk.

Note that cow’s milk does not replace breast milk or infant formula, even during complementary feeding. Babies and children can be allergic to cow’s milk, if in doubt consult your pediatrician or midwife.

Note: When buying cow’s milk, pay attention to the organic seal or the seal for mother-tied calf rearing. In this way you ensure that the calves are also supplied with the necessary nutrients through their own breast milk.

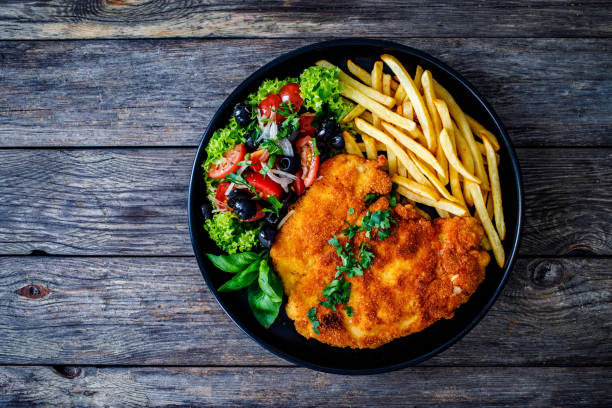
We’ll show you how to bread your schnitzel properly to get delicious schnitzel. Simply bread the schnitzel in the right order. Whether breading schnitzel without egg or breading schnitzel without flour: reading schnitzel properly is easy.

The schnitzel is one of the most popular meat dishes. It should be nice and crispy with a closed breading and tender and juicy on the inside. However, good meat quality alone is far from enough to achieve a sizeable and tasty schnitzel. The problems often begin with beating the pieces of meat and end with a crumbly breading that floats in the pan. And does it always have to be egg or breading? The following tips can give you helpful suggestions for the preparation.

Just get thin schnitzel

Wash the meat and place it on kitchen paper. The upper side of the meat should also be dabbed with kitchen paper so that the schnitzel is dry all over. Then you take a clean freezer bag or plastic bag and put a piece of meat in it. The bag should be about the same size as the flattened schnitzel.

Squeeze the air out of the bag and seal it. Now you can flatten the schnitzel with a meat flattener or a rolling pin without the meat juice splashing on the kitchen furniture. Under no circumstances should you be too rough when beating and do not use a meat mallet, but only meat platers with a smooth surface, otherwise the cell structure of the meat can be damaged. The ideal schnitzel should be 4-5 mm thick. If you are not using freezer bags to get schnitzel as thin as possible, then our instructions and tips for freezing meat will help you.

Bread the schnitzel properly

Lay the side of the cutlets by side on a platter and season the top with salt and pepper. Then turn all the escalopes completely and season the underside. The schnitzel must be thoroughly dry so that the spices and the subsequent breading stick better. The secret of a delicious schnitzel breading is that the schnitzel is breaded twice. By first turning the pieces of meat in flour, then dipping them in beaten egg, and finally turning them in breadcrumbs, the breading sticks firmly to the schnitzel and forms a crispy coating. It is best to set up a so-called breading line for this.

This means that you put four plates next to each other. Fill the first with flour, fill the second with a beaten egg, fill the third with the breading, e.g. breadcrumbs, and fill the fourth with the finished schnitzel. Sometimes there are also containers for breading to buy. Another tip: Use one hand for the dry steps of breading i.e. for the flour and for the breading and the other hand for the egg, otherwise your hands will get very sticky. Disposable gloves are also helpful here. Try our home-style Wiener Schnitzel.

Variants for the breading

You can use different types of bread as breadcrumbs, including gluten-free bread. You can now also buy breadcrumbs made from wholemeal bread and gluten-free breadcrumbs. You can also make breadcrumbs yourself. Crushed crispbread works well too. Instead of breadcrumbs, you can also bread your schnitzel with other breadcrumbs. The Japanese breading Panko is popular and noble. You can find Panko in Asian shops or in the Asia corner in larger supermarkets. Many star chefs prefer to bread their schnitzel with Panko instead of breadcrumbs.

You can also bread your schnitzel with cornflakes. You should crush these properly. Crackers and all kinds of chips such as tortilla chips can also be used as breading. You can even use butter biscuits. If you want it to be a little healthier: Rolled oats, oat bran, or coconut flakes and sesame serve as bread as well as dry herbs. How about a breading made from groundnuts and parmesan? Season your breading again before you use it. Your breading should be as thin and fine as possible so that it becomes crispy. You can also mix different variants. Insider tip: Roast your breading very briefly in a pan with a little oil beforehand.

Bread schnitzel without egg

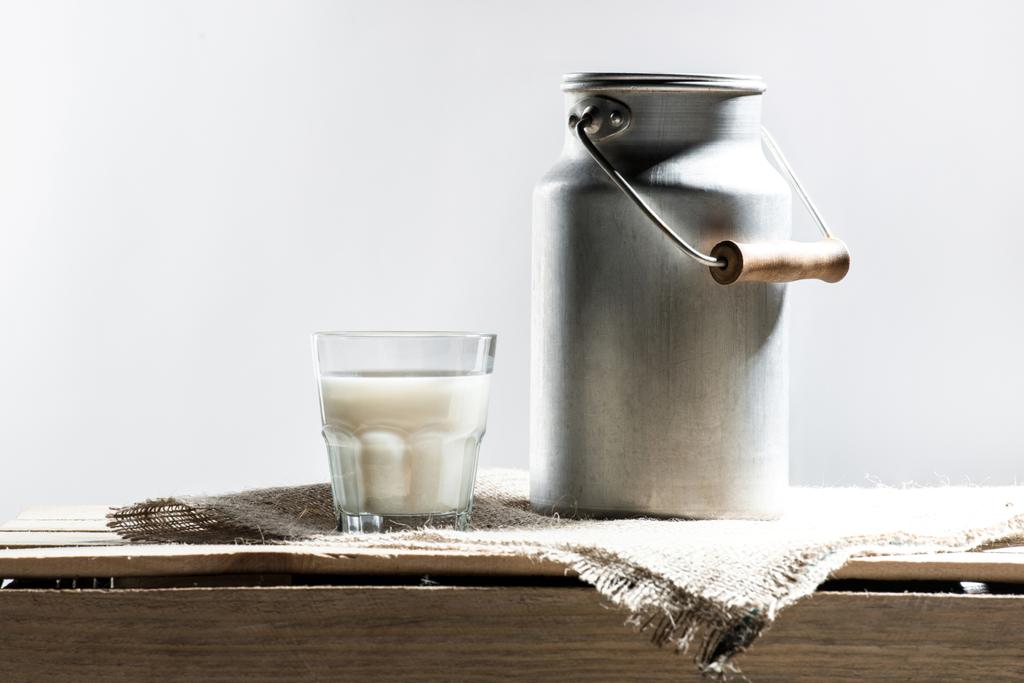
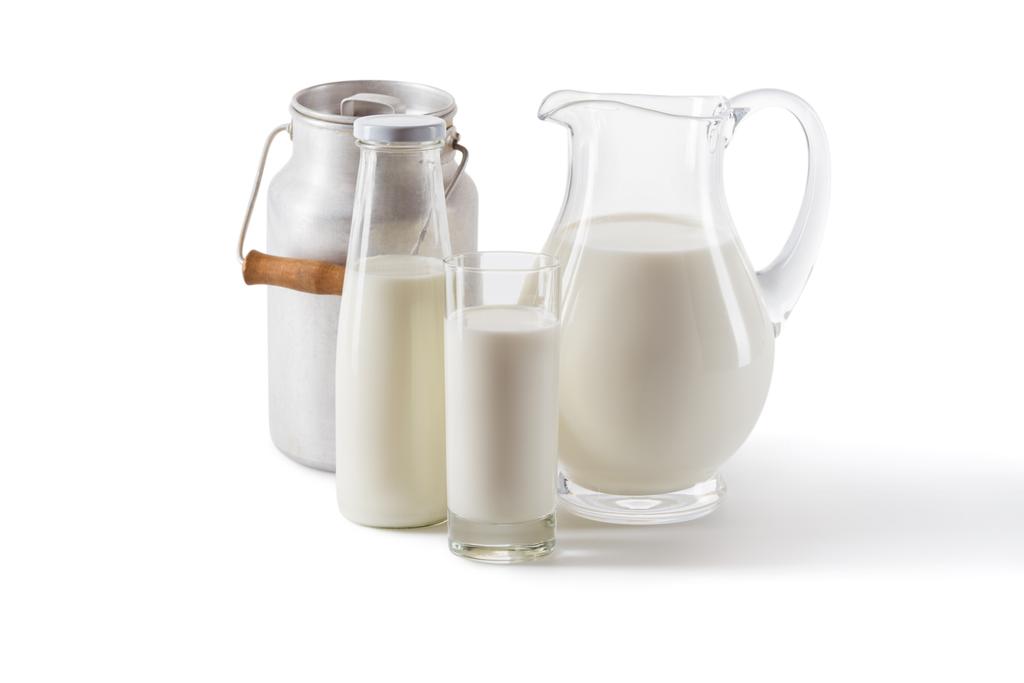
If you don’t have any eggs on hand or you can’t or don’t want to eat eggs, you can easily bread your schnitzel without eggs. You can best replace the egg with buttermilk or fatty whole milk or even cream. Another popular variation is substituting mustard. Here you roll your schnitzel first in flour and then in some mustard before you pull it through the breading.

It should be noted that this will affect the taste somewhat, which is why you should not season your schnitzel and breading too much if you use mustard instead of egg. If you are keen to experiment, you can try almond butter. Basically, you can even just use some water or soy sauce. Also, try our foods and recipes as egg substitutes.

Bread without flour

Flour is needed so that the egg and the breading stick well to your schnitzel. If you want the schnitzel to be as crispy as possible, then you should definitely use flour for breading. Many cooks recommend so-called non-slip flour, which has been sieved beforehand. It is best to use white flour type 405, but other types of flour are also possible.

You can also use whole grain or spelled flour or gluten-free flour such as buckwheat flour. Chickpea flour or almond flour is also possible. If you don’t have flour at hand, you can also use cornstarch or potato starch. Basically, you can simply omit the flour, which acts as an additional glue. Instead, you can then get inventive with the breading. You can find more tips and home remedies for flour here.

Fry the schnitzel properly

While you are breading the schnitzel, you should heat the oil in the pan at the same time. It is best to use a pan with the highest possible edge so that your schnitzel has plenty of space. In principle, vegetable oil with a high smoke point, such as rapeseed oil, is suitable. Olive oil has great properties and gives your schnitzel a very special taste. It is important to always use a sufficient amount of frying fat so that the escalopes are completely surrounded by the oil when they are immersed in the pan. Clarified butter works extremely well too.

The breading becomes crispy and firm, while the meat remains tender and juicy on the inside. You can test the correct temperature of the fat with a few crumbs of breadcrumbs. The ideal temperature is 170 degrees. The crumbs should be bubbling in the hot oil. After you have turned the schnitzel once, it is advisable to drain the golden-brown fried pieces of meat on kitchen paper. You might also be interested in our instructions and tips for frying a steak.

Lentils are very healthy and come in many different varieties. For some, it makes sense to soak them before cooking. You can find out what you need to consider here.

Lentils contain a lot of protein, fiber and minerals and therefore play an important role in vegetarian and vegan cuisine. There are different types that need different cooking times. Especially with lentils with long cooking times, it makes sense to soak them beforehand. Soaking shortens the cooking time, saving you time and energy.

You should soak these types of lentils

Plate lenses are comparatively large and have a brownish color. We recommend soaking these: This shortens their cooking time from 60 to around 30 minutes.
There are many different types of small lentils: brown mountain lentils, green lentils, beluga, puy and pardinal lentils. You can soak them, but you don’t have to. They only take 20 to 30 minutes to cook, even without soaking.
Yellow and red lentils differ from the other varieties because they are lentils that have already been peeled. You shouldn’t soak them as they will break down. In any case, their cooking time is comparatively short at ten to 15 minutes.

Lentils: More digestible by soaking

Soaking lentils not only saves cooking time, but also makes them more digestible. Because in the raw state, lentils not only contain many healthy nutrients, but also substances that are difficult to digest, which can cause digestive problems, among other things. In particular, if you are sensitive to legumes, you should discard the soaking water and use fresh water for cooking. On the other hand, nutrients dissolved in the soaking water are lost.

In addition, lentils (like other legumes and cereals) contain so-called antinutrients that inhibit the absorption of minerals. An example of this: phytic acid. By soaking and cooking the lentils, you destroy a large portion of this antinutrient.

How to properly soak lentils

Combine 1 part lentils with 3 parts water in a porcelain, glass, or ceramic bowl. You should not use plastic or metal bowls, as they can dissolve substances in the soaking water.
Soak the lentils at room temperature for 12 to 24 hours, for example overnight. The warmer it is, the shorter the soaking time.
For subsequent cooking, you can either use the soaking water or fresh water. Both have pros and cons, as the soaking water contains both dissolved nutrients and toxins. The lentils are more digestible if you use new water, but the nutrient content is then lower. Try what is better for you.
If you use the soaking water for cooking, the starch dissolved in the water may cause a lot of foam to form. You can skim it off while cooking.

Date syrup is the ideal way to leave the valuable honey with the bees and still give your desserts and hot drinks a delicious sweetness.

Date syrup is very easy to prepare yourself with a little patience. Just as sweet and tasty as honey, you can smear it on rolls, bake it, refine waffles or pancakes and, of course, sweeten teas and smoothies.

Potassium (good for heart and muscles)
Magnesium (for muscles, heart and brain)
Calcium (important for your bones)
Amino acid tryptophan (important for the formation of the sleep hormone melatonin)

Unfortunately, although dates are famous for their high fiber content, these are lost when the syrup is pressed. Since approx. 100 grams of dates contain approx. 50 to 70 grams of sugar, you do not need any additional sugar to prepare the syrup.

Date syrup: the recipe

To prepare the date syrup, you need a hand blender and a straining cloth as special utensils to squeeze out the syrup.

Ingredients for the date syrup:
200 g pitted dates
1 vanilla bean
1 tsp cinnamon
1 tbsp lemon juice
370 ml water

How to prepare the date syrup:
Pit the dates.
Take half of the dates and let them bake in the oven for about 40 minutes at 120 degrees.
Cut the other half of the dates into small pieces and place them in a saucepan of water.
Cut the vanilla pod lengthwise. Scrape the vanilla seeds out of the pod and put everything in your pot. If you just want a light vanilla flavor, just scrape it once or twice with the teaspoon and store the rest of the pod in an airtight container in the fridge.
Now add cinnamon and lemon juice.
Bring the whole thing to a boil and then let it simmer on low heat for 30 minutes, stirring constantly.
Now put the finished dates from the oven into the date-water mixture and let it simmer for another 15 minutes.
So that the taste can develop properly, leave the pot covered in the kitchen for two hours.
Now take the hand blender and puree the whole thing.
Now place the straining cloth over a bowl. Place the pureed date mixture in the cloth and squeeze as much liquid as possible through.
Now you can fill your finished date syrup into jars and seal them airtight.
The date syrup can now be stored in the refrigerator for about two weeks.