Tag

for

Browsing

Connoisseurs have always appreciated leather. Because the furniture with leather covers becomes more and more beautiful with age. Provided they are properly cared for and cleaned over the years. We show you which cleaning agents are good and which should be avoided.

The leather and its properties

Leather is a material made from animal skin. Centuries ago, people used the material as tent walls and for the production of clothing and containers. Because the leather has positive properties, such as its durability and breathability. In addition, it is flame-retardant and keeps you warm. It is so popular because it is very durable with proper cleaning and care. But you should use the right tools. Otherwise, you can destroy the leather during cleaning.

Tips for the correct cleaning of leather

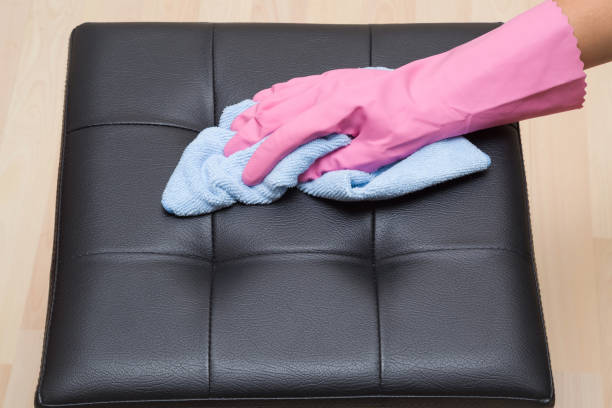
Leather is hard-wearing, but if you want it to look good for a long time, it needs gentle cleansing. In addition, you should take care of it regularly. You shouldn’t do it thoughtlessly. Because there are some important things to consider in order not to ruin the beautiful leather furniture and leather upholstery. That’s why we’ve collected tips for the right treatment of your leather covers. Also, read how to refresh and polish old leather.
1) Refrain from using chemical cleaning agents

The following substances are considered absolutely unsuitable and dangerous for the leather fabric: stain removers, solvents, floor wax, and shoe polish. You should also avoid using petrol and turpentine when cleaning leather. All of these detergents can damage the fabric. Instead, use natural home remedies for cleaning or a special cleaner for leather from the internet.

2) Note the type of leather when cleaning

Contrary to popular belief, simple leather care does not necessarily have to be expensive to be effective. But different types of leather require special care. Thus, the effect can be targeted. Therefore, you should first determine the type of leather. Once you know the species, you can start cleaning.

Cleaning aniline leather

These are the so-called uncovered leathers. This type of leather does not require complicated maintenance. But you should protect it from too much sunlight. You should also dust it off regularly with a damp cloth (at least once a week). And twice a year, treatment with a special cleaning agent should be carried out. Also, note how you can clean leather upholstery with cornmeal.

3) Use a little curd soap

If you want to remove stains from smooth leather, using curd soap can help. You should be careful not to use too much of it. Large-scale use is also not advisable. And you should foam up the curd soap a little beforehand. Then test it on a small spot before you really start. Then care for the material with leather grease. So it doesn’t dry out. Also, note our tips for removing carpet stains.

4) Clean leather with hair shampoo

If you don’t have a special leather cleaner on hand, you can use hair shampoo to clean smooth leather. To do this, dilute it in water. Then you can rub it into greasy spots and dirt. But you should also test the mixture on a small area beforehand. And it is important to let everything dry well afterward. Also, read our ideas for making hair shampoo yourself.

5) Make your own leather care products

Leather furniture tends to develop its own beautiful patina with age. You can make your own care product to keep the leather soft and elastic. To do this, mix 150 ml of water and milk with an egg white. Then use a sponge to apply the mixture thinly to the previously brushed furniture and let it work for a short time. Finally, remove the excess solution with a dry cloth. After this procedure, your leather furniture will be well cared for and shine like new. In addition, note how to remove ink stains from leather.

6) Remove bad smell from leather

If your leather sofa or leather jacket has gotten a bad smell, you don’t have to throw it away right away. Instead, use the popular home remedy vinegar to neutralize the smell. To do this, take a cloth and add some vinegar. Then wipe the respective piece of leather with it.

7) Protect leather upholstery from sunlight

Leather suites are sensitive to light and should not be exposed to direct sunlight over the years. Because they can easily fade in this way or darken in patches. Also, note our article on cleaning and caring for car seats.

8) Enough humidity for leather

You should also ensure that there is sufficient humidity in the living room. Because the leather needs moisture to stay soft and supple over the long term. This is just as important for the care of old furniture and antiques.

In order to have shiny and clean glasses for the next festive occasion, you have to know how to clean them. That’s why we’ve collected the best tips and home remedies for polishing glasses for you.

Tips for polishing the glasses

In addition to good food, every family celebration also includes great drinks. And it’s best to enjoy them from shiny, perfectly polished glasses. This not only applies to Easter, but to all celebrations, be it a birthday, a wedding, or Christmas. Because the most fun is drinking your wine from clear, streak-free glass.

1) The glass should still be a little wet

Because if the water drops have already dried on the glass, it is much more difficult to remove them. If you want to polish a dry glass, it’s best to have a container of boiling water ready. Then hold the glass over it. It fogs up due to the rising steam and can now be polished. Also, note our tips for cleaning porcelain.

2) The right cloth is crucial

A microfiber cloth is best for polishing glasses. You can use it to clean windows or mirrors without leaving streaks. If you don’t have one, you can use a clean, lint-free tea towel. It is important that the cloth is large enough not to touch the glass with your fingers. If there is not such a large cloth, two can be used if necessary.

3) Polish glasses from top to bottom

To avoid breaking a fragile wine glass, you should polish the top first. Then the lower part, i.e. the base of the glass, is polished. To do this, put the cloth in the glass and rotate slowly until everything is dry and you can look forward to cleaning the glasses. Also, read how to polish old leather.

4) Baking soda for stubborn deposits

If the glasses or vases are particularly cloudy, you can put a packet of baking powder in the container. Then fill it up with hot water. The whole thing must then take effect for about an hour. Then rinse it off with clear water and polish it as described above.

5) Polish glasses with lemon juice

You can also use cleansing lemon juice to remove stubborn deposits and calcifications. Simply rub the inside and outside of the glass with a slice of lemon. Then rinse with clear water and polish. This way you can also get milky glasses clean again. This is why the home remedy citric acid is so popular and well-known.

6) Clean glasses with rice

Rice can be used to clean narrow vases or glass drinking bottles that have become cloudy on the inside. So just pour in two tablespoons of uncooked rice and shake. Then put some water in the bottle and shake the rice-water mixture vigorously again. Finally, you have to empty everything and rinse with clear water. If necessary, repeat the whole process and then polish as usual. Also, note the useful tricks for separating wedged glasses.

Environmental protection has been an issue for years. Because many of our ways of life have a negative impact on our environment. To change that, we have collected simple tricks to protect the environment in the home and in everyday life. This allows you to make your life more sustainable and protect the environment every day in the future.

Many people want to do something good for the environment. But don’t know exactly what helps. It doesn’t always have to be a hybrid car or a solar system on the roof, even small changes in your everyday life can have a big impact.

What is environmental protection?

In today’s world we have to deal with a variety of environmental problems. These include climate change, water scarcity, and air pollution. And also famine, species extinction, plastic waste etc. The causes of the environmental problems are well known. These include a growing world population, increased consumption of resources and our consumer behavior. In order to eliminate or counteract these problems, we must protect our environment. This is the only way we can protect our planet for our children. In the following video you can see the two scenarios of what our future world could look like.

Protect and protect the environment in everyday life

It turns out that environmental protection is very important. Global action is essential. And politicians also have to initiate a few things here. But you too can protect the environment in your everyday life and household with simple tricks. With this you can do something good for the environment and your children and do your part to limit environmental problems. At the same time, you can also save money. Also read our tips for saving money in the household.

1) Buy the right way and protect the environment

What does real shopping mean? Now we can already protect the environment when shopping. Because not all products that we find in the supermarket are good for the environment. Some have been transported long distances or their production caused a lot of greenhouse gases. That’s why we’ve put together an overview of the most important shopping tips. In addition, read our savings tips when shopping.

  • Shop local. Because products from the local area save transport routes and consequently greenhouse gases. You also support regional producers.
  • Buy seasonal groceries. Non-seasonal produce must be flown in from abroad or grown in heated greenhouses. And that causes more CO2 emissions.
  • Eat more vegetables than meat. Since the production of meat and dairy products produces more greenhouse gases, it is advisable to eat mostly vegetarian food.
  • Pay attention to organic quality. Organic products come from organic farming. And this is more compatible for our environment than the other productions.
  • Plan your purchases well. A meal plan can also ensure that you throw away less or that the food goes bad. This saves you money and doesn’t take up unnecessary space.
  • Drink more tap water. Since our tap water is usually of good quality and is available in one way or another, it saves unnecessary transport routes. If you can’t do without carbon dioxide, buy a bubbler for at home.
  • Also, read about the advantages of a soda maker.

2) Environmental protection by avoiding plastic

When shopping, you can also make sure that you buy food and products with little packaging waste. Because many products are packaged unnecessarily. You should definitely avoid plastic. As a result, we have collected some tips for you on avoiding plastic in everyday life. Please also note our ideas for making your own shower gel without plastic, making your own deodorant without aluminum, and making your own natural cosmetics.

  • Avoid microplastics in cosmetic products. Buy certified natural cosmetics instead.
  • Use clothes for a long time or buy second-hand.
  • It is best to use your own reusable bottle.
  • Avoid unnecessary single-use plastic products.
  • Go shopping with fabric tote bags.
  • Avoid to-go drinks.
  • Buy fruit and vegetables in bulk.
  • Visit stores without packaging.
  • Separate the garbage at home.

3) Protect the environment while doing housework

There is hardly any other area where you can do so much for the environment as with housework. And this starts with the right cleaning agents. Because many of these chemical compounds are harmful to the environment and can even get into the groundwater. Therefore, you should use sustainable cleaning products based on natural substances in the household and thus protect the environment. Consequently, you can use the following home remedies and tips to clean your apartment:

  • Use of baking soda in the home.
  • The popular baking powder for cleaning.
  • Natural cleaning with the household remedy vinegar.
  • Clean with citric acid.
  • Make your own natural detergent.

4) Save money and energy in the household

You can also save a lot of water and electricity if you don’t wash your dishes by hand and fill the dishwasher completely. Furthermore, modern dishwashers have functions that can be used to save water. Exactly the same is also available for the newer washing machines so that only a fraction of the water originally consumed is used. You should also remove limescale from your devices. Since heavily calcified devices eat up more energy. Read our instructions for descaling the kettle and our article for descaling the washing machine and dishwasher. Also, read our detailed tips on saving electricity. Other tips are:

  • Pay attention to an energy efficiency class A for electrical appliances.
  • Possibly change the electricity provider – use green electricity.
  • You should always turn off your standby devices.
  • When boiling water in a pot, the lid should be on.
  • When showering, you can lower the number of degrees a little.
  • Instead of a tumble dryer, let your laundry air dry.
  • Avoid using a hairdryer for long periods of time.
  • Use washable handkerchiefs instead of paper handkerchiefs.
  • Make sure you ventilate properly.
  • Defrost the freezer and refrigerator regularly.

5) More sustainability when cleaning

In times of increasing environmental awareness, many also want to pay attention to ecological aspects in the household. A topic that should not be underestimated is sustainability when cleaning. Because the cleaning agents available in large numbers contain harmful surfactants and substances from petroleum that get into the wastewater. Consequently, they harm aquatic life and the environment. It can also cause skin irritation and allergies.

Cooking pasta is made easy with our clever tips for cooking pasta and spaghetti. A guide to cooking pasta and important things to watch out for when cooking pasta.

Noodles can be prepared very quickly and in many different ways for a wide variety of meals. Here we have put together the best tips that will guarantee that the noodles will turn out well. Not too soft and not too hard – they should be al dente!

Cooking pasta made easy – in three steps

With just a few simple steps, you can achieve the result of a perfectly cooked pasta. If you follow these instructions, nothing can go wrong even when preparing pasta for the very first time. The three steps make cooking pasta easy.

Step 1: Water and Salt

When cooking noodles, you should always choose a sufficiently large pot in which 1 liter of water is heated for every 100g of noodles (125-150g of dry noodles correspond to approximately one portion at a meal). As soon as the pasta water is boiling, add a teaspoon of salt per liter of water. After a few seconds, the noodles can be added. Be careful not to burn yourself.

With long noodles, such as spaghetti, it usually takes a moment before they are soft enough to be pushed completely into the water. However, it is not necessary to break through these – on the whole, they are easier to eat.

Step 2: Stir and avoid overcooking

Constant stirring to prevent the pasta from sticking or sticking to the bottom of the pot is very important. No oil needs to be added to the cooking water. The pasta water should be constantly simmering with the heat turned down. To prevent the water and foam from boiling over, you can simply leave a wooden spoon in the saucepan. If the water boils over, add some cold water.

Step 3: Drain at the right moment

With the help of a timer that is set to the specified minimum cooking time (see package), you are guaranteed not to miss the moment when you should try the pasta. Incidentally, homemade noodles take much less time than dried noodles. In this case, it is best to stick to the recipe – often just a few minutes are enough to get the right cooking point.

Whether al dente or soft – this is the moment when you have to decide whether the noodles can be carefully drained in a colander – which is ideally already in the sink. There is no need to quench the noodles, which only makes the noodles cold faster, and it also rinses off the starch in the noodles so that the sauce can no longer stick to them. Oil also prevents the sauce from sticking to the pasta. So it’s most recommended to add the noodles straight to the hot sauce, untreated.

Don’t throw away the pasta water, use it in a variety of ways

Pasta water is a true all-rounder. It’s a shame if the water ends up in the sink after draining the pasta. More than ten kilos of pasta were consumed per capita in Germany in 2020, according to the Statista survey portal. The corona pandemic has accelerated the purchase of goods. And the pasta water used can be reused in many areas because the boiled pasta water contains a lot of starch and minerals.

  • Mixing sauces and pesto becomes creamier with pasta water. Since the pasta releases starch into the water, the liquid is suitable for thickening sauces. As long as the water is still hot, it should be processed further.
  • Adding pasta water to soups and stews. This means that vegetable broth or clear water is often no longer necessary. The starch in the water makes the soup thicker and richer. The water also acts as an aromatic ingredient in other meals.
  • Use for pizza and bread dough. Both doughs need water with salt. This is already contained in the pasta water and gives the pastry a special touch. In addition, note a simple guide to making roux yourself.
  • Use pasta water to soak beans, lentils, and peas. To do this, soak these products overnight. Then the pasta water creates a special taste.
  • Food steaming with the water. So then simply hold the vegetables over the steaming water with a sieve. You can also learn more about healthy steaming of food.
  • Water plants with cold pasta water. If you do not want to use pasta water for further cooking, you should let your plants benefit from it. They are happy about the minerals in the water.

Pasta prepared faster

If you need something quick, you can also use fresh pasta from the refrigerated section. You usually only need a few minutes for such noodles to have them ready to serve. Often even heating in the sauce is sufficient.

Alternatively, very thin spaghetti is recommended, which is also cooked in a very short time. These also have the advantage that – in contrast to fresh pasta – they usually do without eggs. This makes them suitable for both egg allergy sufferers and vegans.

Cook pasta differently

TV chef Stefan Marquard shows on YouTube how pasta can be cooked in a somewhat more unconventional way. He promises: that his method does not require any water to be drained off at the end of the cooking process. So don’t mess up the sieve, don’t scald your fingers on the hot steam… Sounds child’s play, give it a try!

You don’t need a garden to plant cress: the popular herb also thrives on the windowsill. We tell you what you have to consider.

Cress: Tasty, healthy and undemanding

Cress spices up soups, salads and sandwiches. Not only does it taste spicy, the cruciferous plant is also healthy. Cress contains vitamin C, folic acid and iron.

The undemanding herb grows almost everywhere because it only needs water and light. Cress likes it warm and bright, but you should avoid direct sunlight. Temperatures between 15 and 25 degrees Celsius are ideal. Therefore, you can grow her indoors all year round and outdoors between May and September. The first cress sprouts can be seen after four days, after eight to twelve days you can harvest cress. To do this, carefully cut off the herb with scissors.

We’ll tell you the best way to grow cress on your windowsill at home. There are two methods for this: either with soil or cotton wool.

Plant cress in soil

With the zero-waste method, you plant your cress in soil. Anything left over after harvesting can go to the compost.

Rinse the container in which you want to sow the watercress thoroughly. This can be a small flower pot, a glass or a flat bowl.
Add fine garden soil. You should fill the pot with soil so high that the cress gets enough light.
Thoroughly moisten the soil.
Sow the cress evenly and carefully press down the seeds.
During the germination period you have to make sure that the soil stays moist. Pour off excess water carefully, otherwise there is a risk of mold.

Plant cress on cotton

Since cress lives on the nutrient depot of the seed for the first few days, you can even sow it on cotton. The whole thing works with any cotton – even with the make-up remover. It is important that the cotton wool is made of organic cotton.

Put the cotton in a bowl of water until it’s soaked.
Then gently squeeze out the wet cotton wool.
Lay the cotton out generously in a container. As with the earth method, this can be a flower pot or a glass, but also eggshells.
Distribute the cress seeds generously. There should be no “seed heaps” forming.
The seeds remain uncovered because they would not get enough light through the thick layer of cotton wool.
You can keep the cotton wet with a water sprayer. Just don’t overdo it.

Nevertheless, it is worth considering whether you can simply plant your cress in soil. This way you avoid waste and save money.

Tip: Cress is a delicious, edible decoration for Easter.

We’ve collected ideas for homemade Christmas gifts that you can easily use to conjure up great surprises for your loved ones! From delicious treats to beautifully designed candles, there is something for everyone. So you can avoid unnecessary stress during the Christmas season with homemade Christmas presents.

Avoid the stress with homemade Christmas presents

Just before Christmas, the same problem keeps popping up: What do I give my family and friends as presents? But not only the gift idea is a problem. In most cases, the gift for Christmas should not be too expensive and still look very attractive and bring a lot of joy. So that the search for the ideal Christmas present does not turn out to be too difficult, we have collected stylish and individual gifts that are homemade and that can be produced cheaply in this article. This makes it easy to find the right DIY gift for family and friends. Consequently, you avoid stress at Christmas.

Delicious homemade Christmas ideas

At Christmas, we like to eat chocolate and sweets. This is why gifts that can be nibbled on by family and friends are particularly useful in this cold season. Depending on the taste of your loved one, you can use different basic ingredients. And if you want to do something for the health of the recipient, why not give away a DIY spice mix Golden Milk.

1) Gingerbread gifts

Gingerbread dough is ideal for making a loving gift. It’s easy to use. Even if you’re not a professional baker, you can handle it with ease. For example, at Christmas, you can poke or cut a large star out of gingerbread dough and bake it in the oven.

The baked gingerbread star is then beautifully decorated with colorful sugar writing and colored sprinkles. Dark or white (homemade) chocolate can also be used to design the star. After the decoration, the gingerbread star only has to be wrapped in clear foil and the Christmas present is ready.

The shape of the gingerbread can be designed individually – you can cut out the first letter of the recipient or make something out of the dough that reminds you of the recipient. There are no limits to creativity there. Also, read how to make the salt dough yourself.

2) Homemade cookies and cakes

Homemade cookies and cakes are also great Christmas gifts, which will bring a lot of joy to the person receiving the gift thanks to their delicious taste. You can also design these with colorful sugar writing, sprinkles, and chocolate. This is how the treats become your very own personal work of art.

Baking and decorating cookies is a lot of fun, especially with children. Making shortbread, vanilla crescents, and butter cookies and then watching the cookies bake in the oven with a children’s punch in your hand is a wonderful weekend activity in the run-up to Christmas.

And even if there are intolerances or special eating habits in your family, that’s not a problem. Grandma’s cookie recipes can also be easily veganized and are therefore equally suitable for people with lactose intolerance and vegans.

3) Christmas pralines and chocolate

Not only as a chocolate Santa Claus and hot chocolate, but the cocoa specialty also tastes particularly good during the dark season. And you can easily make pralines and chocolate yourself as a Christmas present and give them to your loved ones.

You can use praline recipes, for example, and give them a Christmassy touch: simply add marzipan, orange peel, or speculaas spice and the Christmassy flavor is there. Edible glitter in gold or silver for decoration is particularly pretty on the pralines.

It works similarly with chocolate. You can also easily make these yourself. Similar to the chocolates, you can then simply add the Christmas spices of your choice. Finally, you can add traditional Christmas cookie decorations like candy stars or little chocolate Santa Clauses to complete the Christmas look.

4) Design and give away candles

Candles are very popular design elements at Christmas because they spread a very nice warm glow in the home. You can easily design a candle yourself by taking a plain candle and a napkin with a (Christmas) print that you like. Then you carefully remove the top, printed napkin layer and place it on your candle. Now you blow-dry it until the top layer of wax has melted enough that it has accepted the pressure of the napkin. You already have a self-designed Christmas candle!

5) Make lanterns yourself as a Christmas present

Lanterns can also create a pleasant atmosphere. These can be easily made at home with very simple tools. For the handicrafts of lanterns, you need conventional disposable glasses and bright colors and paper. The glasses are simply painted with bright colors and covered with colored paper. The paper can also be covered with glitter and stars. A beautiful bow can also be attached to the glass. Finally, colorful candle sand is filled into the lantern and a pretty candle is placed in the decorated glass. As a result, you are giving away a cozy living light for your home.

6) Winter flowers and plants as a gift idea

Flowers and plants can also evoke beautiful Christmas associations. For green, mistletoe and poinsettia are ideal decorative elements at Christmas time. If you then make the green arrangements yourself, the recipient will be very happy. For example, the flower pot of the poinsettia can be individually designed using serviette technology. This works in a similar way to the candle. You carefully remove the top layer of the serviette and then use napkin glue to apply the motif to the flower pot. Then add a layer of glue to seal and the Christmas self-designed flower pot is ready!

7) Giving away a self-tied bouquet

If you want to bring a bouquet with you at Christmas time, just tie it yourself. By attaching fir green, mistletoe, and small balls or bells, it immediately looks Christmassy. In the end, the whole thing is topped with a ribbon bow with a wintry motif. This is how the classic souvenir becomes an individual gift idea. Dried flowers can also be given away and you can also make this Christmas present yourself.

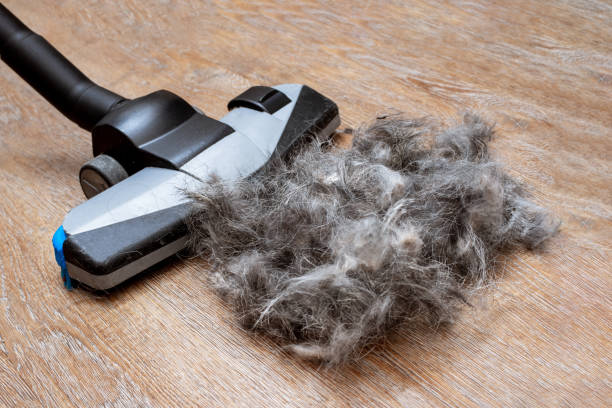
Most pet owners know the problem: dogs, cats, and other small animals like to spread their hair in the most inappropriate places when romping through the house. In order to be able to remove the hair of the animals, you need a powerful vacuum cleaner for animal hair. We have summarized the most important criteria.

Remove animal hair cleverly

Be it on the laminate, carpet, parquet, or upholstered furniture, animal hair is often difficult to remove. So it quickly looks very unclean in the living room. It is, therefore, necessary to remove animal hair regularly, not only for health reasons but also for hygienic reasons – and in the most gentle way possible, because after all the furniture should not be damaged. The right vacuum cleaner is already a very big help here. But what should you look out for when buying the right vacuum cleaner?

Tips for buying vacuum cleaners for pet hair

Some animals lose more hair than others. And in some cases, the animals suffer from hair loss, just like humans. Therefore, effective methods for removing pet hair are needed. One of them is using the right vacuum cleaner. In fact, nowadays there are many vacuum cleaners that make picking up hair a real breeze. However, you can rule out cheap models right from the start. Because these often only offer a minimum of power to remove the hair from the carpet.

1) Narrow attachments for cracks and corners

It is important that the vacuum cleaner for animal hair is equipped with a powerful nozzle attachment, which enables targeted handling on a wide variety of surfaces. Narrow and long attachments are particularly suitable for this, in order to get into cracks and corners of the furniture. And with the help of an upholstery nozzle, you can easily clean upholstery. Some manufacturers also supply several attachments or even special animal hair nozzles. Animal hair attachments are equipped with rotating, long brushes that rummage through the carpet. And this also works excellently with high-pile carpets!

2) pet hair vacuum cleaner with odor filter

In addition, it is advisable to buy a vacuum cleaner with an odor filter. Because dogs in particular tend to give off unpleasant odors when it rains. If this hair is then sucked in, the vacuum cleaner bag may smell. The odor filter is ideal for preventing odors in the vacuum cleaner. This neutralizes bacterial odors and ensures optimal hygiene in the household.

3) Strong suction required

Especially as the owner of a dog or a cat, you should immediately decide on a good vacuum cleaner for pet hair that really has a lot of suction power. Because performance alone is not enough. As a result, you should definitely pay attention to the technology and design of the device. A vacuum cleaner with only 1,400 watts can possibly suck even more powerfully than a device that has an output of 2,000 watts.

Have you announced a spontaneous visit for “afternoon coffee” again? While making coffee is not a big challenge, preparing a delicious cake is a bigger challenge. After all, the end result should not only taste good but also be visually convincing. Now use simple recipes to bake cakes quickly.

Bake a cake quickly

It can happen that spontaneous visitors announce themselves. Then you rarely have time for unusual and exotic recipes. In addition, you usually only have the basic ingredients for cakes in the household. But who doesn’t want to offer their guests more than a few biscuits? So that you and your visitors can eat delicious cake, we have put together simple and popular recipes and give tips on how to spice up your cake. Because grandma’s cakes are back in fashion. In addition, note our tips for an affordable fruit cake.

1) The classic: crumble cake from the tin

To bake a cake quickly, you can choose the classic crumble cake. Because this is quite easy to prepare and it tastes good to many. In addition, it can be easily produced in large quantities on sheet metal. To do this, proceed as follows (take the ingredients from the table):

  • Preheat the oven to 200°C and line a baking tray with baking paper.
  • Knead the ingredients for the crust together and roll out the part on the baking sheet.
  • Then pierce the ground with a fork. Pay attention to regular intervals.
  • Then spread the bottom with jam.
  • Knead the ingredients for the crumble together and sprinkle over the jam.
  • Then bake the crumble cake for about 15 minutes in the preheated oven.

2) Quickly prepare a sponge cake

You can also prepare a classic sponge cake for spontaneous visitors. Because this is very uncomplicated and can be spiced up as you wish. So you can certainly impress your guests. All you need are the ingredients below.

And this is how it works: To bake a cake quickly, first, stir the butter with the sugar and eggs until fluffy, and then add the baking soda, cinnamon, cocoa powder, and rum. Then mix everything with flour and yogurt. Then chop the chocolate into pieces and mix them in as well. Finally, put the dough in a loaf pan and bake the sponge cake at 200 °C for about 35 minutes. A quick cherry cake from the tin also tastes good.

Ingredients for a sponge cake

  • 125 grams of butter
  • two eggs
  • 1.5 cups of sugar
  • 1 tsp baking soda
  • a little cinnamon
  • 2 cups flour
  • 1 tbsp cocoa (powder)
  • 1 cup of yogurt
  • ½ bar of chocolate (preferably whole milk)
  • depending on your taste maybe a little rum

3) Bake a vegan cake quickly

The tastes and food preferences of your visitors can vary greatly. If your visitor eats vegan, you should consider that. But don’t panic! Because you can quickly and easily make a moist vegan chocolate cake with just a few ingredients. Use the following ingredients for this. All you have to do is mix them together. Then put the dough in a greased form and let the whole thing bake for about 35 – 40 minutes at 180 top and bottom heat. Then you can decorate it with a chocolate glaze and fresh fruit. Or how about classic powdered sugar?

Ingredients for vegan chocolate cake

  • 200 grams of flour
  • 35 g baking cocoa
  • 180 grams of sugar
  • 1 tsp vanilla extract
  • half a pack of baking powder
  • 240ml water
  • 100 ml sunflower oil

Incidentally, the trend toward “healthy snacking” is unbroken. Accordingly, it can be worthwhile for many simple recipes to bake completely without eggs, sugar, or flour. Because the market now offers many replacement items. In addition, also note tips for grandma’s classic plum apple cake.

Cleaning your white shoes properly and gently is quite difficult at first glance. People often hesitate when buying white leather shoes with the ulterior motive that they will get dirty. The following tips and home remedies are suitable for regular care, but also for short-term cleaning before a meeting or an event.

Home remedies that work wonders

These home remedies are great for getting rid of smudges and streaks on white shoes. Several applications improve the result. At best, prepare yourself with a pad. Before this thorough cleaning, you can also wipe your white shoes with a damp cloth if necessary to remove the coarse dirt.

  • Nail polish remover: A little nail polish remover on a cloth is enough to clean the white shoes.
  • Baking soda and dish soap: Dissolve in a cup of water and then apply with a cloth.

For long-term care

For long-term care of your white shoes, we recommend shoe polish. You can also use this after cleaning the white shoes to make the shoes shine even more. We recommend the following premium shoe polish for this. Simply apply evenly and leave on for a few minutes. You can repeat this process as needed. After cleaning, you can still treat strong odors from your shoes.

If the cleaning is not enough or the shoes have been worn very often, you can simply buy new shoes. In addition to your local shops, you can also find cheap shoes in second-hand shops or in online shops such as schuhe.de.

Valuable tips for making the perfect milk froth yourself for delicious milk coffee or cappuccino. The choice of the right milk and temperature is crucial, while the methods for frothing milk are versatile.

Tips for making milk foam yourself

Anyone who likes to drink milk coffee or cappuccino knows how important good milk froth is. Because the perfect milk froth rounds off your favorite drink. And really good coffee always tastes best when prepared the Italian way, using frothed milk instead of regular milk. However, good and solid foam can only be achieved if you follow a few rules. Therefore, we have collected the most important tricks for preparing frothed milk. These help you to enjoy a creamy coffee even without a practical fully automatic coffee machine or espresso machine.

Which milk to use for frothing milk?

To froth the milk for a coffee specialty such as cappuccino, latte macchiato, or milk coffee, you should definitely use milk with a fat content of at least 3.5% – no skimmed milk. Protein content of 3.1 – 3.5% is also ideal for making milk froth. Fresh milk from the farmer is best, as it contains even more fat.

Methods for making milk foam

After you have chosen the right milk with your favorite flavor, you can start frothing the milk. Now you have to heat the milk so that the froth stays firm and stable. You will also need various tools, depending on the type of foam preparation you choose. We have an overview of the three most common ways to make milk foam yourself:

Note the temperature of the milk

The milk for milk froth should never be heated above 80 degrees. About 70 degrees is ideal. If the milk and milk froth gets too hot, the milk molecules will be destroyed and the firmness of the milk froth will be reduced dramatically.

1) Use an electric milk frother

An electric milk frother is easy to use, inexpensive and effective. To do this, heat the milk in a saucepan or in the microwave. Then insert the whisk at the end of the frother into the milk and froth it up. This works well with smaller amounts of milk. The SEVERIN milk frother stick is battery-operated and easy to clean, making it a practical help in the kitchen.

2) Make milk froth yourself with a manual frother

You can also froth your milk manually. Use a manual frother for this. Because it’s easy to make milk foam yourself. Consequently, heat milk and put it in the manual device. Then take the lid on which a kind of sieve is attached. Now you can froth the milk with up and down movements and create a perfect milk coffee or cappuccino.

3) Froth milk with induction frother

Another way to conveniently produce delicious milk froth is to use an induction milk frother. This has the advantage that you can heat the milk directly in the vessel. The milk is then frothed automatically.
Make milk froth in a disposable glass

If you don’t have one of these devices at home, you can use a disposable glass. To do this, put the milk in the glass, close it tightly and shake well. Then put the jar in the microwave for about 30 to 45 seconds. The milk should now be a little frothy. Not perfect, but still.

Frequently asked questions and answers

  • What must be considered when frothing milk?
    The fat content, which should be at least 3.5%, is important in the preparation. And the protein content should ideally be between 3.1 and 3.5%. It is also important to heat the milk a little beforehand so that it remains firm and stable.
  • Which milk is suitable for making milk froth?
    Milk froth works best with (lactose-free) cow’s milk, oat milk, or soy milk. You can also use goat milk or hazelnut milk. Unfortunately, it doesn’t work with coconut, almond, or rice milk.
  • How can you make milk foam yourself?
    To prepare the frothed milk, use an electric or manual milk frother. In addition, an induction frother is very helpful for making milk froth yourself.