Tag

Freeze

Browsing

If you have a surplus harvest or simply want to prepare cauliflower out of season, you can freeze it and preserve it that way. We’ll show you how.

Cauliflower is in season in Germany from June to October. Then you can harvest the vegetables in your garden or buy them at the market. But you shouldn’t freeze it raw – otherwise it will probably become soft after thawing. We will show you how to proceed as gently as possible and how to preserve the important nutrients in the vegetables.

Before freezing: chop the cauliflower

  • Wash the cauliflower and remove any leaves.
  • Cut the cauliflower into pieces. Depending on the intended use, you can decide how big the pieces should be. We recommend cutting the cauliflower into bite-sized pieces.

Freezing cauliflower: this is how it works

To preserve the nutrients in cauliflower, you need to blanch it before freezing.
Bring water to a boil in a saucepan.
Meanwhile, have a bowl of ice water ready.
When the water boils, add a squeeze of lemon juice. This prevents the cauliflower from turning brown.
Place the cauliflower in the boiling water for about three minutes.
Then take the cauliflower out of the hot water with a slotted spoon and place it in the ice water.
Remove the cauliflower from the ice water and gently pat dry with a towel.


Place the cauliflower in freezer-safe containers and place them in the fridge. It’s important to portion the cauliflower or it will freeze together. This makes it difficult to separate and portion.
The cauliflower will keep for several months. When you prepare the cauliflower, add it to the cooking water from frozen. If you thaw it beforehand, it will quickly become mushy.

Freezing chickpeas is a great way to always have the healthy legumes ready to cook. We’ll show you what to look out for when freezing chickpeas and how to use them.

Freezing chickpeas preserves the legumes even when cooked. Recipes that use chickpeas usually call for cooked chickpeas. However, the cooking time of legumes is very long, so they are not suitable for a quick meal uncooked.

Chickpeas are healthy because they have valuable vegetable protein, proteins and other healthy ingredients. Legumes are used in a variety of ways in the kitchen. If you freeze cooked chickpeas, you’ll always have them ready to cook.

When buying chickpeas, pay attention to organic quality. This protects the environment, since organically certified seals such as Demeter or Bioland do not use synthetic chemical pesticides.

By the way: in your own garden is very easy. You can grow your own chickpeas in the garden to avoid having to buy them at the store. This is how to plant and care for chickpeas.

Freeze chickpeas: this is how it works

Freezing chickpeas is quick and easy. Only the cooked chickpeas are suitable for freezing. Because in the dried state, properly packaged, the legumes can be kept for many months.

If you want to freeze chickpeas, then proceed as follows:

Cook the chickpeas according to package instructions. In another article, you’ll learn everything you need to know about cooking or soaking chickpeas.
Catch the chickpea water, because you can use it in many ways. In another post we have tips on this: Don’t throw away chickpea water! 5 ideas how to use it
Let the cooked chickpeas cool.
Place the cooked chickpeas in a freezeproof, sealable container. Make sure the containers are reusable. This is how you avoid rubbish. Also read: Freezing food without plastic
Place the container of chickpeas in your freezer. Important: If you are freezing in glass, do not fill the glass to the top, but leave some space so that the chickpeas can expand during freezing. Also, only close the lid after a few hours in the freezer, otherwise the jar may burst if the contents expand too much.
Tip: Freeze the chickpeas in several small containers. So you always have the right amount at hand for a meal.

Recipe ideas for chickpeas

Freezing cooked chickpeas will keep the legumes for a few months. Get them out of the freezer when you need them and use them in delicious dishes. You have two options for this:

Thaw the chickpeas before cooking:

Place them in a bowl in the fridge overnight to use the next day, or
let them thaw at room temperature for a few hours.
If you want it a little faster, put the frozen chickpeas in a small bowl and thaw them in a water bath over medium heat.
With the thawed chickpeas, you can cook particularly well recipes in which the chickpeas are pureed or should be used fresh, i.e. not further cooked and baked. For example, try the recipe for a classic hummus or a fresh chickpea salad.

Use frozen chickpeas:

Add the frozen chickpeas to a soup or warm dish and cook with the remaining ingredients until soft again.

Recipes that use cooked chickpeas also work well to use your frozen chickpeas. For example, they taste great in chickpea curry or chickpea soup.

Tip: Fry the frozen chickpeas in a little oil in a pan. Once they have softened, season them with herbs and spices of your choice.

Baby porridge is great to freeze in advance. This saves you a lot of time and effort. We tell you what you should consider when freezing.

Freeze baby food: Here’s how

The homemade baby food should be frozen as fresh as possible, but completely cooled. You can speed up the cooling process by placing the porridge in a cold water bath.
Boil the freezer containers before you fill them with the baby food.
All containers that are expressly declared as freezer-safe are suitable for freezing. This could be Emsa glass food storage containers, for example, available from **memolife – they are certified as suitable for baby food. Or frozen cans made of bioplastics, available at **Avocadostore.
Freeze the porridge in portions that match your baby’s typical food intake. That way you won’t defrost too much porridge at once later. If your baby eats very little porridge at first, you can also freeze the baby porridge in ice cube trays and then store the frozen cubes in a freezer box.
Freeze leftovers from the jar

If you fed jars of food from the supermarket and have some leftovers, you can also freeze the rest.
It is important that the porridge in the glass has not come into contact with a used spoon. Scoop out a portion of the porridge from the jar with a clean spoon. Pour the rest into a freezer-safe container and freeze.

Tips and hints for freezing baby food

Always work with clean utensils.
Do not fill the freezer containers completely, especially if they are made of glass. The contents expand when it is cold.
Label the containers so you can keep track of the contents and shelf life. Homemade porridge can be kept for up to two months at -18 degrees Celsius.
Be sure to seal the containers tightly before freezing them.
Porridges with avocado, melon, banana and potatoes do not freeze well. After defrosting, the consistency and/or the taste change. You should prepare these foods fresh.
Even cooked spinach should not be refrozen and thawed if it is baby food. When warming up, bacteria could convert the nitrate contained in it into nitrite, to which babies could be sensitive.
You should only add other ingredients such as oil and (mild) spices after defrosting.

Defrost frozen baby food

Only thaw the pulp just before you are about to give it. It should not be left in the fridge overnight to thaw as bacteria can grow and multiply there.
Instead, thaw it in a hot water bath. Make sure it is evenly warm all over before giving it to your baby.
Once thawed, you should not refreeze it.

Why freezing baby food is worthwhile

Homemade baby porridge only contains ingredients that you have selected and are familiar with. If you cook in advance and freeze the porridge, you can always offer your baby baby porridge that you have cooked yourself – even if time is short. If necessary, all you have to do is gently heat the frozen portion.

By freezing, you make the baby food durable and safe without artificial preservatives, because bacteria don’t stand a chance in the cold. In addition, the good nutrients are retained. What’s more, you don’t have to throw away good food. You can freeze the porridge in suitable portion sizes and don’t have to dispose of valuable food (leftovers).

To preserve beans, you need to freeze them. However, important steps must be taken beforehand in order to achieve an optimal result. In this article, you will find out what you need to consider when preparing for freezing.

Beans can be stored in the freezer for up to ten months. You can freeze them cooked or freeze them raw. To ensure that nothing goes wrong when freezing the beans, it is advisable to observe the following points:

Freeze green beans

With our step-by-step instructions, nothing can go wrong when freezing. So you can enjoy bean dishes such as meat sausage and bean pot all year round. In addition, you can freeze not only the green beans but also other garden beans, such as wax beans or green beans in this way. You can then use the frozen supplies to prepare delicious bean dishes at any time.

Wash and prepare beans

Follow this step-by-step guide to preparing the beans.

  • You should wash the beans before you freeze them to remove dirt.
  • Now cut off the ends of the beans with kitchen scissors – about half a centimeter.
  • To be able to blanch the beans right away, you need a pot with boiling water and salt.
  • Set a bowl of cold water with ice cubes next to the saucepan to chill the beans.

Blanch and cool the beans

Blanching means that you first cook the beans very briefly in boiling water and then chill them in ice-cold water. Beans, kohlrabi, or carrots are blanched for 3-5 minutes, and cabbage is blanched a little longer. Place the beans in the pot of boiling water so that all of the beans are completely covered with water. Then let the beans cook for only about 3 to 5 minutes and then drain them. Then, by immediately adding the beans to the bowl of ice-cold water, you’ll preserve their vitamins and colors. Also, note our tips for freezing asparagus.

Drying the beans is very important. It is best to dry the beans as much as possible. This is because if there is still too much liquid, they will freeze together, making it more difficult to remove them individually from the freezer bag later. Tea towels are best for drying the beans. Dab the beans and wrap them in the tea towel. If you have a lot of time, it is best to let the beans dry and spread them out on the tea towel.

Freeze raw beans

To freeze the beans, it is best to place them in a reusable zip lock bag or in a plastic container. Now put them in the freezer. The beans can then be stored in the freezer for eight to ten months.

Freeze cooked beans

If you haven’t just blanched your beans, but already cooked them, you can also freeze them. Place the finished bean dish in a freezer container and follow our food freezing tips and guide. Then you can conjure up your bean dish on the table again later if necessary.

More on freezing

Freezing allows you to make food last longer. Freezing leftover fresh bread or rolls is a great way to keep food from going to waste. If you want to preserve foods such as meat, mushrooms, zucchini, and kitchen herbs such as wild garlic, you can simply freeze them raw. However, other vegetables, such as cauliflower, peas, spinach, beans, carrots, and chanterelles, must be blanched beforehand. Check out our tips on freezing mushrooms for more details. You can also find instructions on how to freeze meat in our articles.

Chives are one of the most popular kitchen herbs. Here you can find out what you should consider if you want to freeze chives. With our tips, the leeks stay fresh and tasty.

Freezing chives: you should know that

Fresh chives refine many dishes with their slightly spicy note. However, the popular kitchen herb is only in season from April to October. The rest of the year, chives come from greenhouses, which use a lot of energy. In addition, the leek plant usually has long transport routes behind it in the colder months.

To be able to use chives with a clear conscience outside of the season, you can freeze them in the summer. In this way, it retains its characteristic taste and nutrients. Important: Harvest the chives before they bloom. After flowering, the culms tend to be bitter and less aromatic. In this article you will learn how you can easily grow herbs yourself. Alternatively, you can buy organic chives at the weekly market or in the organic shop and freeze them.

How to prepare for freezing:
Wash the chives.
Dry it thoroughly with a tea towel. This is important, otherwise it will clump together when frozen and you won’t be able to use smaller portions.
Cut the chives into small rings. You shouldn’t freeze whole straws, as they may stick together. Use sharp scissors to chop. If you chop the chives with a knife, the stalks will crush and lose their flavor.

Freeze chives without waste: Here’s how

You can use a plastic container or an old plastic bag as a freezer container for freezing chives if you have one at home. Important: In order to avoid the production of new plastic, you should not buy classic freezer bags. In another article you will find out what else you can do to reduce your plastic waste. But plastic cans or bags that you have already used can also be contaminated with pollutants.

It is therefore best if you reuse a disposable screw-top jar for freezing. Glasses that are as round and straight as possible with a wide opening are suitable for this. You can simply fill the chopped chives into the jar and store it screwed on in the freezer. Glass lunch boxes work just as well.

You should consider this if you want to use the frozen chives:
Make sure that you only interrupt the cold chain for a very short time. If the chives are thawing, they will become mushy and clumpy if you refreeze them.
Only use the chives when they are frozen: if the chives are thawed beforehand, the cell walls will burst and they will lose their aroma.

Ripe avocados often spoil fairly quickly, but you can freeze them to give them a longer shelf life. We’ll show you how to properly freeze whole and pureed avocados.

Freeze avocados: use leftovers

Your avocado was just perfectly ripe and the next moment it’s already brown? To prevent this, you can freeze ripe avocados and use them later. This is how you actively counteract food waste and can use the leftovers in delicious avocado recipes.

Even if you spontaneously feel like having avocados, it is helpful to have a reserve in the freezer. This way, you don’t have to buy new avocados from the supermarket that may still be unripe and inedible.

You should only consume avocados in moderation anyway, since the long and energy-consuming transport route in air-conditioned ships and the high water consumption have a very negative effect on our environment. Therefore, when buying and consuming avocados, the following motto applies: only buy a little/rarely and always use everything!

The right time to freeze

Before you freeze your avocado, you want to make sure it’s fully ripe. To test the degree of ripeness, you can apply light pressure to the fruit with your fingers. If the avocado yields, it’s ripe.

If the avocado is not yet ripe, it is best to wrap it in newspaper and store it at room temperature. If you put the avocado in a paper bag with an apple, the fruit will ripen even faster. Apples contain the ripening gas ethylene, which causes other fruits to ripen faster. After about one to three days, an avocado should be ripe, now you can freeze it.

Freeze halved avocados

First, halve the avocado with a sharp knife.
Now take a tablespoon and use it to carefully remove the core. Here you can find out what else you can use the avocado seed for.
Now drizzle some lemon juice on the two avocado halves. This will prevent the flesh from turning brown.
Now wrap the halves in beeswax towels and put them in the freezer. You can also freeze them in a screw-top jar.
It’s best to label the bee growth or jar with a water-soluble pen to help you remember the date you froze the avocado.
To defrost the avocado, you can now simply place it on a plate at room temperature for an hour. And you’re ready to enjoy a ripe avocado!
Good to know: Avocados can be stored in the freezer for up to eight months. Don’t be surprised if freezing changes the texture of the avocado. This is completely normal and does not change the taste of the fruit.

Freeze avocado puree

If you puree the avocado before freezing, you can save yourself a step if you want to use it later for guacamole or a green smoothie.
First, cut the avocado in half again and remove the stone.
Now scoop out the fruit with a spoon and place the pulp in a blender. Add some lemon juice to keep the green color. If you don’t have a blender, you can also mash the avocado with a fork.
Mash the avocado until you like the consistency.
Now pour the avocado puree into a freezer container, e.g. a screw-top jar. Don’t forget to label it with the current date!
Off to the freezer!
Place the puree in the refrigerator at least 12 hours before you plan to use it. This allows the avocado to thaw slowly and gently.
Tip: For small portions that are quick to hand, simply fill the pureed avocado into an ice cube mold and freeze it.

Freezing cakes is very easy and practical if one or two pieces are left over. With our tips, cake tastes even better after freezing.

Freezing cakes: You should consider this beforehand

Baked too much or in advance: Freezing cakes is the best solution for this and is also suitable for preventing food waste. Before you put the cake in the freezer, you should consider the following:

Wait for the cake to cool. At the same time, you shouldn’t leave it there for too long. The fresher you freeze it, the more flavor it will retain.
Cut the cake into pieces so you can thaw them individually later and don’t have to take everything out of the freezer.
Cakes and tarts that are decorated with cream should be frozen first before you wrap them. This will prevent the deco from being crushed. To freeze, you can place the cake on a plate in the freezer for a few hours.
Not all cakes are suitable for freezing:
In the case of cakes with icing or gelatine, this begins to crumble after defrosting.
The vegan alternative agar agar is also not suitable for freezing for the same reason.
Also, don’t freeze custard, jam, or buttercream pie fillings, as they will lose their flavor or become too soggy and watery.
However, it is not a problem to freeze choux pastry without filling.
For yeast dough, freeze before you let it rise.

Freezing cakes: this is how it works

No matter what you use to freeze the cakes, it is important that you pack them as airtight as possible. This will prevent freezer burn and preserve the flavor for longer.

Place individual pieces in a freezer bag. By the way, you can use the freezer bags several times if you rinse them well. A plastic-free alternative is a cotton bag in which you can freeze dry sponge cakes, for example. Wrap the cake well in the bag.
You can also freeze cakes wrapped in wax paper. However, the cake only stays fresh for a few weeks.
Plastic food storage boxes are the right size if you want to freeze multiple kitchen items together. The same applies to lunch boxes made of stainless steel.
You can even freeze leftover cake in glass casserole dishes and casseroles. So that the glass does not crack in the freezer, you should only fill the container 3/4 full with cake and only close the lid when the cake is frozen. To keep the individual pieces from sticking together, you can separate them with paper from bakery bags or wax paper.
While they’re often recommended, it’s best not to use cling film or aluminum foil to freeze cakes. Because these disposable products end up in the garbage after a single use.

Freezing cakes: defrosting

If you want to eat the frozen cake, you take it out of the packaging or the container in which you frozen it. Let it thaw at room temperature for about three to five hours. Frozen cake will keep in the freezer for about four months. After that, it loses its flavor and firmness.

You can freeze milk if you don’t need it in the next few days or if you have a lot in stock.

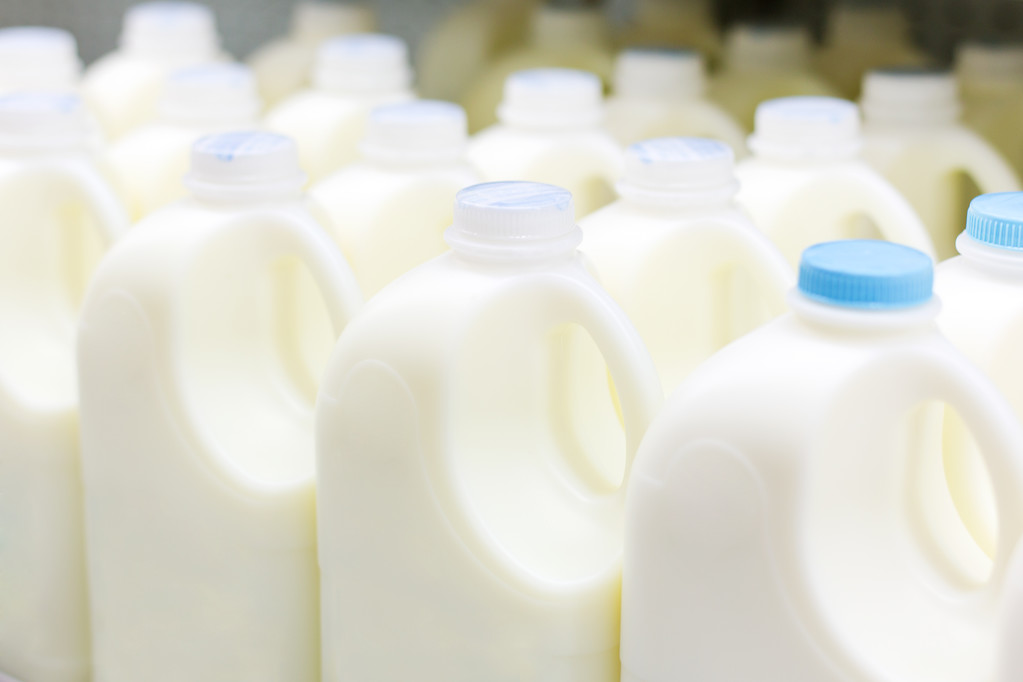
Freezing milk: when does it make sense?

The popular UHT milk is ultra-high temperature, homogenized milk. Since it can be stored unopened for several months without refrigeration, it is no longer common to freeze milk. That wasn’t always the case: before UHT milk was introduced, it was more common to freeze milk to preserve it longer.

With UHT milk, this only makes sense if you have already opened the pack and cannot use the rest of the milk within a few days – for example if you rarely drink milk or if you go on vacation.
The situation is different with fresh milk (“traditionally produced”), which has only been heated to 72 to 75 degrees Celsius: This also belongs in the refrigerator unopened and can only be kept there for seven to ten days.
The so-called ESL milk (“fresh milk, longer lasting”) was heated to 127° C and can be kept unopened for three weeks. So if you have more fresh milk in stock than you need, you can freeze it and make it last longer.

Finally, there is raw milk, which is consumed less these days: it is unheated, untreated milk. This is perishable and should be used up as soon as possible. If you keep cows, goats or sheep yourself, you can freeze raw milk to preserve it without pasteurizing it first.

Disadvantages of frozen milk

Depending on which milk you use, the consistency will change as a result of the freezing process:
When freezing, the fats separate from the protein molecules in the liquid. The result: the fat settles at the bottom of the container, while the liquid above is very watery. In principle, the following applies: the higher the fat content of the milk, the more it settles.
Since all milk (except raw milk) is homogenized, this effect is not as strong: During the homogenization, the milk fat droplets are significantly broken up, which is why they mix better with the liquid.
You can counteract this fat-protein separation by shaking the milk vigorously before freezing. After you have thawed them, you should definitely shake them vigorously again.
Also, milk loses some of its flavor when it freezes. Therefore, frozen milk that has been thawed again is better suited for baking and cooking than for drinking on its own or with muesli.

Freezing milk: step-by-step instructions

If you want to freeze milk, you should consider a few points. This is the best way to go about it:
Choose a suitable container in which you want to freeze the milk: You can simply use the milk carton for this. Of course you can also use a plastic bottle. However, (thick-walled) glass vessels are more sustainable. The danger here: Since the milk expands when it freezes, the bottle can burst under pressure.
For this reason, do not fill the vessel to the brim. This is particularly important for solid containers made of glass or hard plastic. Instead, leave at least 1/5 of the container free as a precaution. Then you can also use (thick-walled) glass containers without any problems. Label the container with the current date. This way you can later see when you froze the milk and how long it can be kept. Info: Milk keeps for about three months in the freezer.
Place the container in the freezer. Glass jars in particular should first be placed in the freezer with the lid open and only closed when the milk is completely frozen. This will ensure that the jar does not burst.
Shelf life: Frozen milk can be kept for up to three months. It should also remain edible beyond that, but it can lose its taste. After thawing, you should use the milk in a maximum of five days. If it was already open for a few days before freezing, this time is reduced accordingly.

Milk ice cubes: Alternatively, you can also freeze the milk in portions as ice cubes. Simply fill in a suitable form. You can then thaw the frozen milk again as needed – for smoothies, for example. In addition, ice cubes also thaw faster than a large block.

Thaw and use frozen milk

You should never thaw frozen milk under heat – not with hot water or even in the microwave. Otherwise, the components of the milk cannot combine properly again.

Instead, you can thaw milk in two different ways:
In the fridge: The milk thaws slowly, which can take more than a day depending on the quantity.
In cold water: Put the container with the frozen milk in a cold (!) water bath. Then thawing takes from a few hours to half a day.
Important: After thawing, you should definitely shake the milk thoroughly so that the individual components combine well.

You can then use the milk as usual. However, it is only suitable for drinking to a limited extent, but it is suitable for baking and cooking. It is also advisable to add the milk, which is still very cold or slightly frozen, to smoothies – a refreshment, especially in summer.

Freezing leftover squash is quick and easy. Just follow this step-by-step guide. We also reveal what you should consider when freezing pumpkin.

Before freezing: cut the pumpkin into pieces

Before you freeze the squash, you should break it up into small pieces. This way you can defrost it later in portions. All you need is a sharp knife and a cutting board.

To prepare the squash for freezing:
Halve the squash lengthwise.
Use a spoon to scoop out the soft insides and seeds.
Depending on the variety, you may need to remove the skin.
Halve the halves again lengthwise and cut into small pieces.

Freeze the pumpkin so it doesn’t stick together

If you freeze the squash straight away, the pieces may stick together afterwards. You can prevent this with the following trick:
Spread the pumpkin pieces on a baking sheet.
Place the tray in the freezer for a few hours.
You can then transfer the pre-frozen pumpkin pieces into freezer-safe containers.
Put the containers in the freezer.
It’s a good idea not to cook the squash before freezing, otherwise it will become mushy. Alternatively, you can boil the pumpkin, puree it and freeze it in the jar.

Depending on the variety, the pumpkin changes its consistency in the freezer. If you need extra crunchy pumpkin for a recipe, it’s better to use a fresh one. Since pumpkin can be stored well, you can buy it regionally until the end of winter.

Freeze squash as a soup

If you freeze the squash as a soup, the consistency does not change and you have a quick meal for cold winter evenings. It is best not to use any spices – you can add them to the warmed up soup if you like.

Tip: If you freeze the pumpkin soup in portions in glasses, you also have a healthy and quick lunch for work. Just take out the glass the night before and warm it up on your lunch break.

It is best to use up the entire pumpkin

Pumpkin is versatile: You can not only prepare it as a soup, but also as a smoothie, spread or any other pumpkin recipe. You don’t have to throw away the skin – depending on the type of pumpkin, you can eat it too. The cores don’t have to go in the trash either. You can roast the pumpkin seeds – this turns them into a delicious snack.