Tag

fresh

Browsing

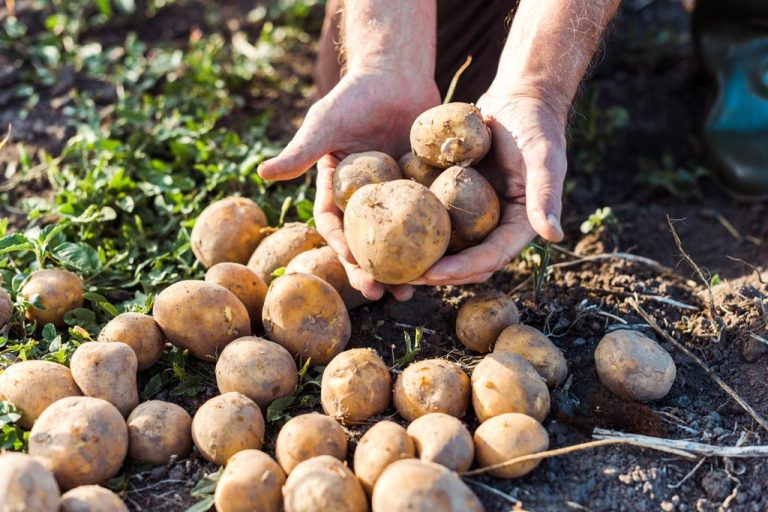
Storing potatoes properly is not difficult at all. The most important thing is that you protect them from light. Otherwise they will quickly start to germinate or turn green. Here you can find out what else you should pay attention to.

Store potatoes correctly: protect from heat and light

Potatoes begin to germinate quickly in warmth and light. The toxic germs cannot be eaten and they deprive the potato of important nutrients. As a result, it shrinks and loses flavor and firmness. Sprouted potatoes can have high concentrations of toxic glycoalkaloids. This substance is also contained in green potatoes and makes them intolerable. You can prevent or at least delay the potatoes from germinating and turning green by storing them correctly.

In addition, potatoes can easily go moldy – even one affected tuber can spread the rot to many other potatoes and possibly make the entire harvest unusable.

With a little experience, you can even store potatoes for many months until the next season. This is practical because you can buy local potatoes in advance without long transport routes. The late potatoes are ripe in September and October, the early potatoes as early as June.

7 tips for storing potatoes properly

Choose a dark place for storage: for example your pantry, the basement or a shed in the garden. If you don’t have all of this available, you can also store the potatoes in a linen bag in the kitchen to protect them from light.
Pay attention to low temperatures, because the potatoes start to sprout from around 10°C. At the same time, it must not get colder than 4° C, otherwise the starch in the tubers will turn into sugar, which will affect the taste. Ideal for storing potatoes is 4°C to 8°C.
Protect the potatoes from frost (e.g. when storing them in the garden or in cold cellars) and never put them in the freezer.
Store them in a dry and airy place so the potatoes don’t get moldy or rot. A linen sack or a wooden box in which the potatoes are loosely stacked is suitable for storage. Plastic bags are unsuitable for storing potatoes. If you have enough space in the garden, you can also build a potato tower.
Check your potatoes from time to time: If small sprouts have formed, the affected tubers must be eaten as soon as possible. Rotten potatoes must be removed immediately and disposed of with organic waste. Regular rearranging also ensures adequate ventilation.
Store potatoes separately from fruit, especially apples. The ripening gas ethylene that many fruits give off will otherwise quickly spoil the potatoes.
Only undamaged potatoes with an intact skin and without bruises or sprouting are suitable for long-term storage over several months. Slightly damaged potatoes should be eaten quickly. If the potatoes are stored well distributed on slatted frames, they will keep for months.

A fresh scent in the wardrobe is important so that the clothes don’t start to smell unpleasant. But very few can motivate themselves to clean the closet. We show you how you can clean your closet from the inside and the musty smell in the closet disappears.

When the freshly washed laundry goes into the closet, it shouldn’t take on a bad smell. Since it should smell just as good as we hung it in, it needs a fresh scent in the closet. As a result, you can use simple tricks to ensure long-lasting freshness.

Why does my closet smell musty?

Musty smell in the closet? The reason for the unpleasant smell in the closet is usually poor or poor air circulation. Moisture in the closet also makes clothes smell bad. This is very often the case when the closet is old. But cupboards that have been in the basement or in damp rooms for a long time also get a musty smell. But what can you do about it? Well, first of all, you should get the closet out of its humid environment. In addition, also note useful tips for reducing humidity in rooms. You can also clean your closet from the inside and use other tricks for a fresh scent.

Home remedies for a fresh wardrobe scent

Various home remedies will help you to stop your closet and the clothes in it smelling musty. Because with these you can neutralize bad smells and spread a good scent in the closet. Consequently, we have collected the best tips for a fresh scent:

1) Clean wardrobe against the musty smell

If your closet and the clothes in it smell bad, you should first clean your closet from the inside. You only need simple household remedies, such as vinegar, or use baking soda to remove bad smells from the closet. So wipe out your closet with vinegar. The vinegar absorbs the bad smell and has a disinfecting effect. Then let the closet dry and air out. Then you can sprinkle some vanilla powder in the cupboard to cover the remaining vinegar smell.

2) Fresh scent in the wardrobe with scented bags

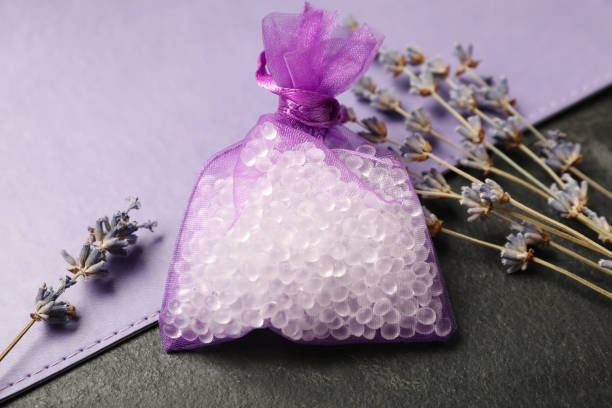
You can also put the classic scented bags with soothing lavender in your closet. These are available everywhere and spread a great scent. And at the same time, you can use it to keep clothes moths away from your clothes. You can also easily make the lavender bags yourself. For this, you have to sew a bag out of a piece of fabric and fill it with fresh lavender. Or take a piece of fabric and put some lavender in the middle. Then gather the ends and tie them up.

3) Soap for pleasant fragrance

Likewise, there are small scented soap bars in drugstores. This quickly and effectively removes musty smells in the closet. And the nice thing is that you can buy them in many different varieties. There is something for every taste. In addition, the small pieces of soap last a long time. Also, read how to make soap yourself.

4) Eliminate unpleasant odor with fragrance oil

Another tip against a musty smell in the closet is the scented oil. This is also available in many different fragrances. So buy a scented oil of your choice and a few wooden balls from the hardware store. Then put a few drops of the oil on the wooden balls and put them in your cupboard. Afterward, it smells good in your closet for a long time. Once the scent wears off, you can drizzle again. Also, note the useful tips for removing bad smells from the apartment.

5) Perfume and cotton wool for a great closet scent

To keep your clothes smelling nice, spray a few cotton balls with perfume every month. Then put them in your closet. So your closet smells like your very own favorite scent. And the advantage of this method is that you have both at hand at home. Also, read our article on making your own perfume.

If you want to store eggplants, you should consider a few things. In this article you will find out how to recognize fresh aubergines and at what temperature you should store them.

Although aubergines are warm-loving vegetables, they can only be stored for a limited time at room temperature. We explain how to store aubergines correctly and what you should pay attention to.

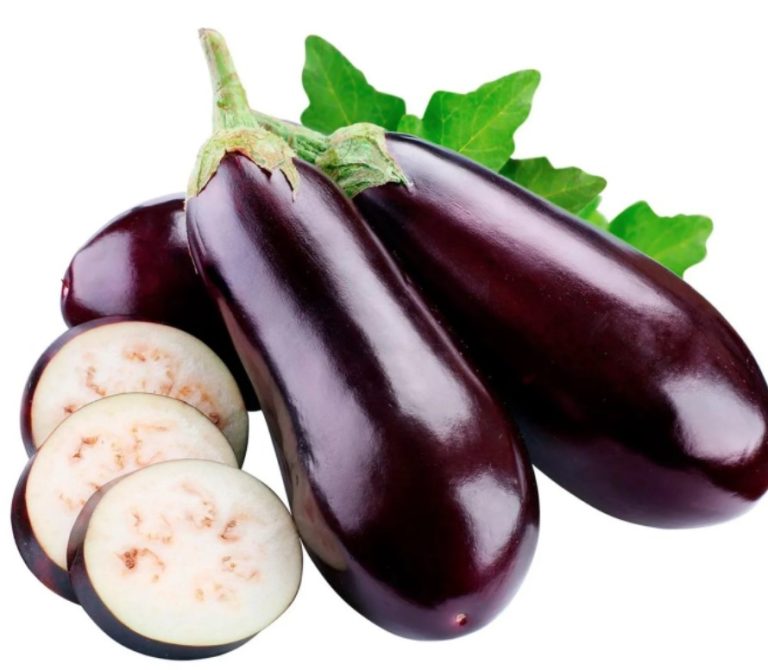
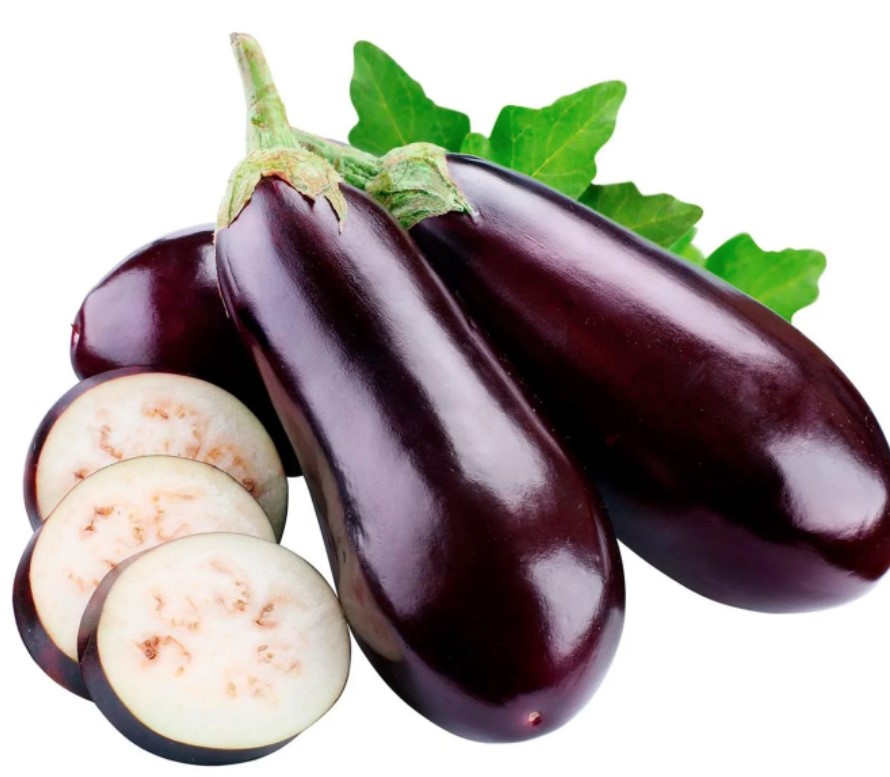
Aubergines belong to the nightshade family and originally come from India. Also known as eggplant, this vegetable is very common in Mediterranean cuisine. Aubergines come in many different colors and shapes, with the dark purple version being the most well-known in this country.

If possible, use organic aubergines for cooking: They are free of chemical-synthetic pesticides and come from more sustainable agriculture. If you get the aubergines from regional cultivation, you also avoid long, energy-intensive transport routes.

Aubergines are in season in Germany between August and October. You can get unpackaged organic aubergines at farmers’ markets, directly from farmers or in organic boxes.

Storing aubergines: You should pay attention to this

When you buy eggplants, you should pay attention to the quality and degree of ripeness. A ripe eggplant has a shiny skin and is firm. If you press gently, it gives slightly. If the aubergine doesn’t yield to pressure, it’s unripe and tasteless. On the other hand, if it is too soft, it will soon spoil. Aubergines taste best when you prepare them fresh. However, you should not eat eggplants raw.

How to store aubergines correctly:

Store eggplants in a dark, cool place in the pantry or basement. Temperatures between ten and 13 degrees Celsius are well suited. Properly stored aubergines stay fresh for around three to four days.
The fridge is actually too cold for aubergines. If you don’t have a pantry or basement, you can still store the eggplants in the crisper of the refrigerator, which is better than storing them at room temperature. It is best to wrap the eggplants in paper to absorb excess moisture. Alternatively, you can place them loosely in the crisper in your fridge. Aubergines stored in the refrigerator quickly become stained and soft. You should process them within a day or two.
Eggplants stored at room temperature are best prepared on the same day or the next day at the latest.
Don’t store eggplants near apples or tomatoes. The escaping ethylene allows the aubergines to ripen more quickly.

Store sliced aubergines

You can store cut aubergines in the fridge until the next day before they spoil.

Place the sliced eggplant in a sealable container.
Keep the container in the fridge and use the leftover eggplant quickly.
Then remove the dried part of the eggplant and wash the fruit thoroughly again.
Aubergine slices turn brown in the air within a short time. It is therefore better to overcook them immediately and not to keep them raw. You can store cooked aubergine dishes in the refrigerator for two to three days.

Store eggplants in the freezer

To store eggplants for a particularly long time, you should freeze them. Eggplants can be frozen for up to nine months.

Wash the eggplants thoroughly.
Cut the vegetables into cubes.
Blanch the eggplant pieces for three minutes.
Immediately cool the vegetables in ice water.
Drain the aubergine pieces well in a hair strainer. Alternatively, you can pat them dry with a tea towel.
Place the blanched cubes in a freezer container. You can also freeze aubergines in jars.
Label the freezer container so you can remember what’s inside later.
Also write the date. This will help you keep track of your freezer.
Frozen aubergines are particularly good for soups, sauces and spreads.

Storing Christmas cookies correctly is important so that you can enjoy your cookies for a long time. We’ll show you how to keep Christmas cookies fresh and how to use leftovers sensibly.

Storing Christmas cookies: This is how you succeed

Whether cinnamon stars, vanilla crescents or gingerbread – cookies are part of the Advent season. So that you can enjoy your homemade biscuits throughout Advent, you should make sure that they last as long as possible. Therefore, we have put together the best tips for you on how to store Christmas cookies properly:

Store by type: After baking, all types of cookies should be allowed to cool completely before tinning. The glaze or other decorations must first dry completely. Otherwise the biscuits may stick together. Then store the Christmas cookies according to type in different airtight cookie jars. You should also wrap homemade stollen in a kitchen towel.
Shelf life is related to the type of cookie: The use-by date is closely related to the type of cookie. Dry cookies can last up to eight weeks. However, if your cookies have a cream filling, you should use them up within a week if possible.
Freezing Christmas cookies: If you can foresee that you will not use up your cookies in time, you can simply freeze them. You will need an airtight container to put your cookies in after they have cooled. However, be careful not to freeze cookies decorated with chocolate. Chocolate turns gray in the freezer. If you want to thaw the frozen pastry again, take it out of the freezer and let it sit at room temperature for several hours.

Tips for making good use of leftover pastries

Storing Christmas cookies properly can avoid food waste. But what to do if there are leftovers? With our ideas you will be able to use what is left over. So nothing has to end up in the garbage, but can be used elsewhere.

Second chance for leftover cookies: You can crumble many types of Christmas cookies and use them instead of biscuits for various recipes. In this way you can refine (vegan) tiramisu or other layered desserts, for example. You can also use them to make sprinkles for apple crumbles. You can melt leftover chocolate and use it as a glaze for cakes or fresh pastries.
Utilize expired ingredients: Each food item is given a sell-by date before it is sold. However, this date is not to be taken so strictly for all foods. Because ingredients such as baking powder, flour or spices can keep much longer. Therefore, you can use these basic foods for baking for a long time without hesitation. Read more: Forget the best before date – many foods last longer than you think
Cookies as a gift idea for friends and relatives: What Christmas cookies you don’t want to store with you may be missing from others. How about giving your homemade treats to friends, acquaintances and relatives? Not only do you give your loved ones a little treat, you also don’t have to throw away your leftover cookies.

If you’re chewing gum, you should now be careful not to let it get stuck in your throat: what you have in your mouth is mainly petroleum with artificial additives. We show how problematic chewing gum is and what alternatives there are to Wrigley’s & Co.

Millions of Germans chew gum every day. Very few people probably know what they are spending money on.

Everyone has their reasons: chewing is said to increase brain power, stimulate digestion, care for or whiten teeth and even help to quit smoking. This may sometimes be true and sometimes not, but what is certain is that most chewing gum contains dubious ingredients.

Chewing Gum: Gum made from petroleum

At the beginning of industrial production, chewing gum was made from chicle, the milky sap (latex) of the pulp apple tree, which grows mainly in Central America. Today, this natural raw material only makes up a few percent, if at all, of the so-called gum mass.

“The manufacturers are not obliged to specify the composition of the chewing base,” says Andrea Danitschek from the Bavarian consumer center.

Modern chewing gum consists almost exclusively of synthetic raw materials. The “rubber” part is usually made up of petroleum-based polymers. In plain language: We chew plastics. And they are not only questionable in terms of taste – they are above all ecologically and health-hazardous.

The production of plastics based on petroleum and natural gas has a bad connotation. Not only are these raw materials becoming scarcer, oil production is also politically linked to wars and abuses and harbors enormous environmental risks – from dirty extraction to accidents on tankers and drilling platforms. In other words, petroleum is not something to put in your mouth for pleasure.

Chewing gum is not biodegradable

Precisely because conventional chewing gum consists mainly of petroleum-based plastic, disposal is also a problem. Because just like other plastic products, chewing gum is not easily biodegradable.

The widespread habit of simply spitting chewing gum onto the floor is all the worse. The removal of chewing gum stains from streets and sidewalks is often only possible with very energy- and water-intensive special machines. A waste of resources that would not be necessary without chewing gum.

Chewing gum: healthy is different

In addition to the plastic gum base, the chewing gums usually contain sugar or sugar substitutes, plus artificial colors and flavors, stabilizers, fillers, thickeners, humectants, antioxidants, flavor enhancers… Yummy?

The ingredient lists of some chewing gum contain substances that are not entirely harmless. For example, the stabilizer urea/carbamide (E 927b), which is also used as an important nitrogen fertilizer, is permitted (but rare). The emulsifier (soy) lecithin is often made from genetically modified soy. The antioxidant BHA (butylated hydroxyanisole) is suspected of possibly triggering allergic reactions and affecting the hormone system and fertility.

The health effects of various synthetic sweeteners – such as aspartame, acesulfame K or sucralose – are repeatedly discussed controversially. Some of the coloring and flavorings used are also controversial – or at least unnecessary.

Most chewing gums are not as healthy as advertising likes to claim. Allergy sufferers in particular should take a very close look at which ingredients and additives are included. Chewing gum for children should also be looked at particularly critically before you buy it: synthetic sweeteners, flavorings and BHA should actually be taboo here.

There are few good alternatives

There are plenty of instructions online on how to make your own chewing gum. There are even ready-made do-it-yourself kits. Some of these use chicle instead of petroleum-based plastic. But: there are almost always ingredients whose origin and/or effect is unclear and questionable, such as sugar substitutes, colorings or flavors.

Whether dry yeast or fresh yeast – you can bake airy pizza dough and bread with both types of yeast. In this guide you will find out what the differences are and how you can use fresh yeast and dry yeast.

Yeast is a unicellular microorganism that belongs to the fungi family. This living organism feeds on the sugars and starches in the dough and converts them into carbon dioxide gas, among other things. This is reflected in the bubbles in the dough, which allow it to rise and make it more airy. We use this property of yeast for many recipes – whether pizza dough, home-baked bread or cinnamon rolls.

You can find yeast in two main forms on the market: as dry yeast and fresh yeast, which is also called block yeast. We will explain how the two differ, what you need to look out for when storing and using them, and how you can convert one type of yeast and replace it with the other.

Dry yeast and fresh yeast: differences in yeast types

Dry yeast and fresh yeast have much more in common than differences:

Both dry yeast and fresh yeast are the same strains of yeast (Saccharomyces cerevisiae), also known as baker’s yeast or brewer’s yeast.
Dry yeast and fresh yeast serve the same purpose in the bakery: they convert sugar and starch into gaseous carbon dioxide, allowing the dough to rise.
The yeast cultures were also grown and propagated in the same way: on a carbohydrate-rich culture medium. The exact cultivation form depends on whether it is conventional yeast or organic yeast – but not whether it is dry yeast or fresh yeast. You can find out below how organic yeast differs from conventional yeast.

But there are also big differences between dry yeast and fresh yeast:

While fresh yeast consists of around 70 percent water, dry yeast only contains around five percent residual moisture. Therein lies the biggest difference: For dry yeast, fresh yeast is dried.
As a result, dry yeast has a significantly longer shelf life than fresh yeast. While you can store fresh yeast in the fridge for a maximum of two weeks, dry yeast can be stored at room temperature for between several months and a year.
The fungal cultures contained in the dry yeast are inactivated and are only activated by adding liquid. Nevertheless, they are living microorganisms – only in a “resting state”.

Dry yeast or fresh yeast – which is better?

Both dry yeast and fresh yeast do an excellent job as leavening agents. In the finished recipe, the difference is hardly or not at all noticeable.

The benefits of fresh yeast are rather subjective:

Some (hobby) bakers swear by fresh yeast because it gives the baked goods a rounder, slightly sweeter taste.
Some also report that yeast dough rises slightly better with fresh yeast than with dry yeast.
If baked goods require a particularly long fermentation time or several resting phases to rise, fresh yeast is usually recommended. Because it is said to have a longer-lasting driving force than dry yeast.
On the other hand, dry yeast has prevailed today mainly because of its practical advantages over fresh yeast:

Dry yeast can be stored at room temperature for several months in a closed packet. Once opened, you can store the packet tightly sealed in the fridge for another two weeks. Fresh yeast, on the other hand, must be stored in the refrigerator and used within two weeks of purchase.
You don’t have to stir the dry yeast into liquid beforehand, you can mix it directly with the dry baking ingredients. This makes it a little easier to mix the dry yeast with the dough than fresh yeast.
In addition, thanks to its shape, dry yeast is a little easier to dose than fresh yeast in block form.

Conclusion of the comparison:

Fresh yeast should give the baked goods a slightly better taste and also have a higher raising power than dry yeast. For a few recipes like yeast loaf or Berlin pancakes, this is possibly the better yeast.
On the other hand, dry yeast is the much more practical form of yeast, especially for hobby bakers: it lasts much longer and is easier and faster to process.

Using dry yeast and fresh yeast: tips for the kitchen

If you want to make yeast dough yourself, you should consider the following points when preparing it:

First stir fresh yeast with some of the lukewarm liquid from the recipe and some sugar and let this mixture stand for about ten minutes. You can tell by the formation of bubbles that the yeast have started their activity. After the ten minutes, you can mix the liquid with the remaining baking ingredients.
You don’t need to mix dry yeast with liquid first. Mix directly into the dry ingredients in the recipe. Make sure that the remaining ingredients are not too cold: you should therefore take them out of the fridge some time beforehand.
Whether fresh yeast or dry yeast: yeast has the best raising power at temperatures between 25 and 30 degrees. At more than 45 degrees, the yeast fungi die off, while at less than ten degrees, the metabolic processes run considerably more slowly. That means: The cooler, the more walking time you have to plan.
When baking, you can easily convert and replace fresh yeast with dry yeast:

You can replace one cube of fresh yeast (42 grams) with two packets of dry yeast (fourteen grams).
As a result, one packet of dry yeast is equivalent to about half a cube of fresh yeast (21 grams).
As a rule of thumb, half a cube of fresh yeast or a packet of dry yeast is sufficient for 500 grams of flour. However, this amount varies greatly depending on the recipe.
In principle, you can also mix fresh yeast and dry yeast in a recipe, should this ever be necessary.

Buy yeast: organic quality and list of ingredients

It doesn’t matter whether it’s dry yeast or fresh yeast: we recommend that you pay attention to organic quality when buying. Because there are some differences between organic yeast and conventional yeast:

Growth medium: Conventional yeasts are often cultivated on molasses (a by-product of sugar production), phosphorus or inorganic nitrogen. Organic yeasts, on the other hand, are cultivated on natural raw materials from controlled organic cultivation, often on grain or sugar beet syrup.
Defoaming agent: To prevent growth-inhibiting foam from forming, sunflower oil is added to organic yeast as a defoaming agent. With conventional yeasts, synthetic substances are used for this purpose, which later have to be rinsed out with plenty of water. Therefore, according to the Bavarian Consumer Center, more water is used in the production of conventional yeast than in the case of organic yeast.
Genetic engineering: In addition, no genetically modified organisms (GMOs) are used in the production of organic yeast. Since there are still no reliable long-term studies on the health effects of GMOs, we recommend non-GMO foods.
If you want to buy dry yeast, you should also take a closer look at the ingredients:

Some of the dry yeast contains emulsifiers so that the yeast does not dry out. The most commonly used emulsifier is sorbitan monostearate with the E number 491. There are even some emulsifiers in fresh yeast.
Organic manufacturers in particular usually deliberately avoid using emulsifiers. With their yeast, there is nothing else in the packet but yeast.

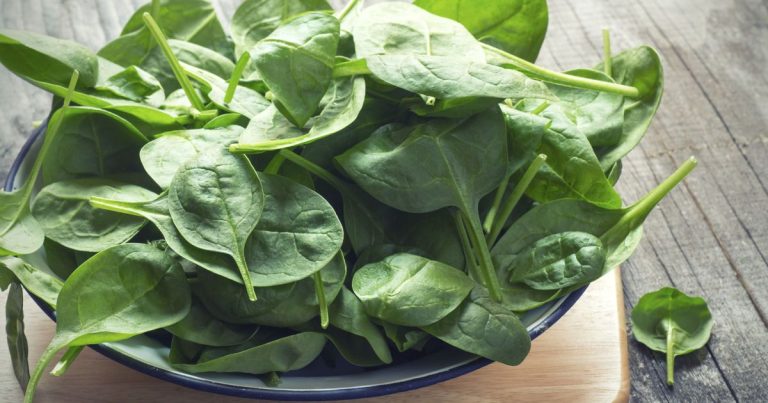
You want to freeze spinach because you had a good harvest? Or do you have leftover fresh spinach and want to preserve it? Find out here how it works and what you should consider when freezing.

Freeze spinach: Here’s how

Spinach is a healthy, regional vegetable. So it’s no wonder he’s so popular. Fresh spinach is especially delicious. If you have bought too much of it or your harvest has been very rich, you can freeze it without any problems.

How to freeze spinach correctly:

Wash the spinach and remove the stalks. These taste mainly bitter and are also not very pleasant when you bite them.
Briefly blanch the spinach. Blanched it is easier to freeze, and because you only heat it briefly, most of the nutrients are preserved.
To do this, add the spinach in portions to boiling water and let it cook for a few seconds.
Immediately afterward, place in a bowl of ice water to pause the cooking process.
Spin it dry in a salad spinner. It is important that the spinach is completely dry, otherwise too much liquid will collect due to the ice crystals when defrosting. You can also press the spinach dry between tea towels. Make sure, however, that it is not exposed to room temperature for too long. Because then nitrite can form in the spinach.
If the spinach is dry, you can freeze it in glass or stainless steel containers.
Tip: Depending on how you want to use the spinach, you can also cut it up or finely chop it before freezing.

You can also freeze spinach raw. However, the spinach should be as fresh as possible and you should clean it well so that no dirt or bacteria are thawed again later.

Fresh kitchen herbs, such as basil or mint, are healthy and also spice up every dish. How about a herb mousse, for example, or try making your own pesto. However, chives and the like taste best when they have planted themselves. We give you helpful tips so that you can soon enjoy fresh herbs from your own garden.

Have you already harvested the herbs? Then you will find everything you need to know about storing fresh herbs here.

Do I need a garden to grow herbs?

No, not necessarily. Herbs can be grown almost anywhere, in the bed in the garden, or in pots on the balcony. A particularly space-saving solution is the herb snail, with which many herbs that have different needs can be planted at the same time.

Appropriate planters are also required for the herb garden on the balcony. Both square balcony boxes and plant pots in various designs and sizes are used. Above all, the depth of the planters should be considered, as some herbs have deep roots, such as lovage or dill. If you observe the following tips, then nothing stands in the way of enjoying fresh herbs by growing them yourself.

The 10 most suitable herbs for the balcony

Parsely

Parsley is probably the best-known and most popular kitchen herb in Austria. The aromatic herb is missing in almost every herb garden. When watering it should be noted: This herb does not tolerate waterlogging at all, but the soil should not be too dry either.

Mint

Mint has a unique aroma and gives the mojito, for example, its characteristic taste. Due to the menthol-like scent, the mint also has a wonderfully refreshing effect. Mint is considered easy to care for and undemanding. But be careful: it spreads incredibly fast!

Chives

Few herbs are as easy to grow as chives. The growing pots need evenly moist soil. The soil should not dry out, otherwise, the green culms will begin to bend. As soon as the temperatures outside are no longer below zero, chives can also be sown directly outdoors.

Basil

Basil is a herb from the south. It, therefore, requires a bit of care to thrive in our climate. Basil likes it sunny and should therefore be grown in a warm, sunny place, for example on the windowsill.

Rosemary

Rosemary is one of the Mediterranean herbs and therefore prefers a dry, sunny and calcareous location. Rosemary should be cut regularly, otherwise, it tends to become woody. You can harvest rosemary all year round, although you should then cut off a whole branch.

Sage

The European garden sage is easy to grow. Sage likes sunny places because the essential oils cannot form in shady locations. Sage grows quickly and survives short periods of drought very well. Waterlogging should be avoided.

Lemon balm

Lemon balm is extremely easy to care for and can “take care of itself” very well. You should be careful not to spread the lemon balm too much. In a sunny location and with enough light and space to develop, lemon balm usually thrives very well.

Lovage

Lovage, also known as Maggi herb, does not require too much care and location. The chosen location on the terrace or balcony should be in partial shade if possible. Please note: Maggi plants can grow up to 2 m tall.

Marjoram

Marjoram likes it very warm. In the best case, it should also be sown in warm soil, at the earliest in mid-May. The sunniest spot on the balcony or in the garden is just right for marjoram. If the marjoram feels comfortable in its location, it will grow almost by itself.

Thyme

Thyme comes from the Mediterranean region and therefore thrives best when it is in a sunny spot in dry soil. What should be avoided at all costs so that the thyme thrives in the best possible way is waterlogging. Once the thyme is rooted, it does not require too much care.

You can easily freeze parsley. So you don’t have to throw anything away after a lush harvest, because fresh parsley cannot be stored for long.

Parsley is at its most fragrant just before flowering. In May or June you can cut them just above the ground. Unfortunately, fresh parsley does not keep very long. To use parsley outside of harvest time, you can preserve it. In the event of a harvest surplus, you also avoid throwing away food.

In principle, you have the option of drying or freezing herbs. Since the parsley loses a lot of its aromatic substances when it dries, we recommend that you freeze the herb.

Freeze parsley: how it works

Wash the parsley with water.
Dry them gently with a kitchen towel.
Place the parsley in a sealable, frost-proof container. We recommend, for example, containers made of glass, stainless steel or cotton bags. For the sake of the environment, you should avoid using plastic fresh storage bags. (More information: Freezing food without plastic)
Another alternative are ice cube molds. Simply fill them with chopped parsley and some water.
Finally, place the parsley in the freezer.


As long as the cold chain is not broken, the frozen herbs will keep for several months. You can take them out of the freezer when needed and simply crumble them with your fingers.

Germ is the Austrian term for yeast. Dry yeast is a preserved raising and loosening agent that does not have to be touched (no steam necessary).

1 packet of dried yeast contains about 7 g and is sufficient for about 500 g of flour. The dry yeast can be mixed directly with the flour. Basically, you need a little more dry yeast and the dough needs a little more time to rise.

1 cube of fresh yeast has 42 g and is sufficient for 1 kg of flour. Dissolve the fresh yeast in the warm liquid (water and/or milk) and only then mix with the flour. A Dampfl can also be prepared as a fermentation test.

Dampf as a fermentation test

A steamer or pre-dough can be used to check whether the yeast is still suitable as a leavening agent, and the yeast dough becomes particularly fluffy. Beat the yeast in the warm liquid with a little sugar and flour until the dough comes off the wooden spoon. Then dust with flour and cover and leave to rise for about 10 minutes. If the Dampfl rises, the yeast is fresh. For further processing, mix the Dampfl with the other ingredients for the yeast dough.