Tag

garden

Browsing

You should plan a self-sufficient garden well so that it works for you. Then it can be an important tool for a more self-determined and sustainable life. Here you can find out more about the most important tips.

More and more people want to live more independently of the economy and the state, focus more on nature and combine sustainability, health and nutrition. You can put this into practice with the help of a self-sufficient garden, for example.

In this article we explain how you can provide yourself with fruit, vegetables, herbs and nuts.

Self-sufficient garden: questions to get started

These relevant questions should accompany you if you are seriously considering becoming a self-sufficient person:

What level of self-sufficiency would you like to have? In other words, what percentage would you like to take care of yourself and what would you have to buy additionally?
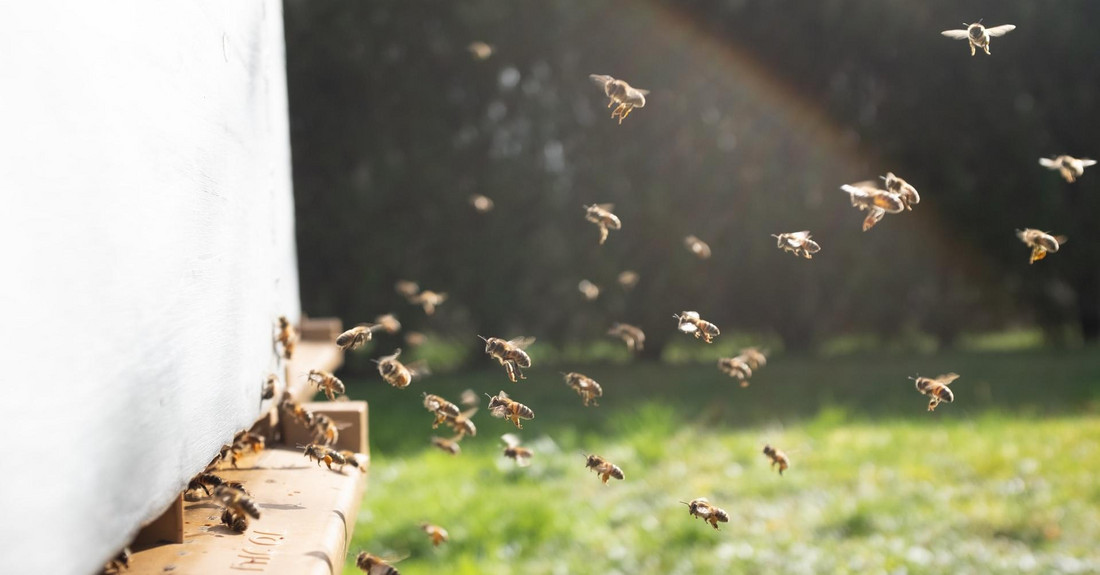
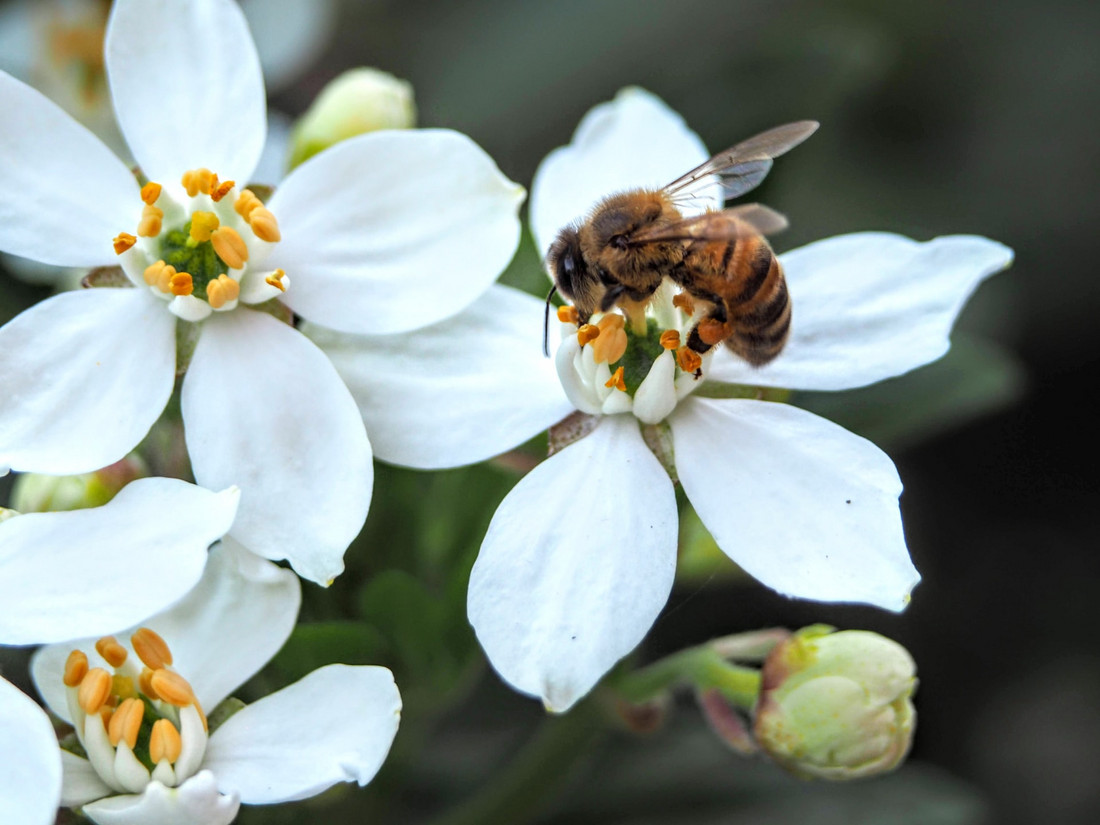
In which areas of daily needs would you like to live self-sufficiently? Just fruit and veg? Or, for example, with honey and eggs?
What is your eating style now and how would it need to change if you were self-sufficient? Would it be possible for you to do all of this yourself?
How much garden space do you have available?
How much time can you take to work in your self-sufficient garden?
How much strength, endurance and patience do you have? Are you aware that self-sufficiency also means being outside at any time of the year?
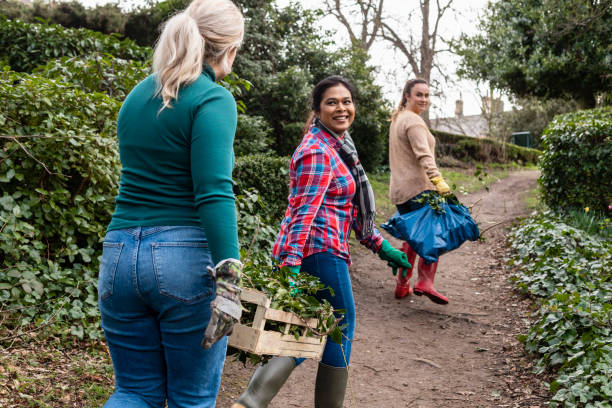
Who would like to help in the self-sufficiency garden? It’s easier when you can share tasks and work.
Which methods do you want to work with? Is classic vegetable cultivation in rows something for you? Do you already know market gardening? Would you like to work with mixed cultures or even with the principles of permaculture?

Basic nutrition and self-sufficiency

If you just want to feed yourself using your self-sufficient garden, you should first find out how much food you need in a day. A food diary can help you with this. Your approximate basal metabolic rate can also serve as a guideline. This indicates how many calories you burn per day at rest.

According to the DGE (German Society for Nutrition), the average calorie requirement for men aged 25 to 51 is 2700 calories on average and for women of the same age 2100.

When creating your menu, you should also make sure that you consume sufficient micronutrients and all macronutrients (i.e. fats, proteins and carbohydrates) in a balanced amount.

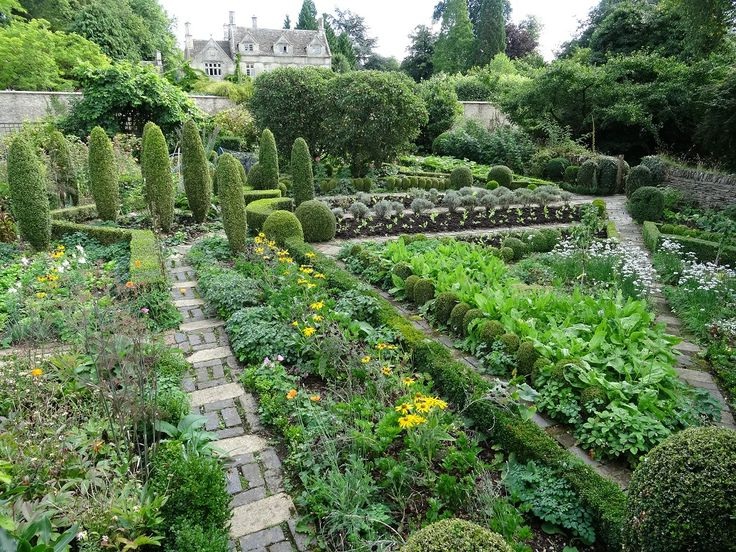
How much space do you need for a self-sufficient garden?

How much space you need for a garden that you can completely take care of yourself depends on many factors. The soil conditions and the type of crops cultivated play a role here, for example. The numbers given here give you a first orientation:

Vegetables and herbs: The DGE recommends eating 400 grams of vegetables per day. That would be around 150 kilograms per year. You should plan a little more for the cultivation. Then you are well prepared if there is a loss in earnings. So if you plan on 180 kilograms per year, you need an area of ​​at least 60 to 70 square meters for the vegetables. The potato is probably the most essential staple food for self-sufficient people. It has high nutritional value and is easy to grow relative to grain. One person eats around 60 kilograms of potatoes a year. This corresponds to a bed area of ​​30 square meters.

Fruit: The recommended amount of fruit per day is 250 grams. That is approximately 90 kilograms of fruit per year. Here’s an interesting comparison: A well-tended standard apple tree produces around 100 kilograms of apples a year. However, it takes a few years for an apple tree to reach this stage. Therefore, it is advisable to grow different fruit trees and shrubs. In order to provide yourself with the amount of fruit mentioned above, you should calculate at least an area of ​​​​80 square meters.

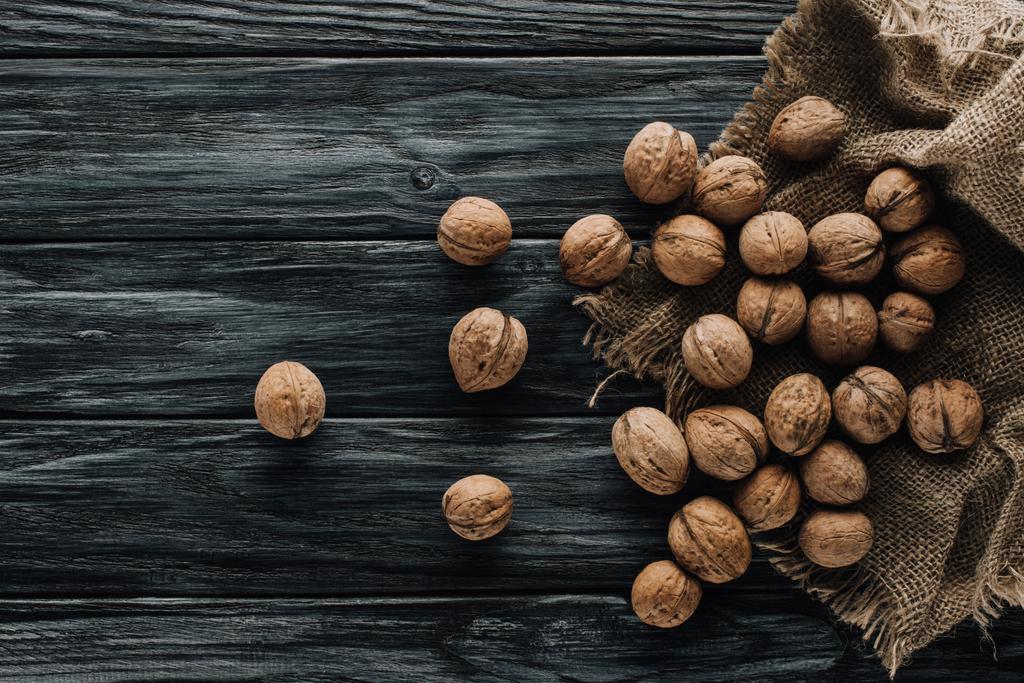
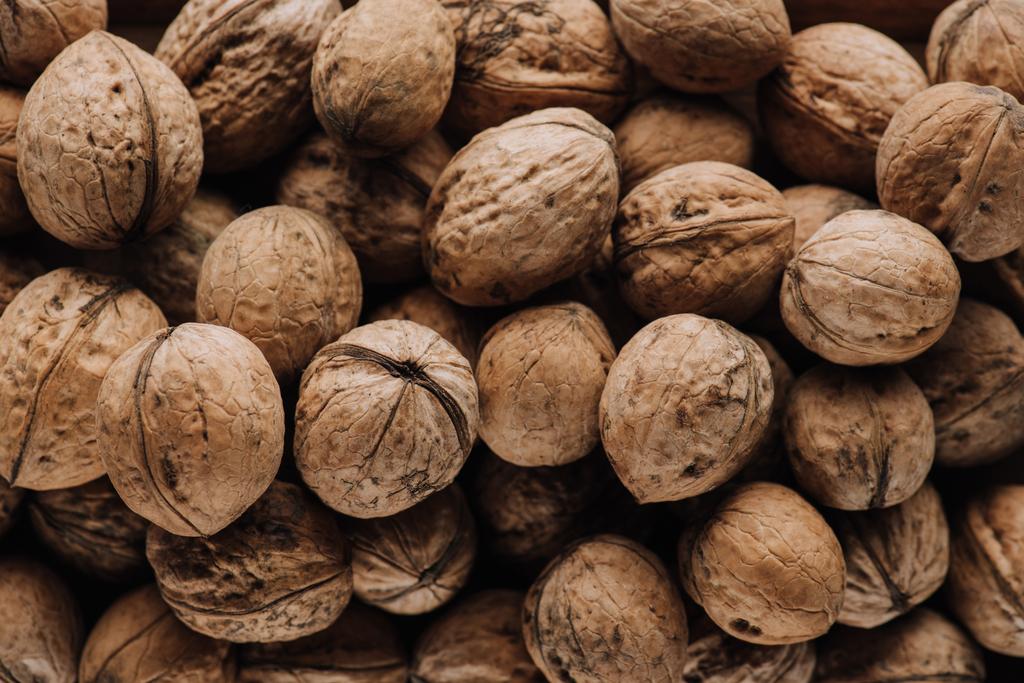
Nuts and seeds: You should also plan some space for this indispensable source of protein and fat. Native walnut species are: hazelnut, walnut and chestnut. It also includes beechnuts and acorns. These nuts were formerly brought in as a food source in times of need and are edible under certain circumstances. A mature hazelnut bush, for example, provides you with about 3 kilograms of hazelnuts per year. They are well suited for planting at the edge of the garden. For a hazelnut tree you need about 20 to 50 square meters. You should plan 80 to 100 square meters for a walnut tree.

Note: The required size of your self-sufficient garden ultimately depends on the extent to which you want to be self-sufficient and whether and to what extent you buy additional groceries.

How much time for the self catering garden?

If you are planning a self-sufficiency garden, you also need to know what time capacities you have. The time of day also plays a role. If you only have time in the evenings, it can be difficult in winter. Your soil quality is also a factor affecting time. For example, if you’re lucky enough to have nutrient-rich soil, you don’t have to go to extra lengths to improve soil quality.

Some self-supporters report that they only need an average of 3 hours of work per week to feed two adults and one child. You can definitely do that with certain gardening tricks. But just when you start building a self-sufficient garden, you will have to plan more time. This also includes the research time.

How much time you will need exactly, you have to find out for yourself at the beginning. A garden diary can help you with this. This way you can plan step by step better and better how much time you have to spend on certain activities.

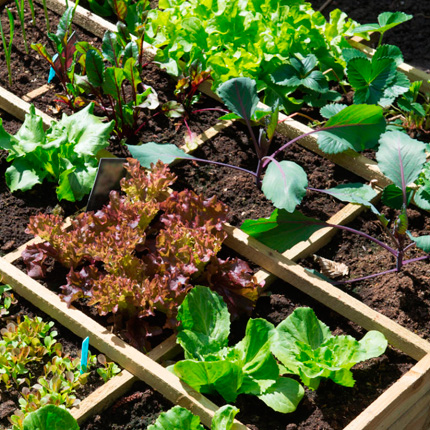
These plants are suitable for cultivation

Plants that grow well without much effort are particularly suitable for a self-sufficient garden, especially at the beginning. These include, for example:

Radish,
chard,
Pumpkin,
Zucchini,
Spinach,
Arugula,
bush beans,
Jerusalem Artichoke,
Potatoes.

Different plants also contain different nutrients. They can be broken down into three categories:

Plants rich in carbohydrates: for example potatoes, corn, carrots, all types of fruit;
Plants rich in protein: for example French beans, broad beans, peas, soybeans, walnuts, hazelnuts;
Plants rich in fat: sunflowers, flax, poppies, walnuts, hazelnuts.

A seasonal calendar gives you the best orientation as to which regional fruits and vegetables you can grow and harvest in which month. The storage periods are also indicated in the Utopia seasonal calendar. In order to fully plan your self-sufficient garden, you should first think carefully about which plants are suitable for which part of the garden. Take the time to read, research and share with others! Your region, climatic conditions and soil conditions are also important when choosing your plants.

Note: In order to be able to eat food from the self-sufficiency garden all year round, you must store it well or preserve it in some other way. To do this, you can boil, dry, ferment, salt, sour or sugar vegetables or fruit. For example, you can make pickled cucumbers, dried tomatoes, sauerkraut, dried fruit, jam, mush or chutney.

Material and equipment for the self-sufficiency garden

Before you start your project, you should get some important things. With the right material and high-quality gardening tools, your work will be much easier.

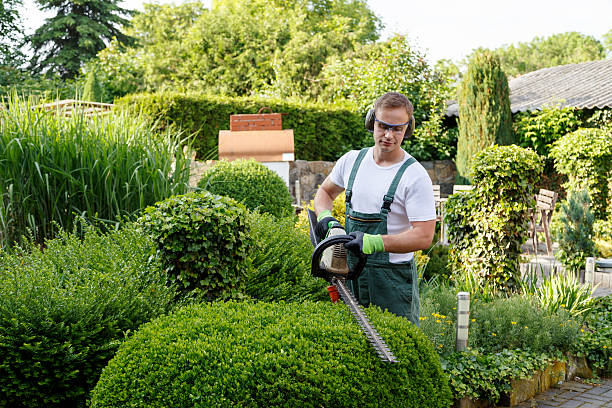
Your equipment for wind and weather: rubber boots, rain jackets and trousers and gardening gloves (e.g. with natural rubber) are essential. Because you will be kneeling on the floor a lot, knee pads or a knee pillow are useful.
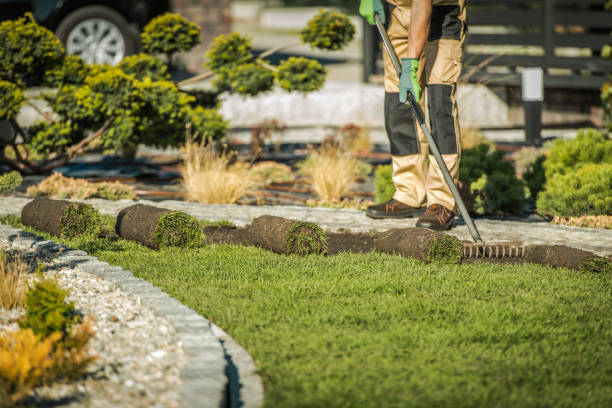
Garden tools: Spades, rakes, rakes, pruning shears, garden shears, hoes, shovels, brooms, knives and weed pullers are the most important garden tools. You can use a lawn mower or even a sickle or scythe for mowing. A ladder, several buckets, a watering can and a wheelbarrow are also among the most important utensils. It is best to look for used equipment to save money and resources.
Planters: Cultivation pots and plant pots of different sizes are essential. Use eco-friendly options whenever possible. Read also: Avoid plastic plant pots: 8 alternatives. If you buy eggs, you can use the egg cartons as breeding pots.
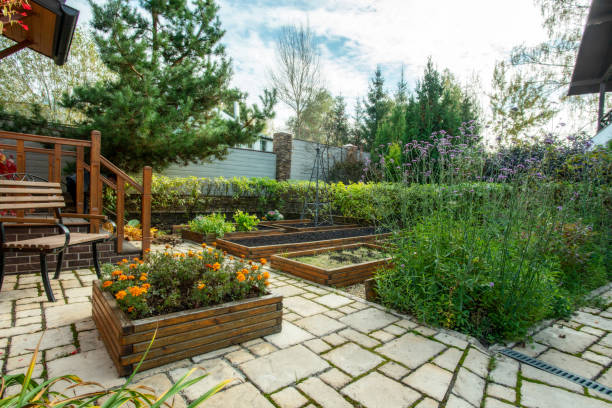
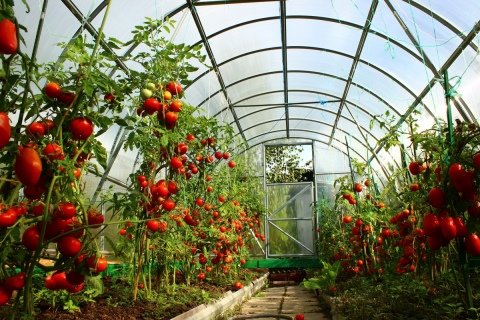
Larger purchases: A self-sufficient person should also create a cold frame, a greenhouse, a planting table, raised beds, a warehouse or a storage cellar and a compost. For your storable harvest, stackable crates come in handy. You should also organize irrigation water.

Self-sufficient garden: conclusion

Complete self-sufficiency from your own garden is almost impossible these days. This would require a lot of compromises and hard work. There are also weather conditions and crop failures.

Nevertheless, there are many reasons to venture into a self-sufficient garden. No one can take away the knowledge and skills you acquire with it. Self-sufficiency makes sense, especially when it comes to fruit and vegetables: In 2020, German agriculture only produced 22 percent of the fruit and 37 percent of the vegetables that were offered for sale. The rest was imported from other countries. If you want to be less dependent on this global industrial agriculture, a self-sufficient garden is a good option.

Now simply drive away the mole in the garden and fight the mole effectively with home remedies. The molehills bother you and you want to drive the mole away? With our tips for fighting moles, you can quickly get rid of the annoying pests.

The mole is under the protection

Just be careful, because the European mole may not be hunted, pursued, injured, or killed in Germany since it is one of the specially protected animal species according to the Federal Nature Conservation Act § 20e and is therefore reflected in the Ordinance for the Protection of Wild Animal and Plant Species.

Fight mole

The classic way to fight moles: if you want to drive moles out of the garden, stick mothballs or fish heads in the tunnel of the molehill. Moles move when they smell bad and look for a new place to live. This will fight the mole.

Repel moles with buttermilk

Fighting moles made easy: Another way to drive a mole out of your burrow is to pour a cup of buttermilk into each molehill once a week. This mole fight will bother the moles quite a bit and they will look for something far away 😉

Killing moles in grandpa’s day

Back in grandpa’s day, the moles were killed quite cruelly. You had to stand next to the molehill with a fork and wait patiently. Then, when a mole was active in the passage, it was only a matter of time before it had to haul fresh soil to the surface. At the moment when small earth movements could be seen, the fork was put into the molehill and the loose earth was torn up together with the mole. The mole then flew through the air and was smashed into pieces with a spade while lying on the ground. Since he was almost blind, he couldn’t escape either.

A useful guide to planting a hedge in the garden. Our detailed step-by-step instructions will help you with the preparation and implementation of the garden hedge.

Properly plant a hedge

A hedge fulfills several functions in the garden. On the one hand, it offers a natural privacy screen, on the other hand, it serves as a shelter for various animal species – for example, beneficial creatures such as birds and insects. However, there are a few things to consider when planting a hedge.

Step 1: Find a suitable hedge for the garden

You can use many different plants for a hedge. Which ones are most suitable depends not only on your own taste, but also on the soil conditions, the growing season, and the location. Depending on the type of plant, it can take several years for a hedge to reach the desired size.

In addition to the popular boxwood, which only grows about ten centimeters a year, and the false cypress, fast-growing and easy-care hedge plants are enjoying increasing popularity. Most plants thrive in both shade and sun. Examples of fast-growing hedge plants are privet and hornbeam. The latter is a good choice for a hedge up to 3 meters high and is also easy to cut. In autumn, the green leaves turn golden yellow and remain on the shoots for a long time.

Privet is also very suitable as a cut hedge plant. Both the gold privet with yellow-colored foliage and the black-green privet with dark green foliage have an upright, loose habit and are also easy to trim. The common beech is also often used for hedge planting. Its bright green leaves turn reddish-brown in autumn. Other popular hedge plants include thuja, cherry laurel, and the red hedge barberry, which is good both as a natural hedge and as a small cut hedge.

Step 2: Choose the right time to plant

The autumn months are the ideal time for planting a hedge because then you can hardly expect longer dry and hot phases. Furthermore, the plants have enough time until winter to form strong roots. Alternatively, you can also plant your hedge in spring. However, keep in mind that plants need more water at this time of year, especially if there is little rain in the following summer.

Step 3: Trim the hedge regularly

Depending on the type of plant, hedges offer good privacy protection within a short period of time. In order for your hedge to have the appropriate density, the hedge plants must be cut back regularly. A pruning also prevents the hedge from growing too wide, but instead upwards. But you should also use hedge trimmers from time to time in the upper area so that the hedge does not thin out too much there. Be sure to wear suitable work clothing and safety shoes for this work to reduce the risk of injury!

The natural hedge as an alternative to the cut hedge

A dense cut hedge is not suitable for every garden, as it often takes up a lot of space. Interesting effects can also be achieved, for example, by staggering the planting of fast-growing hedges and shrubs. These also offer good privacy protection and make smaller gardens appear larger. Another alternative to the green hedge can be to line up flowering, leafy and fruit-bearing shrubs (e.g. lilac, elderberry, hazelnut, firethorn, viburnum). The so-called natural hedge wraps the garden in beautiful colors and scents and can be put together individually all year round.

Before your own garden becomes a place of retreat and relaxation in the first days of spring, some gardening needs to be done. Therefore, you should create a vegetable patch in the spring. But planning the vegetable patch can begin as early as winter.

Create vegetable beds in the garden

A healthy diet includes dishes with vegetables. A small garden also offers the opportunity to grow vegetables. However, the vegetable patch must be properly planned, laid out, and regularly maintained. You can grow different types of vegetables in your own vegetable garden. And then use it for healthy cooking. Every hobby gardener knows how good their own vegetables from the garden taste. So start planning early and make sure you have the right equipment for gardening. Consequently, we have collected the most important tips for creating a vegetable patch.

1) Plan a vegetable patch

So that freshly sown plants do not freeze to death overnight, ground frost must not occur before sowing. So don’t start planting the vegetable patch until spring. However, you can start planning your own vegetable garden in winter. For this purpose, first, create a planting plan. Expertise in vegetable cultivation and mixed cultures is an advantage. However, you can easily find out more about growing vegetables in advance on the Internet or in magazines. You can also order the necessary equipment and clever tools for gardening online.

2) Which vegetables to use for the vegetable patch?

When creating a vegetable bed in your own garden, it is important to pay attention to which vegetables are in season and at what time. In addition, a mixed culture table from the Internet shows you which types of vegetables you can combine well with each other. This is important because you should plant different types of vegetables next to each other in a vegetable patch.

3) Determine the size of the bed

Before creating vegetable beds, the size of the vegetable garden and the individual beds must first be determined. When designing the garden, most hobby gardeners opt for a rectangular or square shape. A vegetable bed is about 80 to 120 centimeters long. However, it is also possible to create narrower vegetable beds so that the marked ground does not have to be walked on when tending. Also, note important tasks in the garden in winter.

4) Choose a suitable location and construct a bed edging

In order for your vegetables to thrive, you should choose a sunny and wind-protected place for your vegetable patch. You can build the bed edging with different materials. You can also use wooden boards, stones, or old slatted frames for this. When using slatted frames as a bed edging, carefully separate the individual slats and place them next to each other as a border for the vegetable bed.

5) Prepare the soil in front of the vegetable patch

But before planting vegetables, you need to prepare the soil. If the soil stores a lot of water and is well aerated, the plants can optimally develop roots. Therefore, dig up the soil spade deep and mix it with vegetable soil or fresh compost. This loosens the soil and you can start sowing. In addition, you should pay attention to sufficient safety when doing any gardening work.

6) Sowing tips for planting

Seed tapes are very helpful when creating a vegetable garden. With these products, the seeds are in a paper band, making it easier for you to sow. The tape will later decompose by itself in the soil. But before sowing, you should level the soil again and water it. Then plant the young vegetable plants directly in the vegetable patch. Depending on the vegetable crop, you can also use seedlings. After planting the plants or seeds, cover them with some soil and water them again. With regular care, you can soon be harvesting healthy vegetables that you have grown yourself. Then you can grill the vegetables or make delicious smoothies yourself.

Practical gardening aids support you effectively in gardening. We show you the best garden tools from the internet that will help you in the garden. In this way, you ensure a beautiful and green garden that makes everyone jealous.

Practical helpers in the garden make work easier

If you enjoy gardening, you should have handy gardening tools on hand. Because many products benefit the green garden and numerous plants. No matter whether it is a small or large garden, everyone will find the right helper on the Internet. Since the selection on the Internet is very large, we have made a small pre-selection. We also recommend taking a look at the useful everyday helpers in the household.

1) Waterproof garden mat is a good garden helper

Of course, when gardening, everyone wears old clothes that can get dirty. But so that you avoid deep-seated stains and don’t have to remove grass stains in the first place, get a garden mat to put under. Because this not only keeps stains and moisture out, it also prevents small tools from disappearing underground.

2) Cultivation mat for plants as a helper in the garden

To make it easier for you to grow plants, you can use growing mats made of rock wool. Because the stone wool has a high level of air and water permeability. As a result, you achieve high yields. You can make such a growing mat yourself or buy it online.

3) Weed killer as a practical garden helper

The weed killer from Unkraut Frei Plus also performed well in the test comparison. Unlike the first two squares, this one is biodegradable, which should be important to every gardener. It also convinces with its rapid effectiveness and the long period of use from March to October. Also, note other tips for destroying weeds.

4) Fertilizer for a green garden

The COMPO green plant and palm fertilizer achieved the best test results. Because this ensures a dense lawn and a green garden. It is also biodegradable and should protect the groundwater. Here you get 20 kg for 800 m². It is also available as a plant fertilizer. Or use natural home remedies as plant and flower fertilizer for a beautiful garden.

5) Water dispenser for plants of any kind

The Scheurich Bördy as a practical garden helper provides a water reserve and waters the flowers automatically. Not only can you take care of your indoor plants, but you can also do something good for your garden plants when you are away from the garden for a long time and the heat is persistent.

6) Wooden signs to label the garden plants

Anyone who tends a garden with many plants, flowers, and herbs can quickly lose track. It is, therefore, worthwhile to identify the individual plants. For this, we recommend the wooden signs for writing as a practical helper in the garden. Because they are plastic-free and environmentally friendly. In addition, they can be used on both sides and look simple but beautiful. In addition, note practical kitchen aids for clever cooking.

7) Tying pliers as a practical garden tool

Whether for the tasks of winter gardening or in summer. Such binding pliers can be quite practical. Because you use these if you want to attach plants to climbing aids. Or want to fix tomato plants, grapes, etc. This makes tying plants easier and saves you time.

8) Auto planter as a helpful gardening tool

The automatic planter is a practical garden tool, especially for working on small beds. With this, you can easily loosen up soil or plant vegetables and plants. It convinces many people because of its easy handling and low price. You will also find out which clever helpers are useful when cleaning.

9) Spreading granules against snails

The sorrow of many garden lovers is snails. They eat the laboriously grown vegetables and the beautiful plants. In order to keep a beautiful green garden, you should buy Compo litter granules. Because this is effective against snails, but does not endanger bees and protects the environment. Then you can drive away any kind of snails and your plants can breathe a sigh of relief.

10) Full Garden Tool Set

A comprehensive set of garden tools is essential for a beautiful green garden. As a result, the Hayate set offers you a variety of practical gardening tools. They convince with their ergonomic handling and beautiful design. If you already have all the tools yourself, this is also a nice gift idea.

A guide to installing a faucet in the garden. Because a garden faucet is practical for watering plants and water fun in summer. Thus, people with a garden should definitely ensure the water supply in the outdoor area. We’ll show you how to successfully install the faucet.

Why have a faucet in the garden?

If you own a garden by growing plants, fruits, and vegetables, you need water for watering. However, you cannot always rely on rainwater to water your plants. Especially in summer, the water supply should be secured by a water connection in the outdoor area. Then this not only ensures a beautiful and healthy garden but also a lot of fun and cooling off in summer. Therefore, we will show you how to install a faucet successfully.

1) Tools for a homemade garden faucet

With a faucet, you can properly care for your roses in the garden and also do other important tasks. In order to successfully install the faucet in the garden, you definitely need the right tools at the beginning:

  • A drill with an appropriate drill bit is suitable for the material to be drilled. In most cases, this will be stone or concrete.
  • A hacksaw, with the help of which a piece of the previously existing water pipe can be cut out.
  • Coarse and fine sandpaper or, optionally, an angle grinder to sand newly created, sharp pipe edges smooth again.
  • A pipe wrench or wrench to tighten the new pipe connections and faucet.

2) Faucet installation materials

If you have the tools you need for your project, you will need the materials to install a faucet. These are manageable and available in the nearest hardware store or from specialized online retailers. In addition to the materials listed below, the last thing you need is the part that will be visible on the house wall at the end: the new faucet. Of course, this should be weatherproof and suitable for outdoor use. Note the best taps in the test.

  • Copper lines of the required length
  • T-connection with valve
  • a drain cock
  • compression fittings
  • Sealing compound or hemp threads or special tapes to seal the screw connections between the water tap and the end of the water pipe

3) How to install the faucet in the garden

Once you have made all the preparations, you can start installing the faucet in the garden. To make sure nothing goes wrong, use our step-by-step instructions. Also, consider that a garden water meter can be useful.

Protect the garden faucet from the cold

To ensure that your newly established water connection lasts for a long time, you should always follow this basic rule: before it gets really cold in winter and the temperatures gradually drop below 0 °C, it is important that you shut down the water line temporarily. To do this, close the T-joint valve and let the excess water out of the line using the drain cock. When the danger of frost has passed – in most cases this will be again in March or April – you can put the line and faucet back into service. As a result, the water supply is secured again in the new gardening season. Find out about other important gardening tasks in winter and how your plants can overwinter.

In order to spend your free time relaxing in your own garden, you need a suitable oasis of calm. Ottoman or sun lounger, swing, or a practical garden set? Feeling good and relaxing is at the top of the to-do list when it comes to garden design.

Wooden garden furniture as a climate-friendly alternative

There are many different types of wood that are ideal for garden furniture. One should give preference to softwoods, for the sake of environmental protection and local forestry. However, hardwoods are winterproof and also durable. Eucalyptus, in particular, is in great demand, but it is also extremely maintenance-intensive. This wood impresses with its high resistance to fungi, pests, and insects. It is cheaper than teak.

The popular teak wood is durable and can spend the winter outside without losing any of its quality. With so many short winters, you save yourself the hassle of storing it in the gazebo or the cellar. It also withstands a storm. However, the price is a big drawback. However, if you consider that you have owned such a noble complete set for a good 25 years, you see it in a different light.

Another alternative would be the so-called “false acacia”. Behind it is the wood of a Robinia, which grows in the local forests and is harder than oak. It is very popular in outdoor furniture because it is weather resistant and durable. In addition, it is also affordable in price. The wood has a fine grain.

Not all garden chairs are the same?

There are still a number of questions to be answered before making a decision. Do you prefer a chair with an integrated armrest or should it be a garden chair without armrests? Then there are a wide variety of options for folding chairs or adjustable high-back chairs.

If you have finally made the right choice, then you have to be lucky enough to find enough chairs in the required design and size as well as the desired design. The selection for a garden setting is much easier.

Advantages and arguments for garden sets

The strongest argument for choosing one of the garden sets is the price. These complete sets are ideally matched and impressed with their harmony. Smaller sets are often space-saving because they can be folded or stacked.

A set with an extendable table is ideal so that a larger group is not a problem. The visitor is comfortably accommodated, nothing stands in the way of a relaxed get-together in the garden.

Spring is in full swing now, summer is fast approaching and many of us will be spending more time outdoors. Many people go after extensive gardening. Because there are many possible jobs that need to be done around the house and in the garden. But the risk of injury is high here. Consequently, ensure more safety in the garden and thus ensure safe gardening.

More safety in the garden

Not long ago we talked about seasonal maintenance efforts, specifically how to stay comfortable with spring cleaning. In this post, we want to talk about further work in spring and summer. Because then the garden is often the focus of work and care. But many accidents happen in the garden. And not just because of carelessness, but because simple rules of conduct in the garden are ignored. We have therefore collected the most important tips for safety in the garden and when gardening.

1) Protect yourself from the sun and nature

Only when the weather is good do we start work that has to be done outside. Because when the temperatures rise and the sun shines again, we like to be outside. Then gardening will be fun again. But the beautiful weather also harbors dangers. To avoid sunburn, you should definitely use sunscreen with a sufficient sun protection factor. Also, keep in mind that insects are now becoming active again. It is therefore worth using an insect spray to protect yourself from insect bites. Also, read valuable tips for an insect-free household. Also, keep in mind that you should avoid thorny plants or poison ivy.

2) The right equipment for more safety in the garden

In order for you to succeed in gardening in summer, you should think about the right equipment for gardening. Use light, long-sleeved outerwear or weatherproof trousers, even if it is warm outside. Because this type of clothing can protect your skin from most of the dangers mentioned above. You should also wear sturdy and stable shoes for more safety in the garden. And other useful gadgets for gardening can also help to ensure sufficient safety and fun in your outdoor activities.

3) Drink enough water

Gardening in the summer will surely make you sweat. That means you’re losing fluids. Then one of the most important measures is to drink enough water. This way you avoid an unpleasant sunstroke or possible circulatory problems. On the other hand, a simple tip helps; You should always have a bottle of water within sight. Consequently, this serves as a small reminder to drink enough. So don’t assume you’ll go inside when you’re thirsty.

4) Observe the instructions for use of gardening tools

If you read the instructions for use of the gardening tools before using them, you can reduce sources of danger. This includes checking for loose screws and the general functionality of the equipment. As a result, you ensure more safety in the garden. In addition, be careful not to damage any cables while gardening

5) Important vaccination for gardening

If you work outside in the garden a lot, you should definitely have a tetanus shot. Tetanus is caused by bacteria found in the soil. They enter the body through open wounds and cause severe convulsions. A refresher should be done every 10 years. Vaccination against TBE is also important. Especially if you live in regions with many ticks, it is important to protect yourself from the disease.

Walnuts from the garden must first be dried before they can be eaten. Find out here how best to dry the delicious nuts and what you should bear in mind when doing so.

Why dry fresh walnuts first?

During the walnut harvest, the nuts are not picked from the tree, but picked up from the ground. Ripe walnuts usually fall from the tree by themselves between September and the end of October. You should then collect them quickly: If soil moisture penetrates through the wooden nutshell, mold will form after a short time.

The walnut harvest can extend over a longer period of time because the nuts do not all fall off at the same time. It is best to check the ground under the walnut tree every day for freshly fallen, ripe nuts that you can pick up.

A walnut tree can easily bear up to 130 kg of fruit. If you want to store a large amount of walnuts, be sure to dry them first. This is the only way to prevent your harvest from spoiling.

Drying walnuts: This is how you prepare the nuts

After harvesting, you should prepare walnuts as follows:

Clean: The wooden walnut shell may still be surrounded by the soft outer shell. Remove these thoroughly and completely with a brush, otherwise mold can form. It is best to wear gloves when working: this way you avoid the peel discolouring the skin on your fingers and hand.
Never wash the walnuts with water, as moisture can spoil them quickly.
Sort: Dry only pristine and ripe walnuts. If they have black spots or appear shriveled, this indicates mold or parasites. These walnuts absolutely must be sorted out.

How to properly dry walnuts

After these steps, you can dry the walnuts. Pay attention to:
The right temperature: It is best to dry the nuts in a room in the house that is around 20 °C. Suitable are, for example, an insulated attic, the boiler room or the house entrance. But make sure that the room is not too warm.
The Right Place: Dry the walnuts in fruit crates lined with newspaper. Wooden frames over which grids are stretched are also very suitable.
Enough space: The most important rule when drying: Only place the walnuts in a single layer in the fruit box or on the grid and leave enough space between the individual nuts. Make sure they don’t touch. The air must be able to circulate around the nuts so that they dry evenly and do not form mold.
Sufficient time: The walnuts need about 4 to 6 weeks to dry completely. Turn them every few days so they dry evenly. Finally, check if the nuts are dry: open one or two and take a good look at their kernels. If it’s not brittle, but rather rubbery, the nut isn’t dry enough.
Once the walnuts have dried, you can store them. Fill them in a basket or in a potato sack and keep them in the pantry. There they stay fresh for up to 12 months.

If you walk around with open eyes, you will increasingly see beehives in private gardens. In recent years, beekeeping has become a hip hobby almost overnight, partly because it has been found that the food supply for honey bees is sometimes far greater in cities than in the country. Because there are often monocultures due to intensive agriculture, which after the harvest are like an empty plate for bees. Politicians are now taking countermeasures with the promotion of flower strips, but the large number of balcony plantings, allotment gardens, city gardens and city-tended flower beds as well as urban gardening projects and tree sponsorships usually still offer a greater variety and a food supply from spring to late summer/autumn.

Beekeeping – A hobby for everyone?

From 0 to 100

Basically, beekeeping is a hobby for everyone. Children are introduced to this form of animal husbandry in beekeeping associations and school projects, and as long as personal fitness plays along, there are no upper age limits.

For those who can no longer or do not want to lift that heavy, a box full of honeycombs can weigh up to 25 kg, there are appropriate solutions: boxes that are only half high and therefore only half as heavy or hive systems light styrofoam to reduce the base weight and of course the help of other beekeeping friends.

Beekeepers as allergy sufferers

Even those who are allergic to bees are not necessarily denied the hobby. There are protective suits and gloves that protect against stings and peoples bred to be gentle who are generally not in a bad mood when handled correctly. If you know that you are allergic to bee venom and that doesn’t deter you, then you should always have an emergency pen with you and inform fellow beekeepers.

Beekeepers without their own garden?

Even without your own garden and thus parking space for your bee colonies should not deter you. If you have a balcony, you can ask your property manager whether you are allowed to keep bees, as there are already systems designed for balconies.

Alternatively, you can ask around in your neighborhood via social media or the classic way with notices in the supermarket whether you can set up your bee colonies in someone’s private garden. There are now many who are open to it and to whom one or the other glass of honey is enough thanks.

Prerequisite for hobby beekeeping

Youtube is good, real discourse is better

In order to keep honey bees and produce honey as a hobby beekeeper, especially for your own use, no training is necessary, but you should be aware that you are dealing with living beings. While in most cases the bees themselves know best what is good for them, there are a few things you should know before getting any bees.

For example, ask your nearest beekeeping association whether they offer courses for newbies. Or ask long-established beekeepers if you can give them a hand and look over their shoulders. It’s important to be able to lend a hand and look inside the beehive, that’s the best way to learn and you have the professional on site to answer your questions.

Member of the beekeeping association and insurance

Similar to liability or household effects, you should also have insurance for your bee colony. If you are a member of the beekeepers’ association and only own a few hives, this is not a big investment and is usually billed together with the association fee.

Report to the Animal Disease Fund

As beekeepers are no longer located miles apart, diseases are more likely to spread more quickly. In order to identify locations in the area, to warn and, if necessary, to withdraw them from circulation, it is therefore absolutely necessary to register your colonies with the disease fund. However, the process is quite easy to complete using a form, which can usually be downloaded from the animal disease fund.

Basic equipment for beekeepers

If you want to start beekeeping, you need some basic equipment. There would be

The hives and frames

These are the dwellings for your bees. You can get these new in specialist shops and in different versions. When buying used, you should be careful, especially as a new beekeeper. The hives can contain remnants of pathogens or mites that are not good for your colony.

The protective clothing

Even if many bee colonies are bred to be gentle, a bee sting, especially on the face, is very unpleasant and a hat with a veil is affordable for protection. Special, thicker and, above all, long gloves are also recommended, as they prevent bees from crawling into your shirt sleeves and then stinging your arm or upper body out of claustrophobia. If you prefer to play it safe, you can wear tops with veils or even full-body suits. The latter are like a sauna suit in hot summers, but you have to think about what exactly you want to do with the beehive beforehand.

The tool

The most important utensils are a smoker and a stick chisel. With a smoker you produce smoke and pretend a forest fire to the bees. They retreat and gorge themselves on Hong to have enough energy in case they escape. Use the stick chisel to lift the frames out of the hive.

That brings you the hobby of beekeeping in a self-sufficient garden

Honey – the sweet, liquid gold

Of course, honey bees produce honey and very few hobby beekeepers keep bees without also having their own, self-produced honey in mind. If you want to be as self-sufficient as possible, honey is of course a sweet source of energy, which can also be used for your health in Oxymels, for example.

A strong colony can bring 20, 40 in good years also 60 kilograms of honey.

Attention: Anyone who wants to sell honey or just give it away as a gift must comply with the hygiene regulations when extracting and filling and labeling the honey jars with all the necessary information is required.

Propolis

There are people who swear by propolis as a panacea, whether as an admixture to honey or as a tincture for wounds.

Beeswax for DIY projects

Anyone who uses their own beeswax to make candles or beeswax wraps knows what’s inside. However, cleaning the wax is a bit time-consuming, which is why many hobby beekeepers do without it. The spun combs can also be reused. This saves the bees the time they need to build their own honeycomb and they can put their energy directly into caring for the brood and procuring food, and thus honey production. The longer the honeycomb is used, the darker it becomes because it is more contaminated. If you don’t want to melt them down yourself, they belong in the residual waste due to possible pest or disease contamination.

Pollinator performance

Of course, it’s not just the honey bees that pollinate our fruit and veg, but having them in your kitchen garden definitely can’t hurt. The work done by the flying helpers is priceless.

Deceleration and feelings of happiness

Keeping bees is usually more of a hobby and relaxation than work. The bees do most of the work without our intervention. We only check from time to time whether everything looks good, the queen is laying eggs and the brood is being cared for, whether we need to expand the brood chamber or honey chamber, whether pests such as the Varroa mite have settled in, harvest the honey and feed it Winter possibly too. The rest of the time we can watch the bees at work, relax with the steady buzzing and nibble the first honey straight from the honeycomb.