Tag

Grilling

Browsing

In hot summer weather there is nothing better for us: being outside, soaking up the fresh air and warmth and eating our home-grown vegetables in the open air. Best with good friends and good music, refreshing drinks and a barbecue.

With almost everything we do, we now ask ourselves as a matter of course: Is what I’m doing really good for me and my body? How do I do it in the most environmentally friendly way possible? And: Can I replace old habits that I no longer really feel comfortable with with simple alternatives? These were also exciting questions about barbecuing, which we curiously got to the bottom of and found out: Thanks to start-ups that love to grill, more ecological barbecuing is fun and easy to implement with a little creativity – maybe there are a few suggestions for you too?

The grill – from a campfire to a high-tech wonder

Kettle grill, table grill, disposable grill, charcoal grill, fire bowl, smoker, water smoker, gas grill, electric grill, solar grill – the selection on the market is huge and offers a suitable device for every occasion. But not every grill variant is equally sustainable…

Charcoal grill

The classic charcoal grill – probably the most common among grill fans due to the woody smoke aromas on the balconies and terraces in this country. However, since charcoal has to be burned with this technology every time you grill, standard lighters are criticized and half the residential area is fogged up with the intense smell of smoke, there are more sustainable and neighborly alternatives. If the charcoal grill is your be-all and end-all, we have a few more tips on how you can use it in a more environmentally friendly way…

Electric grill

For more frequent barbecue evenings, it is worth purchasing an electric grill, in which there is no charcoal smell and the energy is ideally obtained from green electricity – the electric grill does not detract from the taste result. You may need an extension cord for this. In addition to saving charcoal, the electric grill offers the advantage that it is easy to clean and relatively cheap to buy.

Solar grill

A larger, but particularly sustainable investment is a solar grill, which roasts the grilled food completely autonomously using solar energy. Cooking vegetables with the power of the sun is certainly the most advanced and (besides the open fire) the most self-sufficient form of grilling. However, it does require a really sunny day and a bit of patience as it usually takes a little longer to heat up.

Disposable grill

A disposable grill is not particularly efficient due to the fact that it can only be used for one event. Outside of the balcony or garden at home, the disposable aluminum grill is often used. This is also particularly energy-intensive in production and recycling. However, if the use of a disposable grill cannot be avoided, at least disposable versions made of wood* or cardboard offer an alternative. These can be burned without leaving any residue and have the additional advantage of providing the typical wood and roasted aromas.

However, it is better to grill outdoors in public barbecue areas where a barbecue is already installed. Find out where there is a barbecue area near you in your city.

Igniting alternatives to charcoal and grill lighters

Vegetable power instead of charcoal

Logo – for us, vegetables belong ON the grill. But how would it be if vegetables UNDER the grill gave the grilled food “fire under the buttocks”?

Vegetables offer a very environmentally friendly alternative to charcoal. This is often made from tropical woods, which are cleared and have to travel long distances to get to us under the grill. Better: Waste from food production, which arises anyway and normally ends up in the bin. They are increasingly processed and pressed into briquettes. On the market you can find charcoal made from olive stones, coconut shells and corn cobs. Even processed grapevines are suitable as charcoal. Corn cobs can also be found in the supermarket – in addition to the positive ecological aspect, they offer the advantages that hands do not turn black and have a longer burn time.

Use coal responsibly

If “vegetables under the grate” seems a bit bizarre to you, you can look for certification seals when buying the charcoal and thus influence the ecological balance at least a little positively.

The first thing to mention here is the FSC (Forest Stewardship Council) label, which guarantees that the wood for the charcoal comes from sustainable and responsibly managed forests. You can also make sure that the wood is from local woods such as beech. However, the information on the packaging of the coal is not mandatory and is withheld by many manufacturers. The DIN EN 1860-2 test mark is also decisive for less polluting barbecue pleasure. This indicates on the packaging of charcoal that the pollutant content is below a certain limit and therefore no products with pollutant-containing paints were mixed with the wood.

Grill lighter – The spark must fly

When you have provided an environmentally friendly basis with the vegetable charcoal, it is time to light the fire. Even if our basic instinct would like to kindle a big blazing fire, good embers can also be created gently and naturally.

Grill lighters often contain vast amounts of chemical substances, which u. be noticed by their smell. When you consider inhaling these fumes or leaving residues in the grilled food, you lose your taste.

Firelighters made from wood fiber and wax can offer a simple alternative (these are also available with the FSC seal). It’s also a lot of fun to make your own grill lighter, because you know exactly what’s in it and it’s also super easy.

That’s what’s on our plate!

For us, the basis of a colorful barbecue evening is formed by many crunchy vegetable creations, which are usually freshly harvested from the bed and prepared in a variety of ways before they later end up on the grill. Even if the food to be grilled is the focal point at a barbecue party, side dishes such as salads, crispy finger food, delicious dips and good bread do not eke out a shadowy existence with us – on the contrary, they bring variety and round off the barbecue party, freshly prepared and spiced up with pep . As always, local, seasonal and low-packaging or packaging-free foods are the most ecological.

Simple food and drink inspiration

We have collected some ideas on how you can turn your barbecue into a feast for the eyes and soul with colorful vegetables from your own patch, from the balcony, farm shop or weekly market:

Filling Salads:

  • potato salad
  • Salad millet or buckwheat (instead of couscous or quinoa)
  • Salad with cucumber, mango and chickpeas
  • Pasta salad with sun-dried tomatoes, olives and capers
  • Lentil salad with apple, bell pepper and spring onions
  • Beetroot-carrot-apple salad
  • Raw food sticks made from carrots, peppers, cucumber

Grilled food:

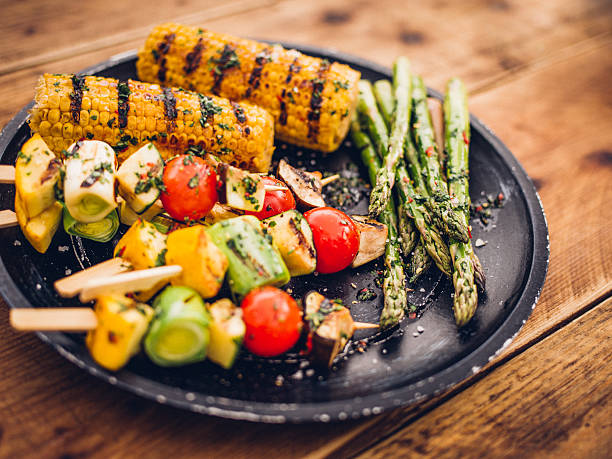
  • Corn on the cob (better to pre-cook to avoid grilling for too long)
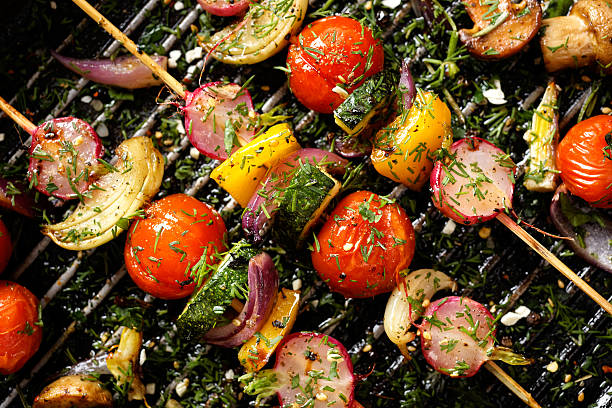
  • Vegetable skewers e.g. peppers, courgettes, cocktail tomatoes, onions
  • Stuffed vegetables such as mushrooms, peppers, zucchini
  • marinated tofu or seitan, strips of tempeh (for the marinade: oil, garlic, pepper, salt, herbs, mustard, soy sauce, etc.)
  • asparagus
  • Zucchini and eggplant in strips
  • Rosemary potatoes (better pre-cook to avoid too long grilling time)

Sauces and dips:

  • Make ketchup yourself from your own tomatoes: Let the onions caramelize, add the tomatoes and let them boil down, season with pepper and salt and, if desired, with curry powder and puree, then pass through a sieve again
  • Yoghurt dip with fresh mint
  • Spicy date chili dip
  • Red bean spread
  • Hummus mild or spicy
  • Our tip: Mix together what you feel like, just try something new!

Beverages:

  • Homemade lemonade e.g. with lemon balm, cucumber and lime
  • Homemade elderberry sparkling wine
  • Sparkling spritzers with our own fruit syrup
  • Bought from reusable glass bottles

Dessert:

  • Grilled bananas: place the bananas in their skins on the embers and allow them to blacken, slice the skin open lengthwise and enjoy garnished with dark chocolate or nuts
  • Roast fruit such as apples, pineapple or strawberries in slices on the grill
  • Fruit salad with soy yoghurt
  • Homemade sorbet

Decorations:

  • Washable napkins made of colorful fabric instead of paper
  • Homemade citronella candles in recycled Weck jars – look pretty and drive away unwanted
  • buzzing guests
  • paper garlands
  • Solar lights – at Sonnenglas there is a particularly nice variant…
  • Hang jars with sand and beeswax candles in the tree with a ribbon

Grilling healthy is not difficult at all: If you are creative and open to new things, you will have many great options – even without meat.

When it comes to grilling, most people think of sausages and steaks first. But it doesn’t always have to be (just) meat: There are also many other options for the barbecue party that are not only delicious, but also healthy. In the following you will find recipes for tasty grilled food and other tips on how to grill as healthily as possible in your own garden.

Grilling healthy: vegetarian and vegan grilled food

Grilling vegetarian or even vegan: For many meat lovers, that doesn’t sound appetizing at all. Meatless grilling is too often associated with dry corn on the cob or boring baked potatoes. There are now countless delicious options if you want to grill sustainably and healthily:

Try the classic: vegetable skewers! The colorful skewers are well known and popular. You can equip them according to your wishes. Just test yourself through your favorite vegetables, from mushrooms to peppers to zucchini. You can find four variants here: Grilling vegetable skewers: 4 vegetarian variants.
Peppers, courgettes and aubergines are not the only things that are suitable for healthy grilling. You can also throw some more unusual vegetables on your grid and grill them healthy. For example, try grilled fennel, grilled asparagus or grilled stuffed mushrooms.
A very important tip for vegetarian or vegan grilled food is the marinade. Because this is not only crucial for steaks, but also for vegetables. You can find a recipe here: Marinate grilled vegetables: This recipe is really tasty.

If you are a fan of potatoes in any form, you should not forget them at your healthy barbecue. By the way, you can not only grill conventional potatoes, but also grill sweet potatoes, for example.
Grilled cheese is also great for vegetarian barbecues. When buying dairy products, make sure that they are organic if possible. In this way you not only support more species-appropriate animal husbandry, but also do something for your own health by avoiding chemical-synthetic pesticides. Also read: Grilling feta: 2 delicious recipes.
Fancy a sweet dessert? No problem! You can grill not only vegetables, but also healthy fruit.

Side dishes for a healthy barbecue evening

Matching side dishes for the barbecue should not be missing at the barbecue evening. These include delicious dips and homemade salads. You can find links to the best recipes for healthy grilling here:

Recipes for salads:

Vegan Potato Salad
Vegan pasta salad
Vegetarian Layered Salad Recipe
Couscous Salad
lentil salad
Party Salad

Tip: Of course, enough bread for grilling is also included. For example, you can bake a fresh baguette yourself. Herb baguette or spelled baguette are also great side dishes.

Healthy grilling with meat

If you don’t want to completely do without fish and meat when grilling, you should consider a few points to grill more healthily:

Buy meat with an organic seal. Avoid the cheap meat from the supermarket.
Support butchers in your region.
Try to reduce your meat consumption and if possible not eat meat every day.
You should also be picky about fish. You can find important tips here: Eating fish: You should definitely keep this in mind.
Tip: Meat substitutes are controversial because of the many additives, but if you like meat and really don’t want to eat it anymore because of animals and the environment, you can consider trying meat-free alternatives instead.

Grilling healthy and sustainable: important tips

Healthy grilling isn’t just about the right food. You should also keep a few general tips in mind:

For healthy grilling, be careful not to drip marinade or other liquids onto the hot charcoal: this can create potentially carcinogenic smoke. You should therefore use metal skewers for vegetables – this way no whole pieces fall through the grate.
Grilling without aluminum foil is more sustainable and poses fewer health risks.
Protect yourself from the heat emitted by the grill. Do not touch the grilled food with your bare hands to avoid burning yourself. Use grill tongs and preferably a grill apron to keep you healthy.
Be careful when using a gas grill. Make sure the surface is stable and only use it outdoors.
If you want to buy a new grill, you should think about an electric grill. This not only saves you time, but also avoids the formation of toxic smoke.

In the best case, you not only grill healthy, but also sustainably. For example, use local charcoal, natural grill lighters and avoid disposable crockery and cutlery.

Grilling is also possible without aluminum foil. You save not only money but also raw materials and minimize the health risk. We introduce you to recipes for feta, vegetables and fish.

Grilling without aluminum foil – why?

Aluminum foil is often used as a matter of course when grilling. It promises that vegetables or fish, for example, are cooked gently and can develop their flavor. Then it ends up in the trash.

Aluminum is a problematic raw material: it is mined in opencast mines, usually at the expense of the rainforest, which requires a great deal of energy. The toxic waste product red mud is produced during production. The finished aluminum can only be used after an electrolysis process. Even in the recycling process, aluminum foil is hardly ever used again. More information: How harmful is aluminum to the environment and health?.

According to a report by the NDR, foods with salt or acid in particular dissolve the aluminum, which can then be deposited. There are good alternatives to aluminum products for many products.

Alternatives to aluminum foil: grill basket, grill boards and vegetable leaves

The easiest way is to place the food to be grilled directly on a well-cleaned grid. You can easily remove soot with a grill brush (you can find e.g. at **Memolife) or a steel sponge. You can also disinfect the grid by heating it up in the embers before loading it.

There is also a large variety of different accessories:

Grill basket: You can use it to prepare vegetables and potatoes well. You can place the grill basket on the grill grate.
Cast-iron pan: You place the pan on the grid. In it, however, vegetables or fish need a little longer.
Grill grids: You can clamp vegetables or fish in grill grids and simply turn them. For fish, there are fish-shaped grilling grids on the market.
Grill boards: You have to soak these in water for one to three hours. Then you can place them directly on the grate and place the food on top. Depending on the type of wood the boards are made of, their steam gives off a tasty aroma to the food to be grilled.
Barbecue skewers: You can place barbecue skewers over the edge of the grill. They are suitable, for example, for vegetable skewers.
Vegetable leaves are a good, organic alternative, especially for fish and cheese. Cabbage, chard, grape, banana or corn leaves are suitable. You fill these and fix them with thread, toothpicks or roulade skewers. They become less sensitive to heat if you also coat them with oil.

Grill feta without aluminum foil

Above all, feta or aromatic mountain cheese from organic dairies enrich the grill menu. To avoid aluminum foil, you can simply wrap the cheese in large vegetable leaves such as kohlrabi, rhubarb or banana leaves.

Grilled Feta (for four servings)

200 grams of feta
1 tomato
1 small onion
1 clove of garlic
salt, pepper, herbs of your choice (e.g. basil)
1 tbsp olive oil
4 large kohlrabi leaves and olive oil
Instructions:

Cut the feta and the tomato into pieces about one centimeter in size. Chop the onion and garlic.
Mix the chopped ingredients together, seasoning with salt, pepper and herbs to taste. Mix in 1 tablespoon of oil.
Now divide the cheese mass into four equal parts and place them evenly in the middle of the four cabbage leaves.
Make a small package out of them and fix the packages with small skewers.
Brush the packets with oil and place them on the grill grate. Protected by the cabbage leaf, the cheese mass can simmer in it without burning. When the cheese is nice and soft, you can unwrap it and serve. You can dispose of the cabbage leaf in organic waste without a guilty conscience.

Peppers stuffed with cheese (for four servings)

2 peppers
200 grams of spicy cheese (e.g. mountain cheese or vegan cheese)
Herbs of your choice (e.g. a Provence mixture)
Instructions:

Halve the peppers and remove the core. This should not result in a hole in the pepper, especially on the stalk side.
Now fill the halves with 50 grams of diced cheese. Scatter herbs over the halves, if desired.
Place them on the grill grate. It’s best to lay them out so that you can place a lid (such as a metal serving platter or non-plastic pot lid) on top of them. This will trap the heat from the grill and help the peppers cook better. The peppers are ready when they are a little soft and the cheese is runny. Don’t worry: you can easily peel off the burnt skin on the underside of the peppers. There is no burnt taste, but a delicious mix of cheese and peppers.

Grill vegetables and potatoes without aluminum foil

Vegetables can also be easily grilled without aluminum foil. Choosing organic vegetables is even more sustainable. Here the farmers pay attention to soil-friendly, sustainable cultivation. In order to preserve biodiversity, as few pesticides as possible are used, especially no synthetic ones.

The easiest way is to slice vegetables and place them directly on the grid. Or you string pieces of vegetables on skewers. Dips for vegetables and herb butter (tip: make your own herb butter) refine the vegetables.

Vegetable shish kebab (for four servings)

4 mushrooms
1/2 zucchini
1 onion
1/2 peppers
for the marinade: salt, cayenne pepper, garlic, herbs de Provence, 2 tbsp soy sauce, 3 tbsp olive oil
metal or wooden skewers
Instructions:

Dice the washed vegetables (except the mushrooms) into cubes about 2 cm in size.
Load the skewers.
Mix the ingredients for the marinade.
Place the skewers in the marinade for about an hour. Make sure it’s well distributed.
Place the skewers directly on the rack.

Grilled potatoes (serves four)

8 medium potatoes
for the marinade: salt, pepper, rapeseed oil, sage and rosemary
Instructions:

Pre-cook the potatoes with the skin on. They shouldn’t be soft yet, but firm to the bite.
Drain and cut in half with the peel.
Mix together the ingredients for the marinade and soak the potatoes in it for about 30 minutes.
Then place them cut-side down on the grill.

Grilling fish without aluminum foil

If you want to grill fish without aluminum foil, cedar wood grilling boards are particularly suitable. After soaking, place the grill board directly on the grid and place the fish on top.

When buying fish, you should make sure that it comes from certified fishing. There are differences in the seals. Some are considered “dolphin safe” but don’t take into account the overfishing of the oceans. The organic associations Naturland and Bioland have the strictest guidelines. In conventional fishing, large amounts of bycatch such as dolphins, rays, sharks and seabirds get caught in the nets. The fish stocks in the sea are getting smaller and smaller. Just as in factory farming, large quantities of antibiotics and other medicines must also be used in aquaculture. The wastewater from aquaculture pollutes the environment.

Bring freshness to your grill: grilled watermelon tastes wonderfully fruity and is refreshing on hot summer days. You can find out how to grill watermelon here.

Watermelon is the quintessential summer fruit and grilling is the quintessential summer activity. So why not combine these two things? Grilled watermelon is refreshing and super easy to make.

Grilling watermelon: You need these ingredients

What you need to be able to grill watermelon:

1 watermelon
3 tbsp oil, for example olive oil
a pinch of salt
We recommend that you use organic ingredients. In this way you can be sure that the food is free of chemical-synthetic pesticides, which supports species protection and soil protection. When shopping, look out for the organic seals from Demeter, Naturland and Bioland – these each follow stricter criteria than the EU organic seal.

Grilling a watermelon: It’s that easy

Slice the watermelon. Note our tricks for slicing melon. If you want, you can cut off the peel right away. You can also leave them on and only remove them when you eat. Don’t throw away the rind: This is how you can use the rind of the watermelon.
Place the slices on the grill for about 3 to 4 minutes per side. Don’t leave the melon on the grill for too long or it will become mushy. You can place the watermelon directly on the grill or use a grill container. You can find out how to do this sustainably in our article on grilling without aluminum foil.
Remove the watermelon from the grill, drizzle the grilled slices with some oil and sprinkle with a little salt.

Tips for refining your grilled watermelon:

If you like it sweeter, you can rub or sprinkle sugar on both sides of the watermelon before grilling. The sugar caramelizes with the heat.
If you want, you can also crumble feta (there is also vegan feta) or herder’s cheese and sprinkle it over the watermelon after grilling.
Fresh lemon or lime juice is also recommended. Drizzle a few drops over the grilled watermelon.
Chop up herbs like basil or lemon balm and serve with the melon.
Chopped nuts or seeds such as almonds or pistachios, sesame or sunflower seeds give the fruit a bite and a nutty note.
If you cut the grilled watermelon into smaller pieces and add the above ingredients and mix everything together, you will have a delicious watermelon salad.
If you serve the watermelon with ice after grilling, such as homemade vanilla ice cream, you get a summery dessert.
Test a savory version and season the watermelon with salt and pepper after grilling.

Will the weather be good for the May holidays? .. You know, it doesn’t matter. True connoisseurs of “rest with taste” are ready for anything: they have already ordered the Grill Master uniform, for which the decree is only the owner’s appetite! Are you planning to join too? Then it’s time to get acquainted with useful recommendations and master the subtleties of cooking nutritious and aromatic … Light, juicy and crunchy … Ruddy, bright, striped … In general, absolutely irresistible treats on a home grill!

  1. Remove the meat from the refrigerator 20 minutes before grilling to allow it to warm to room temperature. Frozen meat will not cook evenly.
  2. Do not leave meat at room temperature for more than an hour, otherwise, bacteria will multiply rapidly and the meat will become less fresh. If you need to defrost meat, leave it overnight or all day in the main compartment of the refrigerator.
  3. Do not add salt until the steak is cooked or it will become tough as the salt wicks moisture away.
  4. Do not pierce the meat with a fork or prong. The juices will run away, the meat will become drier and less flavorful. Use a spatula or tongs to push or turn the pieces.
  5. When grilling, do not rush to turn it over – wait until the crust appears on the grill. If you try to lift the meat until it is tender, it may stick to the wire rack.
  6. Indirect heat is best for grilling chicken, i.e. placing the meat in a cooler grill area for a slow, soft, and even heat.
  7. Test for hardness with the simplest tool: your own finger. A poorly done steak feels soft and spongy, a medium steak is lightly served when pressed, and a well done feels firm.
  8. Do not overdo it. It is better to undercook the grill than overcook it. You can always grill the meat if it’s damp.
  9. Let the dish rest. After removing the grill from the wire rack or baking dish, wait at least 5 minutes before slicing. This will allow the juices to soak back into the meat.

A recipe to make a juicy beef steak at home, almost like in a restaurant. Beautiful, tasty, with stripes, and most importantly healthy! Like the previous steak recipe in a regular pan, this recipe is real salvation from hunger. When you need to quickly cook a piece of meat, there is no better way than to fry a beefsteak. It will take 20 minutes in total to cook. But you can take your time.

  1. Beef meat.
    This is essentially the only ingredient. Everything is correct. Nothing else is needed. For a good steak, we just need one good piece of beef. The beef should be fresh, the fresher the better. Calf meat is ideal. Great – meat streaked with fat. Just don’t confuse fat with ligaments. It will be tough in these places and the piece will also lead when frying since the ligaments are strongly compressed during heating and frying. It is best for meat that it is one piece of one muscle.
  1. Do we need to beat the meat?
    I will answer the question with a question. What for? A piece of meat of 1.5 – 2 centimeters, chosen as we have already decided, does not require any additional processing. In his pan, so her, grill!
  2. Is it possible to fry frozen meat?
    In the last recipe, I allowed the meat to be roasted from the freezer. Taking into account the fact that we are now using the grill, it is still better to let the meat thaw. This will allow less water to melt, which in frozen form is familiar to us as ice. In a flat frying pan, heating frozen meat slightly improves the frying process in terms of reducing sticking and boiling the top layer and frying it at the same time. On the grill pan, we get soup with a piece of meat. Therefore, it is better to let the meat move a little so that the top layer defrosts.
    But ideally, fry chilled or defrosted meat. Then even if there is still ice between the fibers inside, the toasted outer layer inhibits moisture inside the piece.
    Answer: you can, but wisely.
  3. Spices and salt
    The steak does not require salting when frying. This is definitely unnecessary. Serve a cooked piece of grilled meat with coarse salt on top, or add some salt as you eat, and you will be good. The meat has its own wonderful taste, slightly salty. If the steak is not deep-fried, medium, or generally “with blood” – then the tastes will be different and very pleasant and without salt. But experiment, add coarse salt and pepper to the table.
    There are tips to salt before frying, marinate, and more. My advice is not to salt, do not spoil the taste of pure meat. The undersalt is always on the table, and at hand. Give yourself the freedom to choose whether or not to salt!
  4. Frying pan. The best frying pan is a cast iron grill pan. A thick bottom gives some thermal inertia. Naturally, fry only after good heating of the cast-iron pan, not before.
  5. With or without oil. According to the technology of its maintenance, the cast iron frying pan is always oiled. Taking into account the fact that we are grilling in a pan, the meat falls on the grooved protrusions. You don’t need to use oil at all. If this confuses you, lightly grease the pan with olive oil using a brush or a piece of cheesecloth. But I repeat – a cast-iron grill pan allows you to fry without oil.
  1. Temperature or frying mode
    It’s hard to say about the temperature. I roast on gas on the most powerful burner. I set it to almost maximum to warm up the cast iron. Then I decrease it by more than half (when the cast iron handle of the grill pan gets hot). And I fry the meat in this mode. In a hot cast-iron frying pan, you don’t have to think about such trifles as how many degrees Celsius the temperature costs when frying meat.
  2. How often to turn over
    Everything is simple here. As soon as a piece of meat hits the hot skillet, I timed 2 or 3 minutes for each side. Depending on the degree of roast and the thickness of the meat. Meat up to 2 centimeters requires 2 minutes on each side. Thicker is more. Fry deeper – 3 minutes for meat up to 2 cm thick. It’s simple. Turn over – once. Fried 2-3 minutes on one side, turned it over and another 2-3 minutes on the other and that’s it. Meat on a plate!
  3. When and how to serve. Preferably while it is still warm. Why is there a cold steak? Fried a steak, on a plate of it, knives, forks. A bunch of greens. Drinks and everything. Let’s not sit with a stopwatch.

Despite the wide selection of pans and ovens, you can only grill a steak with a unique campfire aroma. Flawless meat has its own secrets: the right choice of cuts, a good recipe, and many small nuances of cooking. We will gladly open them for you.

  1. The claim that salt makes a steak tough is rooted in not knowing when to salt meat. Dip it in salt and pepper just before going to the grill. If you do this in advance, the salt will wash out all the juice from the meat, and it will become dry. Timely application of spices will help create a crispy crust and a distinct flavor.
  2. To get a good crust, you also need to remember: the meat is turned over once during frying.
  3. Make sure that the fire does not come into direct contact with the meat. Otherwise, the fat will char, and carcinogens will begin to be produced in it.
  4. Do not cut or pierce the steak to find out what stage of cooking it is. It is checked by pressing the piece with your finger. If it quickly takes its former shape, the meat is raw or lightly cooked. If slow, medium. And if it regains its shape, the steak is overcooked.
  5. The intense heat will quickly give the meat a ruddy color and crust. Preheat the grill before grilling on all burners for 5 minutes.
  6. Marinate and put the meat on the wire rack with your hands. And to turn the pieces – with forceps with silicone tips. The fork will make holes in the steak, through which the precious juice will flow out.
  7. Remember that meat will still cook after removing it from the wire rack. Due to the redistribution of the juice, the temperature inside will even rise. Do not cut the piece right away, but leave it to condition on a warm plate for 5 minutes or wrap it in foil.
  8. Food photography tip: melted butter or olive oil will add juiciness and shine to the dish.

Want to grill spare ribs but don’t have time to turn them over and over for 3-4 hours over low heat? Why not try this recipe, in which the spare ribs are first cooked in a spicy broth. You have never eaten more tender spare ribs – I promise!

Spare ribs are something delicious: you can nibble on the crispy ribs to your heart’s content until your fingers and face are really smeared with barbecue marinade. Because eating spare ribs with a knife and fork is a no-no!

Along with pulled pork and beef brisket (breast of beef), the spicy ribs are part of the “Holy Trinity” of classic American barbecues. Traditionally, spare ribs are cooked over low heat for several hours, turning them over and over again. This allows the fat to spread out slowly, making the meat tender and crispy. Unfortunately, not everyone has the patience of the American BBQ forefathers and grilling spare ribs often turns into a fat-soaked, chewy, and burnt affair.

Our recipe suits all friends of quick barbecue enjoyment because the ribs are first pre-cooked in a seasoning broth for half an hour. The pre-cooking can also be done a day before the BBQ. After that, 15 to 20 minutes on the grill is enough! A positive side effect: pre-cooking the ribs makes them less greasy.

Grilling spare ribs: the ingredients

  • 2 kg pork rib ready to cook
  • 2 onions
  • 2 cloves of garlic
  • 1 tbsp sea salt
  • 2 tablespoons oil
  • 150 ml dark beer
  • 2 tbsp ketchup
  • 2 tbsp tomato paste
  • 1 teaspoon of liquid honey
  • 1 tbsp Dijon mustard
  • 1 tbsp Worcestershire sauce
  • 1 tbsp paprika powder
  • Salt
  • Tabasco
  • pepper from the grinder

Grilling spare ribs: That’s how it’s done

  1. Wash the spareribs, pat dry, place in a saucepan, pour over enough water to cover, and bring to a boil. Peel and onion and a clove of garlic, cut in half and add to the water along with a level tablespoon of sea salt.
  2. Let simmer for about 30 minutes.
  3. Put the oil in a pan, peel, and dice the remaining onion, and sweat in the oil until translucent. Peel and press the garlic. Pour on the beer, let it reduce a little, and mix in a bowl with the ketchup, tomato paste, honey, mustard, and Worcestershire sauce. Add the paprika powder and season with salt, Tabasco, and pepper.
  4. Remove the spareribs from the broth and place them on a hot grill. Brush with the beer sauce and grill for 15 to 20 minutes, turning occasionally. Keep brushing and turning with the marinade.
  5. Divide the spare ribs into individual ribs and serve them arranged on plates. This goes well with coleslaw.

Lots of useful tips and tricks for grilling vegetables. Not just for vegetarians. As soon as it gets a little warmer outside, the barbecue season begins again. But not only meat and sausages are grilled, but vegetables are also becoming increasingly popular.

Grilling delicious vegetables

The vegetables should be prepared gently so that they taste delicious and the healthy ingredients are preserved. Whether purely vegetarian or as a healthy side dish for grilled meat, with these tips, the vegetables will be a success at the next barbecue party. Your barbecue party is therefore also suitable for vegetarian guests.

1) Large vegetables can be placed directly on the grill

The popular classic here is definitely the whole corn on the cob, which is grilled with a little butter and salt. But you can also put asparagus directly on the grill. Eggplant and zucchini are also popular. It is best to cut them into not too large pieces and soak them in a Mediterranean marinade for a few hours beforehand. To do this, mix some vegetable oil with Mediterranean herbs. If you don’t have enough time to soak the vegetables beforehand, you can brush them with the marinade just beforehand. However, use the marinade sparingly so nothing drips into the grill. Direct grilling, therefore, works best with an electric grill. And this is great for grilling on the balcony.

2) Tasty skewers with different kinds of vegetables

Cut your favorite vegetables into bite-sized pieces and skewer them. In addition to aubergines and zucchini, peppers, cherry tomatoes or potatoes are also suitable here. If you opt for potatoes, it is best to pre-cook them in water so that they can be grilled more quickly. Rub the skewers with marinade before grilling to prevent them from burning. You can also wrap the skewers in aluminum foil. As a result, nothing drips or falls out and the skewers do not burn as quickly. The cooking time is about 20 minutes and you should turn the skewers regularly. Also, note other delicious ideas for your barbecue menu.

3) Grill the vegetables with the aluminum foil

Vegetables are particularly juicy if you grill them indirectly. That means you either wrap it in aluminum foil or put it in an aluminum tray. Especially with a charcoal grill, this method is better than direct grilling. The big advantage is that you can put whole and chopped vegetables in here. However, make sure you have enough oil so that nothing burns. Stuffed vegetables can also be grilled with this method without any problems. For example, fill giant mushrooms or potatoes with cheese or cream cheese and then wrap them in aluminum foil so that nothing can drip out.

4) Proper placement on the grill

In order for the vegetables to be really tasty, it is important to place them correctly on the grill. In principle, the middle is the hottest and the edge is the coolest. Accordingly, it is best to place peppers or garlic on the edge, for example, as they develop bitter substances if they are too hot. The aluminum bowl with vegetables, on the other hand, is best placed in the middle so that the vegetables can cook well. You can simply wrap the potatoes in aluminum foil and place them directly on the embers. Basically, it is always better to leave the vegetables a little longer instead of putting them on the grill when the heat is too high.

5) Note different cooking times

To ensure that all the vegetables are cooked at the same time, it is best to pre-cook vegetables that require longer cooking times. They are then only cooked to completion on the grill. If you don’t want to cook the vegetables first, be sure to combine vegetables with similar cooking times. Put potatoes or corn on the cob with a relatively long cooking time on the grill first and only later add other types of vegetables, which are ready more quickly.

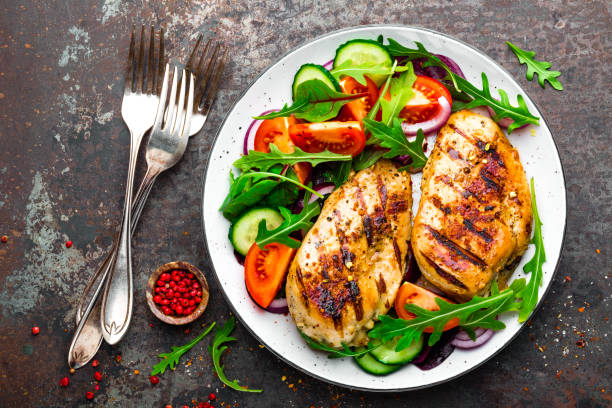
As soon as the temperatures allow it, barbecues will be fired up everywhere. Man’s oldest method of preparing meat is also one of the most popular. Basically, anything that is used in a normal kitchen is suitable for grilling. Chicken meat is of particular importance here. It is lean and tender, and the preparation time is limited. We’ll tell you tricks on how to make your grilled chicken a success every time.

1) The right choice of chicken

A chicken consists of several types of meat. Before you begin, consider how much time you have available. A whole chicken takes a lot more time than individual pieces. These, in turn, are cooked much faster without bones. However, leaving the bones on will keep the meat from becoming overly dry.

The fillet cooks the quickest, but there is also the greatest risk of it becoming too dry. Before grilling, decide what you want to cook. A hearty pancake with chicken ragout or a juicy lemon chicken is just as delicious.

2) Grilling whole chickens

If you have decided on a whole chicken, 2 methods make sense:

  1. If able, remove the carcass from inside the chicken. To do this, they should be able to use a boning knife. The process isn’t exactly straightforward, but it pays off in the end because the cooking time is almost cut in half.
  2. Open a large can of beer and put your whole chicken over it, bottom opening. Then place the can on the preheated grill and put the lid on. Ideally, place an aluminum cup under the meat so that the escaping juices are caught and nothing starts to smoke. The embers should be arranged around the cup, so you grill indirectly.

3) The thicker the meat, the harder it is to grill

If you decide to grill thick pieces, you should keep a close eye on the temperature of your grill. Any thick part of a chicken, such as a whole leg, will take significantly longer to cook. If you work at too high a temperature here, there is a risk that the meat will burn on the outside but is not yet cooked on the inside. This can be remedied by boning the meat or, for example, beating the fillet flat. Due to the reduced density of the food to be grilled, the cooking time is significantly reduced.

4) Marinate meat for flavor and aroma

Purists are content with salt and pepper. If you want a little more, you should familiarize yourself with some herbs and spices. Not only are they healthy, but they also give your chicken a special flavor kick. In principle, grilled meat should always be marinated a few hours before use so that the aromas can spread as well as possible. With chicken, the use of rosemary, thyme, and marjoram has proven to be extremely tasty. Of course, fresh herbs are best here.

However, if you don’t have any at hand, you can of course also use dried ones. In combination with some finely chopped garlic and a little olive oil, this results in a classic marinade that turns every chicken into a treat. Simply place the meat in the marinade and refrigerate for a few hours. Before grilling, wipe with kitchen paper to prevent the oil from dripping onto the embers. Also, note other recipes for winter grilling.

5) Don’t mix chicken with other meats

Since there is unfortunately a risk of salmonella poisoning with chicken meat, it is important to always prepare this meat separately from other food to be grilled. For example, if you use a brush to coat the grilled food with marinade when grilling, it is a good idea not to use the same brush for all of the grilled food.

6) Refine chicken with sauce before grilling

If you want a really sticky, delicious piece of grilled chicken, you should brush it with a sauce just before it is perfectly cooked. A classic sauce contains these ingredients, for example:

  • 120ml honey
  • 80ml mustard
  • 2 tablespoons soy sauce
  • 1 tablespoon apple cider vinegar
  • 2 tablespoons cornstarch
  • 40ml of water

Mix the cornstarch with cold water, and bring the rest to a boil in a saucepan. Then slowly add the starch/water mixture and stir until a thick sauce forms. The honey in the sauce causes a caramel layer to form on the chicken skin. The more times you brush your chicken, the shinier and grander it will look. You can also grill vegetables and serve them with the chicken.

7) Use a thermometer

Unlike other types of meat, chicken is not eaten half-cooked. To be really sure that your grilled food is safe to eat, you should always use a meat thermometer. These are available as a classic variant or digitally. Here, a thick probe of the thermometer is pushed into the meat and checked whether the correct temperature has been reached. For chicken, the perfect core temperature is 80°C. Don’t leave your chicken on the grill for much longer to avoid dehydration.