Tag

guaranteed

Browsing

A vegan diet does not necessarily mean just eating salad or relying on substitute products. Because you probably have these ten vegan foods at home anyway – and you’ll get really full of them.

If you want to eat vegan, you now have a large selection of vegan substitute products that are produced as an alternative to animal food. It’s a nice option, but it doesn’t have to be. Because many foods are already vegan anyway and you probably already have them at home. This is handy if you want to cook something without having to shop for it first.

Make sure that all food is regional and of organic quality. In this way you avoid long transport routes and chemical-synthetic pesticides and do something good for yourself and the environment. We can particularly recommend the Demeter, Bioland and Naturland seals, because they follow stricter criteria than the EU organic seals.

Red lenses

Small but fine: Red lentils can be the basis for many delicious dishes. Rich in proteins and minerals, they provide you with a lot of energy. In addition, they are already cooked after 15 minutes of cooking time – perfect when you need something quick.

Tomato passata

Tomato passata is easy to make yourself. All you need is onions, garlic, a carrot, celery, tomatoes, olive oil, and basil—just veggies you probably already have at home. You can find a detailed recipe here: Make Passata yourself.

Store-bought passata is also often vegan, which you can easily recognize by the vegan logo printed on the bottle or pack.

You can use the passata to make a refreshing tomato soup with oat milk right now in summer. You can also use it directly as a sauce for pasta or on pizza.

Spelled flour

Not only is it healthier than wheat, its hard shell also makes it easier to do without pesticides: spelled. Fortunately, wheat and spelled can be used in a similar way as flour. You can easily replace wheat flour with spelled flour.

A quick recipe with spelled flour is pan bread. You can prepare it in just 20 minutes with just a few vegan ingredients. Vegan spelled waffles are ideal for the coffee table: They are also ready in a short time. They are a healthier alternative to cakes, biscuits and the like and taste particularly delicious with seasonal fruit.

Potatoes

It is one of the staple foods in Germany: the potato. With a similar carbohydrate content as pasta or rice, it has only half as many calories.

The tuber can be used in many ways: you can make your own fries, for example. You don’t need much for these and they are healthier than frozen fries. Another delicious recipe is smashed potatoes. They taste delicious and can be garnished with various vegetables.

Quinoa

Filler and energy supplier: quinoa. The so-called pseudo-grain is gluten-free and can be eaten with vegetables or sauce instead of pasta and the like.

A summery recipe with the pseudocereal is a quinoa salad that tastes delicious and fills you up, but is not heavy on the stomach. But you can also make a sweet snack from quinoa, namely in the form of quinoa bites.

Chickpeas

It goes particularly well with meatless diets: the chickpea. Because the legumes contain many proteins that the body can otherwise get from the meat. Your body can also benefit from the high fiber content of chickpeas.

In oriental cuisine, chickpeas are often made into hummus or falafel. But the legume also tastes very good in curry.

Bananas

Many swear by bananas. And not without reason: because although they contain a lot of carbohydrates and fructose – also in comparison to other fruit – the banana is not unhealthy. Because it is rich in vitamins and provides energy.

If you get bored with bananas as a simple snack, you can also use them to make banana chips. The chips are also perfect as a topping for muesli. Or you make a simple dessert: a vegan chocolate cream. A slightly more unusual variant is the banana soup.

Note: Only buy bananas in moderation, because they have been transported long distances. Through food sharing, however, you can often save bananas that would otherwise have ended up in the trash.

Oatmeal

Gluten-free, healthy, low-calorie: oatmeal is a typical breakfast and gives you the energy you need for the day. This is also due to the high vitamin and mineral content of the grain. By the way: Oat flakes are also gluten-free (pay attention to the label on the pack). Therefore, you can eat them even if you have celiac disease.

One of the most popular oat dishes is porridge. Since you can vary the toppings – for example fruit or pieces of chocolate – very flexibly, you have variety every day. Those who prefer a hearty breakfast can prepare the porridge with vegetables. But oats also taste delicious when baked: It is not without reason that the so-called baked oatmeal – i.e. porridge from the casserole dish – is currently the trend breakfast on Tik Tok.

Coconut milk

It is true that coconut milk is high in calories and fatty acids and it does not necessarily score well with its CO2 balance, which is why you should not buy it too often either. However, it offers a good vegan substitute for cream or crème fraîche and it should not be missing in many Asian dishes. If you want to do without store-bought coconut milk, you can easily make it yourself.

A simple dessert is the coconut milk rice. You can prepare it with just four ingredients and garnish with seasonal, fresh fruit or fruit puree. In Indian korma, a mild curry with ginger and cauliflower, coconut milk is important for taste and texture. And if you want a fruity cool down in summer, you can make your own watermelon ice cream with coconut milk.

Cornmeal

Whether for thickening sauces, for making desserts or for tortillas and nachos: corn flour can be used in many ways. It is also gluten free. But be careful: In contrast to spelled flour, you cannot simply replace wheat flour with corn flour. That’s why other types of flour always have to be mixed into cornbread.

But even if you don’t want to bake bread, you can use cornmeal in your kitchen – for example to make tortillas yourself. Or you can make your own nachos. You can also replace potato flour with corn flour in the dumpling dough.

A dirty baking sheet is not a particularly pretty sight. The encrustations and residues can be easily cleaned with the right tips and tricks.

This is how baking sheets get dirty

If you use the baking tray daily or several times a week, it is quite normal for various types of soiling to appear, despite the baking paper or baking mat. The sheet metal can usually no longer be cleaned simply with water.

No matter what you prepare in the oven: there is always a chance that grease stains, dirt, leftover food or other residues will remain on the tray. We would generally advise you to remove any dirt immediately after use. If you continue to put the dirty sheet in the oven, smoke can form and the dirt can burn and become caked, making it difficult to remove.

Home remedies for cleaning your sheets

There are various cleaning agents on the market that have been specially developed for removing grease stains, burnt-in stains and the like. But if you want to do without chemical cleaners, you can easily use household remedies. These are on the one hand cheaper, on the other hand more environmentally friendly and the best thing about it: We usually already have products like salt, baking soda and vinegar at home.

Clean the baking sheet with baking soda and baking soda

When heated, baking soda develops, together with water, into a strong lye that splits proteins and fats into acids. It is therefore perfect for removing fat and stubborn crusts from the baking tray.

Although it is also found in baking powder as sodium bicarbonate, it can work even better in its pure form. Baking soda in combination with mineral water can hold a candle to some chemical cleaners.

That’s how it’s done:
First you put 50 grams of baking soda on the baking tray to be cleaned and then pour enough mineral water over it until the tray is completely covered.
Now heat comes into play: At 100 degrees below heat you can let the water-soda mixture slowly evaporate for about 20 minutes.
After taking out the tray, let it cool down a bit.
The burnt-in residue can now be easily removed with a sponge or dishcloth.
If you don’t have baking soda on hand, you can alternatively use baking powder. To do this, first soak the tray in warm water and then add a packet of baking powder. After a short exposure time, the crusts should be able to be removed with a damp sponge.

Remove incrustations with salt

Probably the simplest and cheapest home remedy for fighting incrustations is salt. To do this, generously sprinkle all baked areas with commercially available salt so that they are completely covered. Then you put it in the oven at 50 degrees and wait 30 to 60 minutes. When the salt turns light brown, you can remove the tray from the oven and drain the salt. The crusts should now be easy to remove and it is sufficient to rinse the tray again with a little warm water.

Get the baking sheet clean with vinegar and citric acid

Baked-in food residues can also be removed with vinegar and citric acid, which, with their acidic pH value, easily loosen stubborn crusts. The procedure should already be known from the previous uses of baking soda and salt – household remedies, in this case vinegar or citric acid, spread over a large area on the tray and then put it in the oven. At 200 degrees you give the mixture about 20 minutes to show its full effect. When the work is done, pour off the liquid. Here, too, the last step is to rinse the baking tray with clean water and wipe it off with a sponge or cloth.

Tip: The strong smell of vinegar is part of this cleaning method, but it can sting your nose and burn your eyes. To reduce the smell a bit, you can simply mix vinegar with lemon juice.

Fruit acids are also known to gently remove residues from sheet metal. To do this, first cut an apple, rub the incrustations with the inside of the peel and let the sheet soak briefly.

Cleaning the baking tray with coke – does that really work?

Sounds crazy, but it still has an effect! We are talking about cola, which contains phosphoric acid, an active ingredient that is also found in much higher concentrations in rust removers. Here you can simply use the stale leftovers that would otherwise end up in the drain. You put this on the baking tray and let the cola sit for a few hours or even overnight. In this case, you don’t have to heat the tray. After that, you can clean it with a sponge and rinse off the sugar thoroughly.

Chemical cleaners vs. home remedies

Even industrial cleaning agents such as oven and baking sheet cleaners cannot be denied their effective effect. They promise a particularly fast and effective removal of dirt, which is due to their chemical composition. However, such cleaners are not completely harmless. The ingredients can cause allergic reactions and also irritate the skin and eyes.
For environmental reasons, it is not advisable to use chemical cleaners. Our tips and tricks on how to get baking trays clean again with household products such as baking soda, citric acid and the like offer a much more environmentally friendly and gentle alternative.

But if you don’t want to do without industrial cleaning agents entirely, you can use dishwasher tabs to clean your trays. To do this, place a tab in the middle of your baking tray and pour hot water over it. Cover the entire area, wait until the tab has dissolved and then give the mixture some time to take effect.

Prevent encrustations – three rules to keep the sheet clean

So that annoying crusts do not form on the baking sheet in the first place, we give you the following tips:

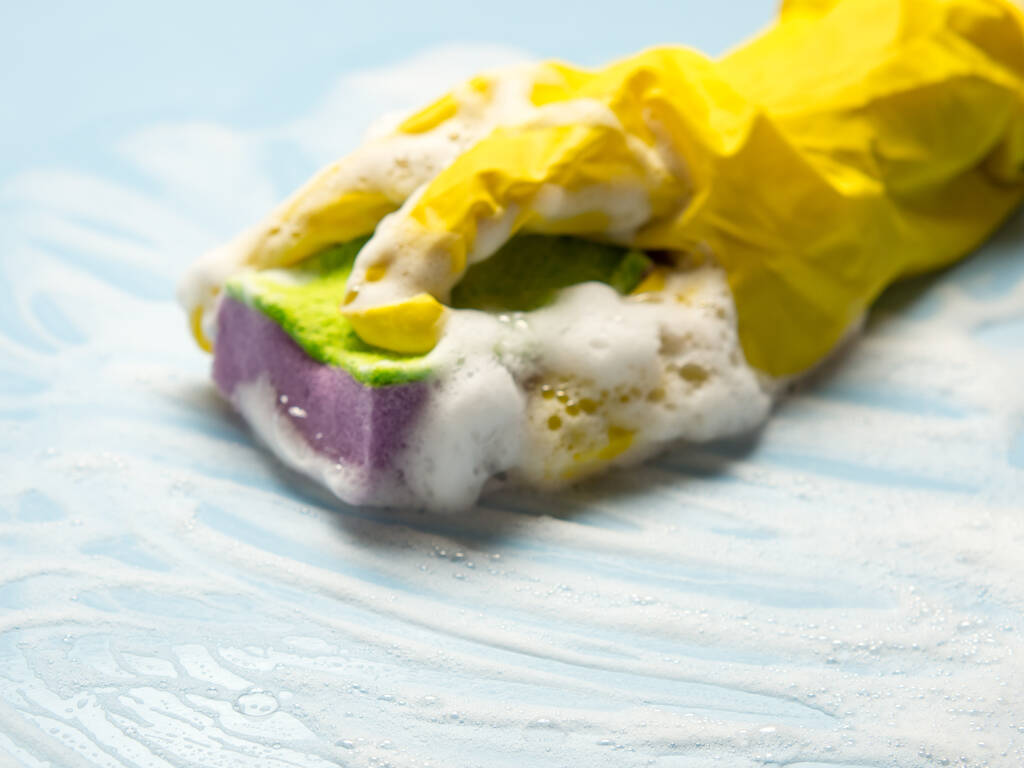
Clean your baking sheet immediately after each use and don’t wait until the leftovers are badly burned on. It is best to soak the tray in warm water and washing-up liquid immediately afterwards. This prevents particularly heavy incrustations and makes cleaning easier later.
A pad is a must! Always use parchment paper or a permanent baking mat when baking.
It is better to avoid cleaning with scratching steel sponges or brushes. The scratches on the baking tray are then even more susceptible to dirt.

Conclusion: Only you can decide which method is the right one for you. But maybe you would like to try one or the other.

Fresh from the fridge, the butter is hardly spreadable. There are little tricks to get them spreadable.

This is how butter is made

As soon as the milk arrives at the dairy, it is separated into cream and skimmed milk. The cream is then heated.
After the cream has been heated (pasteurization), it is sent to a tank called the cream ripener. There it rests together with cultures for a maximum of 20 hours until the cream has a slightly sour taste.
The cream is then processed in a butter-making machine with many kneading processes. This should create a solid but still spreadable butter.
Now the finished butter is portioned and packaged.

Why does butter solidify in the fridge?

Butter reacts very differently to cold compared to margarine. This is due to the different fat composition of the two dairy products, but there are more differences between the two items. Butter contains more saturated fat, which hardens when cold. Whipping the butter also plays an important role, because the consistency changes with the size of the fat globules. The composition of the animal feed also influences the spreadability and the ingredients. For example, if cows get a lot of green fodder, the butter contains more omega-3 fatty acids. On the other hand, corn and a lot of concentrated feed lower this ingredient again.

Soften the butter with water

Spreading the butter quickly at room temperature does not work. You don’t always want to or can’t put the fat spread in the microwave and so every day people put one or more holes in their bread slices, which are now filled with a whole piece of firm butter. But with the following simple trick, the problem is now over.

Here’s how it works

Get a glass jar that’s slightly larger than the butter. Now pour hot water into this and let it stand for a few minutes. Meanwhile, the glass absorbs the heat of the water and you can pour off the water. Now put the warm glass over your butter and wait a few minutes. After just a short time, your butter will be wonderfully spreadable and can be spread on bread or processed in a dough without any problems.

Make butter spreadable with lunch box

If you still want to have your butter ready to spread without any effort, you can achieve this with a water-cooled ceramic butter dish. With this storage, the butter always stays fresh and soft. The butter dish doesn’t even need to be placed in the fridge. Only the lower part of the container is filled with cold tap water. The idea of ​​the ceramic jar came about at a time when there was neither electricity nor a refrigerator, which is why it has a long tradition.