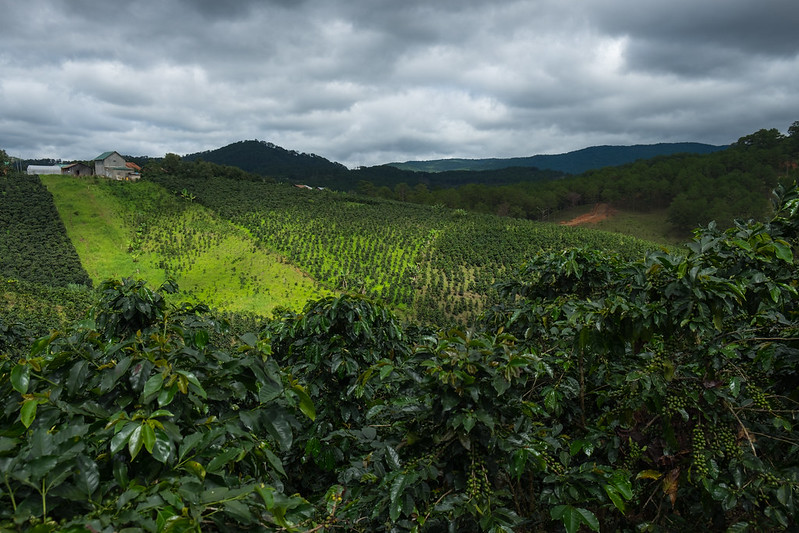
Tag

harvest

Browsing

Wine fans can rejoice, because this year there is a harvest of ice wine, albeit a small one. Many winegrowers were already worried about the noble grapes because the mild winter weeks made hope for ice wine to dwindle this year. Thanks to the frost, some winegrowers can now breathe a sigh of relief.

The Icewine harvest has begun

It seemed almost impossible to harvest the coveted ice wine this year: the temperatures were far too mild. But in the meantime, it is wintry cold in almost all of Germany. This not only pleases wine lovers, but also the winegrowers, who can now harvest frozen Riesling and Pinot Noir grapes.

On the Middle Rhine, on the Nahe, in Rheinhessen, and in the Palatinate there were no frosty temperatures at night: Even during the day, frost is a must for ice wine. However, many winegrowers no longer expected an ice wine harvest, so a large proportion of the grapes were picked from the vines earlier due to the mild temperatures. Otherwise, the risk of the grapes spoiling would have been too great.

This is ice wine

Ice wine tastes especially sweet because the frozen grapes produce a highly concentrated must with high sugar content. For this purpose, the fruits are harvested at least minus seven degrees and then processed immediately in the winery. The water contained in the grapes only crystallizes when temperatures remain below seven degrees.

The nights are currently cold – sometimes frosty! This annoys not only night owls and early risers, but above all the Hessian strawberry farmers, who now have to worry about their rich harvest. Because of the nightly frost, many strawberry plants of the early variety have already frozen in the field.

Frost destroys strawberry plants

Central Hesse shivers at night from the cold – and that primarily harms the strawberry plants of the early varieties: because some farmers have now almost completely frozen to death! Many farmers have even suffered a total loss and are complaining about crop failures of 70 to 100 percent, as Bernd Weber from the Hessian Farmers’ Association told “Bild”. Accordingly, the prices for sweet fruits are also increasing.

The start of the season is probably two weeks later

But strawberry fans can breathe a sigh of relief: Elsewhere, the delicate plants were not completely destroyed, but fortunately only weakened in their growth. The early varieties now need a longer ripening time than originally planned – around two weeks. Then the long-awaited strawberry harvest can finally start and the red berries can be eaten!

That’s why strawberries are healthy!

Strawberries contain more than 300 different aromatic substances, including secondary plant substances that are known for their cancer-preventing effect. The fruits also provide more vitamin C than oranges or lemons: namely 65 milligrams per 100 grams! In addition, there are considerable amounts of vitamin K, folic acid, biotin, and pantothenic acid.

Due to the relatively high iron content, strawberries are considered particularly beneficial for anemia. In addition, the potassium it contains activates kidney activity and helps to drain the body. With zero grams of fat, strawberries are also absolutely figure-friendly and can be nibbled on!

Planting chamomile is also very easy in your own garden. In this article you will find out what you have to consider and how to use the medicinal plant.

From a soothing chamomile bath to classic chamomile tea to hair coloring: you can use chamomile in many ways.

You don’t have to collect or buy the medicinal plant: you can also plant chamomile yourself, for example in your garden or in a pot on the balcony. In this article you will learn everything you need to know from sowing to harvesting.

Planting chamomile: the preparation

The real chamomile belongs to the daisy family and reaches a height of up to 50 centimeters. If you want to plant chamomile, note the following points so that it thrives in your garden:
Location:
Chamomile originally comes from southern Europe. Therefore, the plant prefers a warm and sunny location.
Floor:
The real chamomile thrives best on permeable and dry soil. You should definitely avoid waterlogging.
Chamomile gets by with few nutrients. It is enough to spread a little mature compost at the beginning.
If the soil is too hard, you can fold in some sand to loosen it up.
mixed culture:
Basically, the real chamomile is a frugal neighbor in the vegetable patch. It thrives particularly well next to:
Kohlrabi
onions
Leek
celery
potatoes
Nasturtium

Planting and caring for chamomile

Real chamomile is an annual plant. The medicinal herb is frugal and easy to care for.

Sowing:
Chamomile belongs to the light germs. Therefore, when planting chamomile, it is sufficient to press the seeds to the soil instead of covering them completely.
From the end of April you can sow chamomile outdoors. Before doing this, you should loosen the soil and remove weeds.
You can also plant chamomile in a pot, as it does not have particularly deep roots.
In the field you should keep a distance of 40 centimeters between the individual rows.
After a week or two, the seeds will begin to germinate.
After a month you should thin out between the young plants if necessary so that they have about 20 centimeters of space.
Care:
Chamomile makes few demands on the soil and therefore does not need fertilizer.
You should water chamomile occasionally, but not too frequently. The soil should only be slightly damp – under no circumstances should the water accumulate.
To encourage the growth of additional shoots, you can prune the plants after flowering.
Harvest:
When the flower heads are two-thirds dead, you can harvest the flowers.
The best time is a sunny day after the dew has dried. This is when the essential oil content of the flowers is at its highest.
You can use the fresh buds or dry them beforehand. You should definitely dry and store chamomile away from light so that the active ingredients are preserved.

This is how chamomile works

It is worth planting chamomile: As a medicinal plant, it has a broad spectrum of effects and can be used to treat various ailments. A study from 2011 dealt extensively with the healing properties of chamomile:
Anti-inflammatory properties: The essential oils and flavonoids contained have an anti-inflammatory effect. You can cleanse wounds with a strong infusion of chamomile. For small injuries or inflammation of the gums, you can use the infusion as a mouthwash. You can also inhale chamomile to relieve symptoms when you have a cold.
Soothing for the stomach: chamomile tea soothes the intestinal mucosa and has an antispasmodic effect. That’s why it helps with diarrhea or nausea, for example. The antispasmodic effects of chamomile can also relieve menstrual cramps.
Good for the skin: wraps or ointments with chamomile are used as home remedies for inflammation and skin irritation. You can also treat eczema with chamomile. A facial steam bath can also help with blemishes.
Anti-cancerous properties: Especially in skin, breast and prostate cancer, chamomile was able to significantly reduce the cell growth of cancer cells.
Prevents colds: Chamomile as a tea or in a cold bath relieves cold and flu symptoms.
Good for the psyche: chamomile also has a calming effect on the human psyche. For example, it can provide relief in the event of tension, anxiety disorders or sleep disorders.

Planting peppers works in the garden and even on the balcony. Here you can find out how you can plant peppers yourself and what you have to pay attention to.

The pepper originally comes from Central and South America. But you can also plant peppers with us. The vegetables just need a lot of heat and light. With the right care and a few tricks, you can also grow them in your own garden or on the balcony.

Plant peppers – the cultivation

You should not sow pepper seeds directly outdoors. You make it easier for the little plants if you prefer them in the greenhouse or on the windowsill from the end of February:
To do this, plant the pepper seeds evenly in potting soil and only lightly cover them with another layer of soil.
You can cover the seed pots with a transparent hood to germinate.
Prick out the young plants as soon as they develop the first leaves. Transplanting means transplanting dense seedlings to give them more space.
If no more frost is to be expected, the pepper plants can move outside from mid-May. To do this, you only put them outside during the day for a while – a little longer every day. This is how you make the temperature change as comfortable as possible for them.

The right location for the pepper plants

Location: The right location is essential for the growth of your peppers. Peppers are very sensitive to cold and need a warm, wind-protected place with plenty of light and direct sunlight. Whether in the garden or on the balcony – a wind-protected south wall is ideal. The warmer the location where you plant your peppers, the faster they will ripen.

Soil: Use sandy, loose and nutrient-rich soil. Feel free to add compost too. This saves you additional fertilizer in the first few weeks. When the first peppers appear on your plants, you should fertilize again. To do this, you use a potassium-rich homemade fertilizer for plants. You can also make nettle manure as an additional fertilizer.

Cultivation: Be careful not to place the young plants too close together. Adult pepper plants need a distance of at least 50 centimeters from each other so that the leaves and fruit can develop unhindered.

Tip: Plant peppers as a mixed culture with tomatoes or cucumbers. All three types of vegetables love warmth and need a lot of water. Plant different plants at a sufficient distance from each other or use separate containers. So you always have fresh ingredients in late summer – for example for a delicious salad.

Plant and care for peppers

With your mature plants, you should pay attention to a few things so that the peppers grow quickly:

Watering: Peppers need a lot of water. You should water the plants twice a day, especially in sunny locations. Make sure, however, that no waterlogging forms and that you do not water in direct sunlight. Morning and evening are good times. You will give your pepper plants a special treat if you water them with collected rainwater or other stagnant water.
Support: Stabilize tall peppers with sticks, such as those made of bamboo. Tie the stems loosely to the support. This will ensure that the twigs with the fruit cannot snap.

Harvest your own peppers

Depending on the variety, your pepper plants will reward you with colorful pods between July and October. During the ripening process, the fruit changes from green to yellow to red.

You can use the young, green fruits as paprika.
Red, fully ripe fruits taste the sweetest.
Tip: Don’t just pick your fruit, it’s better to use a sharp knife to harvest it.

Overwinter peppers

Most pepper varieties are perennial. In the second year after you planted the peppers, your harvest is often even better than the year before. You should cut back your plants for the winter. To do this, trim the twigs at each branch above the first knot. Also rid them of dead leaves.

Now the peppers can reduce their energy and sprout fresh in the spring. Place the plant in a bright room with an average temperature of 10 degrees Celsius during the cold winter months. Water the dormant plant twice a week and be sure not to let it dry out. You can then plant them out again in the spring.

If you harvest and dry sage properly, it can be stored for a long time. So you can use it at any time of the year to refine and season dishes. Even harvested and dried sage is also suitable as a tea for a sore throat.

6 tips for the right sage harvest

The real sage is a popular herb for refining dishes. But sage can also provide relief as a variety of home remedies, for example for sore throats or gastrointestinal complaints.

It is important to harvest the sage correctly in order to have sufficient supplies for the cold season, when the sage no longer sprout.

You should pay attention to these tips for a productive harvest:
Harvest time is from May to August. Normally, the sage begins to bloom at the beginning of summer. In its heyday, however, its aroma content is very weak, which would make it uninteresting as a herb.
If you grind consistently and evenly, you’ll reduce woodiness and blooming. The young shoot tips in particular are rich in essential oils and aromatic ingredients.
Never cut into the woody part of the shoots, otherwise the shoot will not sprout again.
Do not wash the harvested sage, just wipe it off to avoid unnecessarily slowing down the drying process and losing valuable ingredients.
To avoid loss of aroma, you should dry or freeze the sage immediately after harvesting.
You should harvest the last time around the end of August so that the shoots can fully mature before the first frost and are therefore protected. To protect the hardy shrub from frost, you can put leaves, fir green or straw around the root area. Attention: Not all sage species are hardy.

drying sage

Dry or Freeze Sage – Which is Better? The answer: both are possible! The essential oils are preserved both dried and frozen.

Sage really dry
In the air:
Dry the sage at 70 to 80 degrees Fahrenheit (21 to 27 degrees Celsius) in a well-ventilated area. That takes about ten days.
You can simply spread individual sheets on newspaper.
If you have harvested stalks, tie them together with string and hang them upside down.
In the oven:
It is also possible to dry the sage in the oven at 40 degrees Celsius within about six hours.
Turn the leaves regularly and leave the oven door ajar (say, with a wooden spoon between them). However, this method is not very energy-efficient and therefore not recommended.

Freeze sage properly

To freeze sage, you can put the sage leaves uncrushed in a screw-top jar or freezer container.

Wild rose hips taste sweet and sour and are the fruits of autumn. In this article you will find out what you should consider when harvesting.

Wild rose hips are the (pseudo) fruits of some native rose species. Depending on the variety, the color palette of rose hips ranges from dark red to light red to orange. They can be round or oval.

Why is it interesting to harvest wild rose hips? On the one hand, the regional superfood is rarely available in stores as a raw product. On the other hand, they are also extremely healthy as they contain a lot of vitamin C (more than lemons per gram) as well as anti-inflammatory antioxidants. Wild rose hips taste sweet and sour.

Where can you find wild rose hips?

Rose hips are the fruit of some rose plants. When the flowering period is over, you can discover the red fruits on the bush. The rose hips contain kernels, the seeds or nuts of the rose plant. Not every rose grows rose hips, but you can find them on many wild rose varieties such as the apple or dog rose.

Rose hips usually grow on large shrubs at the edges of forests, on paths or in bushes and hedges. Roses like sunny locations and nutrient-rich soil. It is better to avoid rose hips on roadsides, as they could be contaminated with fine dust. Just look for rose hips on your next walk. Once you have found a bush, keep checking back, as not all the fruit on the bush will ripen at the same time.

The MundraubMap from the anti-fall fruit platform mundraub.org also provides information. This shows the locations of fruit-bearing plants on a map near you. Basically, you can harvest wild rose hips anywhere. However, pay attention to property rights and handle the plants with care.

What is there to consider when harvesting wild rose hips?

The best time to harvest wild rose hips is from September to December. It is best to harvest when the sun is shining (e.g. at midday), as the vitamin content is higher then. After the first frost on cool autumn nights, rosehips are said to taste more intense because the sugar content increases. However, the skin of the fruit also becomes mealy due to frost and is no longer as firm. However, rose hips are tasty throughout the harvest season. The best time to harvest also depends on how you want to use the rose hips. If you want to process them further, you should harvest them early, if you want to eat them raw, it can also be a later point in time.

Be careful not to confuse rose hips with other red fruits found on shrubs, such as deadly nightshade. However, these fruits are usually much darker (rather black) in color. If you are unsure, better keep your hands off it.

When you pick the rose hips, you should be careful as the bushes have thorns or prickles. If necessary, wear sturdy gardening gloves and clothing that won’t snag you.

Eat wild rose hips

Be careful, you can’t just put wild rosehips straight from the bush in your mouth. Some of the rosehip is not edible raw. A part of the rosehip is not edible raw: the core of the rosehip, which is inside, has hairs with barbs; these can cause itching on skin contact. But what you can do: If the rose hips are ripe and soft enough, you can press them together with your fingers. The marrow should come out on one side – you can then snack on it right away – and the seeds stay inside.

At home, you wash off the collected rose hips with cold water. Remove the stalk, bud base and seeds from each fruit. Be sure to wear gloves. Another option is to boil the whole rose hips in hot water until soft and then squeeze them through a sieve. This way the cores are left behind. How you prepare your collected wild rose hips depends on how you want to process them further.

If you have harvested wild rosehips, you should eat or process them immediately after harvesting. They will keep in the fridge for a maximum of two to three days.

Use wild rose hips

You can make a variety of things from rose hips. Even if you have collected them from nature, you should wash them thoroughly with cold water before use. Note: If you want to benefit from the many vitamins in wild rose hips, only heat them slightly when processing them, as they lose some of them when they are cooked.

On the one hand, you can process them fresh:

Jam: Prepare rosehip jam. This can be used in many ways: it can be used as a spread on your bread, but can also be used in pastries such as cookies or donuts. You can also prepare mousse or jelly from wild rose hips.
Liqueur: You can conjure up delicious rosehip liqueur with sugar and a schnapps of your choice.
Juice: You can filter rosehip juice by boiling it with water, sugar and a little citric acid.
Syrup: Rosehip syrup keeps for a particularly long time and can refine all drinks and dishes.
Tea: You can dry the rosehip seeds and brew a tea from them. It is important that you put them through a sieve and shake them several times so that as many hairs as possible are gone. You don’t want these in your tea. You can store the dried seeds in an airtight container. You need two to three teaspoons of rosehip seeds per cup and leave them in hot water for eight to ten minutes.
Rosehip Oil: It contains many vitamins, healthy fatty acids and minerals.
On the other hand, wild rose hips are also an all-rounder in the dried version:

Instructions for drying the fruit can be found in our article Drying rose hips: how to preserve them. As a guide, firm fruits are often a little better for drying, as softer ones can begin to rot during the drying process.

You can store them as whole dried fruits or process them into rosehip powder. With both variants, you can add them to your smoothie, muesli or porridge, for example, or give your salad a sweet kick. A classic use is a delicious rosehip tea.

Another possible use is to use rosehips as decoration, such as in your autumn decorations or in the Advent wreath.

Coffee farmers

Around 125 million people around the world make their living from the coffee industry. 25 million people among them are small farmers who support themselves and their families from growing coffee. Most of the coffee farmers are very poor and just manage to cover the production costs by selling the coffee beans. Due to numerous intermediate stations, only a small part of the coffee turnover usually reaches the farmers. Many of them lack direct access to markets.

Cooperatives

This can be remedied by cooperatives, which the coffee farmers join together to form. In cooperatives and associations, smallholders have more opportunities: a shared value chain strengthens their position towards buyers, mutual help and access to education ensure better product quality and thus a higher income.

New markets can be opened up. Coffee cooperatives take care of the collection, processing and drying of green coffee. The cooperative also takes care of the financial administration, the implementation of member decisions as well as the planning and implementation of projects and training courses. Marketing the coffee independently means there are no middlemen and the farmers’ yields increase.

Furthermore, many cooperatives strive for certification such as UTZ, Rainforest Alliance, organic or Fairtrade, since minimum prices, surcharges and additional premiums are paid here. In this way, all members are guaranteed a secure income and family support. All members decide together on the use of the bonus. This can be used for new purchases to process the coffee beans or for local purposes (infrastructure).

Without these associations, coffee farmers have little opportunity to make the cultivation and extraction of coffee more economical and to increase the quality of their products, as they do not have sufficient resources and know-how.

There is also the 4C Association, which aims to bring together all stakeholders in the coffee industry with the 4C code – Common Code for the Coffee Community – in order to promote the sustainability of the entire coffee value chain and to improve the situation of coffee farmers. However, the application of the 4C code is not mandatory, it is only done on a voluntary basis.

Harvesting methods

After three to four years, coffee trees deliver the first crops. The trees reach their maximum production capacity after six to eight years. After twenty years, the yields then gradually decline again. Depending on the growing area, the harvest period takes place in different months and usually lasts ten to twelve weeks. If the coffee cherries are ripe, they have to be harvested quickly, as they become overripe after just two weeks, sometimes even earlier.

There are three harvesting methods. These depend on the local conditions and resources, the quality requirements and the type of coffee.
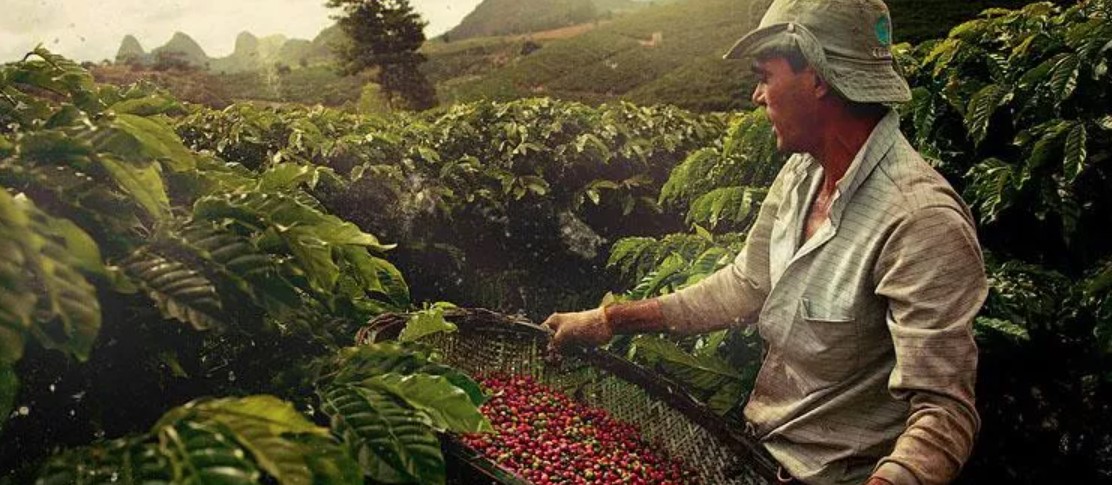
Picking

When picking, the ripe coffee cherries are picked from the tree by hand. The unripe cherries remain on the tree and can continue to ripen. The picking guarantees a high quality because only ripe cherries are harvested and so a pre-sorting already takes place. However, this method is more expensive and time-consuming.

Stripping with a comb

With stripping, all coffee cherries, whether ripe, unripe or overripe, are harvested in one go. The plantation workers run along the branches with a comb and remove all the cherries. Sorting takes place later.

Machine stripping

With machine stripping, a machine is used to remove the coffee cherries, which removes all the coffee cherries from the branches in one go. Here, too, both ripe and unripe cherries are harvested. With the mechanical method, however, branches, leaves and stones also get into the harvested crop, which later has to be sorted out.

Processing methods

The coffee cherries are processed immediately after harvesting. There are three different processing methods that influence the taste and quality of the later coffee beans. The available resources also have an influence on the processing method.

Dry processing

The stripping method usually leads to the use of dry processing. With this processing method, coffee cherries of the same quality (size and ripeness) are spread out together on a surface to dry and turned several times a day. Drying takes three to five weeks. If you shake the cherries and hear the pits rattling inside, they are sufficiently dry.

In the next step, the flesh – also known as the pulp – and the parchment skin are removed so that only the beans with the silver skin remain. The beans are then sorted again and packed in sacks.

Wet processing

Almost only coffee cherries that have been picked by hand bring the quality required for wet processing. Also, this method is not suitable for a huge harvest and requires a large amount of water. The processing must take place no later than 24 hours after harvest. The coffee cherries are pre-sorted in the water basin or flume.

The cherries are then mechanically depulped (removal of the pulp), but in contrast to dry processing, the beans retain their parchment skin, to which remains of the pulp still stick. Now the fermentation – a fermentation in which the remaining pulp is detached from the bean – takes place. To do this, the beans remain in so-called fermentation tanks for one to two days. Once the fermentation process is complete, the beans are washed and dried. Drying takes place mechanically in a few hours or naturally in a few days in the sun. The natural drying produces the better quality. Finally, the parchment skin and as much of the silver skin as possible are removed. A final sorting before filling into bags guarantees the highest possible quality.

Semi-dry processing

Since a lot of water is required for wet processing, but this delivers better quality, semi-dry processing is used in some areas. With this processing method, there is no fermentation after depulping. The beans are dried without fermentation. Then the remaining pulp and the parchment skin are peeled off and the beans are filled into sacks. The finished, bottled green coffee is now ready for export.